
Welcome back to Ellis & Page! Madeline here, and I’m thrilled to share an exciting transformation we undertook in our new home. When my husband and I first purchased this property, we knew it was a diamond in the rough, a true fixer-upper with incredible potential. Having lived here for several months, we’ve truly embraced the renovation journey, tackling projects big and small. We’ve already revitalized several rooms with a fresh coat of paint – seriously, I think I’m single-handedly keeping the paint industry in business! But today, I want to talk about the living room, a space that, despite its initial dated appearance, held immense promise for becoming the heart of our home. The challenge? Revitalizing its most prominent architectural feature: the ceiling beams.
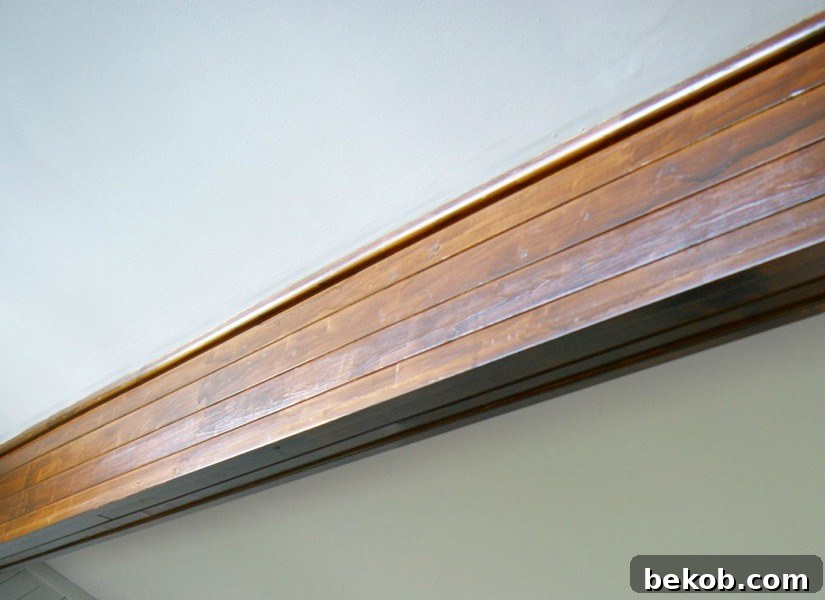
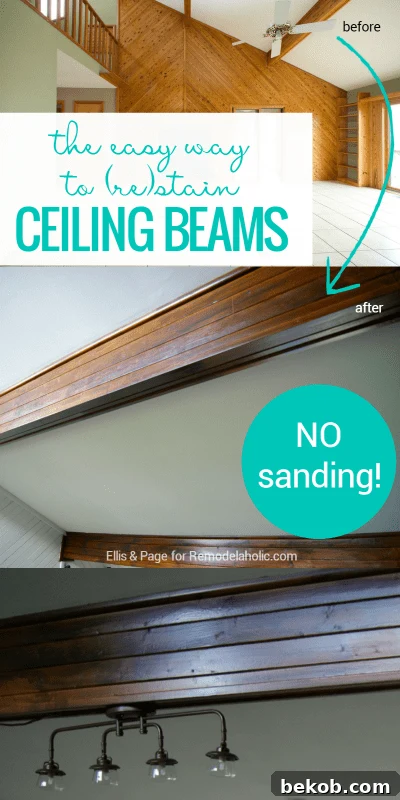
Upon moving in, the living room presented a unique set of design puzzles. While the tile floors, practical for a waterfront home, received a quick refresh by lightening the grout to make them less conspicuous, my main focus quickly shifted to the walls and ceiling. I knew from the start that the extensive wood paneling covering the walls would be painted a crisp, modern white – a decision I know isn’t for everyone, but one that drastically brightens and opens up a space. However, the beams were a different story entirely. Unlike the beautiful, solid wood beams often seen gracing Pinterest boards, ours were constructed from the very same paneling as the walls, giving them a rather unconventional and somewhat awkward appearance. The image below, captured after the staining process, clearly illustrates how these faux beams were meticulously pieced together from multiple sections of paneling, presenting a unique challenge for achieving that coveted rustic wood aesthetic.
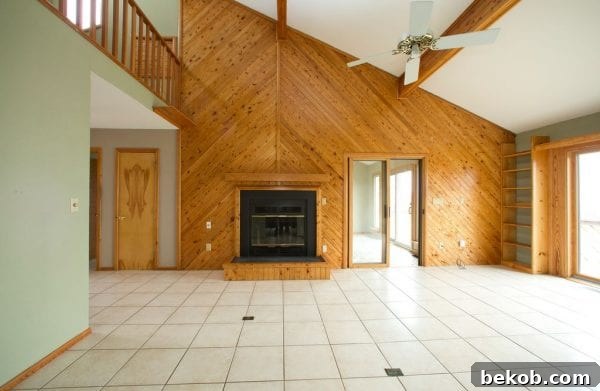
This unusual construction meant our approach to transforming them had to be carefully considered. Traditional wood staining methods, which rely on the stain penetrating solid wood grain, wouldn’t quite work here. The surface was already finished, likely with some sort of polyurethane, and composed of individual panels rather than a unified piece of timber. The task was to create the illusion of genuine, rich wood beams, adding character and warmth to the living space, without embarking on a costly and complex structural overhaul. Our goal was to achieve a sophisticated, contrasting element that would elevate the entire room’s design.
The Decision: Staining for Contrast and Character
After much deliberation and design brainstorming, we finally settled on staining the ceiling beams, and for very compelling reasons. Firstly, I was determined to introduce a strong visual contrast into the room. With the walls slated for a bright white paint, I envisioned the beams as a defining feature, a rich, warm element that would anchor the ceiling and prevent the room from feeling too sterile or monotonous. This contrast would add depth and architectural interest, making the space feel more intentional and inviting.
Secondly, there was a practical concern regarding color matching. Had we decided to paint the beams white, there was a significant risk that the shade wouldn’t perfectly match the existing white of the ceiling. Even a slight variation in white tones can create a jarring and unfinished look, drawing unwanted attention to the beams rather than seamlessly integrating them into the design. Opting for a dark stain eliminated this potential issue entirely, ensuring a cohesive and polished aesthetic.
Given the beams’ unique construction – made from paneling and already coated with a finish – traditional sanding seemed like an incredibly daunting and potentially fruitless task. Stripping down multiple pieces of paneling overhead to expose raw wood felt like an unnecessary ordeal, especially considering the adhesive qualities of gel stain. This led us down the path of researching alternative staining methods, ultimately leading us to the remarkable solution of gel stain.
Why Gel Stain is the Secret Weapon for Faux Beams
Gel stains are truly a game-changer for projects like this, standing apart from conventional liquid wood stains. Traditional stains are designed to penetrate bare wood, enhancing its natural grain and color. Gel stains, however, are essentially pigmented, non-drip coatings that sit on top of the surface, much like a thin paint. This unique characteristic makes them incredibly versatile and perfect for situations where sanding to bare wood is impractical or impossible, such as over previously finished wood, laminate, or, in our case, paneled beams with an existing polyurethane coating.
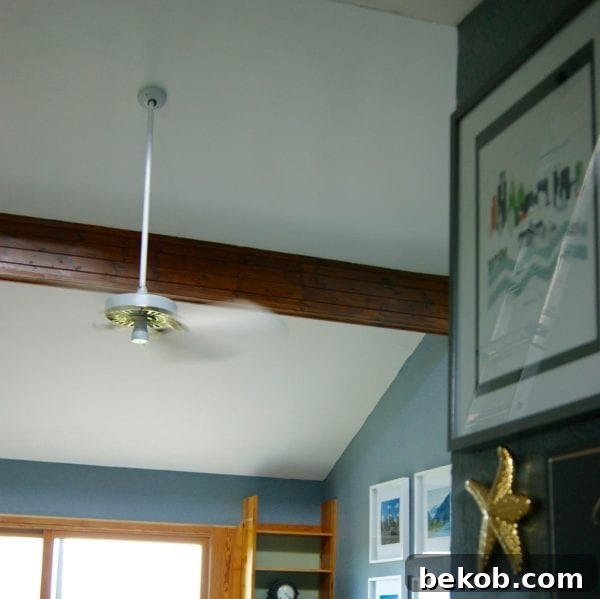
The beauty of gel stain lies in its ability to adhere to surfaces that conventional stains wouldn’t touch, effectively transforming the appearance of the material underneath without extensive prep work. You don’t need to wipe it off; instead, you apply it in thin, even coats, allowing it to build up color and coverage. This was precisely what we needed to give our paneling beams the rich, deep wood look we desired, creating the illusion of genuine timber. The contrast between the original color of our bookshelves and the newly stained beams, as seen in the photograph, vividly demonstrates the dramatic transformation gel stain can achieve.
This method proved to be a DIYer’s dream, saving us countless hours of labor and the mess associated with sanding overhead structures. It allowed us to bypass the formidable task of removing the existing finish, directly applying a new, rich color that simulated the natural beauty of dark wood. The ability to achieve such a profound aesthetic change with minimal preparation is undoubtedly one of gel stain’s greatest advantages.
How to Stain Wood Beams Without Sanding: Our Tried-and-True Method
This post contains affiliate links; see our full disclosure policy here.
Once the decision was made, and our weapon of choice—gel stain—was selected, it was time to get to work. The process itself was surprisingly straightforward, though we quickly learned a few crucial techniques that made all the difference in achieving a professional-looking finish. Here’s a breakdown of our experience and the valuable lessons we picked up along the way. Safety first! Always use a sturdy ladder and have a spotter if working at heights. Protect your surroundings with drop cloths and wear gloves to prevent staining your hands.
Products used: Minwax Polyshades gel stain in Honey, foam craft brush
Our first step was simple but essential: thoroughly cleaning the beams. Even though they weren’t being sanded, removing any dust, grime, or grease ensures optimal adhesion of the gel stain. A simple wipe-down with a damp cloth, followed by a dry cloth, was sufficient to prepare the surface. Once clean and dry, we were ready to apply the gel stain. Here’s what we discovered to be most effective:
1. Maintain a Wet Edge for Seamless Application
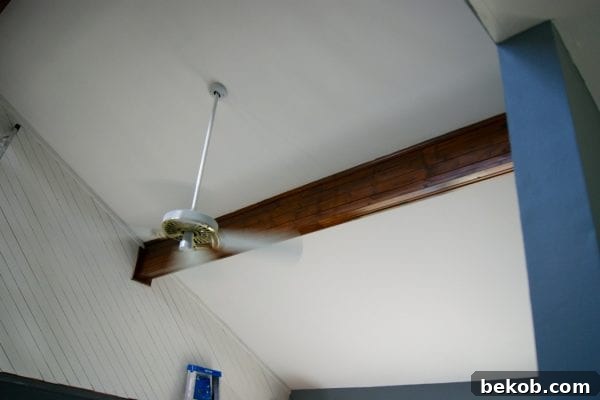
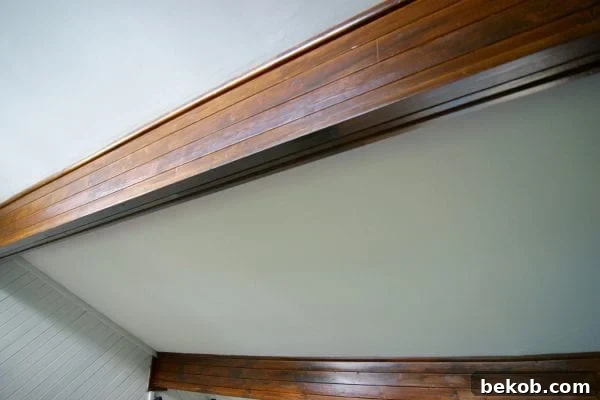
This tip is absolutely paramount for achieving an even, streak-free finish. When applying gel stain, it’s critical to always work into a wet edge. Initially, my husband tried staining one section completely – say, the bottom and sides – then moving the ladder to restart on the next section. The problem with this approach is that by the time he resumed, the previous section had already begun to dry. This resulted in noticeable overlap lines and splotchy areas, making the finish appear uneven. If you examine the beam in the photo above closely, you can just discern where he had to start and stop on the very first beam he worked on. While it’s only noticeable if pointed out, consistent application is key for perfection. The trick is to apply the stain in continuous, overlapping strokes, ensuring that each new stroke blends seamlessly into the previously applied wet stain. This prevents hard lines and creates a uniform appearance across the entire surface of the beam.
2. Speed and Generosity are Your Allies
Following the principle of maintaining a wet edge, it naturally follows that you need to work with a certain degree of speed. Gel stain, as its name suggests, tends to thicken and set quite rapidly once exposed to air. We found that loading a good, generous amount of stain onto the foam craft brush was crucial. This allowed for smoother, more consistent coverage with fewer brush strokes. Over-brushing or trying to spread a thin amount of stain too far only exacerbated the problem. The stain would quickly turn “gloopy,” leading to visible brush marks and an uneven texture. The goal is to apply enough stain quickly and efficiently, then move on, allowing the self-leveling properties of the gel to do their job before it sets. Think of it more like painting with a thick glaze rather than a traditional penetrating stain.
3. Embrace the Power of Multiple Coats
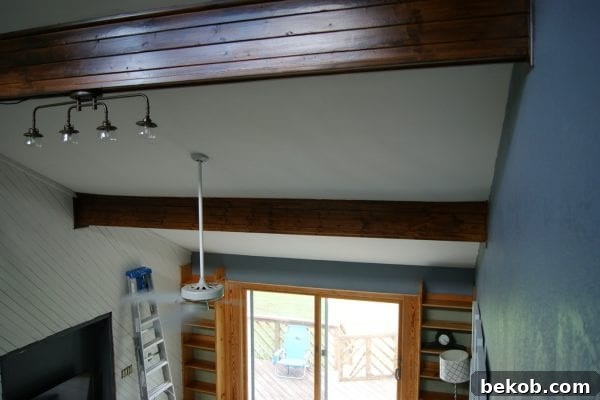
One of the significant advantages of working with gel stain, especially when you’re not sanding, is the flexibility to apply multiple coats. Since the stain sits on the surface rather than penetrating deeply, successive coats build up color and coverage, allowing you to achieve your desired depth and richness. In fact, because of the need to work quickly, you might find that a single coat doesn’t provide the uniform saturation you’re looking for, especially if the original surface has variations. Applying a second coat, after the first has thoroughly dried (always check product instructions for recommended drying times), helps to even out any subtle inconsistencies, deepen the color, and ensure complete coverage. This layered approach is key to transforming a disparate paneled surface into what appears to be a solid, beautifully stained wood beam.
4. Understand the Trade-off: Wood Grain vs. Color Uniformity
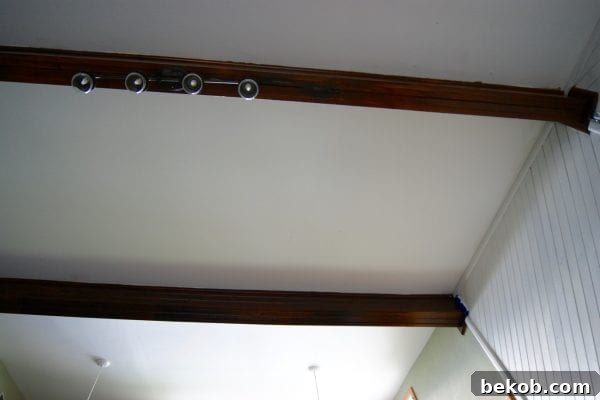
It’s important to set expectations regarding the final appearance. Because gel stain acts more like a covering paint than a penetrating stain, you will likely lose much of the original wood grain detail. For our ceiling beams, which are positioned high up, anywhere from 10 to 20 feet above the floor, this was an acceptable trade-off. At that height, intricate wood grain details aren’t highly visible anyway. What we gained was a uniform, rich color that created the powerful contrast we desired. You can still perceive the subtle textures and any larger knots in the wood, which does add some natural character and prevents them from looking completely flat. However, it’s a different story for surfaces closer to eye level. When I used the same gel stain on our bedroom mantel, I found myself wishing I had chosen a product that would have allowed for more wood grain penetration and, consequently, greater contrast. While I still love the mantel’s finished look, a penetrating stain would have highlighted the natural variations of the wood more distinctly. This highlights the importance of considering the viewing distance and desired effect when choosing your stain type.
The Final Reveal: A Transformed Living Space
The moment we stepped back and admired the newly stained beams, we knew all the effort was worth it. The dark, rich tone instantly added a sense of warmth, sophistication, and character to our living room. It provided that much-needed contrast against the white walls we envisioned, turning what were once awkward paneled structures into striking architectural elements that now define the space. The room feels grounded, inviting, and truly reflective of the rustic-modern aesthetic we love.
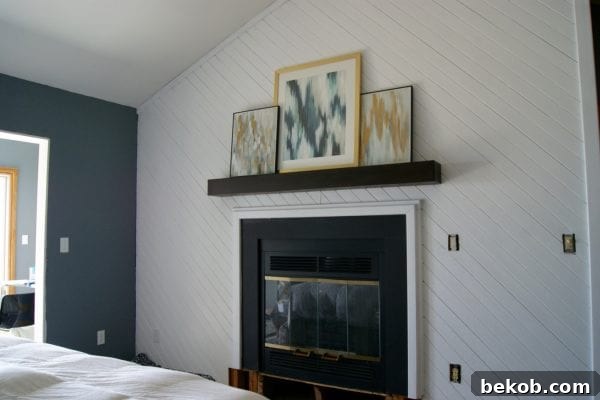
As part of this living room overhaul, we also tackled the track lighting. That project, let me tell you, was quite a headache and is a story best saved for another day! But combined with the stained beams, it dramatically updated the overall ambiance and functionality of the space. The result is a living room that feels cohesive, well-designed, and utterly transformed from its original dated state. We’re absolutely thrilled with the outcome and the way the beams now command attention and enhance the room’s character.
So, what do you think? Are you a fan of the dark, rich beams? This project truly highlights how a creative approach and the right products can completely reimagine a space, even when faced with unconventional starting materials. If you’re curious to understand why we decided to take on such an extensive fixer-upper in the first place, you’ll definitely want to check out our DIY Firepit project – it sheds some light on our motivations for buying this particular home!
Revitalizing these beams with gel stain proved to be an incredibly effective and rewarding DIY project. It’s a testament to the power of thoughtful design choices and the versatility of modern staining products in achieving a high-end look without breaking the bank or undertaking professional-level renovations. We encourage anyone with similar design challenges to consider gel stain as a viable, transformative solution for adding warmth and character to their home.
Beyond Beams: More Inspiring Uses for Gel Stain
The versatility of gel stain extends far beyond just ceiling beams. Its unique properties make it an excellent choice for a myriad of home improvement projects where sanding is undesirable or where you need to refresh an existing finish. Here are a few more inspiring ways you can harness the power of gel stain to transform other areas of your home:
Banister Makeover
Transforming a dated or worn stair banister can dramatically update the look of your entryway or living space. Gel stain is perfect for this application because it adheres beautifully to existing finishes, often found on older banisters, allowing you to achieve a rich, new color without the painstaking process of sanding every spindle and rail. This project can give your stairs a custom, high-end feel with relatively little effort.
Update Vinyl Shutters
Who knew you could stain vinyl? Gel stain’s ability to adhere to non-porous surfaces makes it a fantastic solution for updating faded or unappealing vinyl shutters. Instead of replacing them, which can be costly, a few coats of gel stain can give them a fresh, new color that instantly boosts your home’s curb appeal. This is a smart and economical way to achieve a custom look for your exterior.
Stain a Wood Mantel
Just like our bedroom mantel, gel stain is excellent for giving a wood mantelpiece a refreshed or entirely new look. Whether you’re darkening an existing mantel or adding a faux wood finish to a plain one, gel stain offers a simple way to introduce warmth and focal interest to your fireplace area. It’s a quick project that can significantly impact the overall feel of your living or family room, providing a polished and cohesive design element.