
Embarking on a DIY fireplace makeover can be one of the most transformative projects you undertake in your home. A fireplace, often the heart of a living space, holds immense potential to elevate a room’s aesthetic and serve as a captivating focal point. Join us as we chronicle our journey to transform a dated fireplace into a modern masterpiece, offering inspiration and practical tips for your own home renovation. This is the first installment in a series detailing our progress, proudly sponsored by DAP, whose exceptional products made this dream a reality. All opinions expressed are genuinely ours.
Igniting the Transformation: Our DIY Fireplace Makeover Journey Begins
Over the past few years, since settling into our home, we’ve poured countless hours into making it truly “ours.” Like many homeowners, we often find ourselves caught in the whirlwind of projects, starting numerous tasks but struggling to see them through to a complete finish. There’s always so much to do that once something reaches a functional stage, we often move on to the next urgent item on the list. This tendency, while keeping our home continuously evolving, meant some areas remained in a state of perpetual “almost done.”
Our fireplace mantel and surround was a prime example of such a project. While it possessed a certain charm, it hadn’t received the dedicated attention it deserved. Functionally, it serves its purpose; capable of holding a wood fire, it could certainly act as an emergency heat source. However, for daily living, it was largely overlooked, a decorative element that felt more like an afterthought than a central feature.
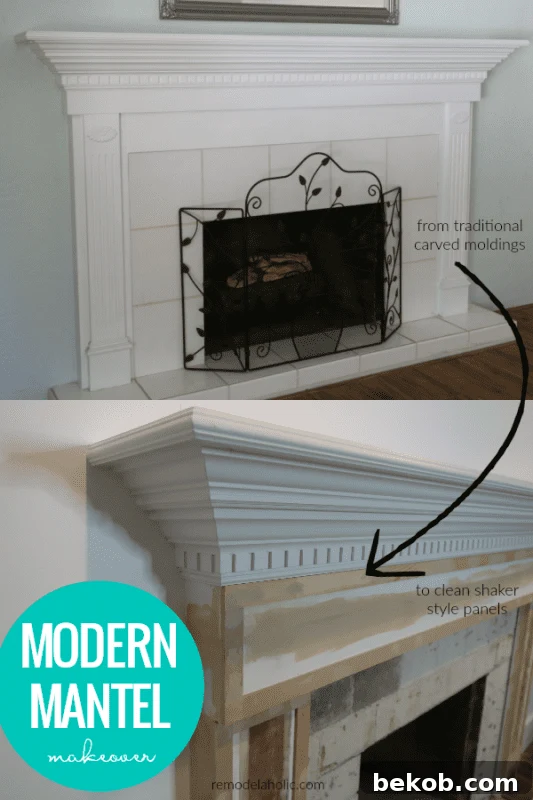
When we first moved in, the fireplace was far from being a priority. Its existing moldings were beautifully crafted, lending an air of classic elegance. At the time, its traditional appearance wasn’t a concern; there were far more pressing renovations to tackle.
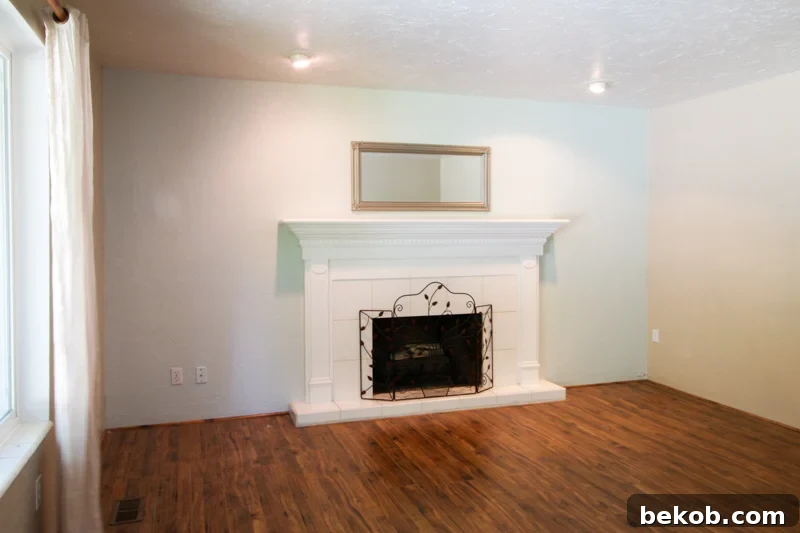
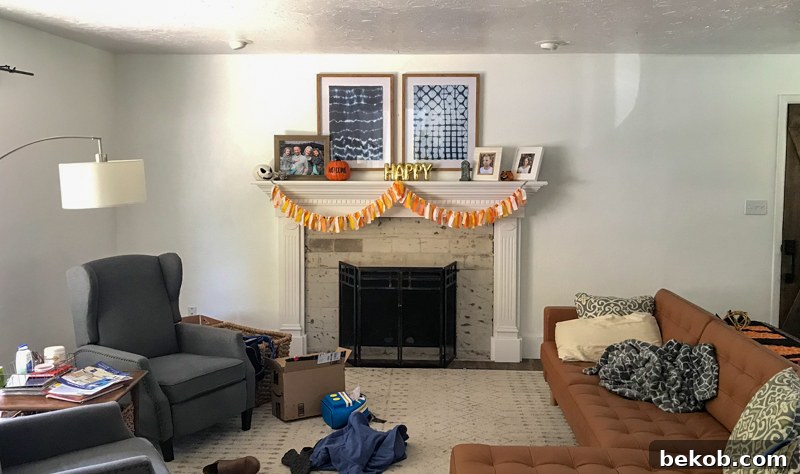
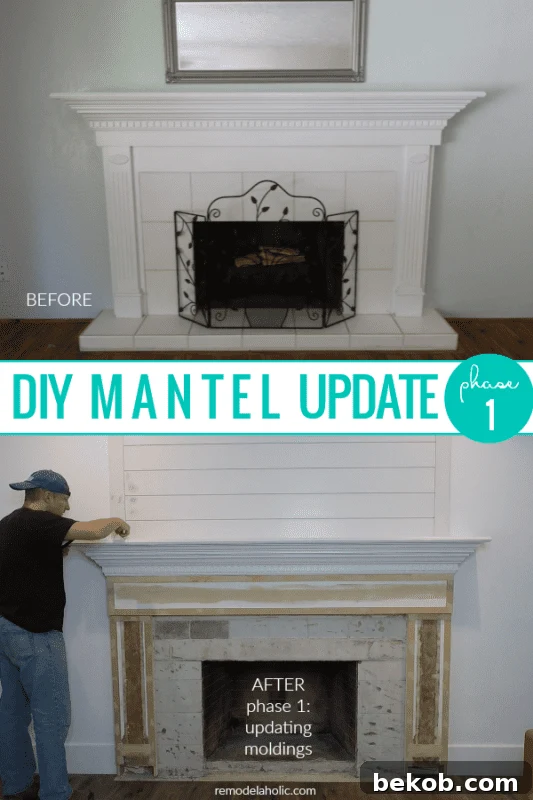
The original fireplace, untouched since we purchased the house.
Visualizing the Change: Our Fireplace Mantel Update Video
Despite its inherent beauty, certain elements of the fireplace began to feel increasingly dated over time. More significantly, after we removed some walls to open up our living space, the mantel felt diminished, failing to command the presence it once had. It simply didn’t anchor the room as effectively in the new, expansive layout.
While we could have continued living with the fireplace as it was, one major design element consistently bothered us: the elevated hearth. In a room that isn’t particularly vast, an elevated hearth tends to encroach upon the usable floor space, making the area feel smaller and less fluid. Our long-term vision was a fireplace flush with the floor, creating a seamless transition and maximizing the sense of openness. This vision truly took hold when it was time to install our amazing new luxury vinyl wood plank floors. We seized the opportunity to carefully remove the existing hearth and tile, laying the new flooring directly over the space. This was a temporary but crucial step, allowing us to live with the newly floored area while we meticulously planned the permanent fireplace transformation. (Remember our earlier confession about starting more projects than we finish? This was one of those strategic pauses!)
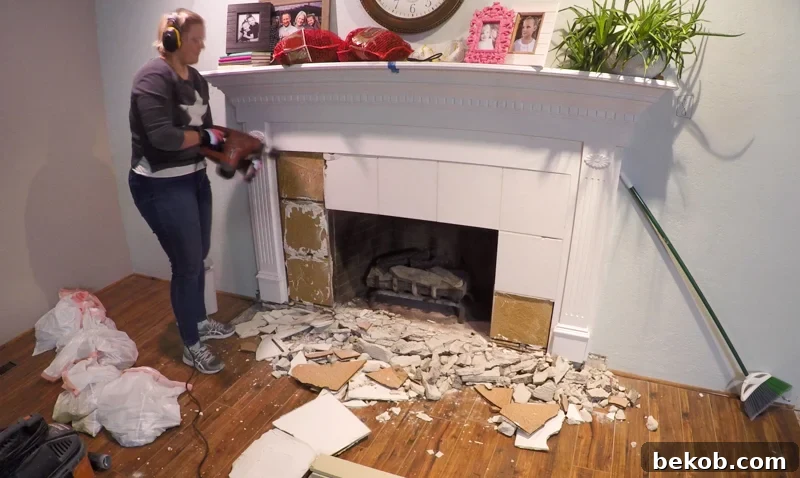
Efficiency at its best: removing stubborn tile with a hammer drill, a task made significantly easier.
For nearly two years, our fireplace stood stripped of its hearth and tile, a blank canvas patiently awaiting its grand design. It was a constant reminder of a project in limbo, but also a symbol of anticipation for the dramatic change to come.
Well, the prolonged wait is officially over! The time has finally arrived for this long-awaited renovation.
A New Era for Our Living Room!
Over the course of our upcoming posts, we are thrilled to unveil the step-by-step process of how we updated our existing fireplace mantel. Our aim was to transform it into the much-needed focal point for our main living space, reflecting a more contemporary and cohesive aesthetic.
And let us tell you, the results are nothing short of incredible! You absolutely won’t want to miss seeing the stunning updates and the dramatic shift in our living room’s ambiance. Be sure to return to follow along with the entire series.
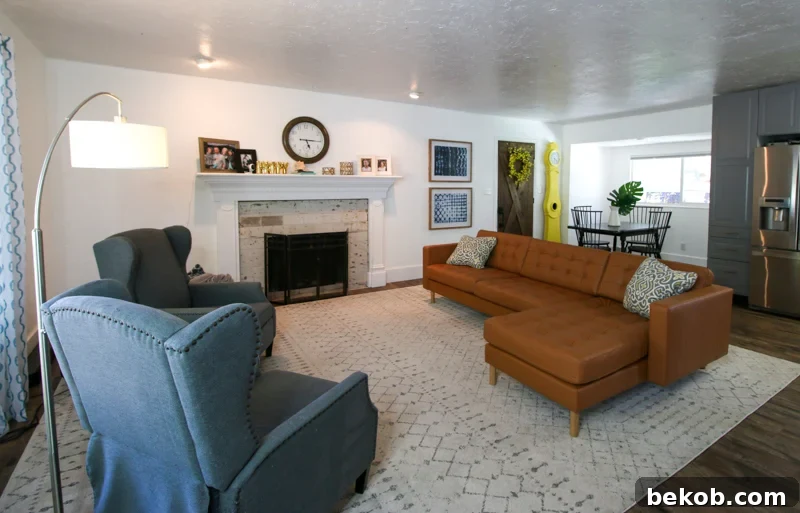
Here’s a glimpse of the space just before this exciting, recent makeover began:
The Power of Visualization: Sketching Our Fireplace Design
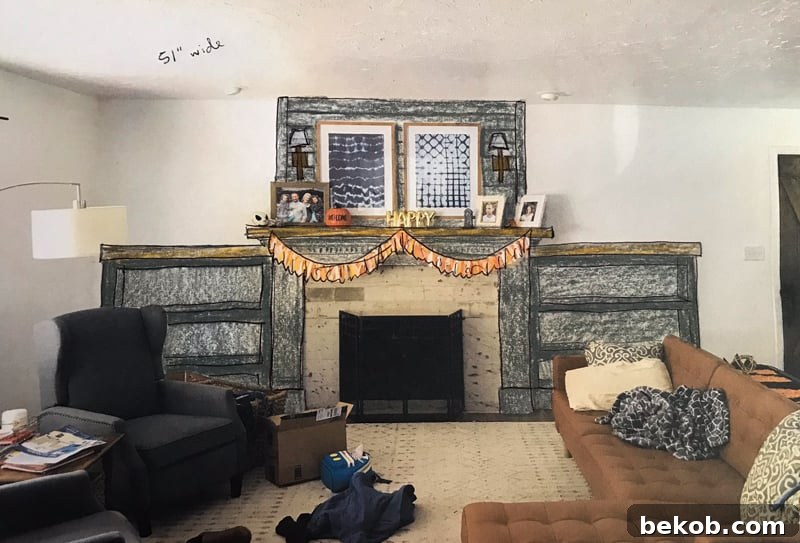
One of our go-to methods for solidifying design plans for any space is to meticulously sketch out proposed changes directly onto a printed image of the current area. We find that coloring these sketches with colored pencils works wonders, as their semi-opaque nature helps to visually diminish the old elements, allowing the new design to truly stand out. It’s an incredibly effective way to visualize the transformation before any physical work begins. So, with pencils in hand, I embarked on the design process, and here’s the initial plan we developed.
The starting point for our conceptual design sketch, laying the groundwork for transformation.
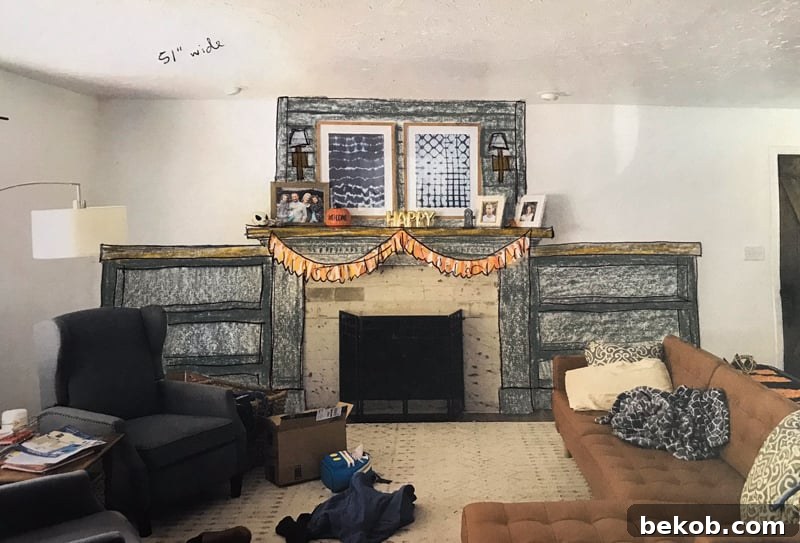
Our rendered sketch illustrating the final design vision we aimed to achieve.
It’s important to note that while the vision includes stunning flanking bookcases, our current focus is solely on the fireplace makeover itself. We believe in tackling projects in phases to ensure each element receives the attention it deserves. However, we eagerly anticipate the day (hopefully in the near future!) when we can embark on building those bookcases – and when we do, they will undoubtedly be full-height, extending majestically to the ceiling! Just imagining that transformation gets us excited, picturing the future “happy dance” in our soon-to-be-completed space.
Essential Foundation: Prepping the Walls for a Seamless Finish
A crucial step that preceded the actual mantel work was dedicating an entire week to leveling the highly textured wall surrounding the fireplace. Many older homes feature prominent wall textures that can detract from a modern, clean aesthetic. We understood that a smooth, uniform surface was essential for the refined look we desired. We plan to share a detailed tutorial on this process very soon, so definitely stay tuned for that invaluable guide. The difference a smooth texture made was absolutely astonishing. It instantly updated the room’s feel, simply by removing the heavy, often dated, wall texture. This seemingly minor detail had a monumental impact on the overall perception of the space.
Now, with the walls prepped and primed, it was time to dive into the intricate details of updating the molding. One absolute certainty for me was the desire to overhaul the existing columns/legs. I wanted to eliminate the traditional fluting and slightly widen the columns for a more substantial, contemporary look. Simultaneously, the header above the fireplace also needed to be broadened to achieve better proportions. To tie the design together, we envisioned adding clean, shaker-style panels to the surround. I communicated these ideas to Justin, who then masterfully sketched a few options. These visual aids were incredibly helpful, allowing us to refine our choices and pinpoint the exact design we both loved.
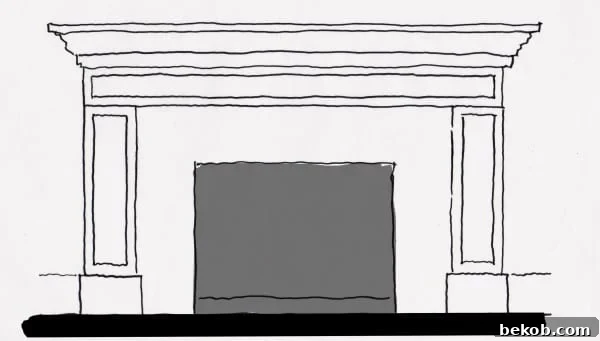
Justin’s precise sketch of the molding option we mutually decided upon.
DIY Tip: Collaborative Design for Home Projects
When undertaking a significant home project, especially with a spouse or partner, sketching out ideas on paper or curating inspiration images is an incredibly effective communication tool. It allows you to visually convey your design aspirations, clarify details, and make necessary adjustments collaboratively before any construction begins. This proactive approach to design has been instrumental in the success of our remodeling projects over the years, fostering understanding and minimizing potential disagreements. It transforms abstract ideas into concrete visuals, ensuring everyone is on the same page.
Once our design plan was finalized and agreed upon, we were absolutely ready to roll up our sleeves and commence the exciting work of the fireplace mantel update.
Essential Products for a Flawless Finish: DAP Solutions
Our ongoing love affair with DAP products runs deep. Their extensive range consistently provides the high-quality solutions needed to achieve professional-grade results. For this significant phase of our DIY fireplace makeover, DAP’s dependable products were indispensable. Here’s a detailed list of the supplies we utilized to execute the woodworking and finishing touches:
-
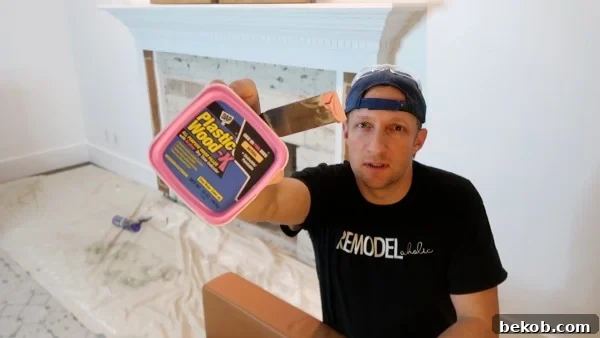
DAP Plastic Wood Patch: This product was a lifesaver for seamlessly patching all nail holes, minor imperfections, and joint seams. Its remarkable workability meant it sanded down exceptionally smooth, creating a flawless surface ready for paint.

-
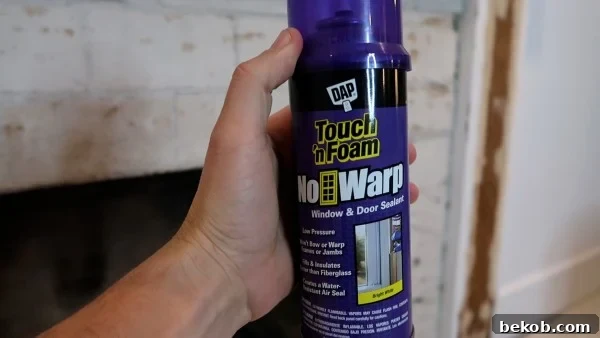
DAP Touch ‘n Foam: Critical for enhancing energy efficiency, we used this expanding foam to meticulously block out cold drafts around the fireplace mantel surround. It ensures a tighter seal, contributing to a more comfortable and energy-efficient living space.
- DAP Weldwood Wood Glue: For all the intricate trim work added beneath the mantel shelf, including the clean lines of the shaker panels, DAP Weldwood Wood Glue provided an incredibly strong and durable bond, ensuring longevity and structural integrity.
- DAP Dyna Grip Construction Adhesive: This robust adhesive was our choice for securely gluing the shiplap panels directly to the wall above the mantel. It offered reliable adhesion, preventing movement and ensuring a lasting finish, even on large panels.
- DAP Alex Plus Caulk: Achieving crisp, clean lines between different surfaces is paramount for a professional paint job. DAP Alex Plus Caulk was used extensively for caulking edges against painter’s tape and filling any tiny gaps between boards, creating a smooth, paint-ready surface.
- DAP Rapid Fuse Glue: For gluing the baseboards in part three of the makeover, this fast-setting glue provided instant grab and a strong bond, significantly speeding up the assembly process.
Precision Woodworking: Key Steps to Our Fireplace Transformation
To truly grasp the intricate details of our woodworking process and witness the stunning final look, we highly recommend watching our comprehensive DIY fireplace makeover video. It visually demonstrates each step, making the process much clearer. For those who prefer a concise overview, here are the essential woodworking steps we followed:
- Demolishing Old Details: We meticulously removed the existing fluted leg details from the original mantel. This required careful prying and some sanding to achieve a smooth, flat surface.
- Surface Preparation: After removing the old details, the surfaces were thoroughly sanded to eliminate any residual glue or unevenness. This was followed by patching any holes or minor damage with wood filler, ensuring a pristine base.
- Expanding the Header: To achieve a more substantial and balanced look, we strategically extended the fireplace header downwards, increasing its visual weight and presence. This involved adding new wood pieces and seamlessly integrating them.
- Widening the Legs: The original legs were too narrow for our updated aesthetic. We carefully widened them by adding additional wood, creating a bolder, more modern profile that better complemented the expanded header.
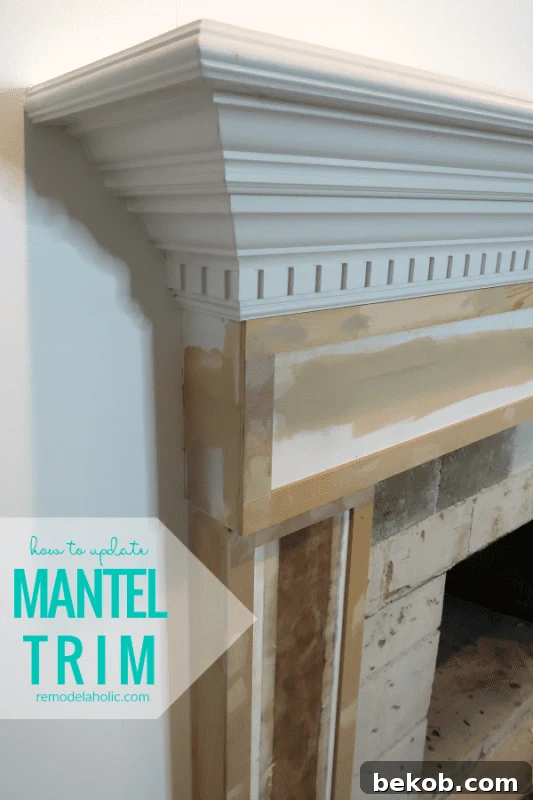
- Adding Decorative Molding Trim: Thin molding trim was precisely cut and added to the legs and header, defining the new shaker-style panels and adding architectural detail. This step required careful measurements and precise cuts.
- Installing Shiplap Above the Mantel: To visually extend the fireplace upwards and create an impressive feature wall, we installed elegant shiplap panels above the mantel, reaching all the way to the ceiling. This vertical element draws the eye upward, enhancing the room’s perceived height.
- Final Patching and Sanding: Once all new woodworking elements were in place, we went through another round of patching all nail holes and seams. This was followed by a final, thorough sanding of all surfaces to ensure they were perfectly smooth and ready for paint.
- Precision Taping for Paint: For a professional, razor-sharp paint edge, we meticulously taped off all edges where the new fireplace structure met the existing wall color and ceiling.
- Caulking for a Clean Finish: To prevent paint bleed and create an absolutely seamless transition, we applied a thin bead of caulk along the taped edges. This technique creates a perfectly crisp line once the tape is removed.
- Pre-Paint Cleaning: Before priming, all surfaces were thoroughly sanded once more and then meticulously vacuumed to remove any dust or debris, ensuring optimal paint adhesion and a smooth finish.
Essential Tools for Your Fireplace Makeover
(Affiliate Links provide a small commission at no extra cost to you, helping us create more helpful content!)
- Harbor Freight Hammer Drill: Invaluable for efficient tile removal.
- Sanding Block: Essential for manual sanding in tight spots and for achieving a fine finish.
- Sand Paper: Various grits for smoothing wood patch and preparing surfaces.
- Putty Knife: Large and Small: For applying wood patch and scraping.
- Caulking Gun: Necessary for applying caulk smoothly and evenly.
- Pin Nailer: For securely attaching trim pieces with minimal visible fasteners.
- Tape Measure: Precision is key in all woodworking projects.
- Pencil: For marking cuts and layout.
- Miter Saw: For accurate angle cuts on molding and trim.
- Table Saw: For ripping wider boards and creating consistent widths for panels.
- Shop Vacuum: Crucial for dust collection and keeping the workspace clean.
- Drop Cloth: To protect floors and furniture from dust and paint.
- Craftsman Flex Claw Hammer: For prying and light demolition.
- Pry Bar: For careful removal of old moldings and trim.
- Step Ladder: For safely reaching higher sections of the fireplace and wall.
Key Materials Used for This Transformation
(Affiliate Links for your convenience, supporting our content creation!)
- Blue Painter’s Tape: For general masking and protecting surfaces.
- Green Painter’s Tape: Offers superior adhesion for long-term masking, especially useful for crucial paint lines.
- (2) MDF Bender Board: Flexible MDF used for creating curves or for specific molding profiles.
- (8) 1x6x8’ Primed Shiplap Boards: The chosen material for the impressive vertical element above the mantel.
- (1) 1×4 MDF Board: Versatile for trim work and paneling.
- Plywood Scraps: Useful for shims, spacers, or small structural additions.
- 2×4 Lumber: For securely extending the header structure.
We sincerely hope this detailed guide to the initial phase of our DIY fireplace makeover has provided you with valuable insights and inspired your own home improvement aspirations. The transformation from dated to dazzling is a rewarding journey, and we’re thrilled to share our process with you. Please feel free to share your thoughts, questions, or your own fireplace makeover experiences in the comments section below. We love hearing from our community!
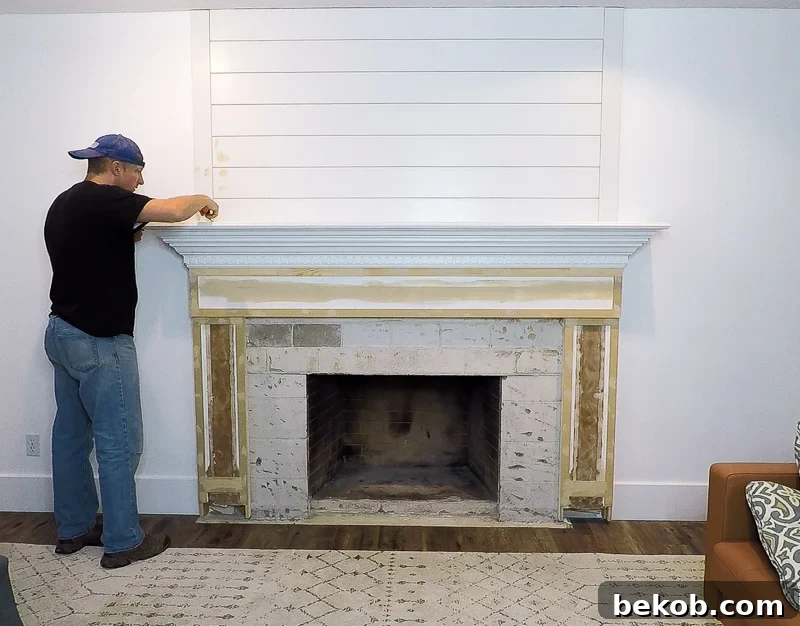
A sneak peek: The final woodwork and trim before the transformative power of paint.
Be sure to return for part two of our series, where we delve into the meticulous process of priming and painting the fireplace mantel, revealing the striking color choice that brought our vision to life!
Discover further inspiration with 25+ stunning fireplace makeovers here.
And for those dreaming of a fireplace where none exists, explore how to build a fantastic fauxfireplace here.