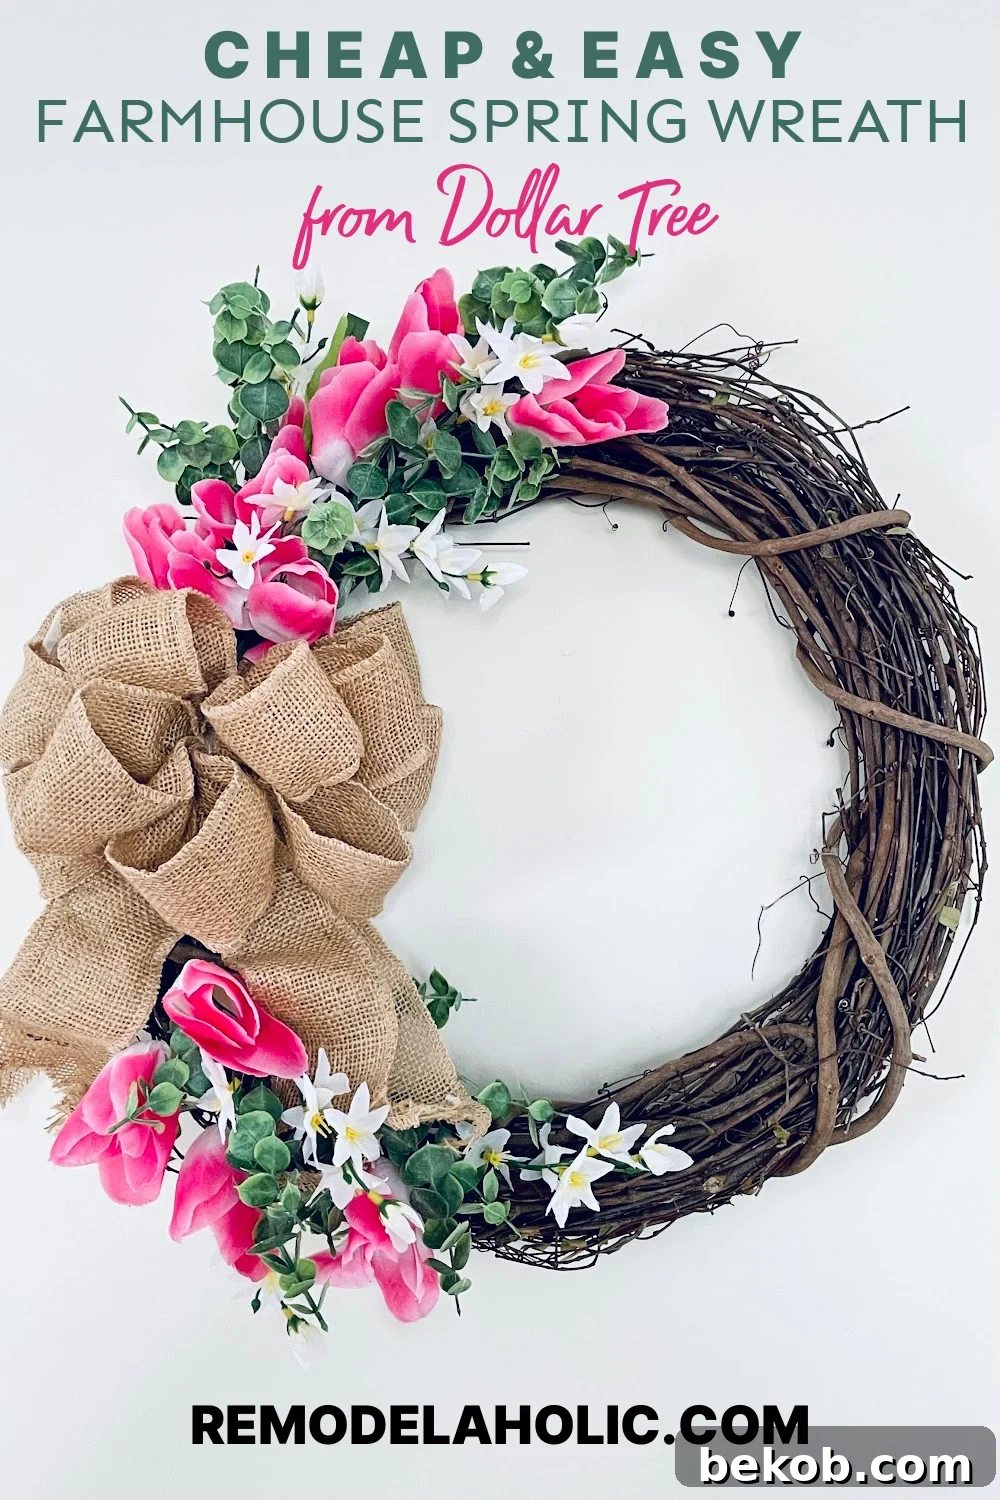
DIY Farmhouse Tulip Wreath: Easy & Affordable Spring Front Door Decor
As winter’s chill fades and the days grow longer, there’s a unique joy in refreshing our homes for spring. Few things capture the vibrant essence of the season quite like a beautiful floral wreath gracing your front door. If you’re looking for an impactful yet incredibly simple and budget-friendly project, our DIY farmhouse tulip wreath is your perfect match. Crafted predominantly from affordable Dollar Tree supplies, this charming spring wreath can transform your entryway into a welcoming haven in under 30 minutes! It’s an ideal craft for a leisurely afternoon, or a delightful activity to share with friends, creating lasting memories along with stunning decor.
Beyond this project, explore more fantastic ideas for brightening your home: discover our Super Easy Flower Market Dollar Tree Floral Wreath, get inspired by this fun Dollar Tree Spring Wreath DIY for Gardeners, and browse through 40 More Great Spring Wreath & Door Decor Ideas for endless inspiration.

Crafting Your Perfect Farmhouse Spring Wreath
Welcome the arrival of spring with open arms and a beautifully adorned front door! There’s something truly special about a handmade touch that store-bought decor just can’t replicate. Our guide to making an easy farmhouse spring wreath featuring cheerful tulips is designed for anyone, regardless of crafting experience, to achieve a professional-looking result with minimal effort and expense. This project isn’t just about making a wreath; it’s about embracing the renewal of spring, adding a personal statement to your home, and perhaps even discovering a new favorite hobby.
Imagine your neighbors admiring your charming, custom-made spring front door decor, all while knowing you spent less than an hour and a minimal budget on this delightful DIY. This project focuses on simple techniques and readily available materials, ensuring a stress-free creative experience. Get ready to transform your entryway and impress everyone with your crafting prowess!

Why a DIY Tulip Wreath is the Ultimate Spring Craft Project
Choosing a DIY tulip wreath for your spring decorating offers a myriad of benefits, making it an incredibly popular and rewarding craft. This project goes beyond simply hanging a decoration; it’s an opportunity to infuse your home with personal charm and celebrate the rejuvenating spirit of spring.
Unmatched Versatility and Customization
One of the primary advantages of crafting your own farmhouse spring wreath is its incredible versatility. Unlike mass-produced wreaths, your handmade creation can be fully tailored to your unique taste and existing home decor. Do you prefer vibrant, bold colors to make a statement, or soft pastels for a subtle, elegant touch? With a wide array of faux tulips available, you can select the exact shades and even varieties that speak to you. You can experiment with different ribbon styles, types of greenery, and the overall density of your floral arrangement. This adaptability ensures that your finished wreath isn’t just a generic decoration, but a true reflection of your personal style, seamlessly integrating with your farmhouse aesthetic or any other decor theme you envision.
Incredibly Budget-Friendly Decorating
In an era where home decor can often come with a hefty price tag, this floral wreath stands out as a wonderfully budget-friendly option. The beauty of this project lies in its accessibility, especially when sourcing materials from dollar stores like Dollar Tree. You don’t need expensive specialty items to achieve a high-end look. A simple grapevine wreath base, a few bunches of faux tulips, some complementary greenery, and a roll of ribbon are often all it takes. Even if you dream of a lush, full tulip wreath that completely covers the base, the affordability of Dollar Tree flowers means you can achieve this opulent look without breaking the bank. This makes it an ideal choice for crafters looking to maximize impact while minimizing expenditure, proving that stunning decor doesn’t have to be costly.
A Fun and Therapeutic Creative Outlet
Beyond its aesthetic and economic benefits, the process of creating this DIY wreath is genuinely fun and therapeutic. Crafting has long been recognized for its ability to reduce stress, improve mood, and provide a sense of accomplishment. Working with your hands, arranging colors and textures, and watching your vision come to life can be incredibly satisfying. It’s an activity that allows you to unplug from daily demands and engage in a mindful, creative flow. This project is perfect for solo enjoyment, offering a peaceful escape, or it can become a delightful social event. Imagine gathering a group of friends, stocking up on supplies, and hosting a “wreath-making party” complete with an easy bagel brunch. It’s a fantastic way to foster creativity, share laughter, and create beautiful decor together.
Infusing Personality and Warmth into Your Home
Ultimately, crafting a farmhouse spring wreath is more than just a seasonal decoration project; it’s about infusing your home with warmth, character, and a touch of your own personality. Each tulip carefully placed, each stem woven into the grapevine, contributes to a piece of art that tells a story—your story. It’s a tangible representation of your care and creativity, making your home feel more inviting and uniquely yours. So, embrace the opportunity to unleash your inner artisan. Gather your supplies, select your favorite spring colors, and let the fresh, vibrant beauty of tulips blossom right at your doorstep, welcoming every guest with handmade charm and a promise of warmer days ahead!
This post contains affiliate links. Learn more and read our full disclosure policy here.
How to Make Your Own Tulip Wreath: A Detailed Step-by-Step Tutorial
Ready to transform your front door with the cheerful charm of a farmhouse tulip wreath? This step-by-step tutorial will guide you through the process, ensuring a beautiful result even if you’re a beginner. Follow these simple instructions, and you’ll have a stunning spring wreath ready to display in no time!
Essential Supplies for Your Farmhouse Spring Tulip Wreath
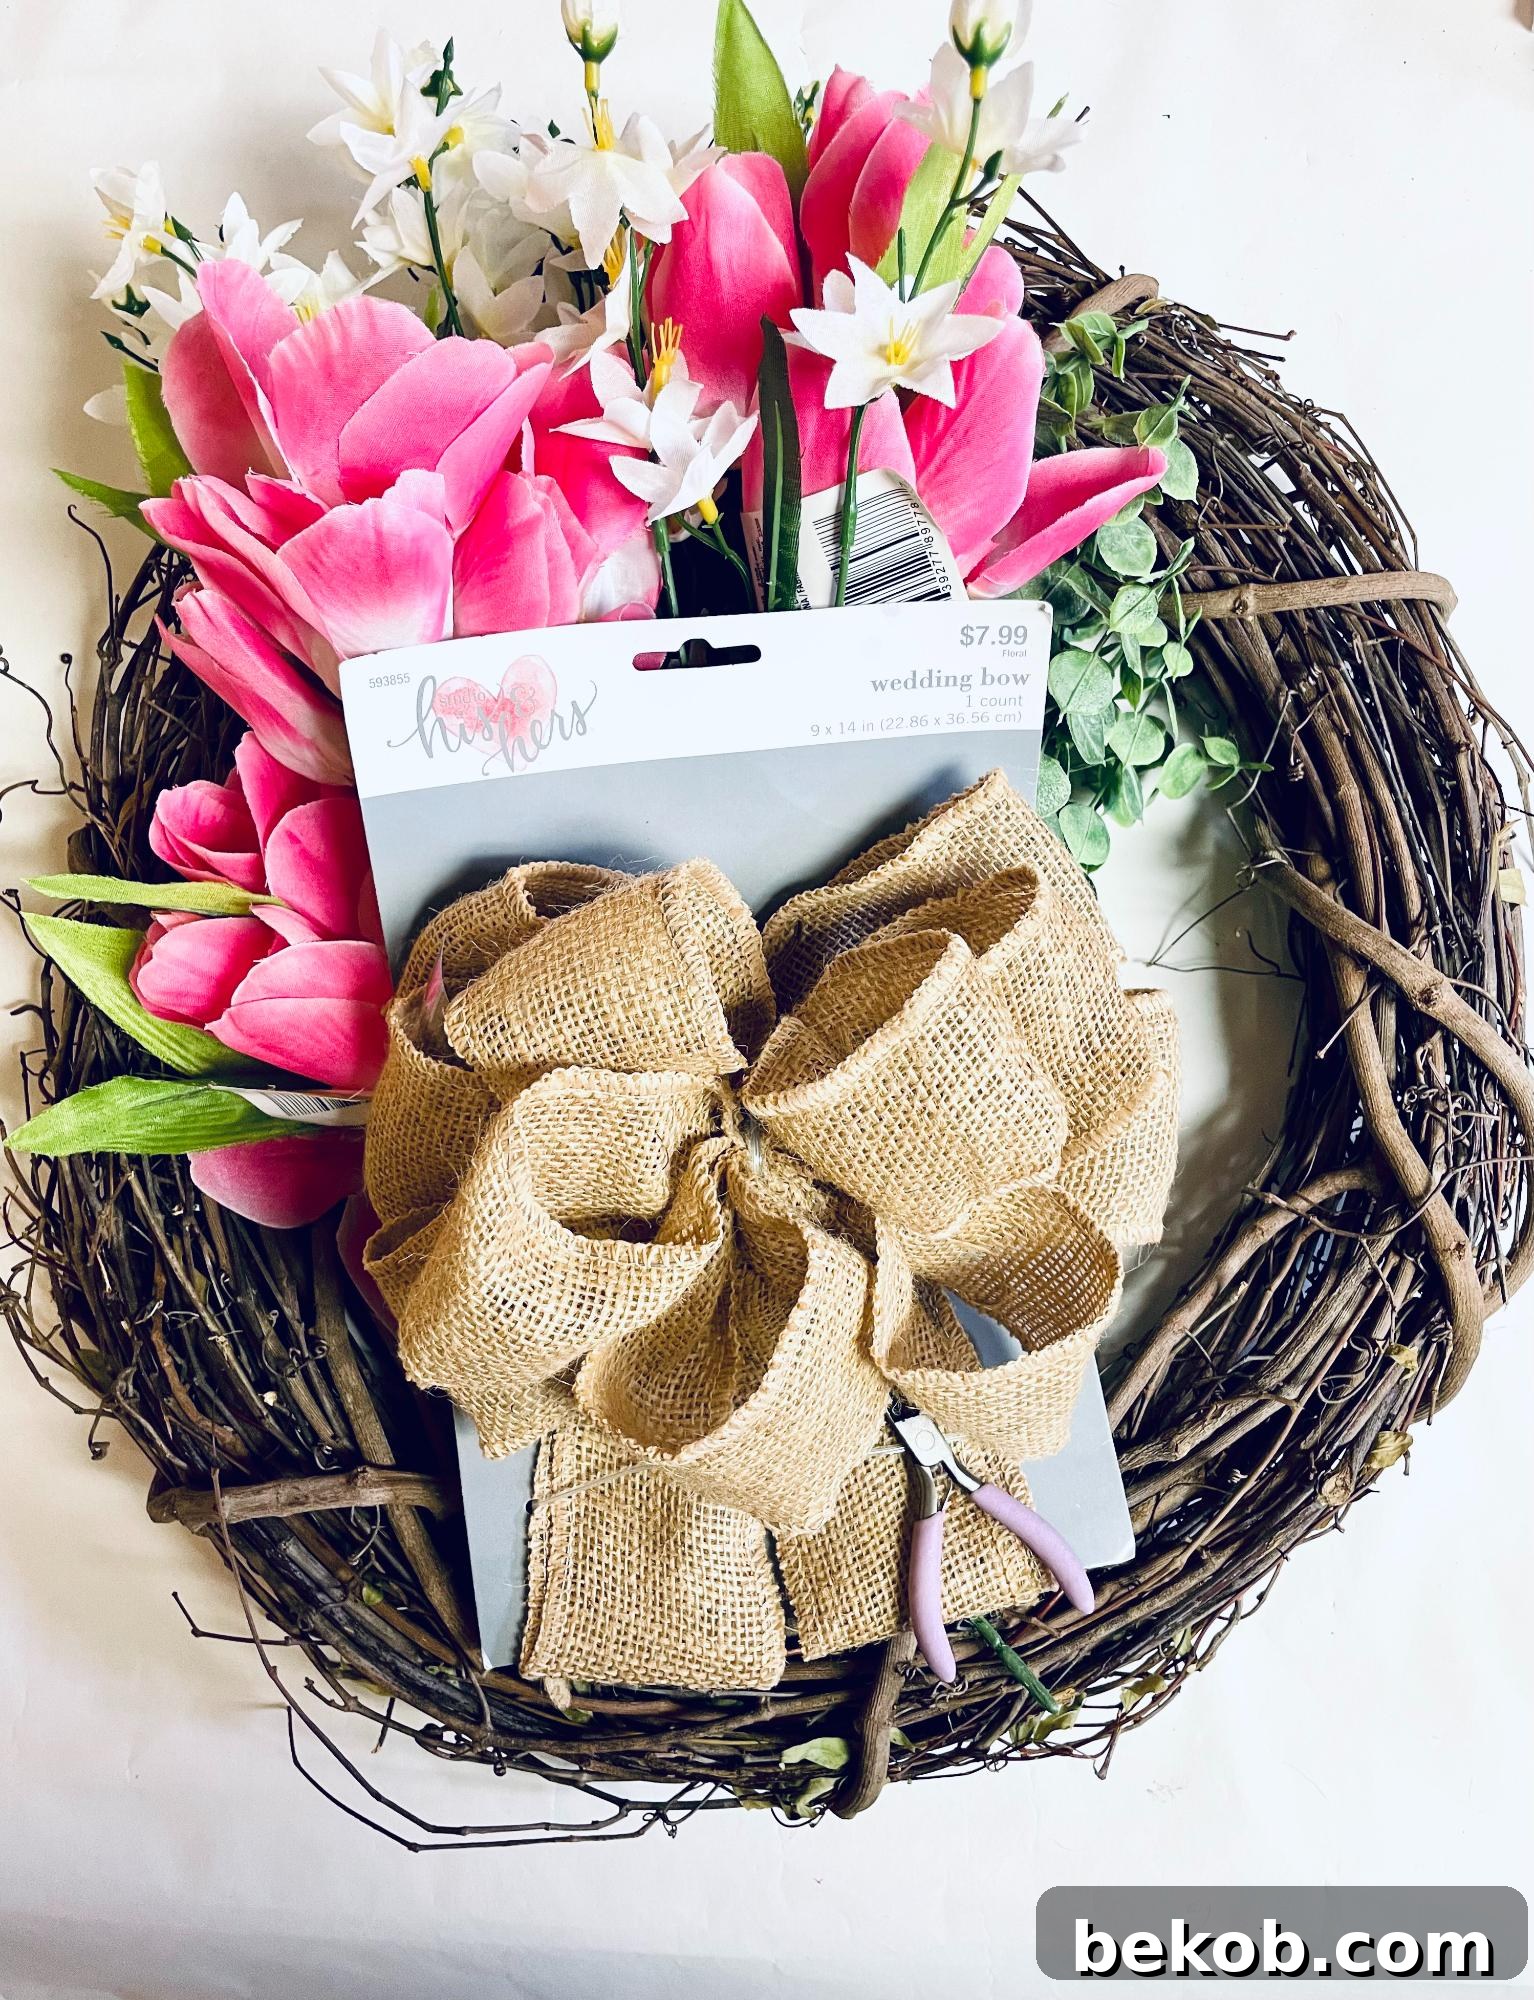
Gathering your materials is the first exciting step in any DIY project. For this charming farmhouse tulip wreath, we’ve focused on accessibility and affordability, primarily utilizing supplies from Dollar Tree. Here’s what you’ll need:
- 18-inch Grapevine Wreath: This is the sturdy foundation for your wreath. You can easily find these at most craft stores like Michaels or Joann’s, or even at large retailers like Walmart. The natural texture of the grapevine adds to the rustic farmhouse appeal.
- Pre-made Burlap Bow (Optional): A burlap bow instantly elevates the farmhouse aesthetic. If you prefer to add a personal touch or can’t find a pre-made one, you can learn to make your own here using affordable Dollar Tree burlap ribbon.
- Dollar Tree Pink Tulips (2 bunches): These are the stars of your wreath! Dollar Tree offers a variety of faux tulips in beautiful spring shades. Feel free to choose light pink, dark pink, or any color that complements your home decor. For a fuller, more abundant look, consider picking up 3-4 bunches.
- Dollar Tree Small White Flowers with Yellow Centers: These delicate blossoms will add beautiful contrast and texture, breaking up the larger tulip shapes and adding an extra touch of springtime freshness.
- Dollar Tree Greenery or Eucalyptus Bunch: Greenery is crucial for adding depth, volume, and a natural feel to your wreath. Eucalyptus is a popular choice for its subtle color and texture, but any faux greenery you find appealing will work wonders.
- Wire Cutters: An essential tool for cleanly trimming the wire stems of your faux flowers and greenery, making them easy to insert into the grapevine wreath.
Pro Tip for Easy Shopping: Don’t forget that Dollar Tree often offers shipping for supplies directly to your door, sometimes in quantities as low as four items! This makes organizing a craft day, especially if you’re making multiple wreaths or crafting with friends, incredibly convenient.
Crafter’s Choice: If you envision a truly opulent, full tulip wreath, simply grab a few extra bunches of your favorite Dollar Tree tulips. The more tulips, the denser and more vibrant your wreath will be!
Detailed Instructions to Assemble Your Tulip Wreath
With your supplies ready, it’s time to bring your beautiful farmhouse spring wreath to life! This process is designed to be straightforward and enjoyable.
Step 1: Prepare Your Faux Flowers and Greenery
Before you begin attaching anything to your grapevine wreath, you’ll need to prepare your floral elements. Use your wire cutters to carefully trim the stems of all your faux flowers (tulips and small white flowers) and about half of your eucalyptus or greenery bunch. Aim to leave approximately 3 inches of stem on each piece. This length is ideal for weaving into the grapevine wreath and securing with hot glue. Having various stem lengths can also help create depth and movement in your final arrangement, so don’t be afraid to vary them slightly.
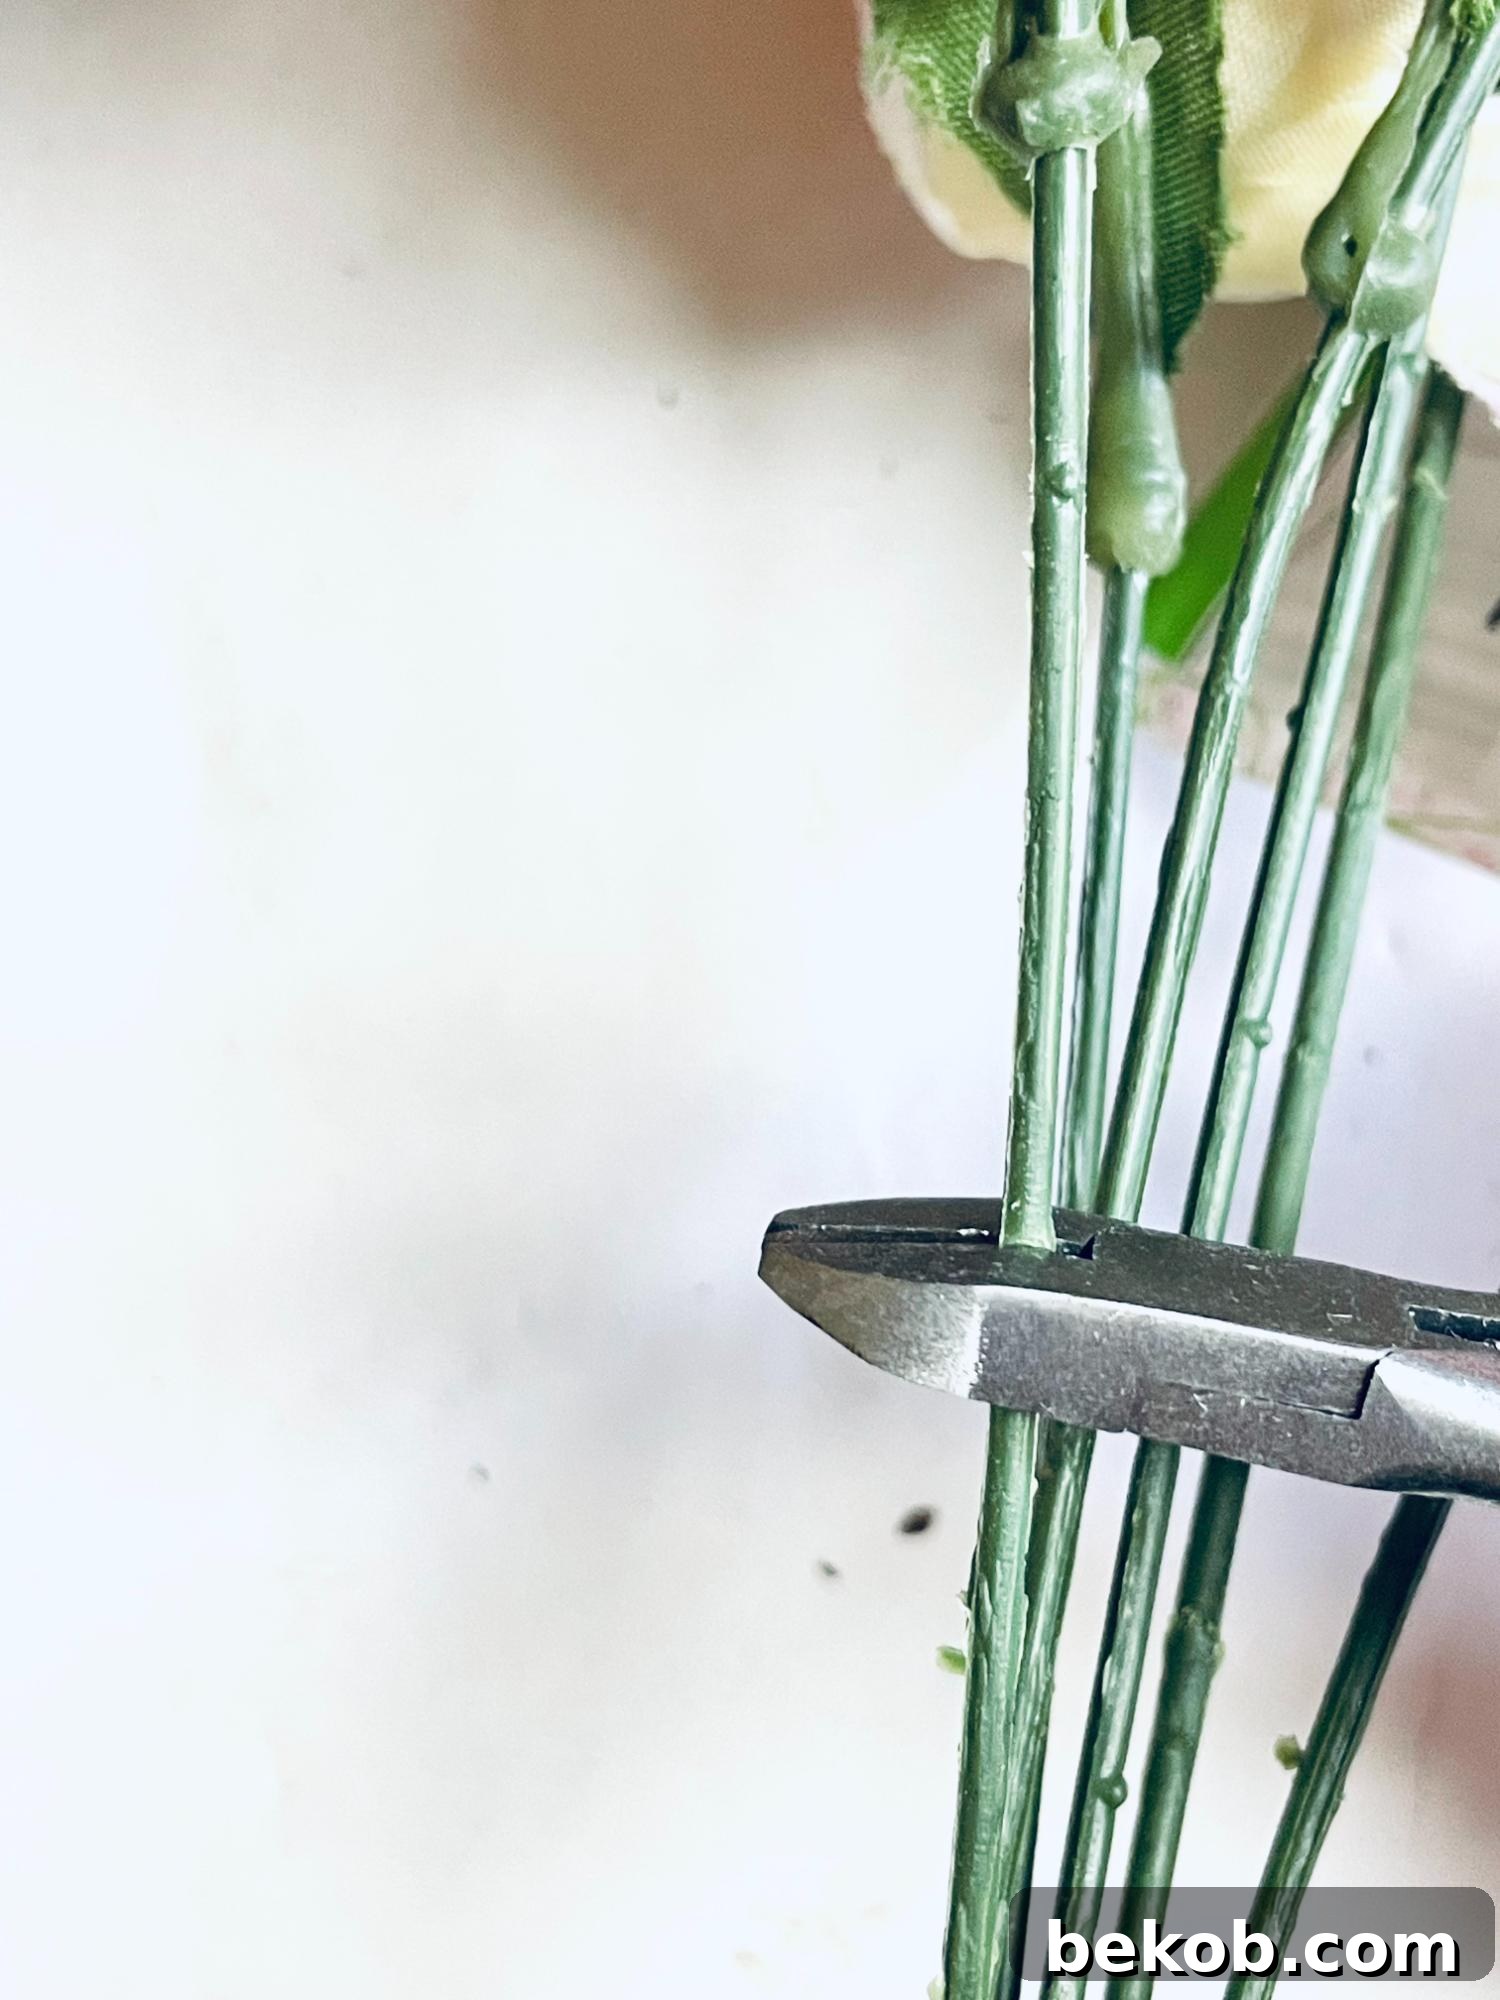
Step 2: Begin Arranging and Securing Flowers and Greenery
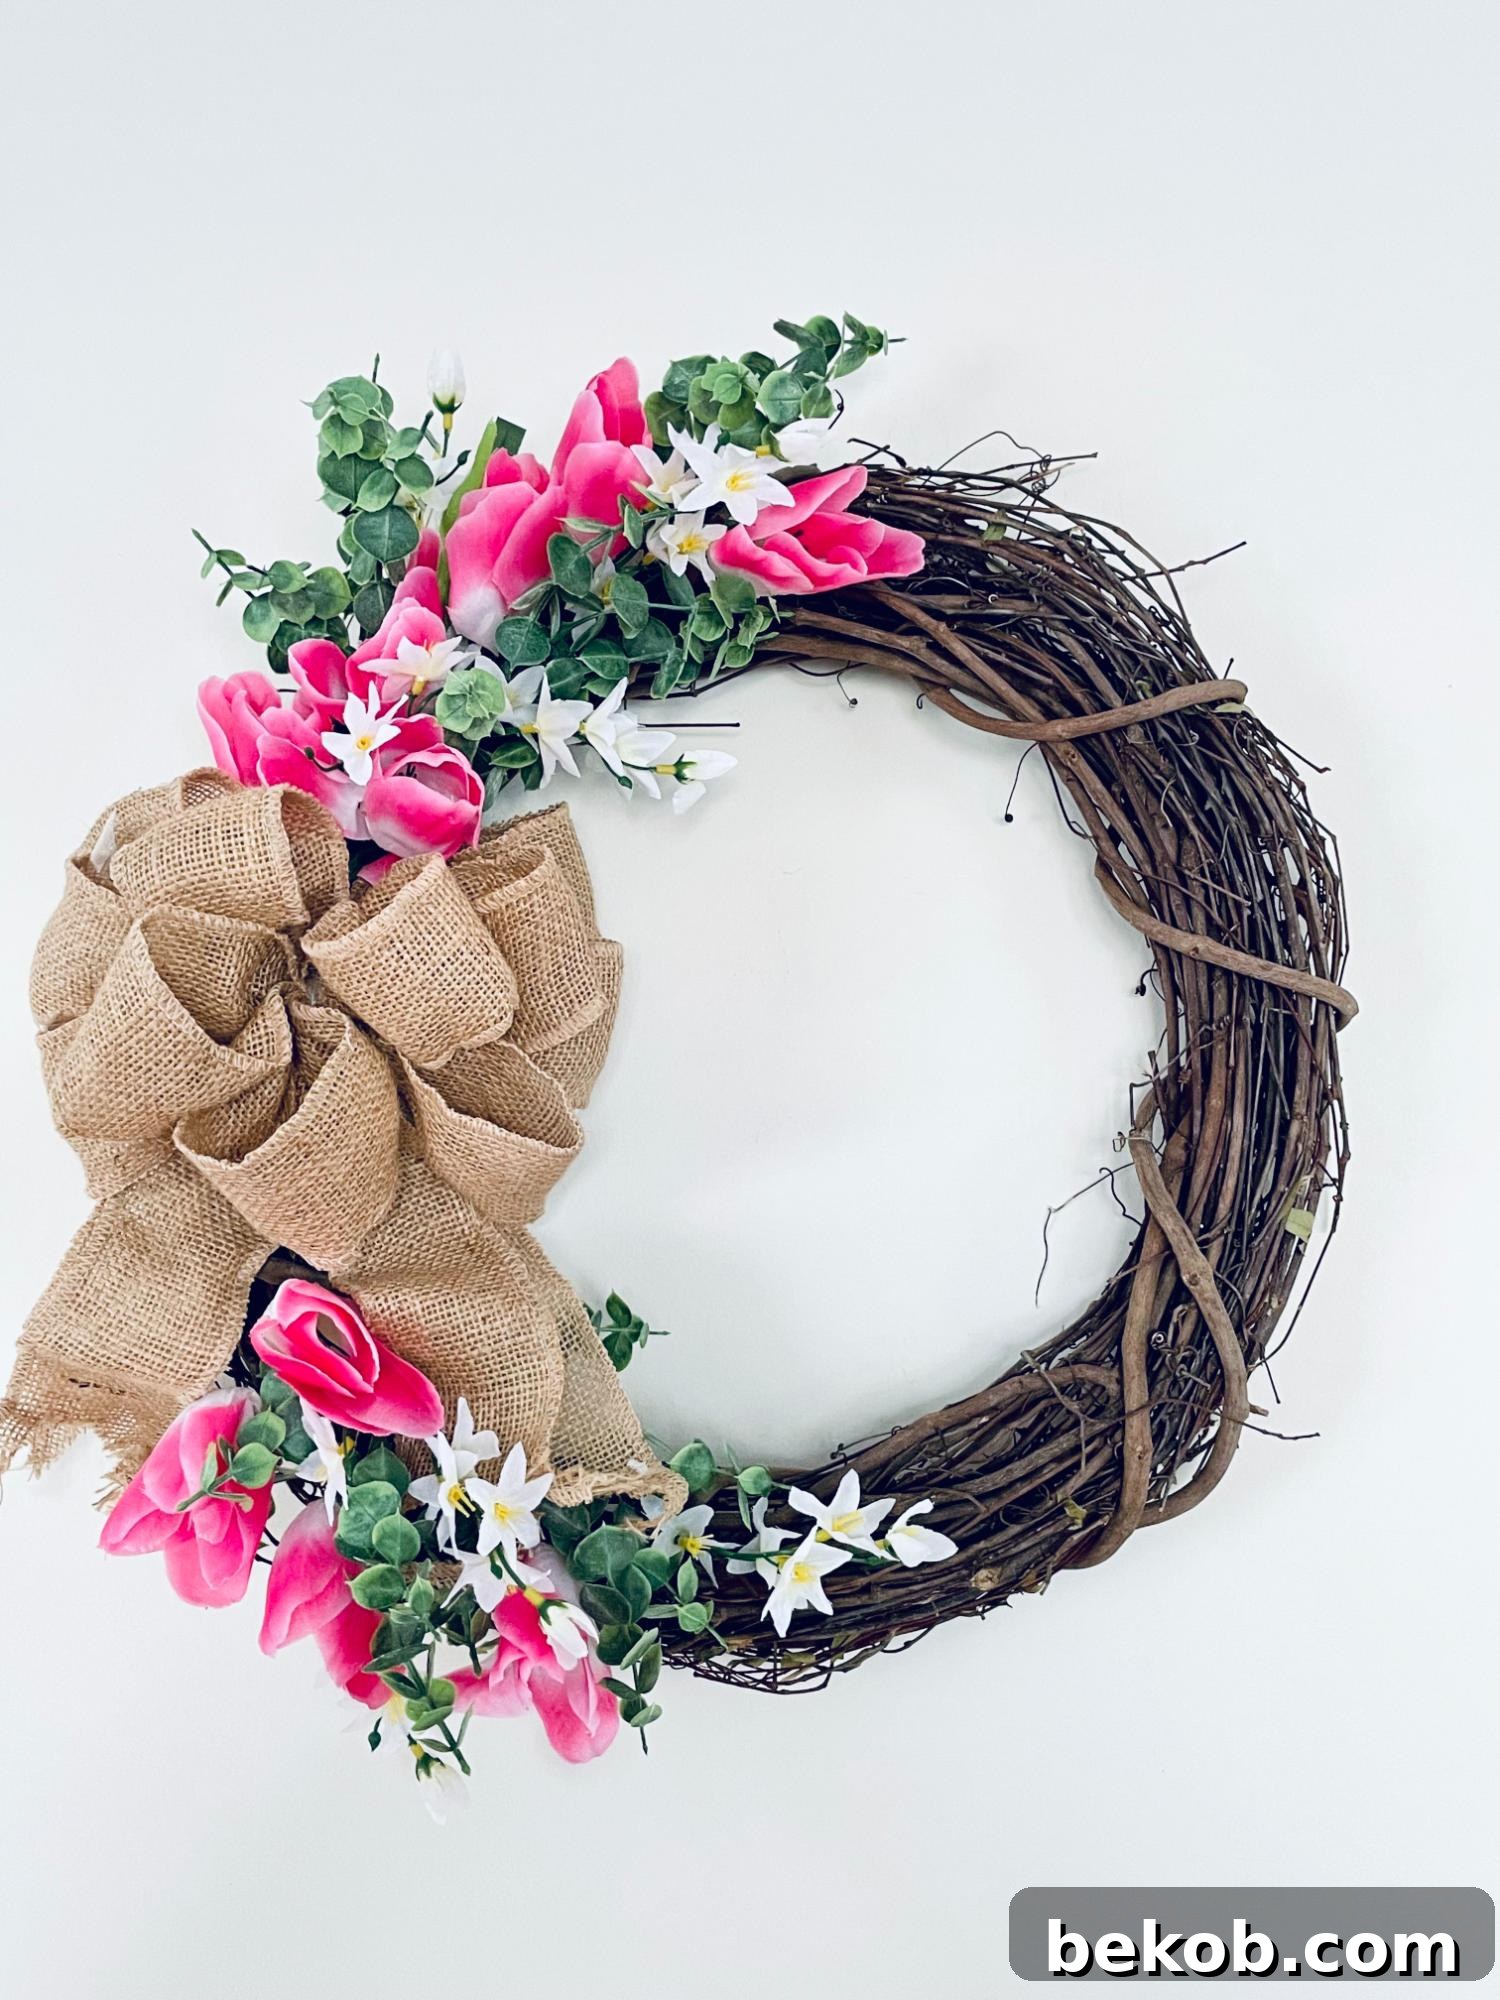
This is where your wreath truly begins to take shape! Start by separating the tulips from their bunches. Take the first bunch of tulips and begin strategically placing them in the top section of your grapevine wreath. Before permanently securing, gently lay them out to visualize your desired arrangement. Once happy with the placement, add a thin line of hot glue along each tulip stem and firmly weave them into the natural crevices of the grapevine wreath. Immediately after, incorporate your trimmed eucalyptus pieces, tucking them in to add fullness and create a lush green backdrop. Finally, intersperse the small white flowers with yellow centers to introduce contrast and delicate texture. Work in small sections, ensuring each piece is securely glued and woven to prevent shifting.

Step 3: Attach Your Decorative Bow
The bow serves as a beautiful focal point and adds a classic farmhouse touch to your spring wreath. Position your pre-made burlap bow in the desired location, typically at the top center or slightly off-center. Secure it firmly to the wreath using the ties usually found on the back of store-bought bows. If you opted to create your own bow using our handy free bow tutorial, use floral wire to attach it securely to the grapevine. Make sure the bow is centered and hangs evenly for the best aesthetic.
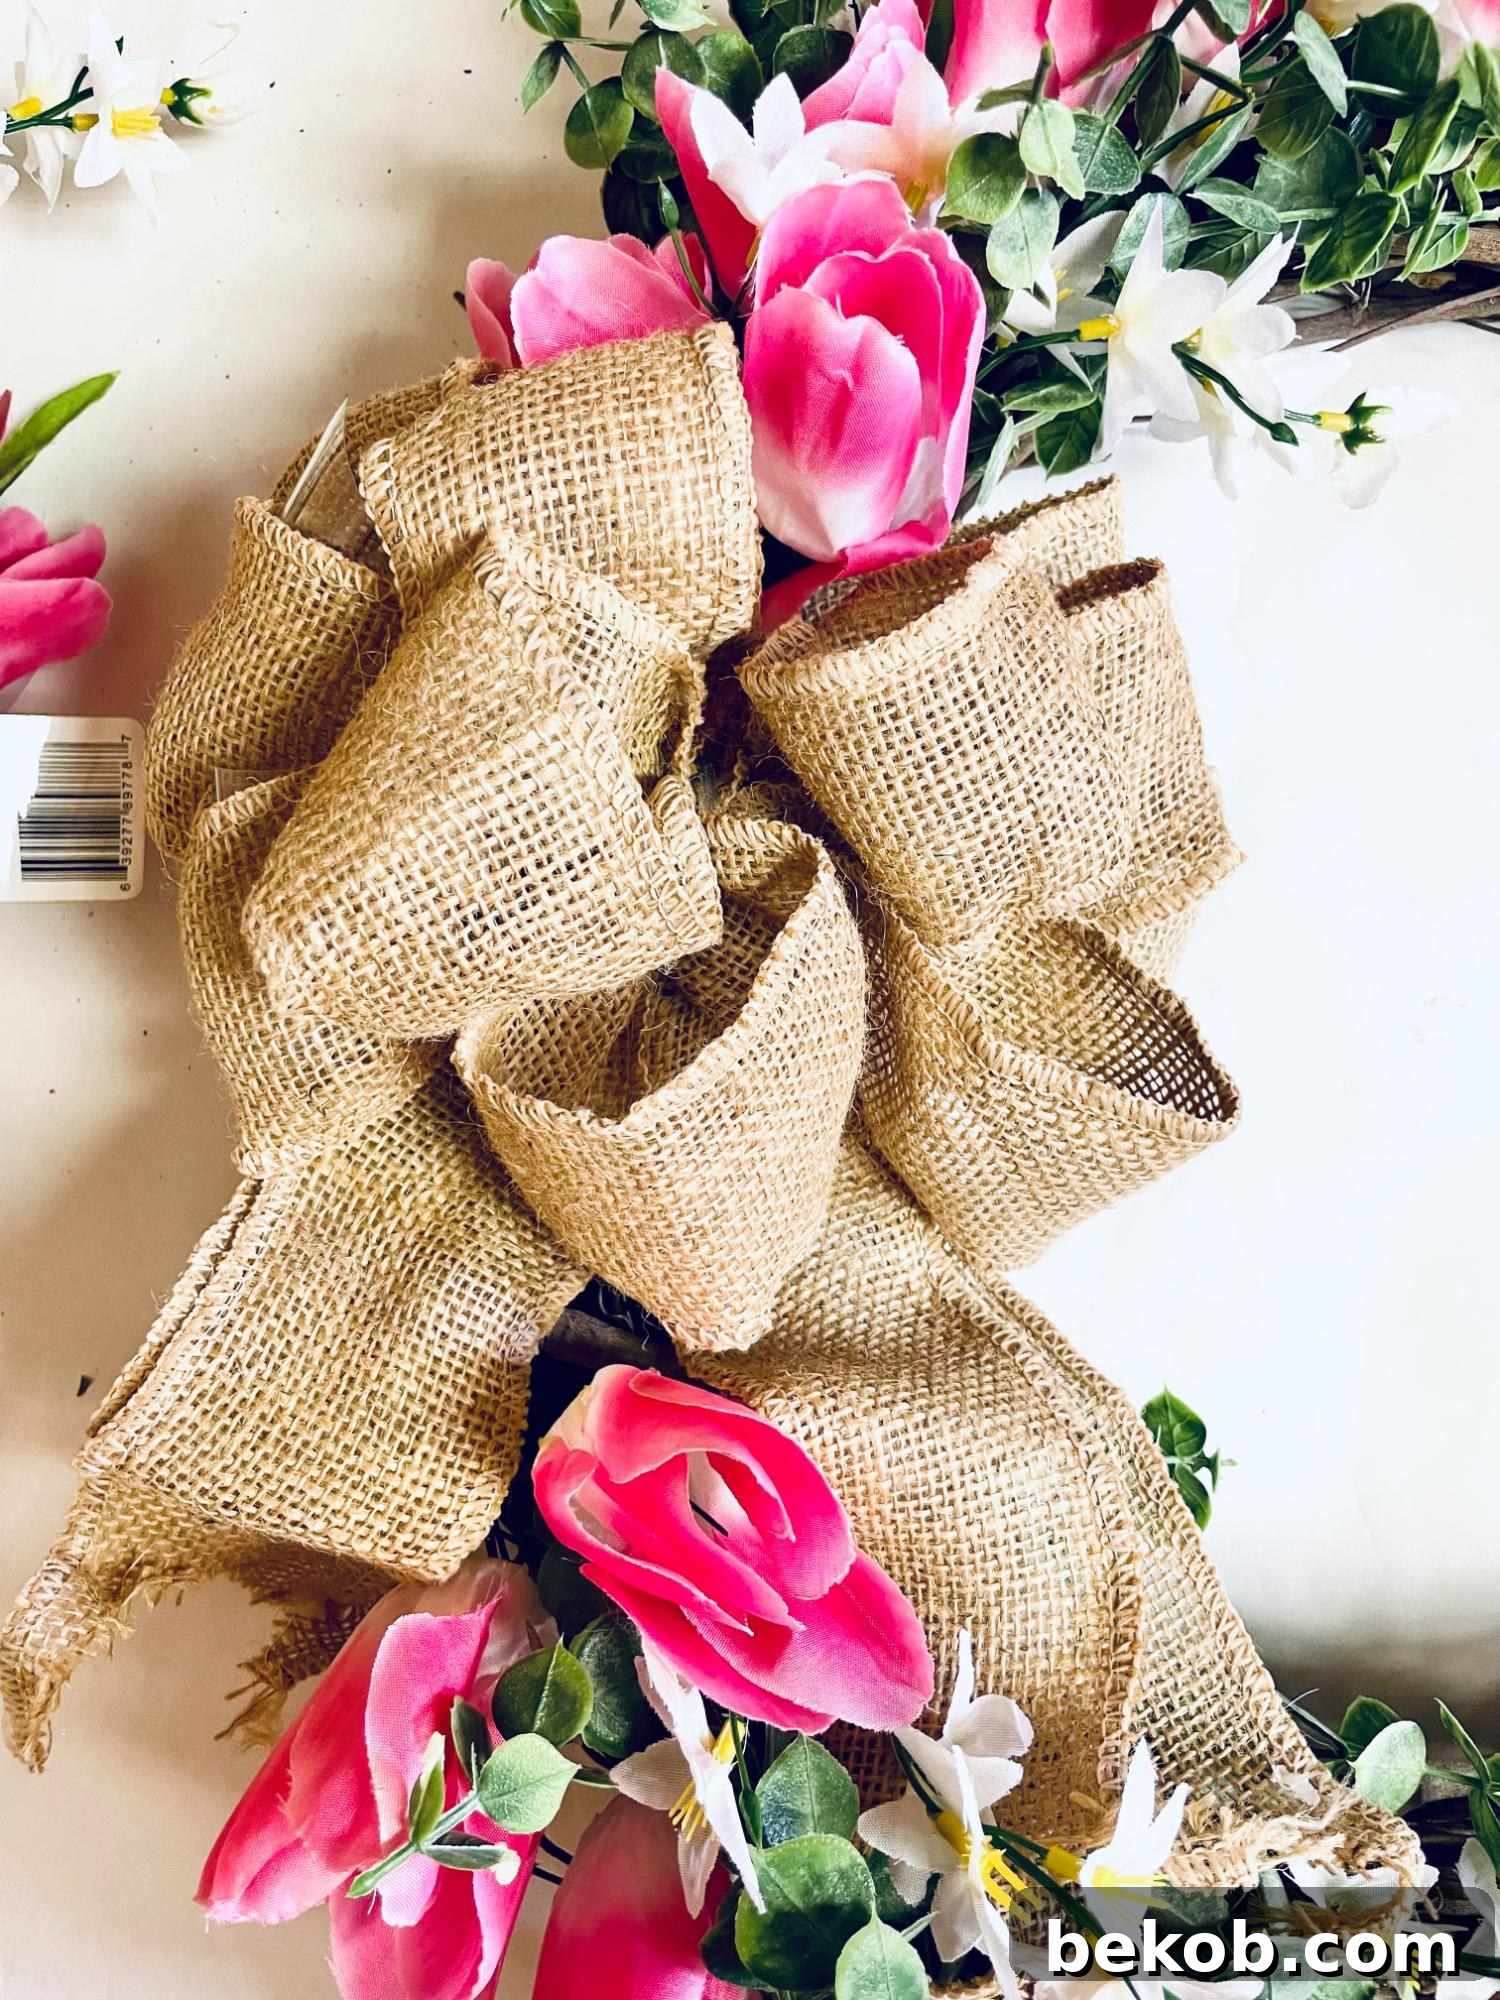
Step 4: Complete the Floral Arrangement
Now, it’s time to add the finishing touches and fill out the rest of your wreath. Take the remaining flowers from your second bunch of tulips and any leftover white accent flowers. Concentrate on filling in the bottom section of the wreath, specifically underneath and around the bow, to create a balanced and full look. Use hot glue to secure these additional flowers, ensuring they blend seamlessly with the initial arrangement. Step back periodically to assess your progress and make any necessary adjustments for an aesthetically pleasing composition. Your goal is a harmonious blend of color and texture.

Once all your flowers and greenery are securely attached, allow the hot glue to fully dry and set. Your beautiful DIY farmhouse tulip wreath is now complete! Hang it proudly on your front door using a sturdy ribbon or a dedicated wreath hanger, and enjoy the cheerful ambiance it brings to your home this spring.
Creative Variations for Your Farmhouse Spring Wreath
The beauty of DIY lies in customization! While this tutorial provides a fantastic blueprint for a farmhouse tulip wreath, don’t hesitate to let your creativity shine by experimenting with different elements. Here are several ways to personalize your wreath for various seasons, occasions, or styles:
- Floral Combinations and Color Palettes: While tulips are quintessential spring, Dollar Tree offers a treasure trove of faux flowers that allow you to adapt your wreath for any season.
- For Spring: Explore daffodils, hydrangeas, lilies, daisies, and peonies. Mix different types of flowers for a more dynamic and lush display.
- For Summer: Transition to vibrant hues with dahlias, classic roses, cheerful poppies, and bright sunflowers. These flowers can instantly create a sunny, warm-weather vibe.
- For Fall: Swap out bright spring blooms for richer tones like deep reds, oranges, and golds. Incorporate faux leaves, miniature pumpkins, or berries for a harvest-inspired look.
- For Winter: Utilize frosted greenery, pinecones, red berries, and maybe a touch of white or silver flowers to create a festive and cozy winter wonderland wreath.
- Greenery Selection: The type of greenery you choose can significantly alter the overall style of your wreath.
- Modern Farmhouse: Instead of traditional eucalyptus, consider lambs ear for its soft, fuzzy texture and muted green color, or magnolias for a more sophisticated and glossy appeal.
- Rustic Charm: Incorporate natural elements like dried twigs, Spanish moss, or different types of faux fern leaves for an earthier feel.
- Add Unique Decorative Elements: Beyond flowers and greenery, small embellishments can add character and visual interest.
- Ribbons and Bows: Instead of burlap, try a buffalo check ribbon for a bolder farmhouse statement, a delicate lace ribbon for a shabby chic feel, or a vibrant solid-color ribbon to match specific flowers. You can also layer different types of ribbons.
- Faux Berries or Fruits: Small clusters of faux berries (like cranberries for winter or subtle white berries for spring) or miniature faux fruits can add a pop of color and realism.
- Natural Accents: Miniature bird nests, tiny faux birds, or even small, polished pebbles can introduce an element of nature and whimsy.
- Personalized Touches: Consider adding a small wooden initial, a custom-painted sign with a seasonal greeting, or even tiny fairy lights for an enchanting evening glow.
- Wreath Base Alternatives: While grapevine is classic, don’t limit yourself.
- You can wrap a foam wreath form with fabric, yarn, or even more ribbon before attaching your floral elements.
- Wire wreath forms can be fully covered with bunches of flowers for an incredibly dense and lush floral display.
By simply swapping out a few key elements, you can create a completely different look, ensuring your farmhouse spring wreath remains fresh and engaging throughout the year, celebrating every season with handmade charm.
Common Questions About Crafting Your DIY Farmhouse Tulip Wreath
As you embark on your wreath-making journey, you might have a few questions. Here are answers to some of the most common inquiries to ensure your project goes smoothly.
Can I use real flowers instead of faux ones for my wreath?
While the allure of fresh, real flowers is undeniable, for a wreath intended for long-term display, especially outdoors, faux flowers are highly recommended. Real tulips, particularly, are delicate and wilt very quickly without a constant water source or specialized floral foam. Using high-quality faux tulips ensures your farmhouse spring wreath remains vibrant and beautiful throughout the entire season, without the need for constant replacement or maintenance. Modern faux flowers are incredibly realistic and offer a durable, practical solution for door decor.
Where can I find grapevine wreaths and other floral supplies for this project?
Finding the necessary supplies for your DIY tulip wreath is quite easy. Grapevine wreaths are a staple at most major craft stores such as Joann’s, Hobby Lobby, and Michaels. You can also often find them at large retailers like Walmart. For your faux flowers, greenery, and ribbons, dollar stores like Dollar Tree are fantastic resources, offering a wide array of options at unbeatable prices. Many of these stores, including Michaels and Dollar Tree, even allow you to buy in bulk online and have supplies delivered right to your door, perfect for planning a crafting session or a party!
Can I use a different type of wreath form as a base?
Absolutely! The grapevine wreath is a classic choice for its natural appeal, but you have several options for your wreath base. If you’re feeling adventurous, you can make your own woven rope wreath base from a simple wire wreath frame, adding a unique texture. Alternatively, you can wrap a foam wreath form with burlap or decorative ribbon, like the wreath in our tutorial, and then attach your floral elements using floral pins or hot glue. For an incredibly full and lush “all-tulip” wreath, consider covering a wire wreath frame entirely by zip-tying tulip bundles around it until the frame is completely concealed. Each base offers a different look and feel, so choose one that best fits your desired aesthetic.
Do I need any special crafting skills to successfully make this wreath?
Not at all! This DIY farmhouse tulip wreath project is designed to be accessible and enjoyable for crafters of all skill levels, from beginners to seasoned artisans. The techniques involved are straightforward: trimming stems, arranging elements, and securing them with hot glue or wire. No intricate weaving or complex tools are required. If you’re new to wreath making or simply a bit nervous, a helpful tip is to first lay out all your flowers and greenery on the wreath form without glue. This allows you to experiment with different arrangements and placements until you’re completely satisfied with the design before making anything permanent. Then, simply go back and glue each piece into its chosen spot. Trust your creative instincts!
How can I ensure my wreath lasts longer, especially if displayed outdoors?
To maximize the lifespan of your beautiful handmade wreath, especially when exposed to the elements, consider a few protective measures. Firstly, use high-quality faux flowers and greenery that are UV-resistant, if possible. While Dollar Tree items are affordable, they might fade quicker in direct sunlight. Secondly, applying a clear UV-resistant sealant spray (available at most craft or hardware stores) to your finished wreath can help protect the colors from fading and provide a slight barrier against moisture. Lastly, if your front door is exposed to harsh weather, consider hanging your wreath under a porch overhang or bringing it indoors during extreme conditions. Proper placement and a little protection can keep your wreath looking fresh for many seasons.
What’s the best way to store my tulip wreath when not in use?
Proper storage will help maintain your wreath’s shape and prevent dust accumulation. The best method is to store it in a dedicated wreath storage box, which helps keep its form. Alternatively, a large plastic tote bin can work; just ensure no heavy items are placed on top of it. You can also cover it with a plastic bag or a sheet to protect it from dust. Store it in a cool, dry place like a closet or attic, away from extreme temperatures that could damage the faux flowers or warp the grapevine base. By storing it carefully, your lovely farmhouse tulip wreath will be ready to grace your door year after year!
More Inspiring Spring Wreath & Door Decor Ideas
If you enjoyed crafting this beautiful farmhouse tulip wreath, you’ll be thrilled to discover more creative ways to brighten your home for spring and beyond. Dive into our collection of inspiring DIY projects and door decor ideas:
DIY Farmhouse Spring Wreath: How to Make a Tulip Wreath
Easy $9 Dollar Store Spring Wreath DIY for Gardeners
40+ Stunning Spring Door Decor Ideas
Quick and Easy Dollar Tree Flower Door Wreath
See All Wreath & Craft Ideas >
How to Make a Tulip Wreath: Step-by-Step Tutorial
Print Recipe

Ingredients
- 18-inch Grapevine Wreath (available at craft stores like Michaels or Joann’s or even at Walmart)
- Pre-made burlap bow (optional – or make your own here from Dollar Tree burlap ribbon)
- Dollar Tree pink tulips (2 bunches)
- Dollar Tree small white flowers with yellow centers
- Dollar Tree greenery or eucalyptus bunch
- Wire Cutters
Instructions
- Use wire cutters to trim the stems of all the flowers and half of the eucalyptus or greenery bunch, leaving about 3 inches of stem.
- Start by adding flowers to the top section of the wreath. Add a line of hot glue down each stem, then weave the tulip stems between the grapevine, followed by the eucalyptus pieces for fullness and greenery. Add the white flowers intermixed for contrast.
- Secure the bow to the wreath using the tie in the back, or with floral wire if you made your own bow.
- Then, fill in the bottom section of the wreath underneath the bow with additional flowers.
Notes
Learn how to make your own ribbon bow, 2 ways: https://www.remodelaholic.com/how-to-make-a-diy-ribbon-bow-2-easy-ways/
Pin this beautiful DIY Tulip Wreath to save and share your inspiration!