
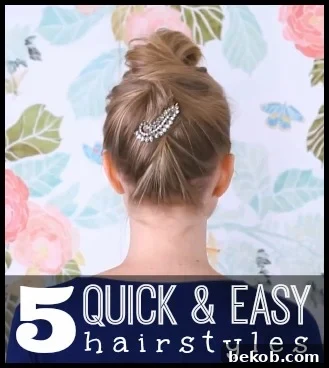
Transform Your Morning: 5 Effortless & Quick Hairstyles for Busy Days
In our fast-paced lives, finding extra minutes in the morning can feel like a luxurious impossibility. The alarm blares, the coffee brews, and suddenly you’re racing against the clock, often sacrificing a well-styled look for the sake of punctuality. But what if we told you that achieving a chic, put-together hairstyle doesn’t have to eat into your precious morning routine? You don’t need to be a professional stylist or spend hours in front of the mirror to look fabulous.
Whether you’re heading to the office, dropping off the kids, or simply enjoying a relaxed weekend brunch, these five simple and easy hairstyles are designed to save you time without compromising on style. Each technique is straightforward, requiring minimal tools and effort, proving that looking great can indeed be quick and effortless. Get ready to conquer your day with confidence and a fantastic hair day, every day!
1. Elevate Your Everyday: The Chic Knotted Ponytail
The humble ponytail is a timeless staple, but sometimes it needs a little twist to transition from casual to captivating. The knotted ponytail offers an instant upgrade, adding a touch of sophisticated detail to this classic look. It’s an ideal choice for those days when you want something more interesting than a basic pony, but still crave the ease and comfort it provides. This style works beautifully on medium to long hair and adds an unexpected element that suggests you put in more effort than you actually did.
How to Master the Knotted Ponytail:
- Prep Your Hair: Start with dry hair. For a sleeker look, lightly brush through any tangles. For a more textured finish, a little dry shampoo can add volume and grip.
- Gather Your Hair: Collect all your hair into a low ponytail at the nape of your neck. You can choose to make it tighter for a polished look or looser for a softer, more romantic vibe.
- Divide and Conquer: Separate your ponytail into two equal sections. Precision isn’t paramount here; a roughly even split is fine.
- Tie the First Knot: Take one section over the other and tie a simple overhand knot, just like the first step of tying your shoelaces. Pull it gently but firmly towards the base of your ponytail.
- Tie the Second Knot: Repeat the process, tying a second overhand knot directly below the first. This creates a more prominent and secure knotted effect.
- Secure with an Elastic: Using a clear, small elastic band, secure the hair just below the second knot. Ensure the elastic is snug enough to hold the knots in place without being overly tight.
- Refine and Finish: Gently tug at the sides of the knots to fan them out slightly, making them appear fuller and more intricate. You can also pull out a few face-framing pieces for a softer look. A light spritz of hairspray will help hold your creation throughout the day.
This knotted ponytail is perfect for adding a touch of elegance to your workday attire or dressing up a casual outfit for an evening out. It’s surprisingly simple yet incredibly impactful.
2. Instant Elegance: The Effortless Twisted Updo
When an updo is required, but time is of the essence, the twisted updo becomes your ultimate secret weapon. This style offers a chic, sophisticated look that can easily transition from a day at the office to an evening event. It’s particularly flattering as it pulls hair away from the face, highlighting your features while maintaining a soft, slightly undone appeal. This quick twist is a lifesaver for all hair lengths that can be gathered into a ponytail, from shoulder-length bobs to flowing long locks.
Achieving the Twisted Updo in Moments:
- Start with a Ponytail Base: Begin by gathering all your hair into a ponytail at the back of your head. The height of the ponytail will determine the placement of your updo; a higher pony will result in an updo closer to the crown, while a lower one will sit more at the nape. Secure it firmly with a regular hair elastic.
- Twist Away: Take the entire ponytail and begin twisting it tightly. Twist in one direction, either clockwise or counter-clockwise, ensuring the twist is consistent from the base to the ends. The tighter the twist, the more compact and polished your updo will appear.
- Coil Towards the Crown: As you continue to twist, start coiling the twisted hair around the base of your ponytail, moving upwards towards the crown of your head. The goal is to create a compact, upward-spiraling shape.
- Secure with a Clip or Pins: Once your twisted coil is in place, secure it firmly. A large, decorative claw clip works wonderfully for this, offering both hold and a stylish accent. Alternatively, use several bobby pins, strategically inserting them into the twisted base to hold it against your scalp. Focus on pinning the sides and bottom of the twist.
- Embrace the Messy Finish: The beauty of this updo lies in its slightly undone charm. Deliberately leave the ends of your twisted hair free and fanned out. This adds a soft, organic texture and prevents the style from looking too stiff or formal. Gently pull a few strands around your face for an even softer effect.
This twisted updo is perfect for anyone needing a quick, elegant solution that keeps hair off the neck. It’s versatile enough for a professional setting or a casual outing, always exuding an air of effortless grace.
3. Perfect in Minutes: The Speedy Polished Bun
The bun is a quintessential hairstyle, celebrated for its elegance, practicality, and versatility. From ballet dancers to boardroom executives, the bun offers a polished look that’s both chic and functional. Our “Bun in a Hurry” method distills this classic style into a five-minute creation, making it accessible even on the busiest mornings. It’s ideal for keeping hair neatly contained, offering a sophisticated appearance that belies its quick execution. This technique is fantastic for medium to long hair and works well for various occasions where a neat, tidy look is desired.
Creating Your Speedy Polished Bun:
- Prepare Your Sides: Start by taking a section of hair from each side of your face, roughly from temple to ear. Twist each section individually backward, away from your face. This adds a subtle detail and helps gather the hair neatly.
- Form the Ponytail Base: Pull both twisted sections, along with the rest of your hair, into a ponytail at your desired bun height. For a classic look, a mid-height or low ponytail works best. Secure this ponytail firmly with an elastic band.
- Begin Twisting the Ponytail: Once your ponytail is secure, take the entire ponytail and begin twisting it consistently in one direction (e.g., clockwise). Keep the twist relatively tight, as this will help form a more compact and secure bun.
- Wrap into a Bun Shape: As you twist, start wrapping the twisted ponytail around its own base in a circular motion. Continue wrapping until all of your hair is coiled into a neat bun shape. The end of your hair should be tucked underneath the bun to hide it.
- Secure with Pins: Use bobby pins to secure the bun firmly to your head. Insert the pins around the perimeter of the bun, pushing them into the base of the bun and then into the hair on your scalp. Use as many pins as needed to ensure the bun feels stable and secure. You might want to use 4-6 pins, placed evenly around the bun.
- Smooth and Set: Gently smooth down any flyaways around your hairline with a little hairspray or a dab of styling cream. For added polish, you can use the tail of a comb to neaten the bun’s edges.
This speedy bun is perfect for achieving an instantly polished and professional look for work, or an elegant style for more formal occasions, all without sacrificing valuable morning time.
4. Vacation Vibes in Minutes: Effortless Beachy Waves
Beachy waves evoke a sense of carefree spirit, sun-kissed charm, and effortless beauty. This popular style, often seen on celebrities and fashion runways, usually requires time with a curling iron or lengthy braiding sessions. However, with this clever flat iron technique, you can achieve those coveted relaxed waves in just a few minutes, making it a perfect quick hairstyle for everyday wear. It’s an excellent option for adding texture and volume to straight hair or enhancing natural waves with minimal effort, suitable for almost any hair length.
Creating Your Quick Beachy Waves:
- Prep Your Hair: Ensure your hair is completely dry. For best results and to protect your hair, apply a heat protectant spray evenly throughout. If your hair is naturally very straight or fine, a volumizing mousse applied before drying can provide extra hold and body.
- Divide Your Hair: Create a center or side part, then divide your hair into two large sections, one on each side of your head. You don’t need to be precise here; the looser the sections, the more natural your waves will look.
- Twist Each Section: Take one of the large sections of hair and tightly twist it from the root down to the ends. The tighter the twist, the more defined your waves will be. Once twisted, secure the end with a small elastic band to prevent it from unraveling. Repeat this process for the other section of hair.
- Flat Iron Application: Take your flat iron, set to a medium heat setting (adjust based on your hair type), and clamp it over one of the twisted sections. Slowly slide the flat iron down the entire length of the twisted hair, pausing for a few seconds at different points. You’ll want to run the flat iron over each twisted section 2-3 times, ensuring heat penetrates thoroughly.
- Cool and Release: Allow the twisted sections to cool completely before unraveling. This crucial step helps to set the wave pattern. Once cool, gently remove the elastic bands and carefully untwist your hair.
- Style and Finish: Once both sections are untwisted, use your fingers to gently separate and smooth the waves into place. Avoid brushing, as this can break up the waves and create frizz. For extra texture and hold, spritz a sea salt spray or a light texturizing spray. You can also lightly scrunch your hair for more volume.
These speedy beachy waves are perfect for a laid-back weekend, a casual outing, or when you want to add some effortless charm to your look without the fuss of traditional curling methods.
5. Braided Beauty, Simplified: The Overlapping Half-Updo
The allure of a beautifully braided hairstyle is undeniable, yet the time and skill required for intricate braids can be daunting. The overlapping half-updo offers a brilliant shortcut, mimicking the sophisticated look of a braid with just a few bobby pins and simple overlapping sections. This style is fantastic for adding a touch of elegance and interest to your hair while still keeping the majority of your locks flowing down. It’s particularly flattering for medium to long hair and is an excellent way to keep front pieces out of your face with a stylish flair.
Crafting Your Overlapping Half-Updo:
- Prepare Your Base: Begin with dry, brushed hair. For a more polished look, ensure your hair is smooth and free of tangles. For added texture and grip, especially if your hair is very fine or slippery, a light application of texturizing spray or dry shampoo at the roots can be beneficial.
- First Section (Right Side): Grab a small section of hair from the right side of your face, near your temple. This section should be about an inch to an inch and a half wide.
- Cross and Pin (Right Over Left): Pull this right section horizontally across the back of your head, aiming towards the left side. Secure it tightly in place with a bobby pin, pushing the pin inward towards the center of your head. You might want to criss-cross two bobby pins for extra hold.
- Second Section (Left Side): Now, take a similar-sized small section of hair from the left side of your face, near your temple.
- Cross and Pin (Left Over Right): Pull this left section horizontally across the back of your head, overlapping the first pinned section, and aiming towards the right side. Secure it firmly with a bobby pin, again, pushing inward and possibly criss-crossing pins for stability. Ensure this section covers the bobby pin from the first section, creating a seamless, overlapping effect.
- Repeat for Desired Look: Continue this overlapping process, alternating sides. Take a new section from the right, pull it over the previous left section, and pin it on the left side. Then, take a new section from the left, pull it over the previous right section, and pin it on the right side. Repeat as many times as you desire to achieve the desired “braided” length or coverage. For a half-up look, typically 2-4 overlaps are sufficient.
- Final Touches: Once you’ve completed your overlapping sections, ensure all pins are hidden and the structure feels secure. Gently tug at the loops of the “braid” to make them appear fuller and softer, enhancing the braided illusion. Leave the rest of your hair flowing down, either straight or with a gentle wave, to complete the half-up style.
This overlapping half-updo is a brilliant way to add intricate detail to your hairstyle in a fraction of the time a traditional braid would take. It’s perfect for a delicate, romantic look that’s quick and easy to achieve.
Conquer Your Mornings, One Great Hair Day at a Time
Embracing a busy schedule no longer means compromising on style. These five quick and easy hairstyles are your ultimate allies in navigating hectic mornings, ensuring you step out the door looking and feeling your best. From the sophisticated simplicity of the knotted ponytail to the effortless charm of beachy waves, each style is a testament to the fact that great hair doesn’t require endless time or professional expertise.
Experiment with these techniques, find your favorites, and even put your own spin on them. A little practice is all it takes to transform your morning routine and elevate your everyday look. Say goodbye to bad hair days and hello to a repertoire of stunning, speedy styles!
Looking for even more easy hair ideas? Discover practical ways to style your hair without heat! Try these No-Heat Hairstyles!
Featured image via Better Homes and Gardens.
I’m Frances. I am a mother, a wife, and a community volunteer. I work as a scientist by day and moonlight as a blogger. Making lists helps me keep everything on track. While I have a good life, there is always room for improvement. Join me as I decorate, organize, and try new things over at my blog Improvement List.