This post contains affiliate links. Learn more and read our full disclosure policy here.
Expert Guide: Installing Custom Solid Core Wood Doors in Your 1960s Basement Remodel
Embarking on a significant home renovation, especially within a charming 1960s residence, is an exciting journey filled with both challenges and rewarding transformations. As we meticulously remodel our own mid-century home, a key aspect of our basement transformation involves the installation of custom doors. Our primary goal is to achieve a seamless match with the original flat-panel wood doors that grace the upper levels, ensuring a harmonious aesthetic throughout the entire house. This detailed guide shares our tried-and-true tips and tricks for successfully hanging new custom doors, helping you achieve a professional and beautiful result in your own basement renovation.
Don’t miss a beat of our renovation journey! You can find all of our basement remodel vlogs and project updates right here.
The Choice for Quality: Understanding Our Custom Wood Doors
For homes built in the mid-20th century, like ours, architectural details are often distinct and carry significant character. The original doors in our 1960s home are notable for their elegant, simple flat-panel design. To preserve this authentic mid-century modern aesthetic and ensure continuity throughout the entire property, selecting custom doors for the basement was a non-negotiable decision. Off-the-shelf options rarely offer the precise dimensions, specific styles, and material quality needed to truly complement an older home’s existing features, making custom solutions ideal for a thoughtful basement remodel.
Navigating the Custom Door Ordering and Delivery Process
The process of ordering custom wood doors requires foresight and patience. Unlike purchasing standard doors, custom fabrication involves a specific lead time, as each door is built to your exact specifications. In our experience, from the moment we finalized our order to the delivery of our custom wood doors, the timeline stretched to approximately three weeks. This period is vital for planning, as it impacts the overall schedule of your basement renovation. Always factor in manufacturing and shipping times when setting project milestones to avoid unexpected delays.
Our chosen doors are solid birch veneer doors. It’s important to understand what this construction entails for those unfamiliar with door terminology. These are not hollow-core doors, which are typically lightweight and less durable. Instead, they feature a robust solid core. This core construction provides superior structural integrity, excellent sound insulation, and a satisfyingly substantial feel. The exterior surfaces are then covered with a genuine birch wood veneer, which showcases the natural beauty of birch grain, offering the aesthetic appeal of solid wood. This combination provides the benefits of both worlds: the stability and acoustic properties of a solid core, paired with the elegant, natural finish of real wood veneer, often at a more accessible price point than entirely solid wood doors.
Pre-Installation Preparations: Ensuring Durability and Beauty
Upon receiving these custom solid core doors, their considerable weight was immediately noticeable. While this weight is a testament to their quality and contributes significantly to sound dampening and durability, it also highlighted a crucial detail we overlooked during the ordering process: the need for a third hinge. For heavy, solid-core doors, especially those intended for areas with frequent use, adding a third hinge provides essential extra stability. This helps distribute the weight more evenly, preventing potential sagging over time and ensuring the door operates smoothly for decades to come. We strongly recommend specifying this detail when placing your custom door order.
Since our birch wood doors arrived unfinished, the next step was to prepare them for their long life within our home. This involved a multi-stage finishing process. First, we carefully sanded each surface to achieve an impeccably smooth finish, essential for proper stain or paint adhesion. Following sanding, we applied a high-quality polyurethane finish. This protective topcoat does more than just enhance the natural beauty and grain of the birch; it creates a durable barrier against moisture, scratches, and the daily wear and tear that doors inevitably face. This crucial step ensures that our custom doors will maintain their pristine appearance and structural integrity for many years, blending perfectly with the home’s timeless style. Once fully cured, the doors will be ready for the final touch: hardware installation.
Precision Installation: Hanging Your Custom Wood Doors
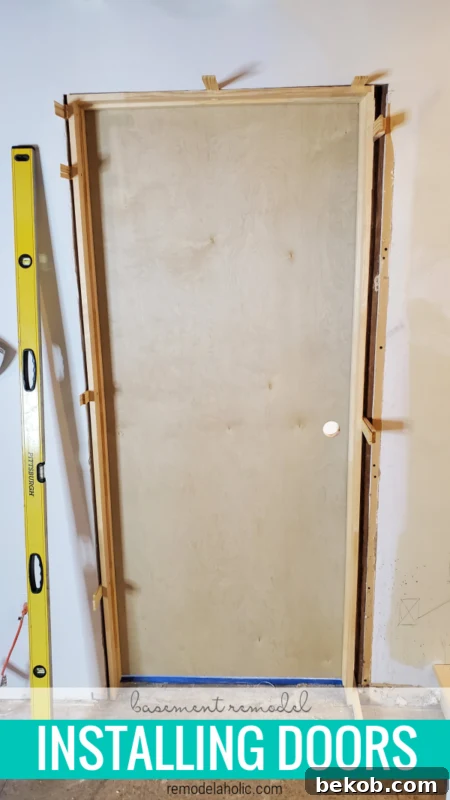
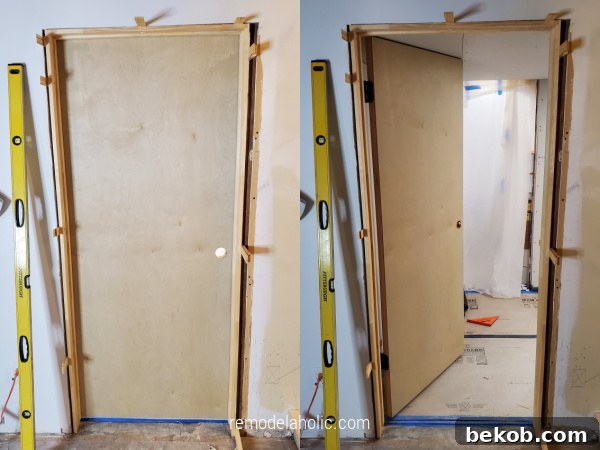
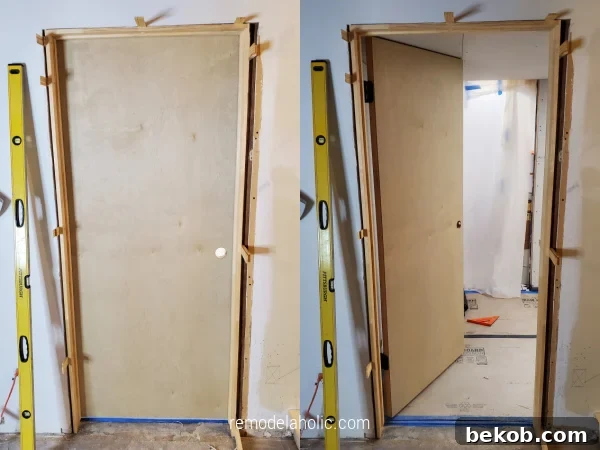
Installing custom doors can present specific challenges, particularly within the unique confines of a basement. One notable obstacle we encountered was the extremely limited ceiling clearance for the door leading into our storage room. This tight space demanded exceptional precision, careful measurement, and a degree of finesse beyond typical door installations. Navigating such tight spots requires specific techniques and a methodical approach to ensure the door fits perfectly and operates without obstruction, guaranteeing a professional and functional outcome.
While you’re watching the door installation process unfold, you might also notice our cleverly designed low-profile ceiling lights, which are already installed and perfectly integrated with the new drywall. These are an ideal solution for basements where ceiling height is a premium.
Key Tools and Step-by-Step Installation Techniques
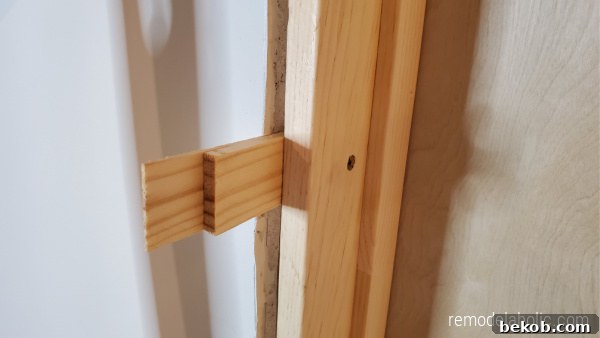
A successful door installation hinges on having the right tools and employing precise techniques. Beyond the basics like a drill, tape measure, and various screws, certain items proved invaluable. The specialized brackets demonstrated in the video were particularly helpful. These ingenious tools provided essential support, securely holding the heavy custom door in place within the frame, allowing for meticulous adjustments during the critical initial positioning. They act like an extra set of hands, making the solo installation of weighty doors significantly easier and more accurate, especially in confined spaces.
The foundation of any perfectly hung door is ensuring its frame is plumb (vertically straight) and level (horizontally flat). We began the installation process by focusing on the hinge side of the door frame. This is arguably the most critical juncture, as it determines how the door will swing and sit within the opening. Using a combination of strategically placed shims—thin wooden wedges—and secure screws, alongside a reliable 6-foot level, we painstakingly adjusted the frame until it was perfectly plumb. The aforementioned brackets were instrumental here, enabling precise micro-adjustments until the hinge side alignment was flawless, ensuring no future issues with door swing or binding.
Once the hinge side was impeccably set, we systematically moved to level the top section of the door frame. This step involves carefully shimming any gaps between the header of the door frame and the rough opening, ensuring an even, consistent space along the top. Finally, we turned our attention to the latch side of the frame, repeating the meticulous shimming and leveling process. The goal was to achieve perfect alignment with both the top and hinge sides, ensuring the entire frame was square, plumb, and level. This methodical, three-sided approach guarantees that your custom door will hang perfectly straight, operate smoothly without any friction, and close securely, providing a truly professional finish to your basement remodel.
Enhancing Door Frames: Insulation, Pest Control, and Sound Management
Beyond structural integrity, intelligent additions to your newly installed door frames can significantly boost comfort and functionality. After securely fastening the door frame, we applied specialized expanding door foam to fill any remaining voids between the door jamb and the rough opening. This isn’t merely about sealing; it offers a multitude of benefits:
- Superior Insulation: This foam creates an effective thermal barrier, dramatically reducing drafts and helping to maintain consistent temperatures within your basement. This is crucial for energy efficiency and overall comfort.
- Preventive Pest Control: By sealing even the smallest gaps, the foam acts as an excellent barrier against insects, rodents, and other unwanted pests, preventing them from entering your living spaces.
- Enhanced Sound Management: A significant advantage of this foam is its ability to reduce sound transfer. It dampens noise coming from other parts of the house or from outside the basement, contributing to a quieter, more private, and serene environment. This is especially valuable for creating comfortable basement bedrooms, home offices, or dedicated entertainment areas.
These thoughtful finishing touches elevate the quality of your basement remodel, ensuring that your custom doors are not only visually stunning but also contribute to a highly functional, comfortable, and efficient living space.
The Road Ahead: Completing Our Basement Transformation
With the custom doors now securely installed and looking magnificent, our basement remodel is rapidly progressing towards its final stages and an exciting reveal. The immediate next phase involves meticulous trim work, a critical step for achieving a polished, finished look. This detailing will extend beyond these new doors to include our versatile TV nook (which we’re still debating—it might just become a cozy piano nook!). We recently provided an update on the evolving space in our basement update post a few weeks ago, showcasing the ongoing transformations.
Beyond the detailed carpentry, we are eagerly anticipating the installation of new carpeting, which will introduce much-needed warmth, softness, and acoustic comfort to the basement floor, truly converting it into an inviting living area. Before the carpet layers can begin their work, a final, essential round of drywall finishing needs to be expertly completed. This ensures every seam is flawless, every surface is perfectly smooth, and all walls are primed for their final paint coat. These concluding steps are paramount for delivering that professional, high-quality aesthetic that justifies all the hard work and planning.
Things are indeed coming along beautifully, and the vision for our modernized 1960s basement is quickly taking its final, impressive form. We wholeheartedly encourage you to be sure to subscribe to our updates to follow every exciting step of our ongoing progress and, of course, to be among the first to witness the breathtaking finished reveal of our dream basement!