
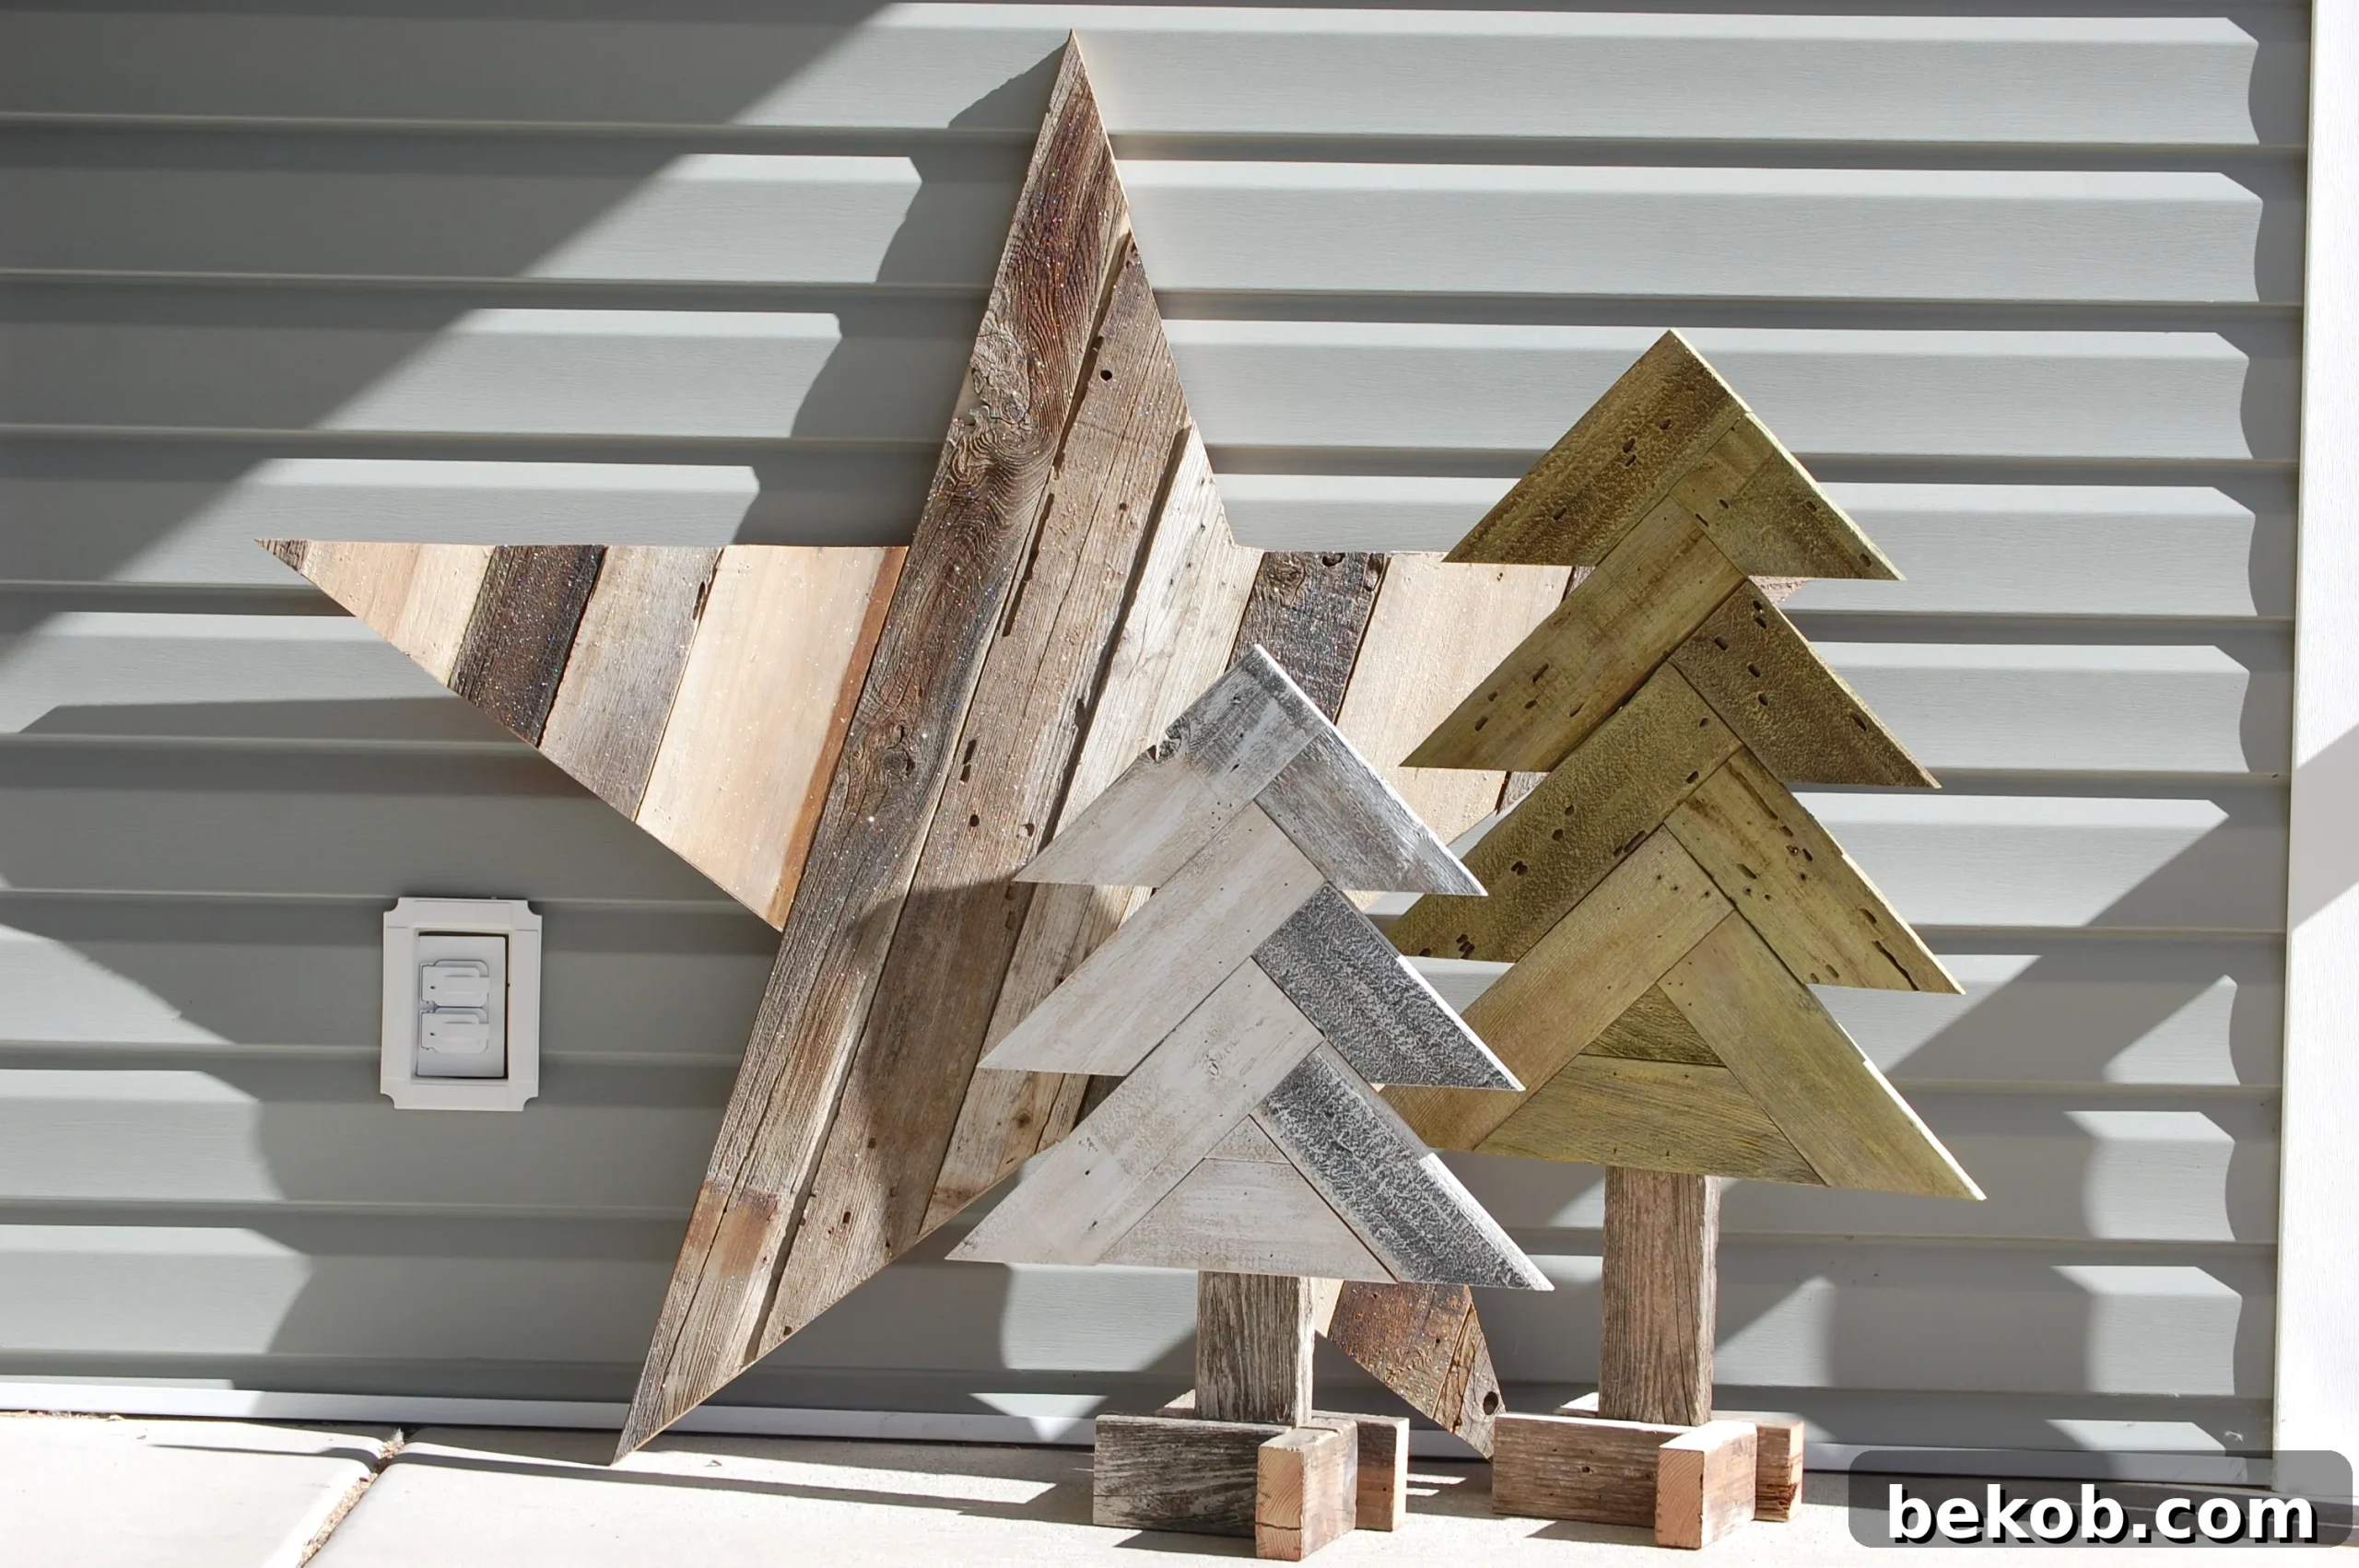
Remember those charming 3D wood trees and delightful wood Christmas stars we hinted at in previous tutorials? The wait is over! Get ready to transform your home with these beautiful rustic herringbone wood Christmas trees. Crafted from reclaimed fence boards, these festive trees bring a touch of timeless, farmhouse-inspired elegance to your holiday and winter decor. They are not just decorations; they are conversation starters, handmade with love and designed to endure for seasons to come.
Whether you’re looking to enhance your curb appeal from early November through a frosty February, or seeking a welcoming accent for your entryway, these DIY herringbone trees are perfectly sized and incredibly versatile. Their rustic appeal makes them suitable for a variety of decor styles, from modern farmhouse to classic cabin. Embrace the joy of creating something truly special that adds warmth and character to your home. Watch our detailed video tutorial below to see exactly how these come to life, and then download the comprehensive printable instructions to guide you every step of the way.
Craft Your Own Rustic Herringbone Wood Christmas Trees
Ready to start building? Our exclusive woodworking plan provides all the essential details to construct these stunning herringbone trees. This plan simplifies the process, making it enjoyable for both novice and experienced DIYers.
Click here to purchase your printable woodworking plan for the herringbone wood tree
If you’re also interested in crafting the charming 3D stacked trees featured in the video, you can find their detailed instructions right here.
Maximize your savings! This versatile plan is also available as part of our Wooden Christmas Tree Woodworking Plan Bundle. Acquire 4 unique plans and save 30% compared to purchasing them individually – a fantastic way to expand your holiday decorating repertoire!
Gathering Your Supplies: What You’ll Need
Building these sturdy and aesthetically pleasing trees for your front porch, entryway, or any indoor space is a straightforward process once you have the right materials and tools. The beauty of these trees lies in their rustic charm, often enhanced by using reclaimed or weathered wood. Here’s a comprehensive list to help you get started:
- Weathered Fence Slats: You’ll need approximately 2-3 fence slats, each measuring about 3 1/2 inches wide. The weathered appearance of old fence boards adds authentic character and a unique texture that’s hard to replicate with new wood. If salvaged fence boards aren’t available, you can achieve a similar look by distressing new pine boards.
- Weathered 2x4s: Two weathered 2×4 pieces are essential for the structural integrity of your trees. These will form the sturdy base and trunk, ensuring your trees stand tall and stable, even in outdoor conditions.
- 16 Gauge 1 1/4″ Finish Nails: These heavier-gauge nails are crucial for securely attaching the herringbone pattern boards to the main frame. Their strength provides a durable hold, ensuring your tree withstands the elements.
- 18 Gauge 2″ Finish Nails: Lighter 18 gauge nails are perfect for more delicate attachments or for areas where a smaller nail head is preferred for a cleaner finish. Always select nails appropriate for the thickness of your wood to prevent splitting.
- Paint: Choose your preferred paint colors for finishing. Acrylic craft paint, outdoor-grade latex paint, or even wood stains can be used depending on the desired effect. Consider metallic hues for a festive shimmer or classic whites and greens for a traditional look.
Essential Tools for a Smooth Build
Having the right tools will make your DIY project much more efficient and enjoyable. Safety is paramount, so always familiarize yourself with your tools and follow manufacturer guidelines.
- Miter Saw: A miter saw is indispensable for achieving precise, angled cuts required for the herringbone pattern. Accuracy in these cuts is key to the clean, interlocking look of the design. Always wear safety glasses when operating a miter saw.
- Air Compressor: An air compressor powers your pneumatic nail guns, providing consistent and powerful nailing. This speeds up the assembly process significantly compared to manual nailing.
- 18 Gauge Finish Nail Gun: Paired with the air compressor, this nail gun will quickly and neatly drive the 18-gauge finish nails, making connections strong and almost invisible.
- 16 Gauge Finish Nail Gun: For the heavier 16-gauge nails, this nail gun ensures they are driven flush and secure, creating robust joints without the effort of hammering.
Building Your Herringbone Wood Tree: A Step-by-Step Overview
Crafting these rustic herringbone wood trees is a rewarding project that allows you to create truly unique decor pieces. While the full, detailed instructions, including exact measurements and a comprehensive cut list, are available in our premium printable plan, here’s a general overview of what you can expect from the building process. The printable plan is your ultimate guide, designed to minimize lumber waste and provide assembly instructions for both the smaller (~24″) and larger (~37″) wood trees.
Download your printable building instructions here.
The 6-page printable woodworking plan goes into extensive detail, providing a precise cut list that helps you make the most of your lumber and reduce waste. It outlines the specific dimensions for both the charming small wood tree (approximately 24 inches tall) and the more substantial large wood tree (around 37 inches tall), ensuring you can build them to perfectly suit your space.
The core of the build involves creating a sturdy wooden frame from your 2x4s, which will serve as the trunk and base of your tree. Following this, the weathered fence slats are cut at specific angles to form the distinctive herringbone pattern. This intricate design, while appearing complex, becomes manageable with clear instructions and accurate cuts. Each piece is then carefully secured to the frame using your nail guns, creating a robust and visually striking tree structure. The satisfaction of seeing the herringbone pattern emerge as you assemble each piece is truly gratifying, resulting in a beautiful holiday decoration that stands out.
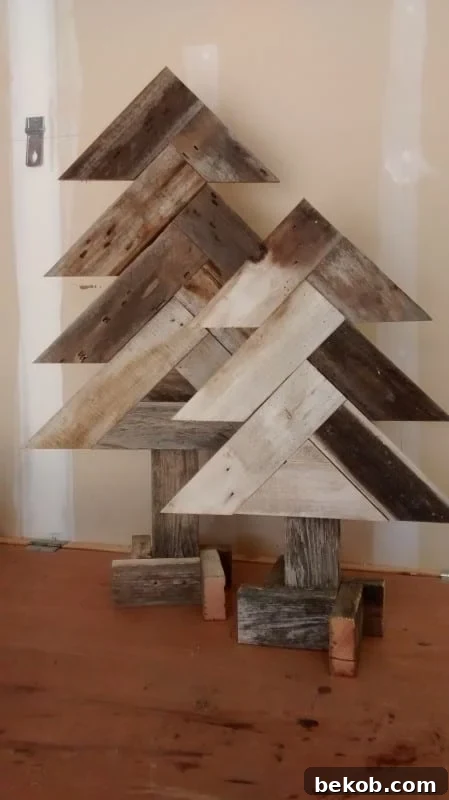
Finishing Touches: Tips for Painting Weathered Wood Trees
Once your herringbone wood trees are assembled, the fun of finishing begins! Painting weathered wood offers a unique opportunity to enhance its natural character rather than concealing it. The goal is often to achieve a rustic, charming look that highlights the wood’s texture and imperfections. Here are some invaluable tips for painting your new creations:
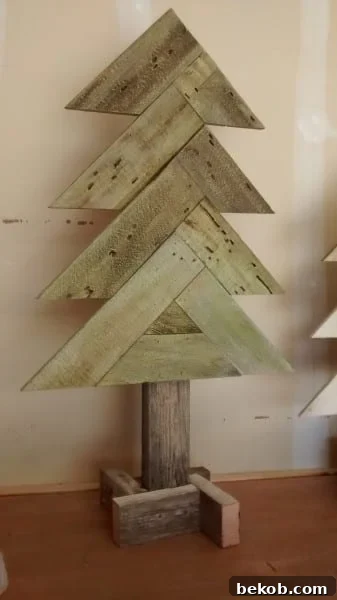

I personally used a dry brush technique to paint both of these trees, and it’s a fantastic method for allowing the inherent character of the weathered wood to show through beneath the paint. This approach creates a beautiful, distressed finish that adds to the rustic appeal.
For the green tree, I opted for acrylic craft paint with a subtle metallic sheen, which catches the light beautifully and adds a festive sparkle. For the other tree, a non-metallic white paint was chosen, providing a classic, soft, and slightly muted finish that complements the natural wood tones.
The Dry Brush Technique Explained: The secret to successful dry brushing on weathered wood lies in using a brush that is mostly dry, not heavily loaded with paint. Here’s how to do it:
- Dip just the very tips of your paintbrush into your chosen paint color.
- Immediately wipe almost all of the paint off the brush onto a paper towel, a scrap piece of wood, or another absorbent surface. You want the brush to feel “dry” and leave only a whisper of paint when tested.
- Lightly drag the brush over the surface of your weathered wood tree. The nearly dry paint will catch on the raised grains, textures, and imperfections of the wood, highlighting them beautifully and allowing the underlying wood color to peek through. This creates a soft, translucent layer of color that enhances the rustic feel.
If you’re working with fresh, smooth sanded planks or new wood, you might prefer Cassity’s renowned color-washing technique. This method allows you to apply a translucent layer of color, effectively staining the wood any hue you desire while still letting the wood grain show through. It’s an excellent alternative for achieving a similar effect with different types of lumber.
After painting, especially if your trees will be displayed outdoors, consider applying a clear, weather-resistant sealant. This will protect your paint job and the wood from the elements, ensuring your beautiful trees last for many holiday seasons to come.
I am confident that you will absolutely adore these handmade trees and find yourself bringing them out year after year, making them a cherished part of your holiday traditions. They are more than just decorations; they are expressions of creativity and warmth for your home. Please let me know if you enjoyed embarking on this rewarding build! And, as promised, for those who love rustic charm, our highly anticipated rustic star tutorial is now available here!
——————–Reader Update, February 2019——————–
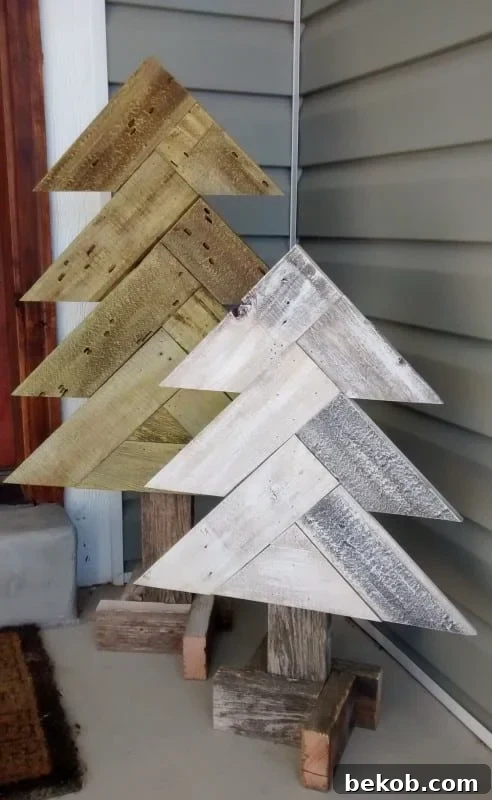
It’s always incredibly inspiring to see how our readers bring these projects to life and add their own unique flair! We were absolutely delighted when Lori, one of our talented readers, shared photos of the stunning trees she built for her front porch using these very plans. Her project beautifully illustrates how simply changing the type of wood used can dramatically alter the overall aesthetic and create a distinct look that perfectly matches individual styles.
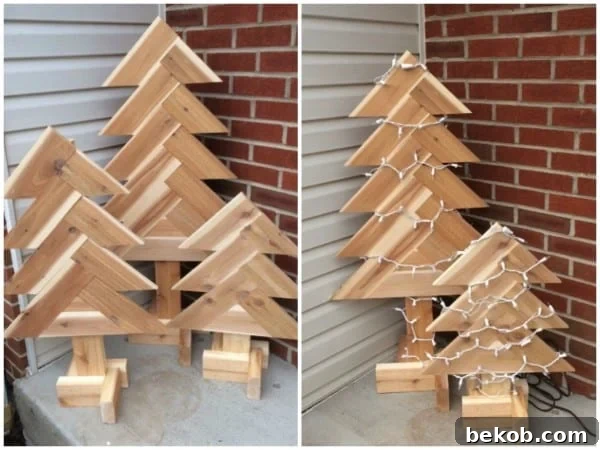
Lori enthusiastically shared her experience, stating, “I made the trees out of rough cedar purchased from the home improvement store. I made the small and the large, and then decided to make an even larger tree. I used the smallest and largest together at the front door and put some lights on them. Looks great!”
And we couldn’t agree more with Lori; her trees look absolutely fantastic! The rough cedar she chose gives them a wonderfully rugged and authentic natural feel, distinct from the weathered fence boards, proving that the foundation of the plan can be adapted to various materials to achieve diverse results. Thank you so much for sharing your inspiring project with us, Lori!
————————————————–
Unleash Your Creativity with More Creative Christmas Projects
The holiday season is a perfect time for DIY, and we have a treasure trove of ideas to keep your hands busy and your home festive! Dive deeper into our collection of Creative Christmas projects for more inspiration. To ensure you never miss out on our latest Christmas tutorials, delicious recipes, and free printables, we highly recommend staying connected:
Be sure to subscribe by email or RSS, and follow along with us on social media! You can find us on Facebook, Instagram, and YouTube. Keep an eye out for the hashtag #CreativeChristmas so you won’t miss any of our exciting new content!
Looking for more amazing DIY decor ideas? Check out these popular projects that perfectly complement your new herringbone trees:
Create Whimsical 3D Wood Trees
These charming 3D wood trees are a delightful addition to any holiday display. Easy to build and incredibly versatile, they offer a different texture and silhouette compared to the herringbone design, creating a dynamic visual interest when grouped together or placed throughout your home. They can be painted, stained, or left natural to match your existing decor.
Easy DIY Wood Christmas Stars, 5 Ways
Nothing says rustic holiday charm quite like a handcrafted wooden star. Our tutorial provides five different methods to create these beautiful stars, offering a range of styles and complexities. They make perfect mantel decorations, wall art, or even tree toppers, adding a warm, inviting glow to your festive arrangements. Mix and match different finishes for a truly personalized touch.
DIY Christmas and Holiday Countdown Board
Build excitement for the holidays with our easy-to-make Christmas and Holiday Countdown Board. This interactive piece of decor is perfect for families, allowing you to track the days until Christmas, Thanksgiving, or any special occasion. Customize it with festive colors and interchangeable signs to celebrate every event throughout the season, making anticipation part of the fun!