Transform Your Kitchen: DIY IKEA Over-the-Fridge Cabinet Organizer for Maximum Storage
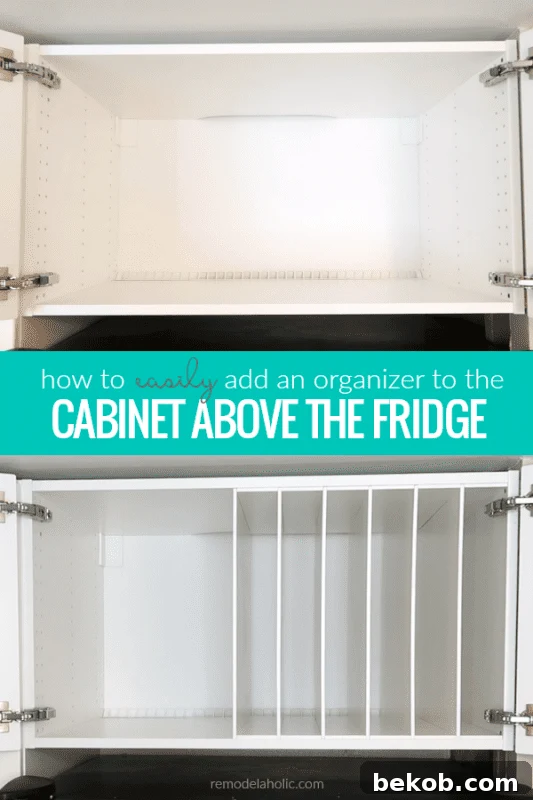
Are you tired of cluttered kitchen cabinets and struggling to find a dedicated spot for your cookie sheets, baking pans, and cutting boards? This ingenious IKEA kitchen cabinet hack offers a brilliant solution! We’ll guide you through creating a DIY over-the-fridge cabinet organizer with removable, adjustable, and customizable dividers designed to perfectly fit your specific storage needs. Say goodbye to the chaos and hello to a perfectly organized kitchen space.
When it comes to efficient kitchen organization, smart storage ideas are paramount. In our own kitchen, we’ve embraced innovative solutions, from transforming a drawer into a dedicated baking supplies pantry alternative to utilizing our beloved IKEA cabinets with custom rollouts organized using our favorite pantry containers. Today, we’re excited to share another groundbreaking IKEA kitchen cabinet hack: the installation of a DIY over-the-fridge cabinet organizer. This project isn’t just about adding storage; it’s about reimagining a frequently underutilized space into a highly functional and accessible zone for essential kitchen items.
Unlock Hidden Potential: Your DIY Over-the-Fridge Cabinet Organizer Guide
Click here to subscribe to our channel for more exciting IKEA hacks, creative home organizing projects, and inspiring DIY transformations!
Crafting Your Custom Above-Fridge Organizer: A Step-by-Step Approach
The space directly above the refrigerator is notoriously one of the most challenging kitchen cabinets to organize effectively. Its deep, often awkward dimensions can make it a dumping ground for infrequently used items, or worse, a wasted space altogether. While some homeowners opt for open shelving or simply leave this area open, we firmly believe in maximizing every inch of storage, especially in a busy kitchen. Our preference is for a deep cabinet above the fridge, providing ample opportunity for intelligent organization that truly elevates functionality.
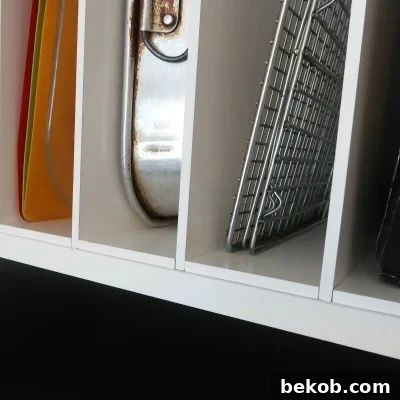
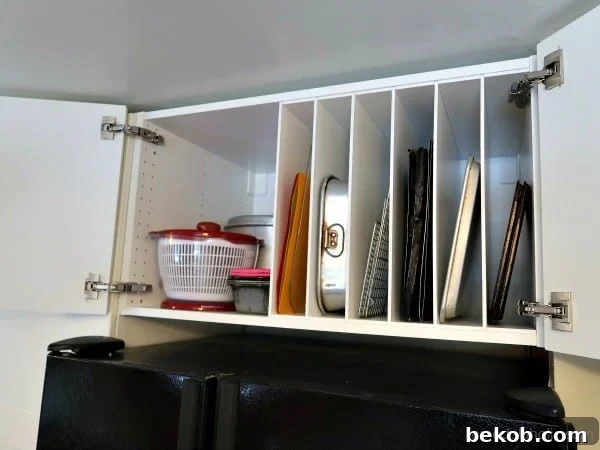
This straightforward DIY project creates an incredibly efficient organizer designed to store cookie sheets, baking trays, cutting boards, and other flat kitchen essentials vertically. By doing so, it not only optimizes accessibility but also leaves valuable space within the cabinet for larger items such as bulky pots, small appliances, or even bulk paper goods. Imagine effortlessly grabbing the exact baking sheet you need without a chaotic cascade of metal pans! This hack is all about maximizing every square inch of your above-fridge storage, transforming it from a neglected void into a highly functional storage solution.
Our appreciation for IKEA kitchen cabinets runs deep, having integrated them into numerous kitchen remodels due to their versatility and modern aesthetics. While IKEA offers various internal components for cabinet organization, for this particular above-the-fridge challenge, we decided to take a different route. We embarked on a custom DIY hack, crafting an organizer precisely tailored to our unique storage requirements. The results speak for themselves: an impressive amount of items are now neatly organized, easily accessible, and visually appealing, proving that a little DIY effort can go a long way in creating bespoke kitchen solutions.
Curious about our insider tips and secret tricks for meticulously planning and flawlessly installing IKEA cabinets? Share your thoughts in the comments below – we’d love to hear from you and potentially delve deeper into the world of IKEA kitchen design!
Essential Materials & Tools for Your Vertical Cabinet Organizer
For this innovative kitchen organization project, we proudly partnered with DAP to rigorously test their Rapid Fuse glue. Rest assured, all opinions and observations expressed throughout this guide are, as always, entirely our own and genuinely reflect our experience.
Please note: This post may contain affiliate links. By clicking and making a purchase, you help support our work at no extra cost to you. To understand more about our affiliate relationships, please read our full disclosure policy here.
Creating this custom vertical cabinet organizer requires surprisingly few materials, making it a cost-effective and approachable DIY project:
- One 1/4″ x 4′ x 8′ sheet of 2-sided white MDF (medium-density fiberboard)
- White edge banding (we recommend a high-quality option like this melamine edge banding)
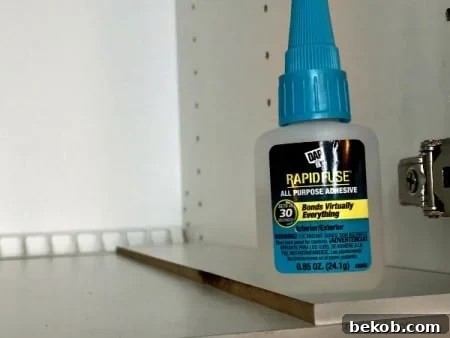
- High-performance glue – we utilized (and were genuinely impressed with) DAP Rapid Fuse adhesive
The choice of a double-sided, pre-finished MDF panel is a significant time-saver. Both sides arrive with a smooth, durable laminate or melamine finish, eliminating the need for extensive painting and priming. This finish also boasts excellent cleanability, a definite bonus in a kitchen environment. While we sourced our panel from a local lumber yard, if a 2-sided MDF panel proves elusive in your area, a standard MDF panel can be used, simply requiring a coat of high-quality primer and paint for protection and aesthetics. Our experience with DAP Rapid Fuse adhesive was exceptionally positive. It provided an incredibly strong bond with a single application, unlike some other rapid-set adhesives that require a two-step process. This quick and powerful adhesion was a game-changer for speeding up the assembly process.
In addition to the core materials, you’ll need a few essential tools to bring your custom organizer to life:
- A saw – while a table saw with a workbench streamlines the cutting process significantly, precise cuts can also be achieved with a circular saw or jigsaw paired with a miter saw for crosscuts.
- A metal file (or a utility knife/edge banding trimmer) for neatly trimming edge banding.
- An iron (a standard household iron works perfectly for applying edge banding).
- A nail gun and short brad nails (optional, but highly recommended for temporarily securing pieces while glue dries).
This specific IKEA cabinet hack was implemented in my parents’ home, a project proudly featuring my lovely mom in the video tutorial! For more insights into our broader use of IKEA kitchen cabinets, you can explore our various projects here.
Detailed Construction: Building Your Custom Cabinet Organizer
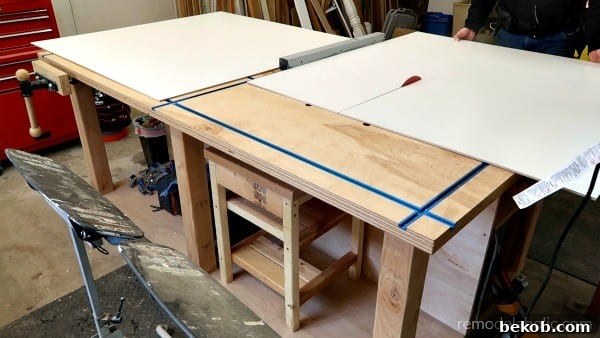
The cornerstone of a successful DIY cabinet organizer lies in precise measurements and thoughtful customization. While we’ll provide our specific dimensions as a reference, it’s absolutely crucial to measure your own over-the-fridge cabinet carefully. Every kitchen is unique, and tailoring the organizer to your exact space and storage needs is what makes this hack truly effective.
One of the most appealing aspects of this DIY cabinet organizer is its unparalleled flexibility. You have complete control to customize it to perfectly accommodate the various sizes of your sheet pans, cake pans, cutting boards, serving trays, and other kitchen essentials. Beyond initial customization, the design incorporates removable dividers, offering future adaptability. Should your storage requirements evolve – perhaps you acquire a new, larger baking dish – you can effortlessly reconfigure the internal spaces to create wider sections without dismantling the entire organizer. This built-in adjustability ensures your storage solution remains effective and practical for years to come.
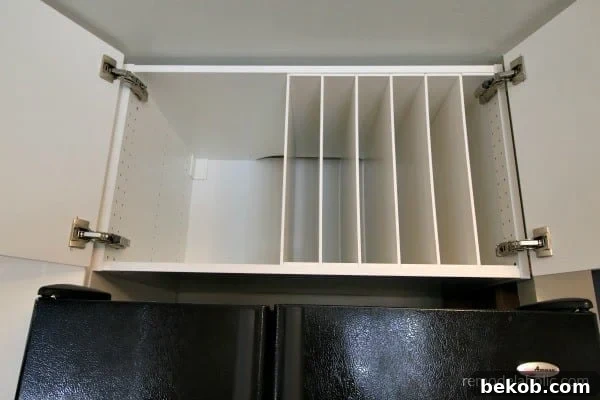
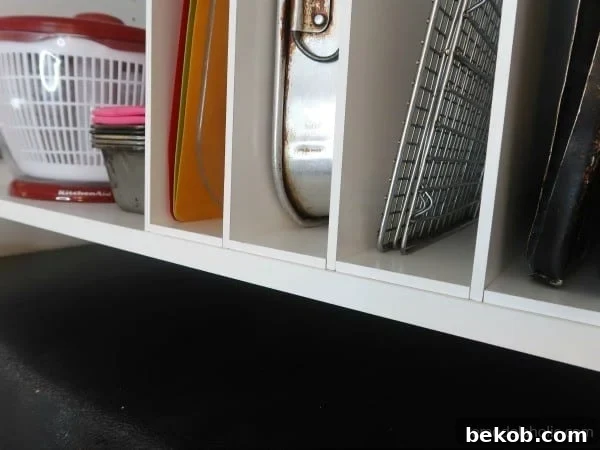
Our specific design for this over-the-fridge cabinet organizer focused on maximizing vertical storage for flat items while retaining some flexibility for bulkier pieces. We opted for a configuration that created six narrower slots, ideal for thin items like cookie sheets and cutting boards, alongside one wider section at the end. This wider section is perfect for accommodating larger pots, small appliances, or even stacks of paper goods. However, the beauty of this DIY lies in its adaptability. If your primary need is for vertical storage across the entire cabinet width, you can easily install dividers across the full span, creating as many uniform slots as you require. The choice is entirely yours, driven by your kitchen’s unique demands.
Understanding Dimensions: Your Cabinet, Your Organizer
As emphasized, precise measurements are critical. Before making any cuts, always measure your specific fridge cabinet twice to ensure accuracy. For reference, our IKEA cabinet positioned above the fridge measured 36 inches wide, 20 inches high, and 24 inches deep. These dimensions served as the foundation for our custom design.
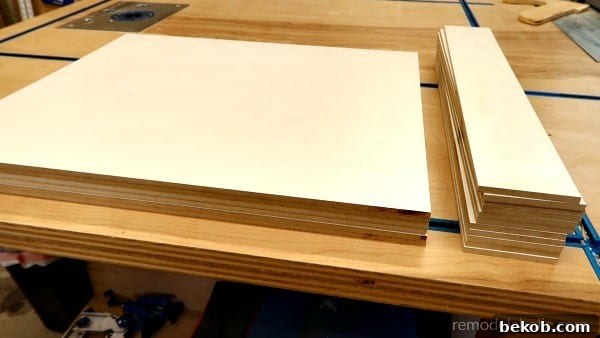
To fit this particular space, our vertical dividers were cut to 21 inches deep by 18 3/8 inches high from the 1/4-inch melamine sheet. It’s important to note that we deliberately reduced the depth of our dividers from the full cabinet depth. This decision was made to accommodate a metal bracket located along the back of the cabinet, ensuring a seamless and unobstructed fit. Always check for any internal obstructions within your cabinet before finalizing divider depth measurements.
For our desired configuration of six vertical partitions (which effectively creates seven individual storage spaces), we also cut 12 horizontal spacers. Each section requires one spacer at the top and one at the bottom to secure the vertical dividers. Our spacers measured 21 inches deep by 3 inches wide. This depth perfectly matched that of our vertical dividers, while the 3-inch width provided ample space for neatly storing standard-sized cutting boards and cookie sheets within each slot. Adjust these spacer widths based on the thickness of the items you intend to store.
Finishing Touches: Prepping the Partitions and Spacers
Once all the MDF sheet material was precisely cut to the required dimensions using our trusty table saw (and its incredibly convenient workbench), the next phase involved applying the edge banding. While the process of applying edge banding to cabinet dividers is straightforward, it does require careful attention and can be a bit time-consuming. Having a vise on our workbench significantly simplified this task by holding the pieces steady, freeing up both hands for the application process.
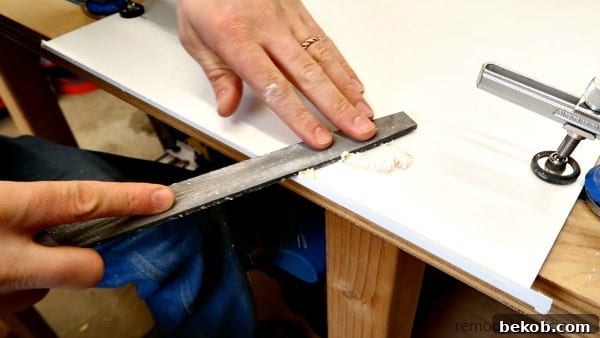
The technique for applying edge banding is quite simple: begin by cutting a piece of melamine edge banding slightly wider than the raw edge you intend to cover. Ensure your iron is plugged in and preheated to a medium-high setting, then carefully iron the banding onto the edge, applying even pressure. The heat activates the adhesive on the banding, creating a strong bond. Once applied, gently fold the excess banding at the edge and use a metal file (or a dedicated edge banding trimmer) to carefully sand or shave away the excess material, creating a perfectly flush and smooth finish. This step is crucial for achieving a professional, factory-finished look.
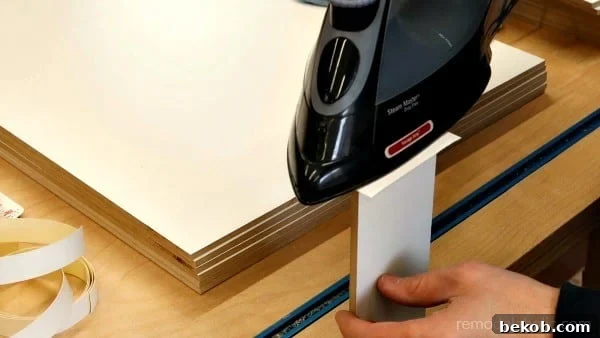
Given the slender profile of the 1/4-inch MDF, we discovered an efficient trick: after trimming one side of the banding with a utility knife, the remaining neatly trimmed strip could often be used for another piece, effectively doubling the linear footage the banding could cover. This not only saves material but also reduces waste. We selectively applied the banding only to the edges that would remain visible once the organizer was installed. This strategic application ensures a remarkably clean, polished, and professional appearance for your DIY cabinet organizer. The result is so seamless that no one will ever suspect this perfectly customized, high-quality storage solution was crafted by your own hands rather than a professional installer.
Seamless Integration: Installing the Cabinet Organizer Above the Fridge
One of the advantages of this design is that the cabinet organizer can be installed directly within the existing IKEA kitchen cabinet. As demonstrated in our detailed video tutorial, we began the installation process from the right side of the cabinet. Our first step involved positioning and securing two spacers – one firmly at the top interior and one at the bottom interior of the cabinet, setting the stage for the first vertical division.
For securing these spacers, we utilized the impressive DAP Rapid Fuse adhesive. This glue proved incredibly effective, providing a strong, fast-acting bond. To offer additional assurance and allow us to proceed with the installation more quickly, we also incorporated a couple of short brad nails with our nail gun. These nails provided temporary holding power while the glue cured. In retrospect, the rapid drying time of the DAP Rapid Fuse meant that the nails were often redundant, a testament to the adhesive’s strength and speed!
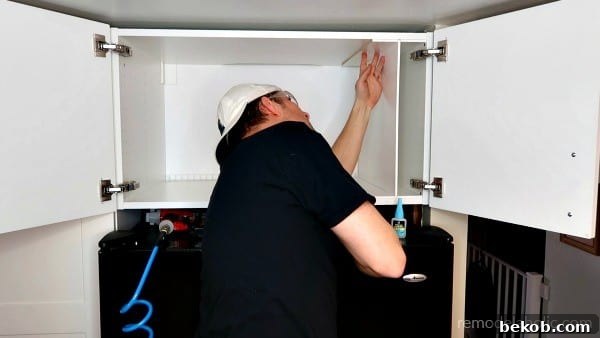
Following the initial spacers, we simply slid one of our prepared vertical dividers into place. Immediately after, we installed two more spacers – one at the top and one at the bottom – to create the next division. This sequence of “slide in a divider, then install two spacers” was repeated for all subsequent vertical dividers, creating a consistent and stable framework for our organizer. The process is remarkably straightforward and becomes intuitive after the first few repetitions.
A key design feature enhancing the versatility of this organizer is the way the dividers are secured. Only the left-most vertical divider was permanently affixed into place using both glue and nails. All other vertical dividers are simply seated snugly between their respective top and bottom spacers. This deliberate choice means that these central dividers are entirely removable. By foregoing glue or nails on these, we’ve ensured the cabinet organizer remains fully adjustable, allowing you to easily create wider vertical storage sections in the future should your needs change. This adaptability is invaluable for long-term kitchen organization.
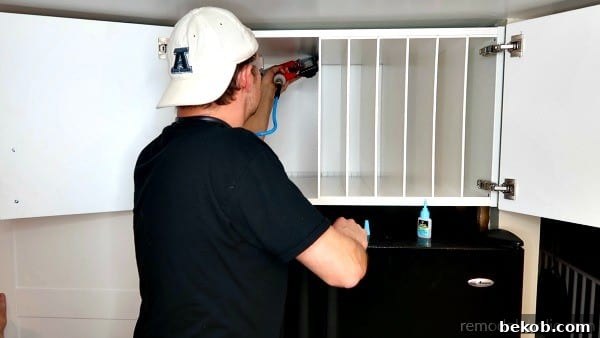
While this project specifically tackled the challenging space above the refrigerator, the core concept of adding vertical dividers is incredibly versatile. This DIY approach can be replicated in virtually any cabinet throughout your home to create custom vertical storage. Imagine using it in lower kitchen cabinets for large serving platters, in a pantry for baking dishes, in an office for organizing binders and folders, or even in a craft room for keeping supplies upright and accessible. The possibilities are endless for anything that benefits from being stored vertically to maximize space and improve organization. Where in your home could a custom vertical cabinet organizer like this make the biggest impact?
Explore More Smart Kitchen Organizing Ideas:
- Ingenious Drawer Organization: Transforming a Drawer into a Pantry Alternative for Small Kitchens
- Our Top Picks: Favorite Pantry Containers for Optimizing IKEA Rollout Shelves
- DIY Charm: Printable Custom Pantry and Spice Labels for a Cohesive Look
- Beyond the Basics: How to Create Functional Storage from the Cabinet Above Your Stove (DIY Range Hood Storage)