
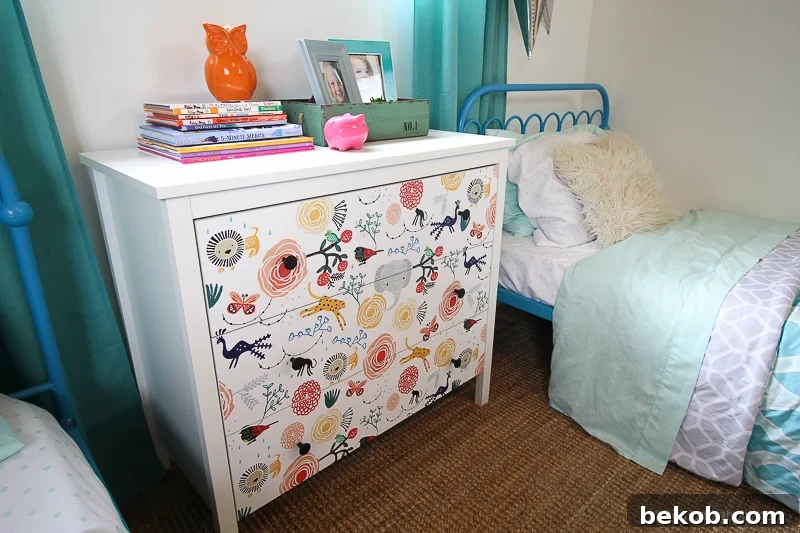
Transform Your IKEA Dresser: An Easy 15-Minute Peel and Stick Wallpaper Hack
Are you tired of that plain, uninspired IKEA dresser staring back at you? Dreaming of a custom, designer look without the hefty price tag or endless hours of DIY? Your solution is here! In just about 15 minutes, you can completely transform your mundane IKEA dresser into a stylish statement piece using the magic of peel and stick wallpaper or contact paper. This brilliant hack is not just about aesthetics; it’s about empowering you to refresh your living space with minimal effort and maximum impact.
Not long ago, I embarked on a mission to inject new life into my daughter’s IKEA dresser. The result was astonishing, and the process was so incredibly straightforward that I knew I had to share this game-changing tutorial. Prepare to be amazed by how simple and rewarding this project is!
One of the most appealing aspects of this furniture makeover is its non-permanent nature. Life, and indeed home decor, is constantly evolving. What looks fantastic today might not suit your style in a few years. With peel and stick wallpaper, that’s absolutely no problem! You can easily peel off the old design and either revert to the original dresser finish or embark on a new transformation with a different pattern. This flexibility makes it an ideal choice for renters, those who love to frequently update their spaces, or anyone hesitant about permanent alterations to their furniture.
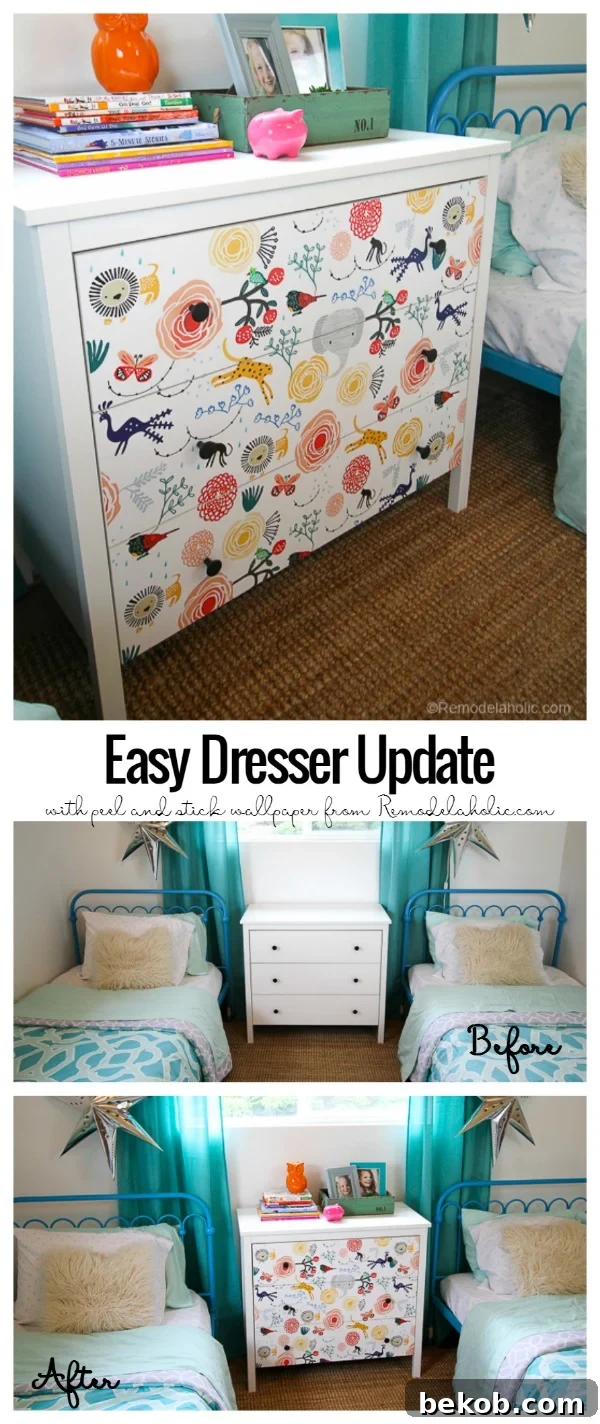
The Ultimate 15-Minute IKEA Dresser Hack: Wallpaper Covered Dresser
While the steps are incredibly simple, seeing them in action can make all the difference. For a comprehensive visual guide and a deeper dive into the process, be sure to check out our full tutorial video available on our YouTube channel. We encourage you to subscribe to our channel and give the video a well-deserved thumbs up! Your support truly helps our channel grow, allowing us to continue bringing you fresh, innovative DIY content. We publish new videos every Saturday, with occasional bonus content during the week, so hit that little bell icon next to the subscribe button to receive instant notifications whenever we share a new project!
Unlock Instant Style: A Step-by-Step Guide to Your IKEA Dresser Makeover
Ready to get started? This project is remarkably straightforward, requiring minimal tools and a surprisingly short amount of time. Follow these easy steps to achieve a stunning, customized look for your IKEA dresser.
Step 1: Preparation is Key
Before you even unroll your beautiful wallpaper, a little prep work goes a long way. Start by thoroughly cleaning the surfaces of your dresser that will be covered. Use a mild all-purpose cleaner and a soft cloth to wipe away any dust, grime, or fingerprints. A clean, smooth surface ensures optimal adhesion for your peel and stick material. Allow the dresser to dry completely. If your dresser has hardware (knobs, pulls), remove them. You can always reattach them later or replace them with new, complementary hardware for an even more custom finish.
Step 2: Precise Measurement and Cutting
Accuracy here ensures a seamless finish. Measure the dimensions of each drawer face or panel you intend to cover. It’s often helpful to add an extra inch or two to your measurements on all sides. This slight overhang provides a buffer for trimming, ensuring a perfect edge later. Carefully transfer these measurements to the backing paper of your peel and stick wallpaper. Most wallpapers come with grid lines on the back, which are incredibly useful for making straight cuts. Use a sharp pair of scissors to cut out each piece. If your design has a repeating pattern, take care to align the pattern across multiple drawer fronts for a cohesive look. This may require extra material, but the visual continuity is well worth it.
Step 3: The Application Process – Smooth and Steady Wins the Race
This is where the magic happens! Peel back a small section of the backing paper, about 2-3 inches, from one edge of your cut wallpaper piece. Align this exposed adhesive edge with the top or side edge of your dresser drawer or panel. Press it down gently, ensuring it’s straight. Once aligned, slowly and carefully peel off more of the backing paper with one hand, while simultaneously using a smoothing tool (or an old credit card) with your other hand to press the wallpaper onto the dresser surface. Work from the center outwards, pushing any air bubbles towards the edges. This technique is crucial for achieving a smooth, wrinkle-free finish. If you encounter a stubborn bubble, you can gently lift the wallpaper and reapply, or use a pin to poke a tiny hole and smooth the air out.
Step 4: Trimming for a Professional Finish
With the wallpaper fully applied, it’s time to trim any excess for a clean, professional look. Using a sharp utility knife, carefully run the blade along the edges of the drawer or panel. It’s best to use a straight edge or a ruler as a guide to ensure your cuts are perfectly straight. For corners and intricate areas, take your time and make precise cuts. A sharp blade is essential to prevent tearing the wallpaper. Change blades frequently if you notice any resistance or ragged cuts.
Step 5: Final Smoothing and Refinement
Once all the trimming is done, take your smoothing tool and go over the entire wallpapered surface one last time. Apply firm, even pressure to ensure maximum adhesion, especially along the edges. If you removed any dresser hardware in Step 1, carefully poke holes through the wallpaper where the hardware will reattach and screw it back into place. Step back and admire your handiwork!
Essential Supplies for Your IKEA Dresser Transformation
This project is incredibly simple, and you won’t need a plethora of tools to get it done efficiently. Below, we’ve provided links for your convenience. Please note that these links may contain affiliate commissions, meaning we earn a small percentage from purchases made through them. This does not increase the cost to you but helps us continue to bring you new tutorials and valuable content daily! Your support by using our links for your DIY project purchases is greatly appreciated. For more information regarding our affiliate relationships, please see our disclosure. (A special thank you to Wayfair for providing the peel and stick wallpaper used in this project for a video on their YouTube page; this post itself was not sponsored).
- Peel and Stick Wallpaper: The star of the show!
- Wallpaper I used (similar options available): Wildlife Wallpaper
- Browse a wide variety of designs: Other great Peel and Stick Wallpapers
- Budget-Friendly Alternative: Contact Paper (perfect for those looking for an even more economical option without sacrificing style).
- Smoothing Tool: Essential for applying wallpaper without bubbles and achieving a flawless finish. (Purchase a dedicated smoothing tool, or simply use an old credit card or a plastic squeegee).
- Utility Knife: Crucial for clean, precise trimming around the edges of your dresser. (Find a reliable utility knife).
- Scissors: For cutting your wallpaper to the initial rough size. A good, sharp pair will make the job much easier.
- Ruler or Straight Edge: For accurate measurements and guiding your utility knife for perfectly straight cuts.
- Cleaning Supplies: A soft cloth and mild all-purpose cleaner for preparing the dresser surface.
What do you think of this incredibly simple yet impactful transformation?
Before: A Blank Canvas
Behold the dresser in its original, untouched state. Functional, yes, but lacking personality and a certain je ne sais quoi. It served its purpose but offered no hint of the vibrant character it was about to embody. This is the beauty of IKEA furniture – it’s designed to be a canvas for your creativity.
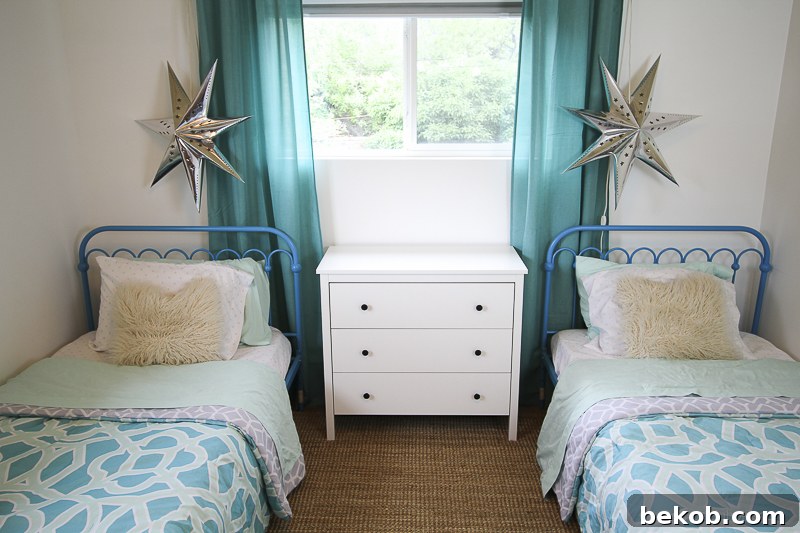
Notice the clean lines, the neutral tone – all perfect for a bold pattern or a subtle texture to truly pop. This “before” image perfectly captures the potential that lies within every standard piece of furniture, waiting for a touch of personalization.
After: A Stunning Transformation!
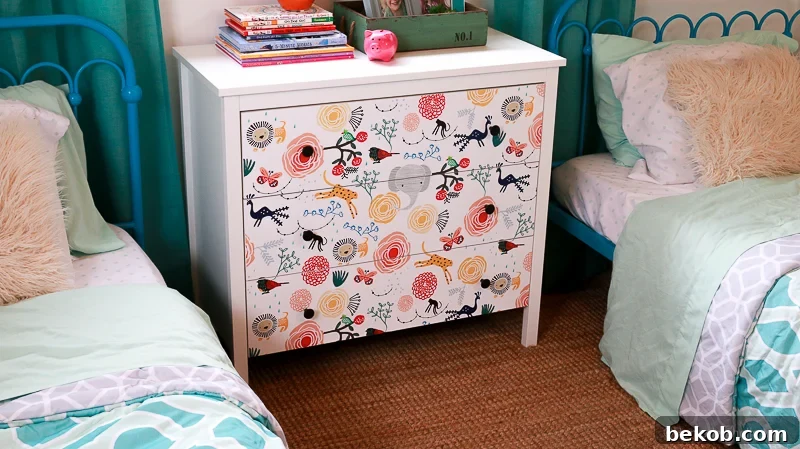
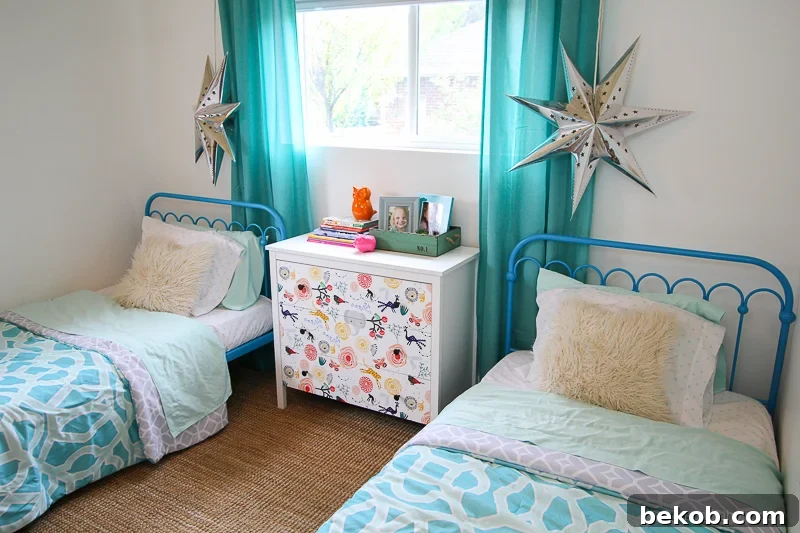
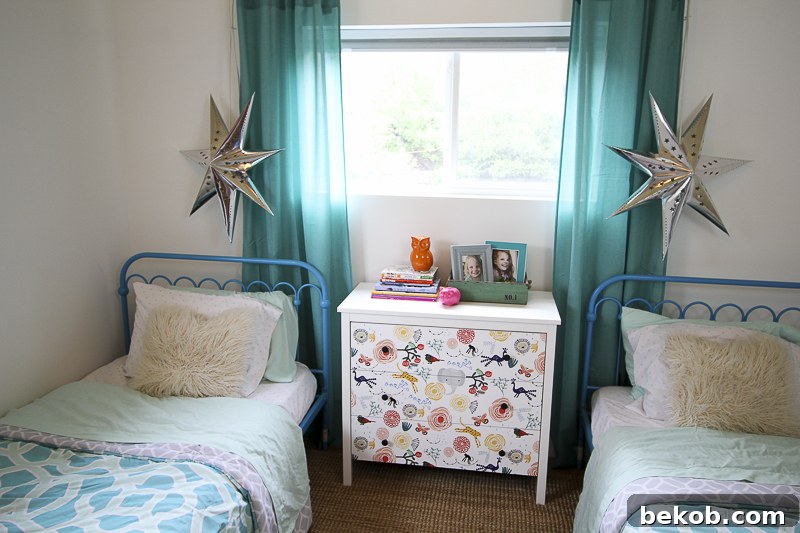
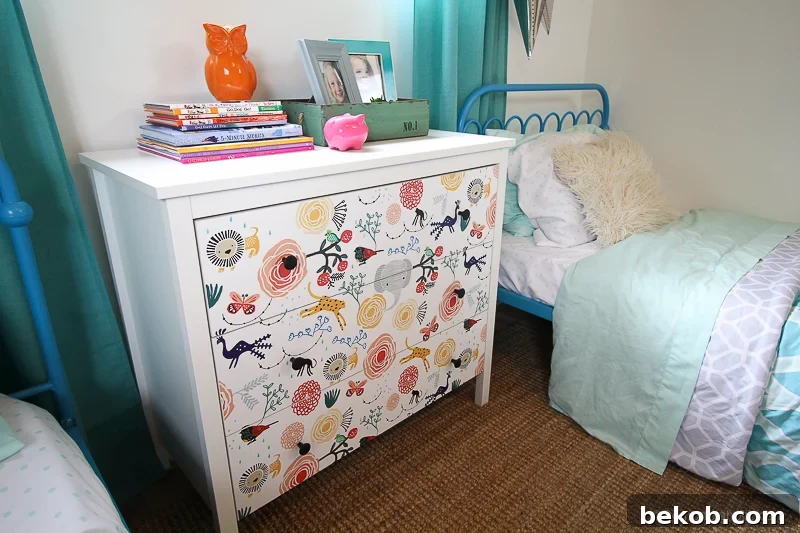
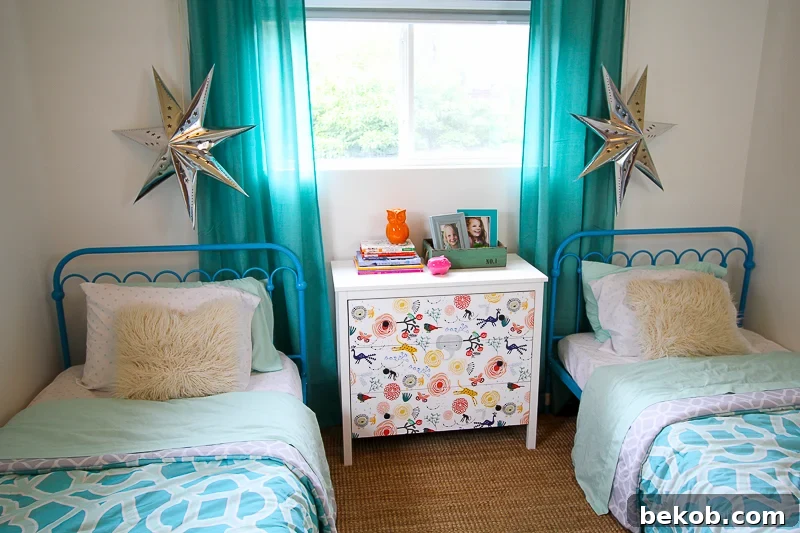
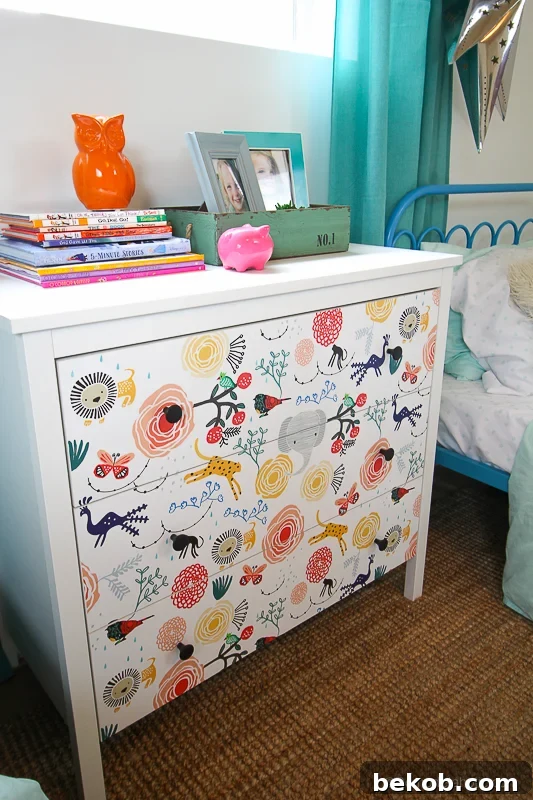
The joy and excitement my girls showed when they saw their updated dresser was truly priceless. It’s not just a piece of furniture anymore; it’s a reflection of their vibrant personalities and a fun, inspiring element in their room. If only every DIY project could be this easy and yield such satisfying results!
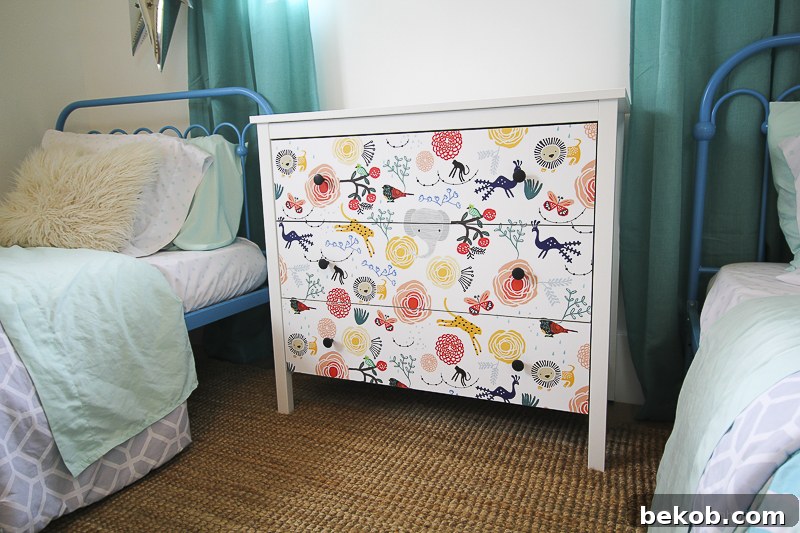
This transformation goes beyond just covering a surface; it breathes new life into a room, making it feel more intentional and custom. The chosen pattern adds depth and character, turning a simple storage unit into a decorative focal point. This hack proves that high-impact design doesn’t require a high budget or professional skills. It’s accessible to everyone!
Beyond Dressers: Expand Your Peel and Stick Horizons
The beauty of peel and stick materials isn’t limited to dressers. Consider applying these same principles to other IKEA furniture pieces: bookshelves, nightstands, tabletops, or even the inside of cabinets for a surprise pop of color or pattern. It’s also an excellent way to update rental kitchen backsplashes or add a temporary accent wall. The possibilities are truly endless!
Tips for Success & Longevity
- Start Small: If you’re new to working with peel and stick, choose a smaller project first to build your confidence.
- Patience is a Virtue: While this is a quick project, don’t rush the application. Taking your time to align and smooth will yield better results.
- Overlap if Necessary: For very large surfaces, you might need to overlap wallpaper pieces slightly. Look for patterns that make seams less noticeable.
- Care and Maintenance: Most peel and stick wallpapers are water-resistant and easy to clean. Use a damp cloth to wipe away spills or dust, avoiding harsh abrasive cleaners that could damage the finish.
- Consider a Top Coat (Optional): For high-traffic surfaces or extra durability, especially if using contact paper, you might consider applying a clear, non-yellowing protective topcoat. Always test on an inconspicuous area first.
Why Choose Peel and Stick for Your Next DIY?
Peel and stick wallpaper has revolutionized the DIY world, offering an accessible and renter-friendly way to personalize spaces. Its ease of application and removal means you can experiment with trends, update decor for different seasons, or simply change your mind without commitment or damage to your furniture. It’s a sustainable choice for refreshing items you already own, preventing them from ending up in a landfill and giving them a brand-new lease on life.
Your Next Project Awaits!
We hope this detailed guide inspires you to tackle your own IKEA dresser hack or any other furniture makeover you’ve been dreaming of. It’s a testament to how a little creativity and a few simple supplies can completely transform your home. Don’t let a plain piece of furniture dictate your style; instead, make it an extension of your unique taste.
We’d love to see your amazing transformations! Share your projects with us on social media, and don’t forget to tag us. For more inspiring DIY hacks, home decor ideas, and helpful tutorials, keep visiting our site and subscribing to our YouTube channel. Happy hacking!