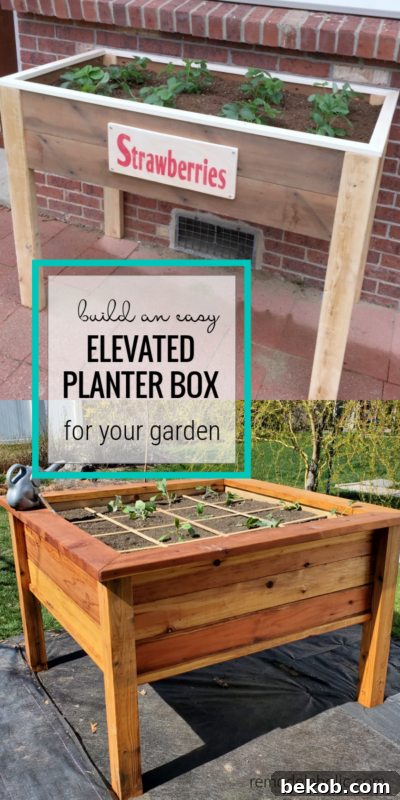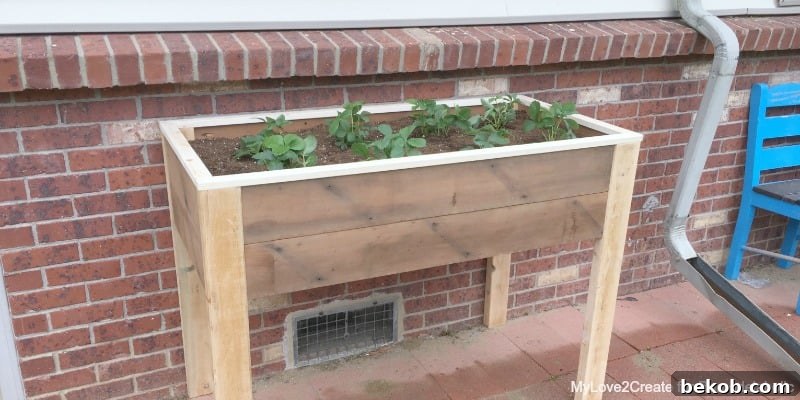
Transform your gardening experience! Construct this robust and straightforward elevated planter box, and say goodbye to back strain from bending over to tend to your beloved plants.
Embark on a journey to discover more innovative gardening solutions with our curated resources:
- 10 Creative DIY Vegetable Garden Ideas for Raised Garden Beds and Trellises
- Craft a Stunning DIY Wood Slat Garden Wall with Integrated Planters
- 25 Engaging Ideas for Gardening With Kids to Foster a Love for Nature
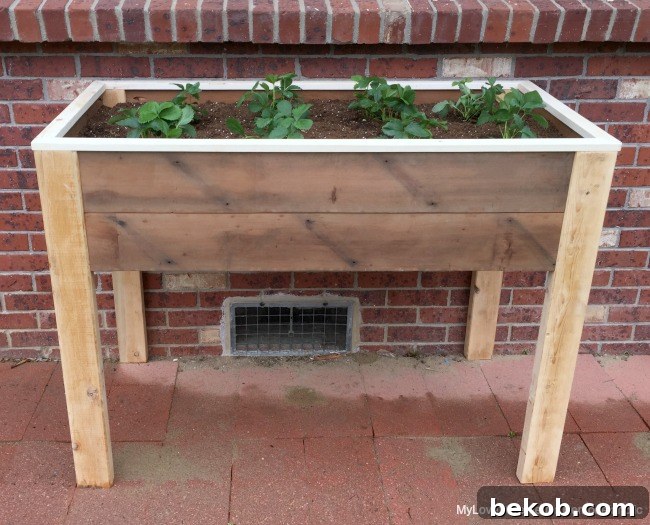
Craft Your Own Ergonomic Elevated Planter Box: A Step-by-Step DIY Guide
Authored by Mindi of MyLove2Create
Please note: This post may contain affiliate links. For full transparency regarding our privacy policy and disclosure practices, kindly refer here.
Considering a Larger Elevated Planter Box? Explore Our Square Design!
While this tutorial focuses on a conveniently sized rectangular elevated planter, we understand that gardening needs vary. If you’re looking to cultivate a larger harvest, explore our robust square version of an elevated garden box, specifically designed for square foot gardening and other extensive planting schemes. This alternative offers greater depth and overall size, making it ideal for a wider variety of plants and more ambitious gardening projects. Discover our square elevated garden box plans here for a more expansive planting area.
Ideal Dimensions for Your DIY Elevated Planter Box
This comprehensive building guide will help you construct an elevated planter box perfectly sized for comfort and productivity. Once completed, your custom planter will measure 48 inches long by 24 inches wide, offering ample space for a variety of herbs, vegetables, or flowers. Standing at a finished height of 35.75 inches, it brings your garden up to an ergonomic level, significantly reducing the need for uncomfortable bending and kneeling. The soil box itself provides a generous 11 inches of depth, which is sufficient for many popular garden plants, from shallow-rooted greens to deeper-rooted varieties like carrots or small tomatoes. These dimensions strike an excellent balance between a substantial growing area and a manageable size for most patios, decks, or small garden spaces.
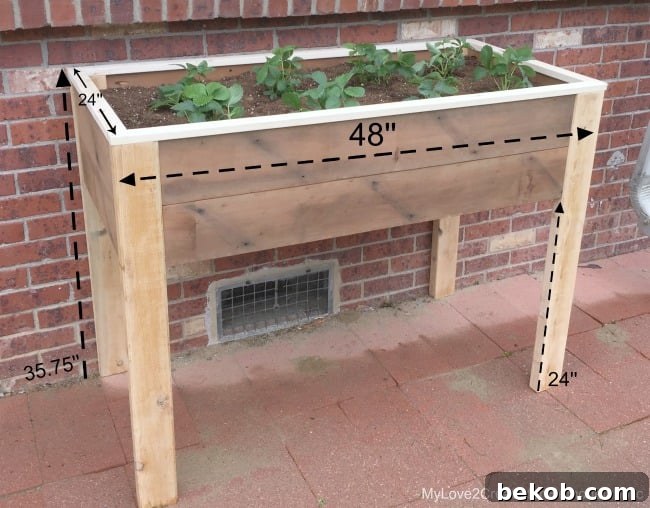
For your convenience, access the complete, printable building plans directly from Mylove2Create. These detailed plans will simplify your DIY project, ensuring accuracy and ease throughout the construction process. Click here to get your printable building plans now!
Essential Supplies for Building Your Elevated Planter Box
Gathering all your materials and tools before starting is crucial for a smooth and efficient building process. For this sturdy elevated planter box, you will need the following:
- Lumber:
- 2- 2x4x8 boards (These will form the robust legs of your planter, providing essential support and stability.)
- 4- 1x2x8 boards (Versatile for slat supports and top trim, adding structural integrity and a finished look.)
- 5- 1x6x8 boards (These are the primary boards for the planter box walls and the internal base slats, forming the core structure.)
- Hardware:
- Hardware cloth (An indispensable addition, this will create a secure bottom for your soil box, preventing soil loss while ensuring adequate drainage and deterring pests.)
- Pocket Hole Jig and Screws (A pocket hole jig is key for creating strong, concealed joints, resulting in a cleaner and more professional finish.)
- Wood glue (Enhances the strength and durability of your joints, ensuring your planter withstands the elements and weight of the soil.)
- Staples (For securely attaching the hardware cloth.)
- Tools:
- Circular Saw (Essential for precise and straight cuts on all your lumber pieces.)
- Drill/Driver (Used for drilling pilot holes and driving screws, especially pocket hole screws.)
- Sander (Prepares your wood surfaces for finishing, ensuring a smooth, splinter-free planter.)
- Nail Gun (Speeds up the assembly of slats and trim pieces, providing strong fastenings.)
- Staple Gun (Perfect for attaching the hardware cloth firmly to the slat supports.)
- Wire cutters (Necessary for accurately cutting the hardware cloth to size.)
- Measuring tape, pencil, safety glasses, and hearing protection (Always prioritize safety when working with power tools.)
One of the most rewarding aspects of DIY projects like this is the opportunity to repurpose materials. As you’ll observe in the upcoming images, I successfully utilized scrap wood to construct my elevated planter box. For instance, the sturdy 2x4s were salvaged from a wall during a bedroom renovation project (you can read more about it in my Teen Boys Bedroom Reveal). Similarly, the 1×6 boards were given a new life, having previously served as decking. Embracing reclaimed wood not only adds character to your project but also contributes to sustainable living.
Precision Cut List for Your Elevated Planter Box
Accurate cuts are fundamental to a well-built planter. Double-check all measurements before making your cuts. Here’s the detailed cut list for your elevated planter box:
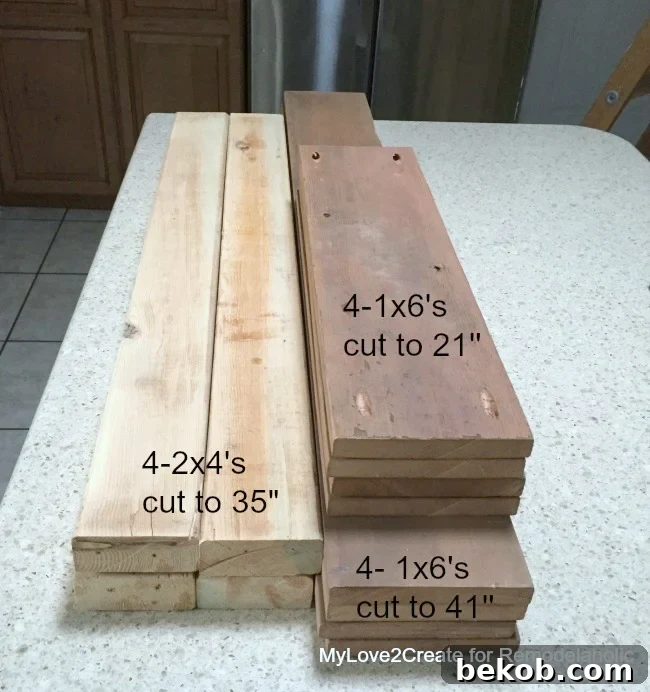
- 4- 2x4s @ 35” (These will serve as the robust legs, elevating your planter to a comfortable working height.)
- 4- 1x6s @ 41” (These boards form the longer front and back panels of your planter box.)
- 4- 1x6s @ 21” (These pieces constitute the shorter side panels, completing the main frame of the soil box.)
- 2- 1x2s @ 41” (These are essential slat support boards, running along the longer interior sides to hold the bottom slats.)
- 2- 1x2s @ 21” (These slat support boards run along the shorter interior sides, providing additional support for the base.)
- 6- 1x6s @ 22” (These internal slats form the very bottom of your soil box, providing drainage and support for the hardware cloth.)
- 2- 1x2s @ 21” (These are additional side slats, providing supplementary support or acting as alternative bottom pieces if desired.)
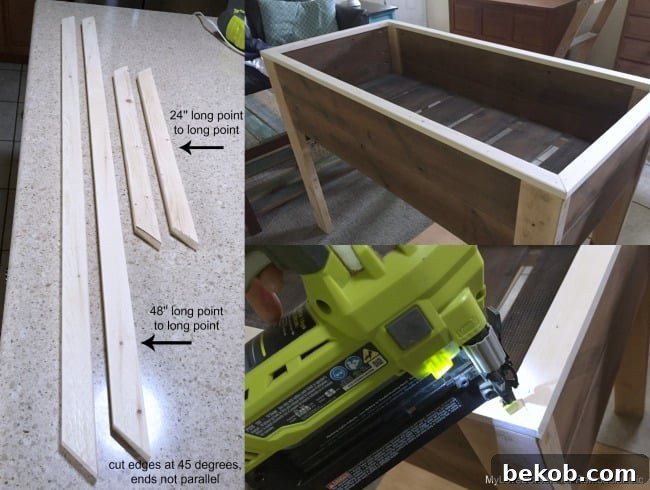
- 2- 1x2s @ 48” long point to long point, ends cut at 45 degrees, ends not parallel (These create the elegant, mitered top trim for the front and back of the planter.)
- 2- 1x2s @ 24” long point to long point, ends cut at 45 degrees, ends not parallel (These pieces complete the mitered top trim, forming the sides of the planter’s upper edge.)
Carefully measure and cut each piece, ensuring clean, precise edges. This attention to detail will greatly simplify the assembly process and result in a professional-looking finished product.
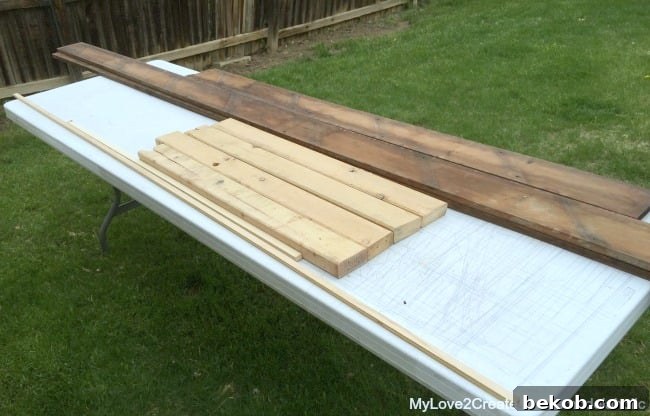
Watch the Elevated Planter Box Build in Action: A Visual Tutorial
For those who prefer a visual guide, this video provides a comprehensive overview of the entire construction process for the elevated planter box featured in this tutorial. From the initial cuts to the final assembly, you can watch each step unfold, offering clarity and confidence as you embark on your own DIY project. This video complements the written instructions, ensuring you have all the resources needed to build your planter successfully.
Your Comprehensive Guide: How to Build an Elevated Planter Box
Building this elevated planter box is a rewarding project that combines practical utility with aesthetic appeal. Follow these detailed steps to construct your own ergonomic gardening solution, perfect for growing your favorite plants without straining your back.
Step 1: Precision Cutting of Legs, Side Boards, and Front/Back Boards
Begin by preparing the foundational components of your elevated planter. Using your circular saw, carefully cut the four 2×4 boards to a length of 35 inches; these will serve as the robust legs for your planter. Next, move on to the 1×6 boards. Cut four of these to 21 inches for the side panels of the planter box, and another four to 41 inches for the front and back panels. Accuracy in these initial cuts is paramount, as they determine the overall dimensions and squareness of your finished planter. Always wear safety glasses and use appropriate clamping techniques to ensure safe and precise cuts.
Step 2: Drilling Strategic Pocket Holes for Strong Joints
Once your main lumber pieces are cut, the next crucial step is to prepare them for assembly using pocket holes. A pocket hole jig is an invaluable tool for creating strong, hidden joints that provide exceptional structural integrity. You will need to drill 3/4-inch pocket holes into each end of all eight of your 1×6 boards (the four 21-inch side boards and the four 41-inch front/back boards). Ensure the jig is set correctly for 3/4-inch material thickness. As illustrated in the accompanying photo, the 1×6 boards are typically flipped over to expose the drilled pocket holes, which will later face inward when assembled, keeping the exterior surfaces clean and free of visible fasteners. This method results in a much cleaner and more professional finish.
Step 3: Smoothing Surfaces Through Thorough Sanding
Before assembly, take the time to sand all your cut wood pieces. This step is often underestimated but is vital for both aesthetics and safety. Sanding removes splinters, sharp edges, and any rough patches that may have resulted from cutting. Depending on the condition of your wood, you may start with a coarser grit sandpaper (e.g., 80 or 120 grit) and then progress to a finer grit (e.g., 180 or 220 grit) for a truly smooth finish. A well-sanded surface not only feels better to the touch but also prepares the wood for any potential staining or painting, allowing for better adhesion and an even finish. After sanding, wipe all dust from the wood surfaces with a damp cloth.
Step 4: Assembling the Side Panels and Legs
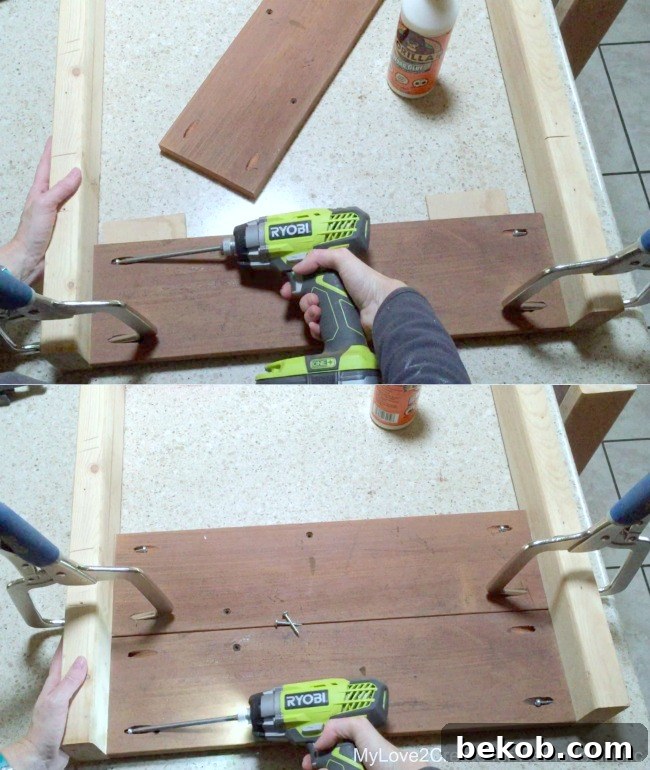
With your pieces cut and sanded, it’s time to begin assembling the frame. Attach the 21-inch 1×6 side boards to the 2×4 legs. Apply a bead of wood glue to the ends of the 1×6 boards before securing them with 1 1/4-inch pocket hole screws. It’s crucial to ensure that the top edge of your upper 1×6 board is flush with the top of the legs for a clean, even finish. I highly recommend using Kreg Right Angle Clamps or similar corner clamps to hold your boards securely in place while you drive in the screws, ensuring a precise 90-degree angle.
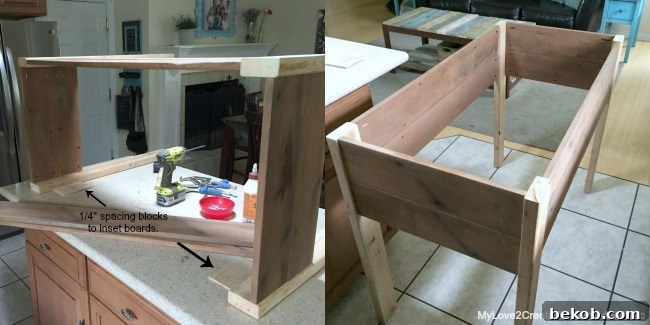
Here’s a handy tip for a preferred aesthetic: In the top photo below, you’ll notice a 1×6 board resting on two pieces of 1/4-inch scrap wood. These scrap pieces act as temporary spacing blocks, allowing the 1×6 boards to be set back slightly, causing the 2×4 legs to protrude slightly for a more distinguished look. This is an optional design choice; if you prefer the legs to be perfectly flush with the sides of your elevated planter box, simply omit the spacing blocks and let the 1×6 boards rest directly on your workbench as you drill in the screws. Consistency is key: if you opt for the inset look, apply the 1/4-inch spacing blocks for every board attached to the legs. Complete the assembly for both side sections of the planter box before moving on.
Step 5: Securing the Front and Back Panels
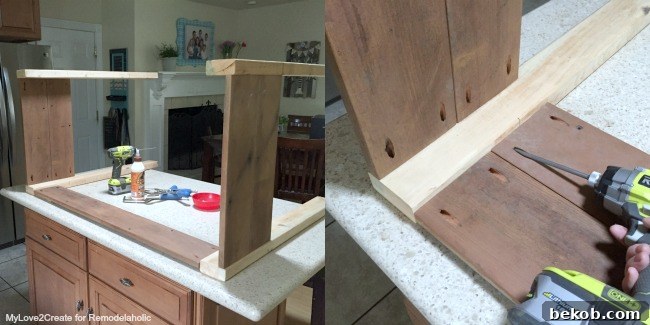
Now that your two side assemblies are complete, it’s time to connect them by attaching the front and back boards. This step is carried out using the same secure method as in Step 4: apply wood glue to the ends of the 41-inch 1×6 boards, then fasten them to the legs using 1 1/4-inch pocket hole screws. If you chose to use the 1/4-inch scrap pieces as spacing blocks to inset the side boards, ensure you do the same here for the front and back boards to maintain a consistent aesthetic. Build one long side (front or back) completely, connecting the two side assemblies, then carefully flip the partially assembled frame over. Attach the remaining front or back boards to the legs. As these panels come together, the structure of your elevated planter box will truly begin to take shape, forming a robust and stable frame.
Step 6: Installing Interior Support Boards for the Planter Base
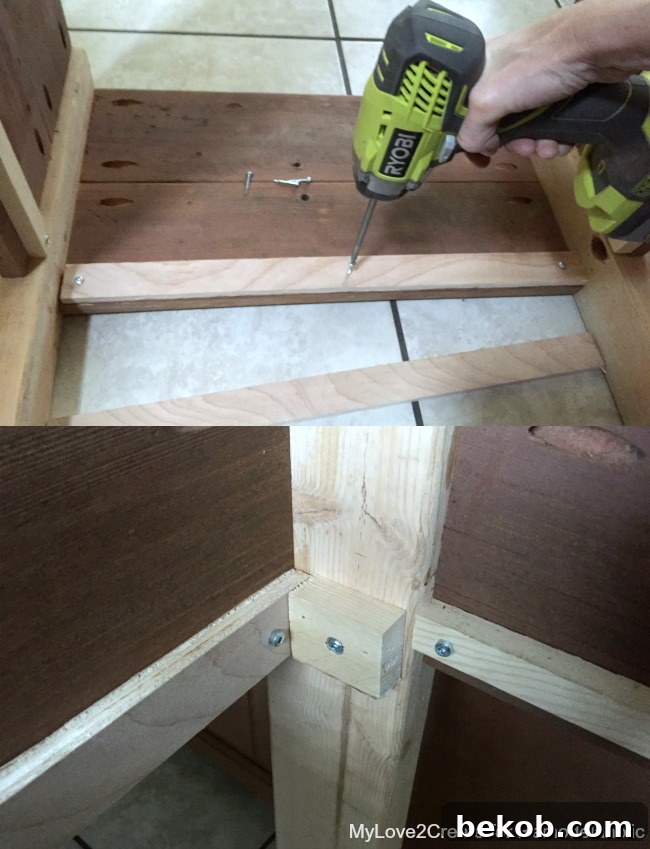
With the main frame of your elevated planter box assembled, the next critical step is to install the interior support boards. These supports will ultimately hold the slats that form the bottom of your soil box. While I opted to use scrap wood for this part of my build, the cut list specifies using 1x2s, which work perfectly. The key consideration is ensuring that the top edges of all your support boards are perfectly level, regardless of whether you use 1x2s or slightly different scrap wood sizes. If using 1x2s, position them flush with the very bottom of the lowest 1×6 boards of your planter box. Secure them firmly in place with screws. Additionally, for extra reinforcement and stability, add a small scrap piece of 1×2 to each leg at the same height. These supports create a sturdy ledge upon which the base slats will rest, ensuring your soil has a solid, level foundation.
Step 7: Installing the Base Slats for Proper Drainage
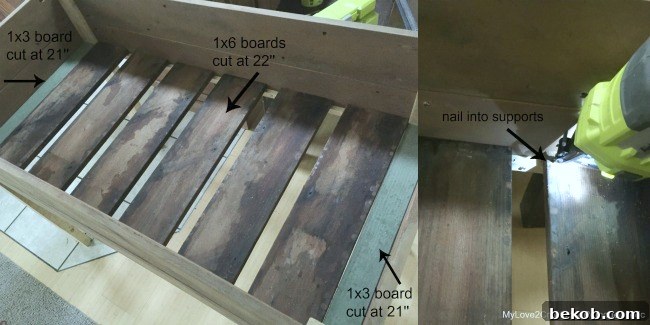
Following the installation of the interior support boards, it’s time to add the slats that will form the actual bottom of your planter’s soil box. While the cut list suggests 1x6s for the main internal slats and 1x2s for the side slats, feel free to adapt based on available materials, much like I used some scrap 1×3 boards on the ends of my planter. The most important aspect here is to ensure even placement of the slats, leaving a small, consistent gap between each one. These gaps are vital for proper water drainage, preventing your plants from becoming waterlogged. Once positioned, firmly nail the slats into the support boards you installed in the previous step. This creates a solid yet permeable base, essential for healthy plant growth.
Step 8: Adding Hardware Cloth for Soil Retention and Drainage
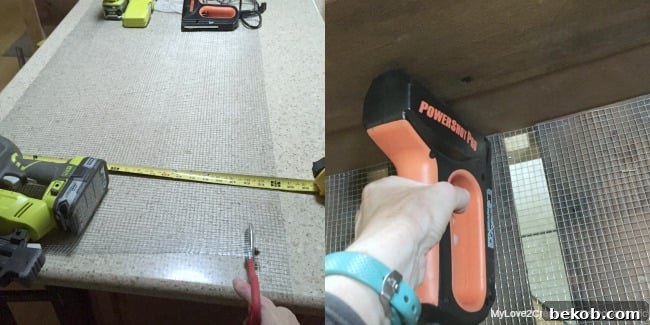
To prevent your precious soil from escaping through the drainage gaps between the slats while still allowing excess water to pass through, a layer of hardware cloth is indispensable. Hardware cloth also acts as an excellent barrier against rodents and other pests that might try to burrow into your planter from below. Using tough metal scissors or heavy-duty wire cutters, precisely cut a piece of hardware cloth to match the internal dimensions of your planter box, ensuring it completely covers the slats. Carefully place the cut hardware cloth over the slats, then use a staple gun to securely fasten it to the wood. Apply staples every few inches around the perimeter and along the slats to ensure it stays taut and firmly in place. This layer is crucial for maintaining the integrity of your soil bed and promoting optimal growing conditions.
Step 9: Crafting and Attaching the Decorative Top Edges
To give your elevated planter box a refined and finished appearance, adding top trim is highly recommended. Initially, I hadn’t planned for a top edge, but at the last minute, I realized it would significantly enhance the planter’s aesthetic appeal and protect the upper edges of the wood. While I personally would have preferred to use 1x3s for a slightly more substantial overhang, similar to my X Planters, I opted for 1x2s due to readily available scraps. The 1x2s align flush with the edges of the legs, which still provides a neat look. If you use 1x3s, you could achieve a lovely, subtle overhang that adds a touch of elegance.
To create the top trim, carefully cut the ends of your 1×2 boards at a 45-degree angle to form mitered corners. The front and back top boards should measure 48 inches from long point to long point, while the side top boards should be 24 inches long point to long point. Ensure the ends are cut at opposing 45-degree angles so they join seamlessly at the corners. Once cut, apply wood glue to the bottom surface of these trim pieces and carefully align them with the top edges of your planter box. Secure them firmly in place using a nail gun, ensuring the nails are driven flush with the surface. This final touch truly elevates the look of your DIY project, making it a beautiful addition to any outdoor space.
- Finishing Touches: I personally found the natural contrasting colors of my reclaimed wood pieces charming, so I chose to leave my planter unfinished. However, you have complete creative freedom! Consider staining your planter to bring out the natural wood grain, painting it a vibrant color to match your outdoor decor, or applying a clear protective sealant to enhance its longevity and resistance to the elements. Whatever finish you choose, ensure it’s suitable for outdoor use.
- Soil Volume Calculation: When it comes to filling your new elevated planter box, you’ll need approximately 7.9 cubic feet (or just under 8 cubic feet) of soil. This information is incredibly useful if you’re planning to purchase bagged garden soil or a custom soil mix. Knowing the exact volume required helps you avoid over-buying or under-buying, making your gardening preparations more efficient and cost-effective.
- Optimizing Drainage: While the hardware cloth and slat design already provide good drainage, some plants thrive in even better-drained soil than others. If you’re growing plants that are particularly sensitive to moisture or prone to root rot, consider adding a layer of coarse gravel or broken pottery shards at the very bottom of the planter, beneath the hardware cloth and soil. This creates an additional drainage layer. However, be mindful that this will reduce the overall soil depth slightly. Researching the specific drainage needs of your chosen plants will definitely pay off in their health and vitality!
Once filled with soil, my elevated planter box became the perfect new home for my thriving strawberry plants. It was incredibly satisfying to complete the project and immediately put it to use!
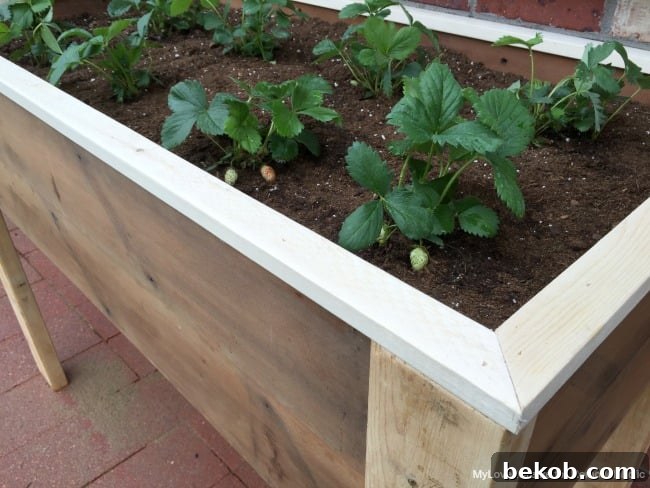
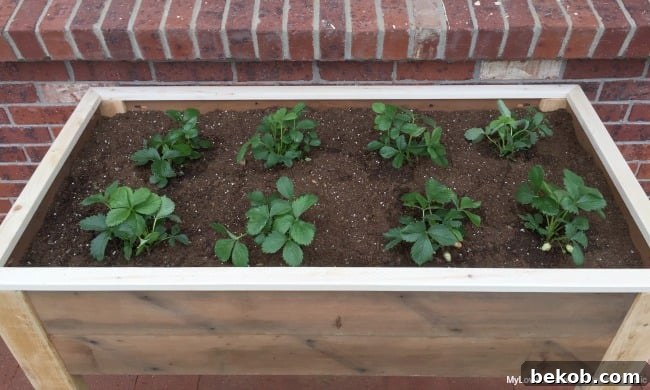
The versatility of this elevated planter is truly impressive! Its generous dimensions make it suitable for a vast array of plantings. Imagine dedicating one to a fragrant herb garden, another to a vibrant assortment of leafy greens, or perhaps a third to a selection of your favorite vegetables. The possibilities are endless, and I’m already tempted to build a few more to accommodate all my gardening ambitions!
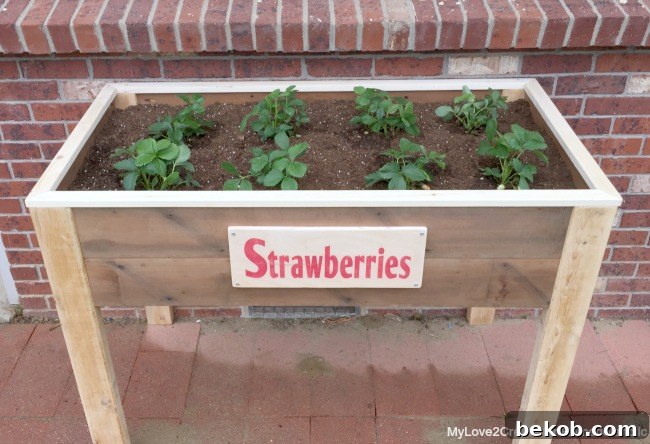
To add a personal touch and a bit of whimsical charm, I quickly whipped up a fun sign for the front of the planter. I’m currently contemplating adding the word “fresh” in elegant cursive above it – though I might just leave it as is. Regardless of the final sign design, I am absolutely thrilled with how this elevated planter box turned out!
Now it’s your turn to get hands-on! Embark on this rewarding DIY project and craft your very own awesome elevated planter box. Give your back and knees a much-needed break this gardening season while enjoying the satisfaction of growing your own produce. Thank you for following along with this tutorial!
Warmest hugs,
Mindi
Explore More Inspiring DIY Planter and Garden Projects:
- Looking for even more space? Here’s how to build a bigger elevated garden bed.
- Design and build your own custom raised garden boxes for any space.
- Learn to build a charming tall wooden planter to add vertical interest to your garden.
- Discover a variety of indoor and outdoor planter tutorials for all your needs.
- Plus, every beautiful garden deserves a focal point! Doesn’t yours just need a lovely arbor?