
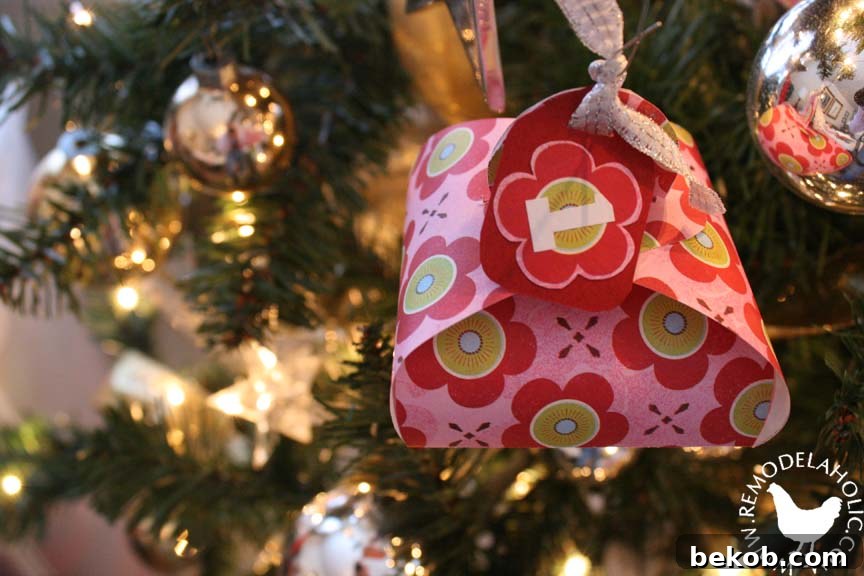
On the 8th Day of Christmas: Handcrafted Holiday Boxes for Festive Cheer!
As the holiday season twinkles into full swing, there’s nothing quite like the joy of creating something beautiful with your own hands. On this eighth day of our festive crafting series, we’re diving into the wonderful world of DIY holiday boxes. These charming little containers aren’t just for gifts; they can transform into delightful advent calendars, unique tree ornaments, or festive party favors. Imagine the excitement as children pull down a numbered box from the tree each day, revealing a sweet treat or a tiny surprise!
This guide will walk you through crafting two distinct and adorable paper boxes: the “Little Puffy Box” and the “Dreidel-Like Box.” Perfect for adding a personal touch to your holiday celebrations, these projects are fun, customizable, and surprisingly simple to make. Get ready to unleash your creativity and infuse your home with handmade holiday spirit!
The Enchanting “Little Puffy Box” – Versatile & Sweet
Our first project, the “Little Puffy Box,” draws inspiration from a classic Martha Stewart Easter craft. We’ve adapted the original design to make it even more accessible and perfectly suited for Christmas and other festive occasions. This box’s charming, rounded shape gives it a delightful “puffy” appearance, making it irresistible when filled with goodies.
These boxes are incredibly versatile. Hang them on your Christmas tree, fill them with small candies or messages for an advent calendar, use them as unique gift packaging for jewelry or small tokens, or even as decorative elements on your holiday table. Their simple construction means you can make a whole batch in an afternoon, creating a coordinated and charming display.
To help you get started, we’re providing a printable template for the “Little Puffy Box.” This template incorporates our modifications, simplifying the original design for ease of crafting. The dashed lines on the template indicate where you’ll need to fold your paper, making the assembly process straightforward and enjoyable.
How to Use the Template: Simply click on the image above to open it in a new window. Save the image to your computer, and then print it out. For best results, print on cardstock or a heavier paper weight (around 65-80 lb) to ensure your boxes are sturdy enough to hold their shape and contents. If you want to make larger or smaller boxes, you can adjust the print scale on your printer settings. Remember, the key to a perfect box is precise cutting and crisp folds.
Crafting Your “Little Puffy Box” – A Step-by-Step Guide:
- Print and Cut: Begin by printing the template onto your chosen paper. Carefully cut out the entire shape along the solid outer lines. Precision here will result in a neater box.
- Score and Fold: Using a ruler and a bone folder (or the back of a butter knife), score along all the dashed lines on the template. Scoring creates a clean crease when folding. Once scored, fold along all these lines, making sure your folds are sharp and crisp.
- Form the Box Base: Apply a thin line of craft glue or double-sided tape to the side tabs of the box. Carefully align and press them to secure the box’s main body. Hold firmly until the adhesive sets.
- Close the Bottom: Fold in the bottom flaps and secure them with glue or tape. This forms the stable base of your “puffy box.”
- Prepare the Handles: You’ll notice two flaps at the top with handle cut-outs. These are designed to interlock.
- Fill and Close: Now comes the fun part! Fill your box with your chosen treats, small toys, or festive messages. Once filled, simply fold one edge over the handle, then fold the other side over, allowing the handles to interlock and secure the top.
- Personalize for an Advent Calendar: If you’re creating an advent calendar, add a numbered tag to each box. You can tie a pretty ribbon through the handle holes, knotting it to attach the tag and create a hanging loop. Imagine 24 of these delightful boxes, each numbered and hung on a garland or tree, waiting to be discovered each day!
Voila! Your “Little Puffy Box” is complete and ready to spread holiday cheer.
The Distinctive “Dreidel-Like Box” – A Geometric Delight
Our second box project takes on a more geometric shape, reminiscent of a dreidel with a charming pyramid-like top. This unique design offers a different aesthetic, perfect for a more sophisticated or modern holiday decor. Its defined angles and clean lines make it a striking container for small gifts, sweets, or even as standalone decorative pieces on a mantelpiece or shelf.
This box style is particularly appealing if you enjoy adding dimension and structure to your paper crafts. It provides an excellent canvas for embellishments like glitter, metallic pens, or intricate paper cut-outs, allowing you to customize it to match any holiday theme.
Just like with the “Little Puffy Box,” simply click on the image above to save and print your template for the “Dreidel-Like Box.” Again, using cardstock will yield the best results for durability and shape retention. The dashed lines indicate fold lines, guiding you through the assembly process.
Assembling Your “Dreidel-Like Box”:
- Cut and Fold: Print your template and carefully cut along the solid outer lines. Score and fold all dashed lines with precision. Sharp folds are crucial for the crisp appearance of this box.
- Glue and Assemble: Apply a small amount of strong craft glue or double-sided tape to the folded flaps. Carefully join the edges, ensuring they align perfectly to form the box’s body and its pyramid top. Hold the glued seams firmly until the adhesive is fully set.
- Embellish Your Creation: Once the box is assembled and stable, it’s time to let your imagination soar with embellishments!
Creative Embellishment Ideas:
- Paper Choice: Experiment with patterned cardstock, glitter paper, metallic paper, or even vellum for different effects.
- Stamps and Ink: Use holiday-themed stamps and inks to add intricate designs before assembly.
- Glitter and Adornments: Apply glitter glue, sequins, small rhinestones, or even tiny beads to highlight certain areas.
- Ribbons and Tags: Tie a festive ribbon around the box, or attach a personalized gift tag for an extra special touch.
- Paint and Markers: For a truly unique look, consider painting sections of the box or drawing intricate patterns with fine-tip markers.
Essential Tips for Paper Crafting Success
To ensure your holiday box projects turn out beautifully, keep these tips in mind:
- Quality Paper: Invest in good quality cardstock. It holds folds better, resists tearing, and provides a sturdier finished product.
- Sharp Tools: Use a sharp craft knife or scissors for clean cuts. A dull blade can lead to jagged edges.
- Scoring Tool: A bone folder and ruler are invaluable for creating crisp, professional-looking folds.
- Adhesive Choice: Craft glue that dries clear is generally best, applied sparingly. Double-sided tape can also be a quick and clean option.
- Patience: Allow glue to dry completely before moving to the next step to prevent unraveling.
- Personalization: Don’t be afraid to experiment with different papers, colors, and embellishments to make each box uniquely yours. This is where the magic of DIY truly shines!
If you’re loving these paper crafting ideas, be sure to check out the other wonderful projects in our Christmas decoration series. Each day brings a new dose of inspiration to help you adorn your home and celebrate the season:
Day 1 |
Day 2 |
Day 3 |
Day 4 |
Day 5 |
Day 6 |
Day 7
A Special Helper in the Crafting Workshop!
One of the true joys of holiday crafting is sharing the experience, and I was lucky to have a wonderfully helpful “cutie-pie” by my side for this project. Their enthusiastic presence (and sometimes curious paws or tiny fingers!) always adds an extra layer of warmth and fun to any creative endeavor. As I was photographing the finished boxes, I realized that my little assistant’s festive collar perfectly matched one of my handmade ornaments. It was too cute not to capture!
Of course, once the photoshoot was over, the ornament (and a few of the less perfect boxes) became an irresistible plaything. It’s all part of the process, and seeing the pure delight in a child’s or pet’s interaction with your creations truly makes the effort worthwhile!
We hope these holiday box projects inspire you to add a touch of handmade charm to your celebrations. Whether you’re filling them with treats, using them as advent calendar surprises, or simply adorning your home, these paper crafts are a beautiful way to embrace the festive spirit. Happy crafting!