
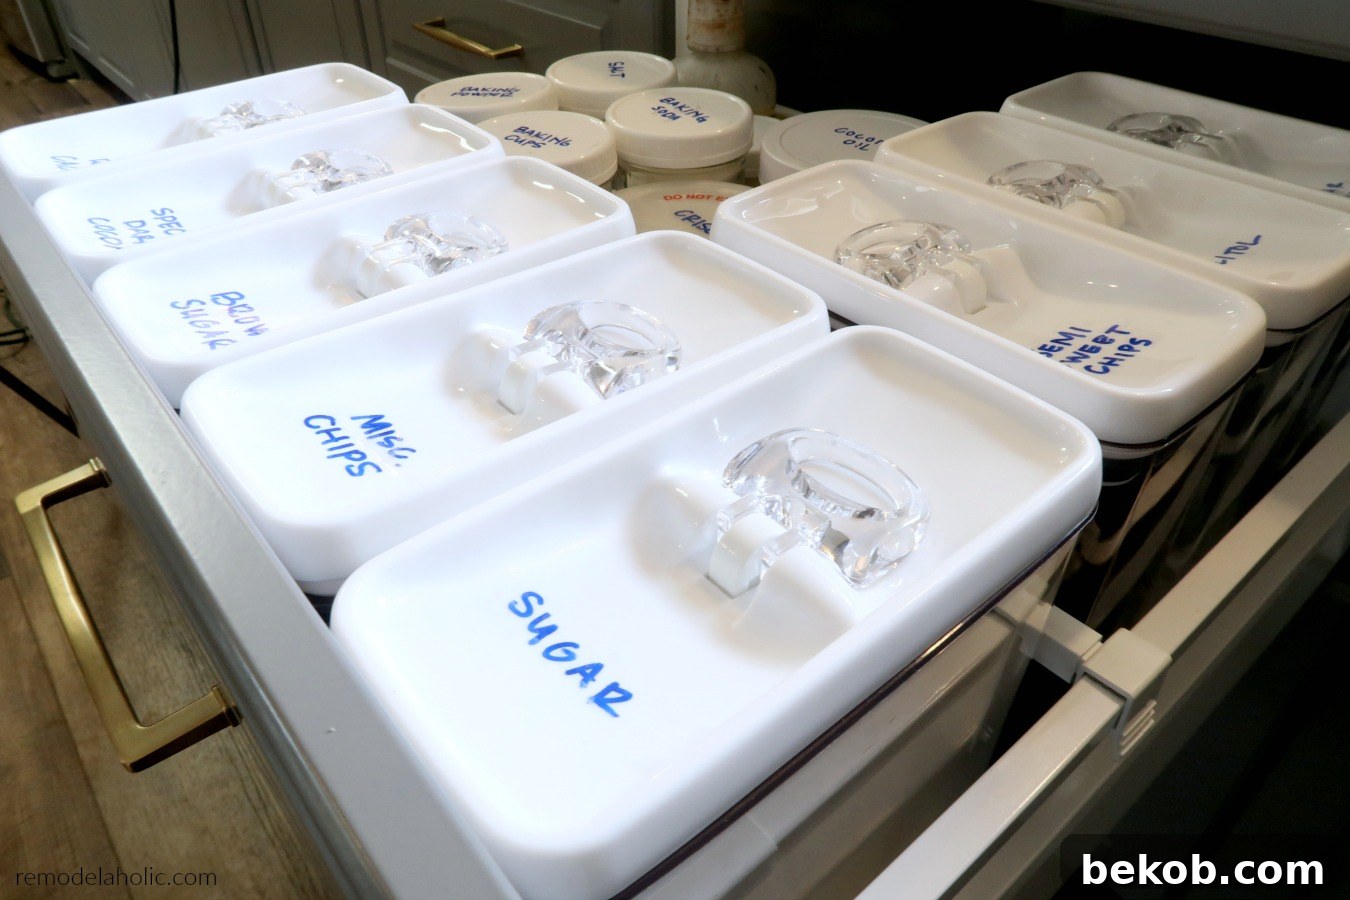
Transform Your Kitchen: The Ultimate Guide to Organizing Your Baking Drawer for Small Spaces
In the perpetual pursuit of a more organized home, we’ve tackled countless spaces, from the inviting entryway to the essential closet drawers, and even optimized our coat closet and pantry, including specific solutions for a spice rack or two. Each project, undertaken steadily over time, brings us closer to a harmonious living environment. Our latest endeavor addresses a common challenge in many homes, especially those with limited square footage: organizing baking supplies. For us, this means transforming our baking drawer into a highly functional pantry alternative in our small kitchen. This isn’t just about tidiness; it’s about creating an efficient, inspiring space where every ingredient is at your fingertips, making home baking a joyous and effortless experience. Join us on this rewarding journey to a more organized and productive kitchen. You can always find more inspiration and follow our progress by subscribing to our YouTube channel here.
Why an Organized Baking Drawer is a Game-Changer for Small Kitchens
In a small kitchen, every inch of space is precious, and intelligent organization becomes not just a luxury, but a necessity. Deep drawers, often underutilized, offer an incredible opportunity to create a highly efficient “pantry alternative,” especially for baking essentials. The traditional pantry might be a distant dream, but a well-organized deep drawer can provide surprising capacity and accessibility for all your dry goods. Imagine a space where your flours, sugars, spices, and leavening agents are not only visible but also easily reachable. This is the power of strategic drawer organization.
Beyond simply tidying up, an organized baking drawer offers a multitude of benefits. It drastically reduces the time spent rummaging for ingredients, streamlines your baking process, and significantly minimizes food waste by keeping items fresh and within sight before their expiration date. Furthermore, a clutter-free and visually appealing baking station transforms cooking from a chore into a pleasure. It removes the “friction” that often discourages home food preparation, making it easier to choose healthier, more frugal home-baked goods over costly and often less nutritious takeout options. So, whether your baking haven is a traditional pantry or an innovative drawer system like ours, embracing organization is an investment in a more functional, economical, and enjoyable kitchen life.
Discover more organizing ideas and subscribe to our YouTube channel for fresh content
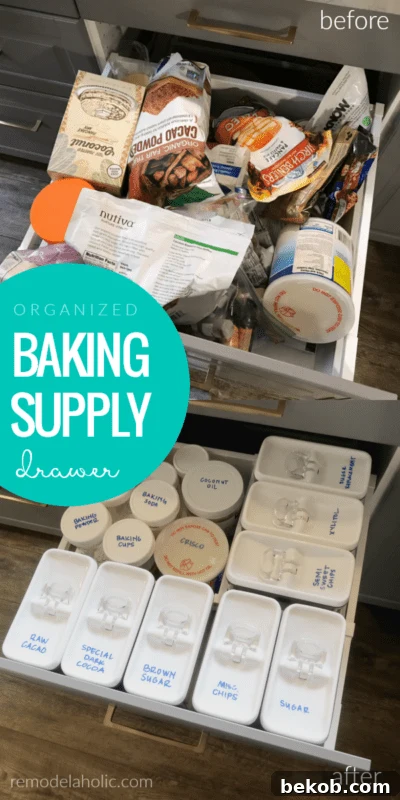
Mastering Deep Drawer Organization: A Step-by-Step Guide
The key to a perfectly organized baking drawer lies in a systematic approach. Just like we approached our spice rack and pantry labels, the goal is to make everything you need accessible and visually pleasing, enhancing both functionality and your desire to get creative in the kitchen. Here’s how we transformed our deep drawer:
Step 1: Empty and Declutter
Begin by completely emptying your drawer (or pantry). This allows you to see the full scope of what you have. Take everything out, place it on your countertop or a table, and then thoroughly clean the drawer itself. Wipe away any crumbs, flour dust, or sticky residues. This fresh start is crucial for effective organization.
Step 2: Evaluate and Purge
With everything laid out, it’s time for a critical assessment. Check expiration dates on all your baking ingredients. Discard anything expired, stale, or no longer used. If you have multiple open packages of the same ingredient, consolidate them into one container. Be honest with yourself about what you truly use regularly versus what’s just taking up valuable space. This purging step is vital for making room for what truly matters.
Step 3: Categorize and Group
Now, group similar items together. Think categories: all-purpose flour, specialty flours (almond, oat), different types of sugars (granulated, brown, powdered), leavening agents (baking soda, baking powder), extracts (vanilla, almond), sprinkles, chocolate chips, nuts, and so on. This logical grouping will be the foundation of your organized system, making it intuitive to find ingredients when you need them.
Step 4: Choose the Right Storage Containers
This is where your deep drawer truly shines as a pantry alternative. Airtight, space-efficient containers are your best friends. We specifically chose the Better Homes & Gardens food storage containers for our baking drawer, similar to those we loved in our snack pantry. Their square and rectangular shapes are excellent for maximizing space, preventing wasted gaps that round containers often create. They are sturdy, durable, and most importantly, affordable, making them an ideal solution for any budget-conscious organizer. These containers fit perfectly into our IKEA kitchen drawers, proving that you don’t need a custom kitchen to achieve a custom feel.
- Airtight Rectangular Containers (e.g., 4″ x 8″, 11.5 Cups): Perfect for larger quantities of flour, sugar, oats, or chocolate chips. Their clear design allows for easy identification of contents at a glance.
- Wide Mouth Pint and Half Ball Jars (24 oz): Excellent for smaller bulk items like dried fruits, nuts, or specialty flours. The wide mouth makes scooping easy.
- Regular Mouth Jelly Jars (12 oz): Ideal for extracts, smaller spice quantities, baking powder/soda once opened, or sprinkles. Their compact size keeps tiny items from getting lost.
- Ball Jar Wide Mouth Lids and Regular Mouth Lids: Essential for maintaining airtight freshness and extend shelf life of your ingredients.
Step 5: Label Everything Clearly
Labels are the unsung heroes of organization. Once your ingredients are in their new containers, label each one clearly. Include the ingredient name and, if desired, the expiration date or purchase date. This prevents confusion, especially with similar-looking white powders like flour, sugar, or cornstarch. For reusable containers, a wet erase marker is invaluable, allowing you to easily update labels as contents change without leaving a residue. Consider using our printable spice and pantry labels for a cohesive and stylish look.
Step 6: Strategic Arrangement
With everything contained and labeled, it’s time to arrange your baking supplies back into the deep drawer. Employ the “first-in, first-out” (FIFO) method for ingredients to ensure older items are used before newer ones. Place frequently used items towards the front for easy access. Taller containers can go at the back, while shorter ones remain visible at the front. Utilize drawer dividers or small bins within the drawer to prevent smaller items from rolling around and to maintain categories. This thoughtful placement maximizes visibility and accessibility, making your baking drawer a joy to use.
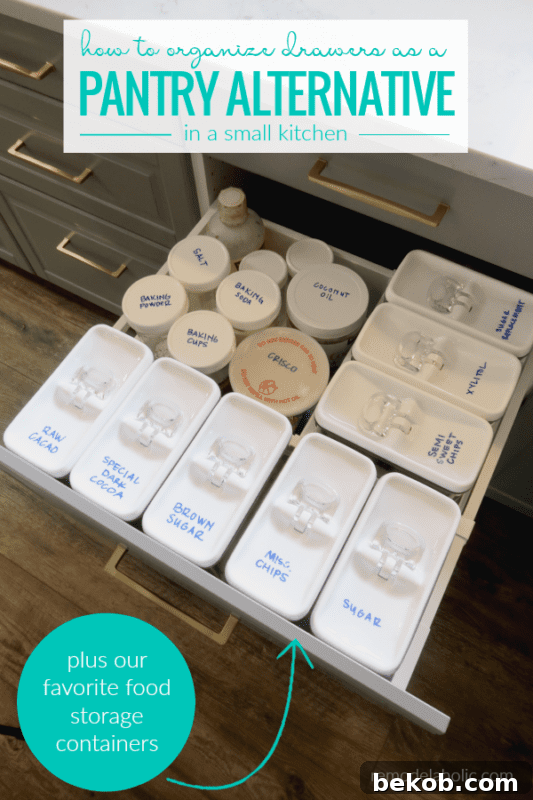
What We Used to Organize Our Baking Supplies
This post contains affiliate links. Learn more and read our full disclosure policy here.
As mentioned, our preferred choice for food storage containers comes from the Better Homes & Gardens line, which we’ve consistently used and loved. They strike the perfect balance between functionality, aesthetics, and affordability, making them an excellent investment for any kitchen. Their modular design means they fit seamlessly into various drawer and cabinet configurations.
- 4″ x 8″ Rectangular Container, 11.5 Cups (Ideal for larger bulk ingredients)
- Ball Jar Wide Mouth Pint and Half 24 oz (Great for medium-sized dry goods or nuts)
- Ball Jar Wide Mouth Lids (To ensure airtight seals for freshness)
- Ball Regular Mouth Jelly 12 oz (Perfect for smaller ingredients like extracts or sprinkles)
- Ball Regular Mouth Lids (For the smaller jelly jars)
- Wet Erase Marker (A must-have for easy, reusable labeling)
Beyond the Baking Drawer: Holistic Small Kitchen Organization
An organized baking drawer is a fantastic start, but true small kitchen efficiency often requires a holistic approach. Consider these additional strategies to maximize every inch of your kitchen:
- Vertical Space: Look up! Wall-mounted shelves, magnetic knife strips, and even pegboards can free up valuable counter and drawer space. For deep cabinets, use stackable shelves or risers to create more levels.
- Door Storage: The back of cabinet doors can be fitted with hooks or small racks for measuring cups, spices, or even pot lids.
- Smart Corner Solutions: Lazy Susans or pull-out corner units can make traditionally awkward corner cabinets highly functional.
- Mobile Storage: A small kitchen island or utility cart on wheels can provide extra prep space and storage that can be moved out of the way when not needed.
- Digital Declutter: While physically organizing the kitchen, don’t forget the digital world! Years of projects and family photos can create a daunting digital mess. Establishing a system for backing up and organizing digital files can save you headaches down the road. If you have tips for us on this front, we’re all ears!
Remember, organizing is a continuous journey, not a one-time destination. It’s about creating systems that work for your lifestyle and maintaining them with small, consistent efforts. Your kitchen, no matter its size, can be a highly efficient and enjoyable space for all your culinary adventures, from simple weeknight meals to baking your favorite pies.
More Kitchen Organizing Inspiration:
Discover how we tackled other challenging kitchen areas, providing practical solutions for everyday living.
Our Organized Pantry Roll-outs
Organized Spice Rack + Printable Spice and Pantry Labels
Our Countertop Spice Storage Cupboard
And for even more ideas, check out 25 More Clever Kitchen Storage Ideas
Embrace a More Organized and Joyful Kitchen Life
Organizing your baking drawer, especially in a small kitchen, is more than just tidying up; it’s about reclaiming your space, saving time, reducing waste, and fostering a deeper love for cooking and baking at home. By implementing these strategies, your deep drawers can become efficient, accessible pantry alternatives that support your culinary endeavors. This quest for an organized life is a gradual process, but each completed project, like this baking drawer transformation, brings immense satisfaction and tangible benefits to your daily routine. We hope this guide inspires you to tackle your own organizing challenges, whether in the kitchen or the digital realm. What organizing projects are you currently tackling in your home? Share your journey with us!