
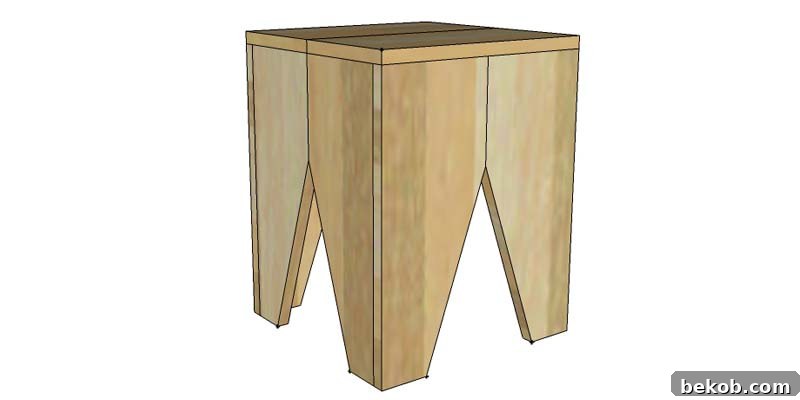
Build Your Own Modern Block Stool: A Step-by-Step DIY Guide
Looking for a simple yet stylish way to add extra seating to your home? This modern block stool is the perfect DIY project! Inspired by contemporary design and natural materials, this stool is both functional and aesthetically pleasing. Follow this easy-to-understand guide to create your own unique piece of furniture.
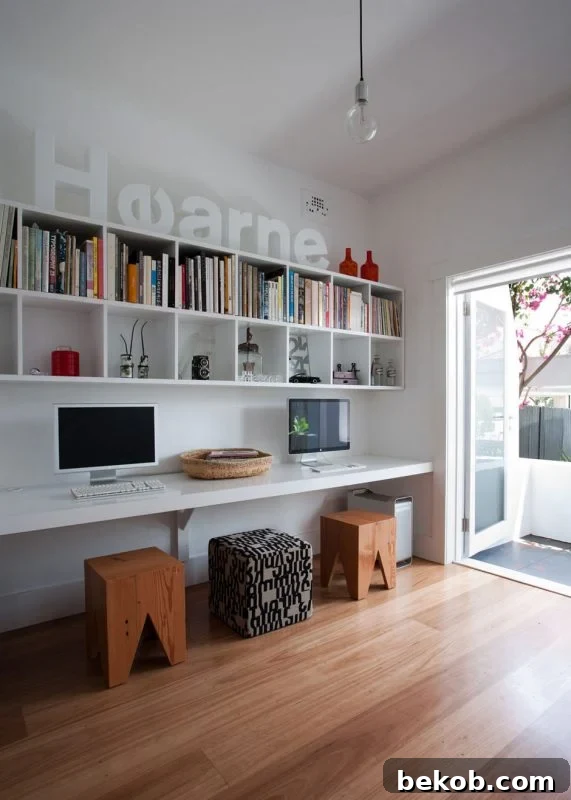
Inspiration for our DIY modern block stool project.
Why Build a Block Stool?
Block stools offer a blend of simplicity and modern design, making them a versatile addition to any home. They’re ideal for:
- Extra Seating: Perfect for accommodating guests or adding seating to small spaces.
- Home Decor: Their minimalist design complements various interior styles.
- DIY Fun: An enjoyable and rewarding project for woodworking enthusiasts.
- Customization: Easily customizable to match your preferred colors and finishes.
- Cost-Effective: Building your own stool is significantly cheaper than buying one.
Step-by-Step Guide to Building Your Block Stool
This guide provides detailed instructions to help you build your own modern block stool. Let’s get started!
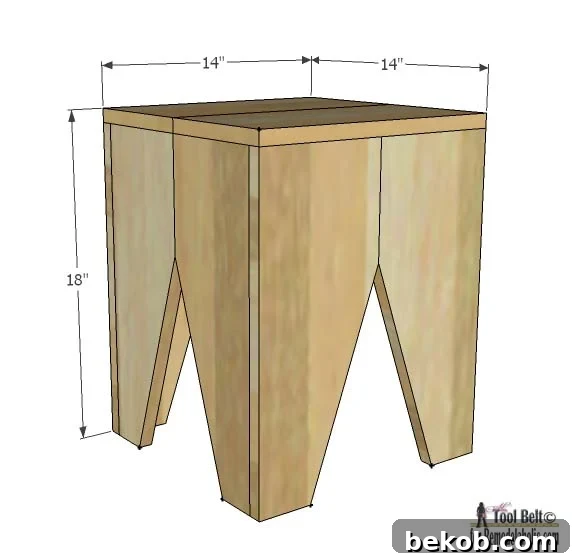
Overall dimensions for the modern block stool.
Materials You’ll Need:
- 2 – 1″ x 8″ x 8′ lumber (pine, poplar, or your preferred wood)
- 1 1/4″ pocket hole screws
- 1 1/2″ brad nails (optional)
- Wood glue
- Sandpaper (various grits, from coarse to fine)
- Wood filler
- Paint, stain, and top coat (or your preferred finish)
Estimated Wood Cost: Approximately $18 (depending on wood type and location)
Tools Required:
- Miter saw or circular saw
- Jigsaw (optional, for angled cuts)
- Pocket hole jig (Kreg jig recommended)
- Drill
- Brad nailer (optional)
- Clamps
- Sander
- Measuring tape
- Pencil
- Safety glasses
- Ear protection
Cut List:
- 4 – 7″ x 17 1/4″ (Leg Pieces – Large)
- 4 – 6 1/4″ x 17 1/4″ (Leg Pieces – Small)
- 2 – 7″ x 14″ (Top Pieces)
Detailed Instructions:
Follow these steps carefully to ensure a sturdy and well-constructed block stool.
Step 1: Preparing the Large Leg Pieces
Begin by shaping the larger leg pieces. This involves making angled cuts to create the distinctive block stool design.
- Take each of the four 7″ x 17 1/4″ boards.
- Measure 6″ down on one side.
- On the opposite end, measure 3″ over.
- Mark a line connecting these two points.
- Carefully cut along the marked line using a jigsaw or circular saw. This creates the angled edge.
- Repeat this process for all four large leg pieces.
- Drill pocket holes on the inside face of two of the leg pieces. This will be used to connect the legs.
- Apply wood glue to the edges that will be joined.
- Use 1 1/4″ pocket hole screws to join two 7″ boards together, forming two larger leg assemblies.
- Clamp until the glue dries.
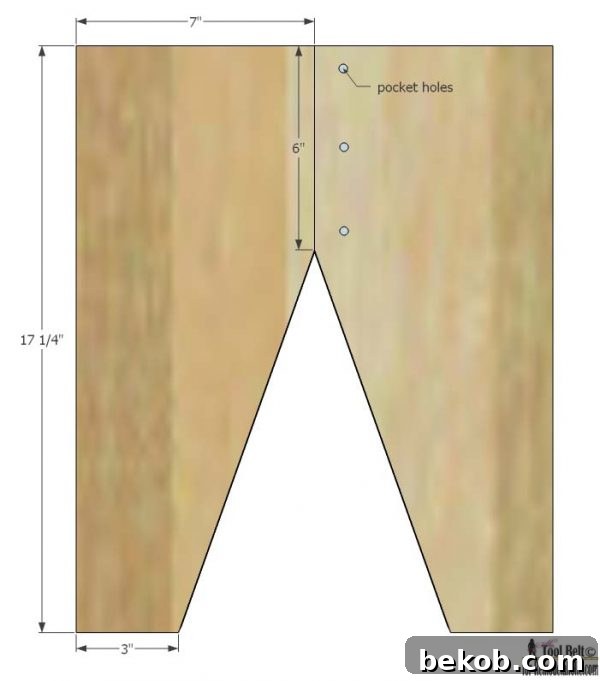
Creating the angled cut on the large leg pieces.
Step 2: Preparing the Small Leg Pieces
Next, prepare the smaller leg pieces, which will complement the larger ones to form the stool’s base.
- Take each of the four 6 1/4″ x 17 1/4″ boards.
- Measure 6″ down on one side.
- On the opposite end, measure 2 1/4″ over.
- Mark a line connecting these two points.
- Cut along the marked line using a jigsaw or circular saw, creating the angled edge.
- Repeat this process for all four small leg pieces.
- Drill pocket holes on the inside face of two of the leg pieces, focusing on the edges that will be joined.
- Also, drill additional pocket holes that will be used to assemble the stool and attach the top later.
- Apply wood glue to the edges of the small leg pieces.
- Use 1 1/4″ pocket hole screws to join two 6 1/4″ boards together, forming two smaller leg assemblies.
- Clamp until the glue dries.
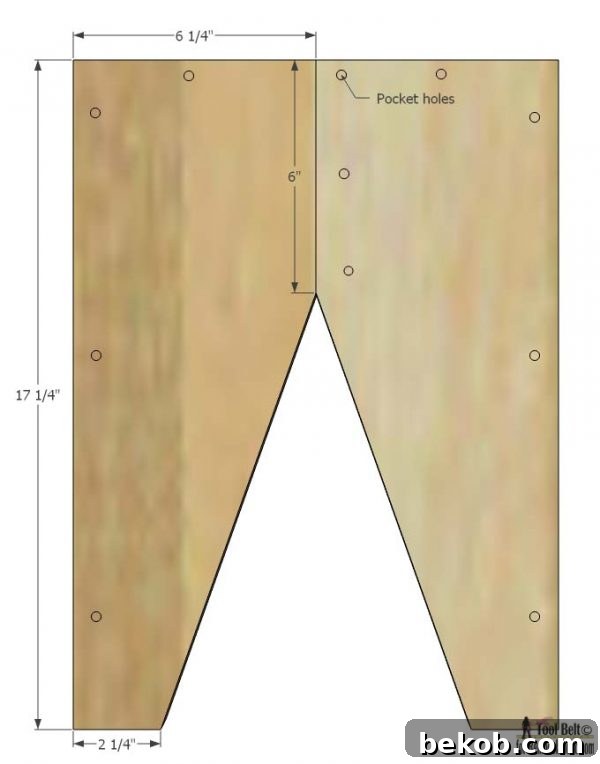
Creating the angled cut on the small leg pieces.
Step 3: Constructing the Stool Top
Now, let’s assemble the stool top. This will provide a comfortable and stable seating surface.
- Take the two 7″ x 14″ pieces.
- Drill pocket holes in one of the 14″ pieces along the edge that will be joined.
- Apply wood glue to the edges of both pieces.
- Use 1 1/4″ pocket hole screws to join the two pieces together, creating the stool top.
- Clamp until the glue dries.
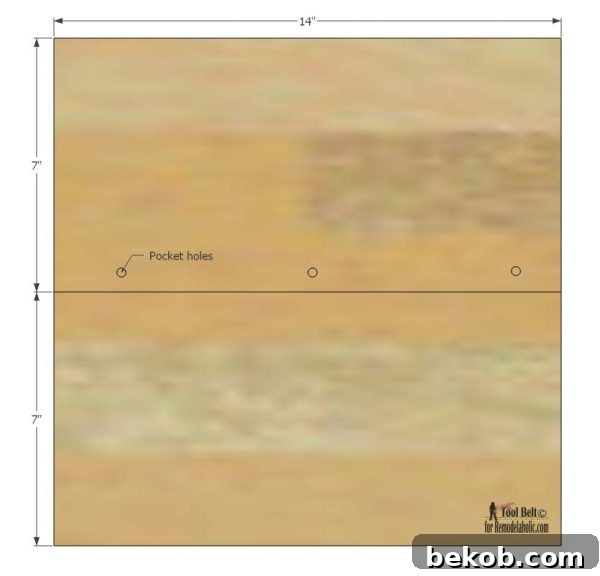
Joining the pieces to create the stool top.
Step 4: Assembling the Stool Base
With the leg pieces and top prepared, it’s time to assemble the stool base and attach the top.
- Assemble the base pieces by connecting the large and small leg assemblies.
- You can use 1 1/4″ pocket screws on the inside for a cleaner look or 1 1/2″ brad nails for a quicker assembly.
- Ensure the corners are aligned properly for stability.
- Once the base is assembled, attach the top to the base using 1 1/4″ pocket hole screws or 1 1/2″ nails.
- Make sure the top is centered on the base before securing it.
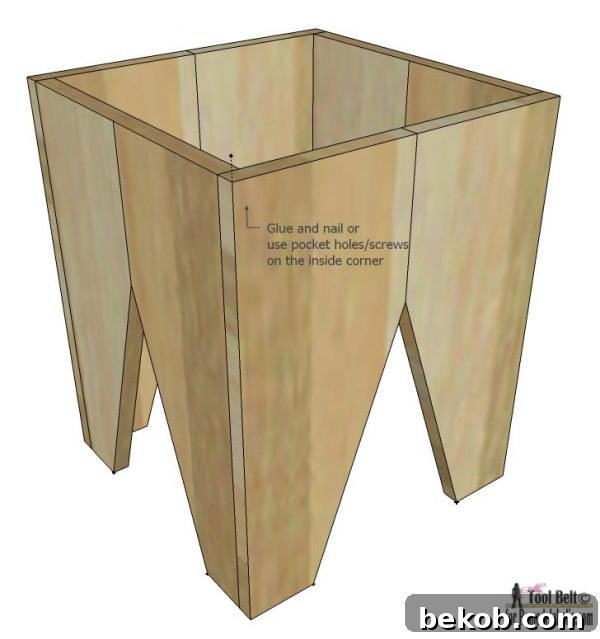
Connecting the leg pieces to form the stool base.
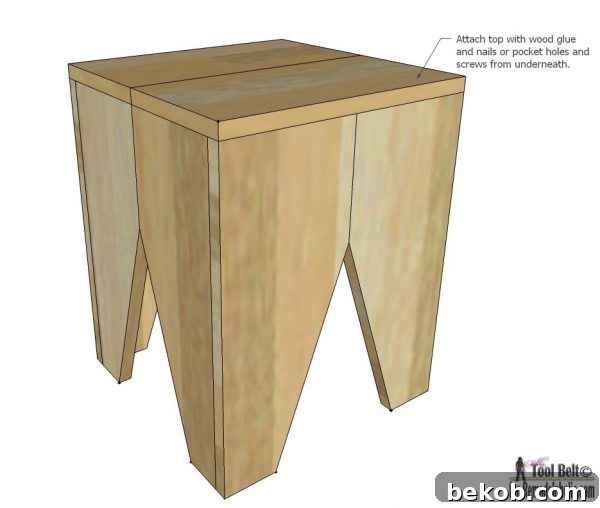
Attaching the stool top to the assembled base.
Step 5: Finishing Touches
The final step involves refining the stool’s appearance and protecting the wood.
- Fill any cracks, blemishes, or screw holes with wood filler and allow it to dry completely.
- Sand the entire stool, starting with a coarser grit sandpaper and finishing with 120-150 grit paper. Sand in the direction of the wood grain for a smooth finish.
- Choose your desired finish: paint, stain, or a clear top coat. Apply the finish according to the manufacturer’s instructions.
- Allow the finish to dry completely before using the stool.
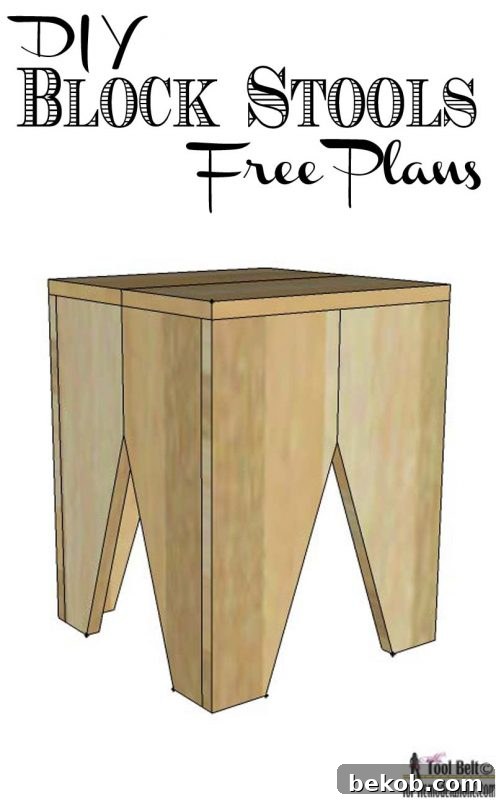
The completed modern block stool, ready to use.
Enjoy Your New Block Stool!
Congratulations! You’ve successfully built your own modern block stool. This stylish and functional piece will add a touch of contemporary design to your home. Enjoy your new creation!
More DIY Projects You Might Like
If you enjoyed this project, check out these other DIY furniture plans and tutorials:
| Shoe Shelf Bench | Star Wars Shelf | Curvy Side Table |
——————————————–
Explore More Seating Options:
| Rustic Farmhouse Bench | Modern Bar Stool |
| Entryway Bench with Storage | Comfortable Indoor Seating |