
Welcome back to our extensive upstairs bathroom remodel series! If you’re just joining us, you can catch up on our transformation journey through these previous installments:
- Wet Your Appetite, Part 1
- Got Paint, Part 2
- Tile with Style, Part 3
- For Vanity’s Sake, Part 4
- Mirror Mirror, Part 5
Over-the-Toilet Cabinet: A Custom Storage Solution for Small Bathrooms
It feels like an eternity, but our custom over-the-toilet cabinet is finally here! The journey to this reveal has been a testament to the unpredictable nature of home renovation projects. From the initial cabinet build taking longer than anticipated to navigating the distractions of Thanksgiving and Christmas holidays, progress can often feel like a leisurely stroll rather than a sprint. We’ve all been there – the best-laid plans often face unexpected delays. But rather than dwelling on the excuses, we embrace the reality that good things take time, especially when you’re crafting something custom with your own hands.
Through this remodeling adventure, one valuable lesson has emerged: it’s often best to complete a project entirely before diving into the detailed sharing process. This allows for a comprehensive overview, showcasing the full transformation and avoiding the awkward pauses of an unfinished narrative. After all, living in a state of perpetual renovation has become somewhat of a norm for us. I recall a period in college where our hallway sub-floor remained uncovered for over three years – a minor inconvenience that taught me a deep tolerance for “work-in-progress” environments! However, for our readers, a finished reveal is always more satisfying.
Maximizing Space: Why an Over-the-Toilet Cabinet is Essential
One of the primary motivations behind this entire bathroom remodel, particularly in a compact space, was the critical need for an above-the-toilet cabinet. Small bathrooms often present significant storage challenges, especially when modern vanities lack the practical drawer space we’ve come to rely on. Our tiny vanity, for instance, offered zero drawers, making the quest for organized storage an absolute priority.
An over-the-toilet cabinet provides a multitude of benefits. Firstly, it allows for the secure and discreet storage of cleaning products, keeping them out of sight and safely out of reach of children or pets. Secondly, it creates invaluable vertical space for toiletries, linens, and other bathroom essentials, effectively decluttering countertops and making the bathroom feel more spacious and serene. This strategic use of vertical real estate is a game-changer for any small bathroom struggling with storage limitations.
Recycling and Reinvention: Our Budget-Friendly Approach to Bathroom Storage
This isn’t our first foray into over-the-toilet storage. In a previous home, we had a similar setup and truly missed the functionality it offered. Back then, we creatively modified a standard, store-bought “over-the-commode” cabinet – those units typically come with legs. We simply chose not to install the legs, instead securing the cabinet directly to the wall studs with heavy-duty screws. It was an incredibly easy and effective customization that transformed a somewhat cumbersome piece into a sleek, wall-mounted solution. This experience reinforced our belief in the power of smart, space-saving storage.
This time around, however, our goal was even more ambitious: to achieve this essential storage solution with virtually no budget, or at most, a very minimal spend. Our quest led us to a local treasure trove for DIY enthusiasts: The Habitat ReStore. This fantastic resource allows you to find salvaged building materials and home goods at incredibly low prices, not only saving money but also contributing to environmental sustainability by diverting items from landfills.
Our initial score was a perfect cabinet door, found for a mere $4.00! This single find became the cornerstone of our new project, dictating the dimensions and style of the custom cabinet we planned to build around it. The satisfaction of finding such a key component at such a bargain price is truly unparalleled in the DIY world.
From Concept to Creation: Designing Our Custom Cabinet
With the cabinet door in hand, the real design work began. My incredibly talented partner, Justin, took my specifications and transformed them into a tangible design. He meticulously planned the cabinet’s structure, ensuring it would seamlessly integrate into our bathroom while providing maximum functionality. What truly set this process apart was his use of 3D rendering software. Before a single piece of wood was cut, we could visualize the cabinet from every angle, understanding its proportions and how it would interact with the existing space. He even created a rendering with a mirror on the inside of the door – a thoughtful touch we considered for added utility.
(An example of the type of over-the-commode cabinet we previously modified. Our new custom build offers an even more integrated look.)
(Detailed 3D renderings allowed us to visualize and perfect the design before construction began.)
This iterative design process, involving tweaks and adjustments, ensured that the final product would perfectly meet our functional and aesthetic needs. Once the design was finalized and approved, Justin was ready to bring it to life.
Building on a Budget: Upcycled Wood for a Custom Look
True to our “zero-cost” ethos, the construction of the cabinet utilized entirely old, recycled wood. This not only kept our expenses at an absolute minimum – effectively making the cabinet FREE to build, save for the $4 door – but also added a unique character and sustainable element to our bathroom remodel. Salvaged wood often carries a story, and its imperfections can add a beautiful, rustic charm that new materials simply can’t replicate. It’s a fantastic way to achieve a custom, high-end look without the high-end price tag.
Above, you can see the cabinet coming together before any paint was applied. The raw, reclaimed wood stands out, a testament to our commitment to upcycling and affordability. This hands-on process, from concept to assembly, embodies the true spirit of DIY home improvement.
(The completed cabinet frame, ready for its finishing touches.)
The Finishing Touch: Painting for Protection and Polish
While the actual painting process lacked its dedicated photo-shoot – a common oversight when you’re deeply engrossed in a project – the transformation it brought was undeniable. A fresh coat of paint not only protects the wood from moisture and wear, essential in a bathroom environment, but also brings the entire piece together, seamlessly integrating it into the bathroom’s aesthetic. The choice of paint color can dramatically alter the feel of a room, and for this cabinet, it provided that final polish, elevating its look from raw wood to a finished, elegant fixture.
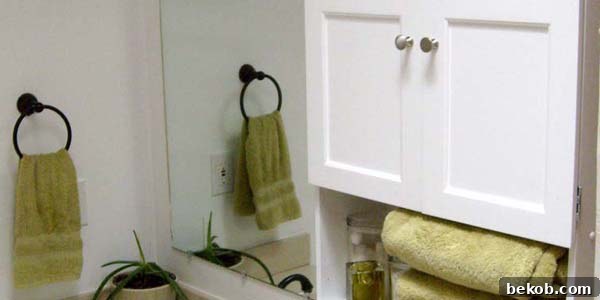
(The final, beautifully painted cabinet, now installed and ready for use.)
And there it is – our new custom cabinet, looking absolutely fantastic! The contrast between the raw wood and the smooth, finished surface is truly satisfying. It perfectly addresses our storage needs while adding a bespoke touch to the bathroom, demonstrating that functionality doesn’t have to sacrifice style, especially on a budget.
What’s Next for Our Upstairs Bathroom Remodel?
With the cabinet now a proud fixture, the next exciting phase involves accessorizing and updating a few remaining fixtures to complete the cohesive look. These smaller details often have the biggest impact, transforming a functional space into a truly personal oasis. We’ll be tackling these final touches in the coming days.
Next week, I’ll be sharing these delightful minor fixes and updates, followed by a comprehensive summary post of the entire upstairs bathroom remodel. You won’t want to miss the grand reveal of the fully transformed space!
Stay tuned as we bring this extensive remodel to a close, and get ready for a full tour of our rejuvenated bathroom.
We are thrilled to share our remodeling journey and this custom cabinet project with fellow DIY enthusiasts and home improvement lovers. You can find this post and many other inspiring ideas at these fantastic link parties:
Reinvented,
Today’s Creative Blog, and
2nd Time Around Tuesday.
Thank you for following along!