Materials and the sequence of the job sit together on this page.
Submitted By Keeping It Cozy
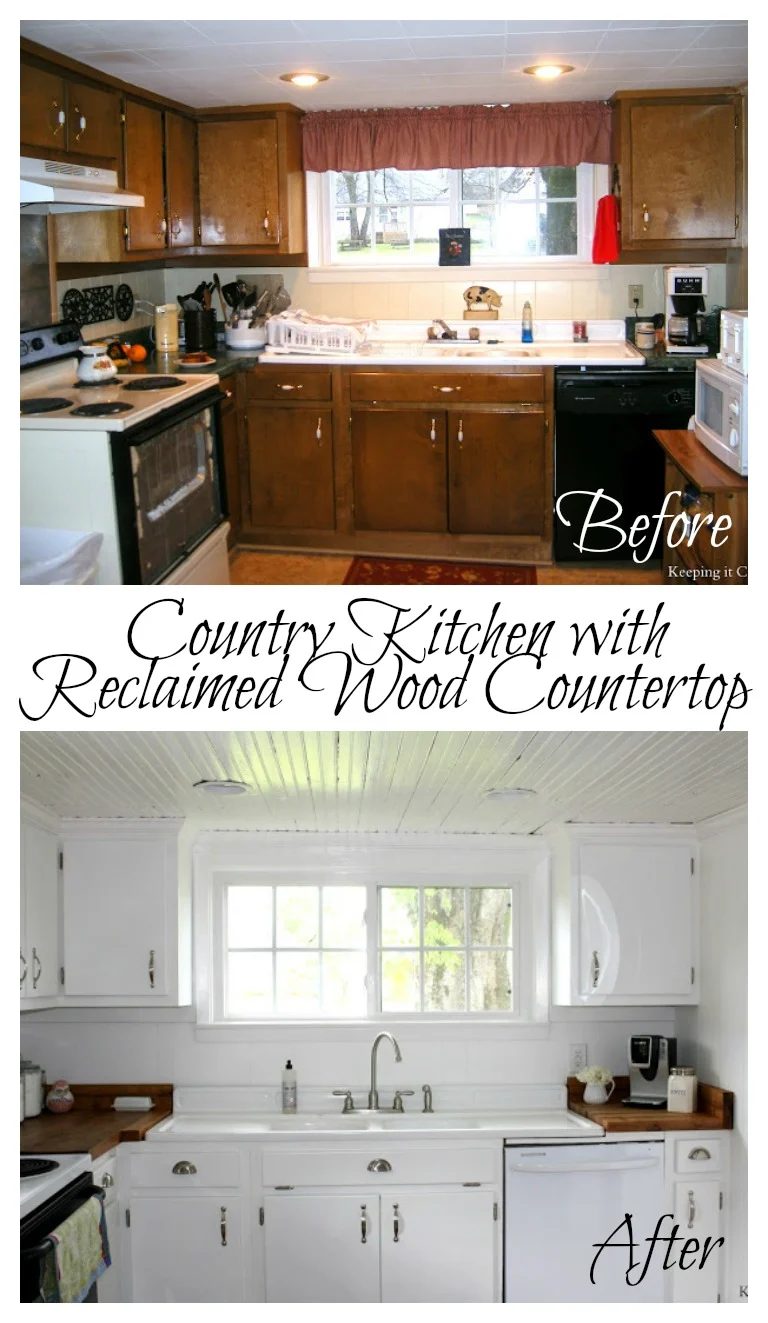
The reason I decided to share this is because we actually did this makeover on a modest-cost of $1000. I always feel like paint is the most affordable way to completely make over a room and painting kitchen cabinets are a well fitted example. The other ways to affect a remodel on a modest-cost are to be resourceful, use existing elements if possible, prioritize those things you feel are worth the extra money and finally, do the work yourself!
BEFORE:
This is how the kitchen looked when we did a walk-through on the house. Can you believe that I lived with it like this for almost a year? But it was almost exactly a year ago (I was 6 months pregnant at the time) that we were ready to tackle the kitchen!
Believe it or not, we did the majority of the work one Saturday. My daughter spent her first night away from home with her grandma and we worked all day and some of the night. I did all of the painting while Justus took care of trim work, light fixtures, and other time consuming details.
I had never painted cabinets before (in our previous house we purchased new cabinets when remodeling our kitchen) and I was very nervous. But there was really no reason to replace these cabinets. Sure, they were ugly, but these cabinets were as solid as could be, made with thick oak wood.
I visited our local Benjamin Moore store and they helpfully pointed me in the right direction as far as what kind of primer to purchase and a cabinet paint roller. The $6 for the cabinet paint roller was worth every penny! (smile) I originally wanted to use an oil-based primer, but since I was pregnant at the time, we went with latex. I painted one coat of primer and three coats of paint.
AFTER:
I used the same color for the cabinets and walls (Simply White by Benjamin Moore). Since our kitchen is on the small side, I knew white would not only brighten the space, but also make it appear larger.
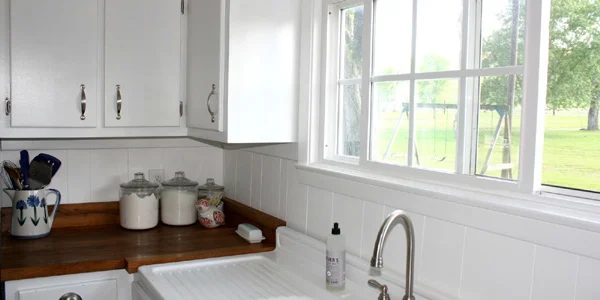
If you’ve read about our butcher block countertops, then you know they are something I have always wanted. The warmth of wood looks striking with an all white palette. These countertops are my go-to thing in our kitchen. They were made by my husband and father-in-law from 100-year-old reclaimed barn wood (you can read more about them here).
We were fortunate that the countertops were essentially free since my father-in-law had the wood and tools needed to build the countertops on hand. The countertops are an example of being resourceful though… sometimes unique and lovely things can come about when you have to think outside the box.
BEFORE:
When we purchased our house, the original bead board was covered with foam tiles. Justus and I had no option what the condition of the bead board would be in when he removed the tiles. He did the laundry room and kitchen at the same time and we were pleasantly surprised that although the bead board was covered in pealing old teal paint and had a few holes, it was in a salvageable condition. This was a very dirty project and Justus did it all himself since I was pregnant and we knew we were potentially dealing with lead-based paint. He shut off this section of the house for a day and wore a face mask when sanding and making repairs. He then added a coat of primer and a coat of paint before opening this section back up. I added three more coats of paint after that to ensure everything was sealed properly and would be for several more years.
AFTER:
By renovating the ceiling, we were able to raise the ceiling height by a good 4″. This was a very positive thing since the back portion of our house originally was a porch (before there was such a thing as indoor plumbing) and has a lower ceiling height than the rest of the house. Justus added trim on top of the cabinets for a finished look.
The farmhouse sink is also original to the house and fortunately is in excellent condition. We did replace the faucet and spent about $200 on it I believe. I purchased the cabinet hardware off of Ebay for about 1/3 of the price of what we would have spent somewhere like Lowe’s. We also replaced the dishwasher.
The white bead board cabinet is something I found prior to purchasing our home and I use it for a pantry (you can read more about it here).
Later I purchased this wood piece at a local antiques store and I use it for extra storage since we have a limited number of cabinets. I love both pieces in the kitchen since I feel like they worth keeping been made around the same time period as our house and the bead board gives a cohesive look.
BEFORE:
AFTER:
This view is looking into the laundry room and then a bathroom. Eventually we’ll replace the floors in this portion of the house to match the rest of the downstairs. We left the walls as they were because the bead board behind didn’t appear to be in good condition from what we could see and although this is a type of paneling, it is solid wood about 1/4″ thick. And actually I feel like a little variation from bead board is okay… our entire house is bead board!
I found this farmhouse table for something like $40 and refinished it. We love this old table and even though we’re a little crowded, we usually eat our family meals here instead of the dining room.
Some day we’ll replace the refrigerator and stove, but for now, these work fine.
Although our kitchen is by no means well fitted, it’s cheerful, charming and the heart of our home. I don’t feel like you have to spend a lot of money to bring about some major improvements. We have some options in mind for additional improvements, but with an old house, a modest-cost, and limited time, you learn to prioritize home repair projects and be content until the time is right.
For fun, here is a list of what we purchased for our kitchen makeover with approximate prices:
– Paint $100
– Cabinet Roller $6
– Trim $75
– Faucet $200
– Cabinet Hardware $85
– Light fixtures and covers $150
– Dishwasher $400
My butcher block countertops may be my go-to thing in my kitchen. When we remodeled our kitchen last year, I told my husband that my ONE requirement was that I wanted butcher block countertops.
The only problem? The affordable butcher block (Ikea) was 5 hours away and butcher block offered online was back-ordered up to 6 weeks. That was when my husband asked, “Why don’t I just make them?”
Lucky for me, my father-in-law had literally a pile of 100-year-old oak wood from an old chicken house. He also had the power tools needed to build the countertops. Although power tools are needed, the process is quite direct:
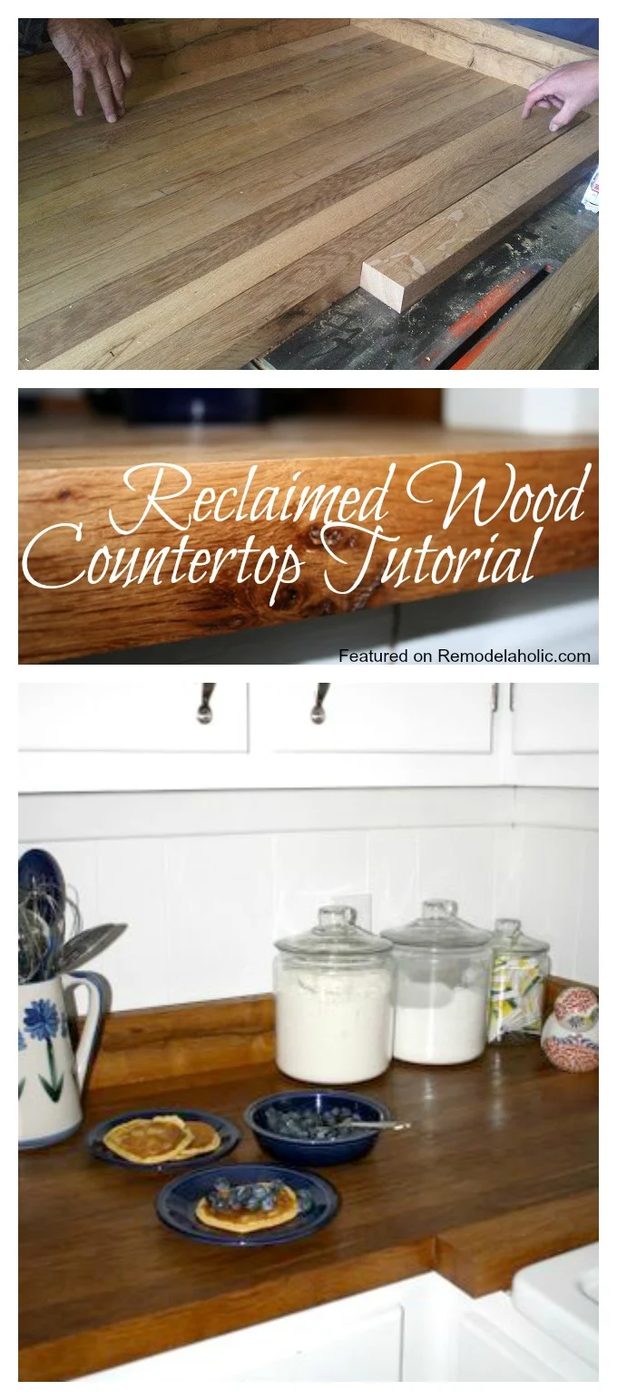
Handmade Reclaimed Wood Countertop walkthrough
1. Find your wood. Good, straight boards without nails that have at least a quarter inch that can be planed down would be your ideal choice.
2. Plane boards to your desired thickness with a planer.
3. Cut slats to desired widths.
4. Place all boards in a jig that keeps it square.
5. Glue each slat with Tight Bond wood glue.
6. Clamp pieces together.
7. Place weight (at least 200 lbs) on top of countertop to keep boards from pushing up.
8. Wait at least a few days for glue to cure.
9. Attach backsplash.
10. Sand to desired smoothness and to sand out any glue that has pushed out through the seams.
11. Install!
Here is a picture of the butcher block being built.
When my husband brought the countertops home to be installed, I was blown away by how striking they were. I love all the little “imperfections” in the reclaimed wood, like the worm holes and nail holes. To me, that’s just another piece of history in our home.
The countertops are 1.5″ thick. See the old knot in the wood?
There is also a backsplash. I had not originally thought we would have one, but I love the additional warm wood in the white kitchen. Do you see the nail holes at the top of the backsplash?
I was worried that butcher block would be hard to maintain. While I wasn’t planning on using the surface for cutting, what if I damaged the surface? How would it hold up with water? I have been so pleased. If you do have an imperfection, you simply sand the surface and reseal, but in the year I’ve had these (and I cook every day), I have not once had to sand out an imperfection. While I am careful not to leave pools of water on the counter tops, they see dribbles of water, grease and other food ingredients every day.
What product did I use to seal them? I read about many different products and saw some wonderful reviews, but in the end I decided to use what my father-in-law recommended. It’s Behlen Salad Bowl Finish. You can purchase it online; it is affordable and you will find it lasts a long time. The instructions are provided on the product, but basically we sanded down the surface to a smooth finish and then applied a thin coat of the product with a lint-free white cloth. We applied 3 coats initially, allowing the product to dry completely in between. Every 4-6 months, I empty the countertops and reapply a coat. Once fully cured, salad bowl finish is completely food safe and non-toxic. It contains only FDA approved ingredients.
To clean the countertops, I typically use a mild dish soap with water and then dry with a cloth. I also keep a spray bottle with white vinegar and water handy and use this combination often to disinfect the surface.
Now that I have had the countertops for a year and realize how durable they are, I am not nearly as cautious as I was in the beginning, but I do try to keep the surface as dry as possible.
If you are researching countertops, I cannot recommend butcher block enough! It is sturdy, easily maintained, natural, and even has anti-bacterial properties. The definition of “reclaimed” is to bring into or return to a suitable condition for use. I love that something striking was made out of an old pile of barn wood – something to be made for many more years of use.
BEFORE:
AFTER: