
Create Your Own Stunning DIY Branch Silhouette Artwork: A Step-by-Step Guide
There’s something incredibly satisfying about creating your own custom artwork, especially when it transforms a space in your home. Instead of spending a fortune on generic store-bought pieces, imagine crafting a unique masterpiece that perfectly reflects your style and vision. Just like Amanda from Our Humble Abode, who inspired many with her beautiful custom branch silhouette art, we believe in the power of handmade decor. Embracing the DIY spirit not only saves money but also infuses your home with unparalleled personality and charm. We’ve previously delved into custom mosaic wall art, which you can explore here, demonstrating the versatility of personal artistic expression. Today, we’re going to guide you through the process of creating your very own elegant branch and leaf silhouette painting, perfect for adding a touch of nature-inspired serenity to any room, particularly a bathroom.
Why Choose DIY Custom Artwork for Your Home?
The allure of custom artwork extends far beyond mere aesthetics. Opting to create your own piece offers a myriad of benefits that mass-produced items simply cannot match. Firstly, it ensures complete originality. Your painting will be a one-of-a-kind creation, imbued with your personal touch and artistic choices. This exclusivity makes it a powerful focal point in any room, sparking conversations and admiration. Imagine having a piece of wall art that truly nobody else in the world possesses – a reflection of your unique taste and effort.
Secondly, DIY art is incredibly cost-effective. While high-quality art can command hefty price tags, crafting your own allows you to achieve stunning results using readily available and inexpensive materials. This makes home decoration accessible, regardless of budget constraints. Whether you’re repurposing scrap materials, utilizing old paint samples, or simply investing in a few basic art supplies, the financial savings can be substantial. Furthermore, the creative process itself is immensely rewarding. Engaging in artistic endeavors provides a wonderful outlet for stress relief and self-expression, fostering a sense of accomplishment and pride that lasts long after the paint dries. It’s a therapeutic activity that yields a tangible reward.
Lastly, custom art offers unparalleled personalization. You get to choose the exact colors, dimensions, and subject matter that perfectly complement your existing decor and personal taste. Whether you’re aiming for a minimalist look, a nature-inspired theme, or a bold abstract statement, the possibilities are endless when you’re the artist. For our project, we aimed for a calming, natural motif to enhance our main bathroom, proving that even a functional space can be elevated with thoughtful, handmade decor. This level of customization ensures that the art doesn’t just hang on your wall; it becomes an integral part of your home’s personality and atmosphere.
Preparing Your Canvas: The Foundation of Your Masterpiece
Every great painting begins with a well-prepared surface. For this project, we chose Medium-Density Fiberboard (MDF) due to its smooth finish, stability, and affordability. MDF offers an excellent, uniform surface for painting, making it a popular choice for DIY projects. After a previous project involving spray painting a new magnet board for Vincent, our thoughts turned to creating something special for our main bathroom. We scoured our garage and discovered a conveniently sized scrap of 1/2-inch thick MDF, measuring approximately 13 inches by 31 inches. While our ideal dimensions for a truly elongated statement piece were closer to 12 by 36 inches, this scrap was close enough to work with and saved us a trip to the hardware store for cutting and purchasing new materials.
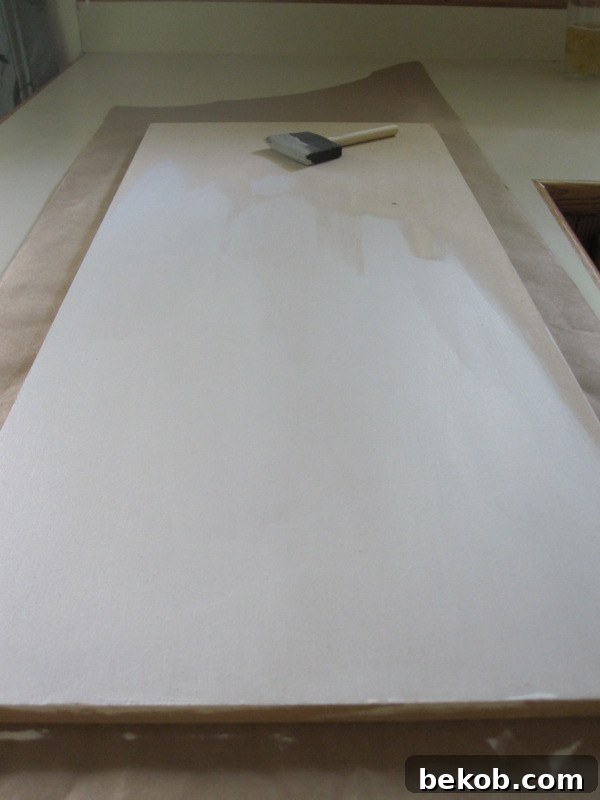
Once the MDF piece was selected, the preparation began in earnest. First, a quick but thorough cleaning was essential to remove any dust, grime, or oils that could impede paint adhesion. A damp cloth followed by a dry one did the trick, ensuring a pristine surface. The next crucial step was applying a coat of high-quality primer to all sides of the MDF. This isn’t merely about getting a good base for your paint; it serves a vital protective function, especially when the artwork is destined for a high-humidity environment like a bathroom. Primer also helps the paint adhere better and provides a uniform surface for your artwork’s colors to truly pop.
The Importance of Priming All Sides for Durability
MDF, while versatile and cost-effective, is inherently susceptible to moisture absorption. If left unsealed, it can easily swell, warp, and ultimately, compromise the integrity and appearance of your artwork, particularly in a high-humidity setting like a bathroom. By meticulously priming and then painting all sides – including the often-overlooked edges – we effectively seal the MDF. This creates a robust, protective barrier that prevents humidity from penetrating the board and causing unsightly damage or structural degradation. This diligent preparation is not just a recommendation; it’s a critical step that ensures the longevity and enduring beauty of your finished piece, allowing it to withstand the rigors of a moist bathroom environment for many years to come, keeping your custom art looking fresh and vibrant.
Finding Your Muse: Nature’s Inspiration for Your Silhouette
Inspiration for your DIY art project can strike in the most unexpected places. For this particular project, the muse arrived in the form of natural light and shadow play. The late afternoon sun, filtering through the dense canopy of leaves on our backyard tree, cast intricate and ever-changing silhouettes onto the walls of our house. These organic patterns, fluid and graceful, immediately sparked the idea for a branch and leaf silhouette painting. It’s a wonderful testament to how everyday observations – something as simple as sunlight through trees – can be transformed into profound artistic concepts that bring a sense of calm and nature indoors.
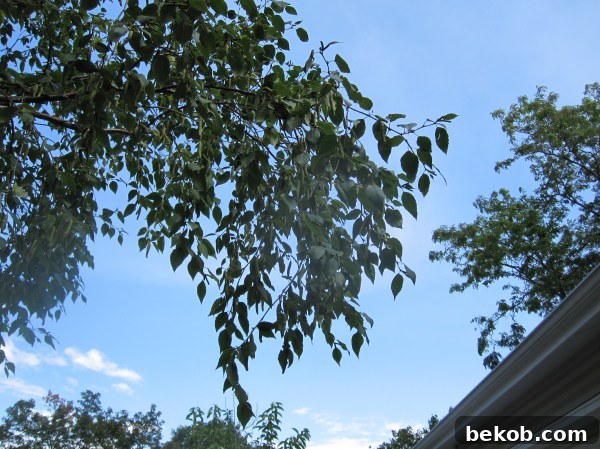
To capture this fleeting beauty and ensure accuracy in our design, we stepped outside to take a high-resolution reference photograph of the tree’s branches and leaves. This photo would serve as our primary guide, allowing us to accurately replicate the natural forms, delicate interplay of light and shadow, and the unique arrangement of the foliage. When seeking inspiration for your own projects, consider looking to your immediate surroundings: the patterns in textiles, the lines of architectural elements, the intricate details of flora and fauna, or even abstract shapes found in everyday objects. A simple photograph or even a quick sketch can become an invaluable tool for translating real-world beauty into a painted masterpiece, providing a solid foundation for your creative vision.
Sketching Your Silhouette: Bringing the Design to Life
With our primed canvas ready and inspiration firmly in hand, the next crucial step was to translate the natural beauty of the leaves onto the MDF board. After ensuring both the primer and the initial coat of white background paint were completely dry – patience here prevents smudging and ensures crisp lines – we began the sketching phase. Using our reference photograph as a guide, we lightly drew the outlines of the leaves with a pencil directly onto the painted MDF surface. The goal here is not necessarily perfection in exact replication, but rather an approximation that captures the general shape, flow, and spatial placement of the natural elements. Light pencil strokes are key, as they are easier to erase or paint over.
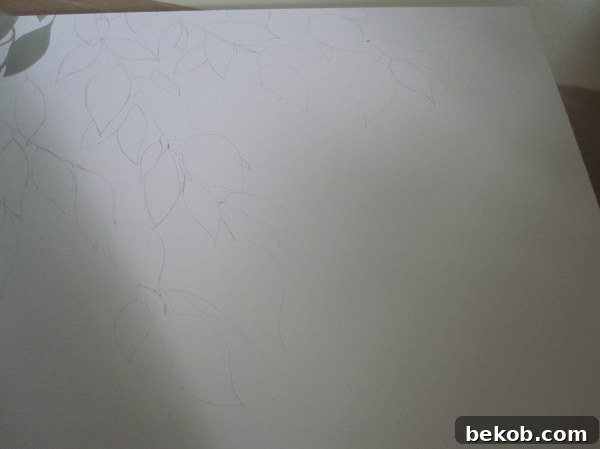
Some areas where the leaves were densely clustered in the photo presented a challenge for exact replication due to their intricate overlaps. This is precisely where artistic freedom comes into play and is encouraged. Instead of stressing over precise duplication, we embraced the opportunity to adapt the design, drawing leaves as we liked, ensuring a balanced, aesthetically pleasing, and coherent composition that felt organic yet refined. This flexibility is a key aspect of DIY art – it’s about making the project uniquely your own and enjoying the process. Within about 10 minutes, approximately half of our leaf template was complete, laying the exciting groundwork for the painting to begin and bringing our vision one step closer to reality.
Mixing Custom Colors and Painting the Silhouette
Choosing the right color is crucial for a silhouette piece, as it defines the form sharply against the background, setting the overall mood of the artwork. For this project, we opted for a sophisticated and versatile “greige” – a beautiful blend of grey and beige that offers both warmth and neutrality. This particular hue provides a subtle elegance that complements various interior palettes. To achieve this custom color, we mixed a small amount of black paint with a generous quantity of white, and then carefully introduced a touch of yellow to give it that subtle, earthy beige undertone. Experimenting with color ratios in a separate, small container or on a scrap piece of paper is highly recommended to get your desired shade before committing it to your main artwork. This prevents waste and ensures color satisfaction.
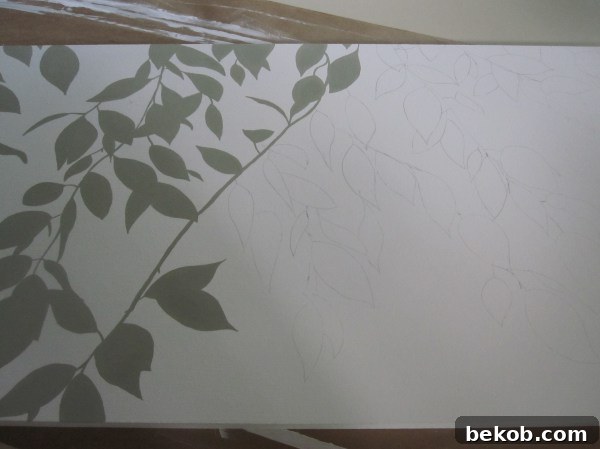
Once the custom greige was perfected and ready, we began the careful process of filling in the drawn leaf outlines. This stage requires patience, a steady hand, and a focus on detail. Using a fine-tipped brush for the delicate edges and intricate points, and a slightly larger brush for the broader areas of the leaves, we meticulously applied the paint, ensuring full coverage and crisp lines. While it was a somewhat time-consuming process, taking approximately an hour and a half to complete, the meditative nature of painting can be incredibly enjoyable and relaxing. Many, ourselves included, find immense satisfaction in such focused creative endeavors, preferring to invest time and effort in creating free, personalized art rather than simply purchasing an impersonal, mass-produced piece. The act of creation itself is a reward.
The Finished Piece: A Custom Bathroom Statement Transformed
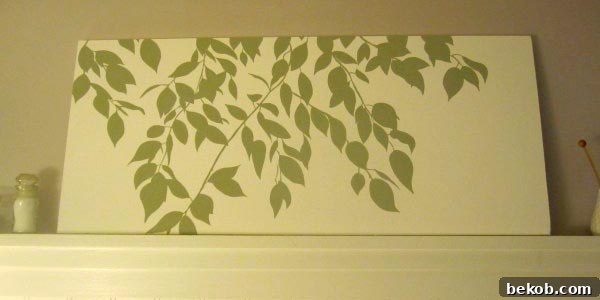
The dedication to detail and the sheer joy of creation culminated in a truly custom, one-of-a-kind piece of art designed specifically for our bathroom. The carefully chosen greige color perfectly complemented the existing decor, harmonizing with the neutral tones of the space, while the natural leaf silhouette introduced an element of organic serenity and a touch of the outdoors. The long, rectangular shape and size of the MDF board (approximately 13×31 inches) proved to be an excellent choice. Its elongated form commanded attention and made a much stronger visual statement compared to the smaller, less impactful decorative items that previously adorned the wall. It filled the space with purpose and style.
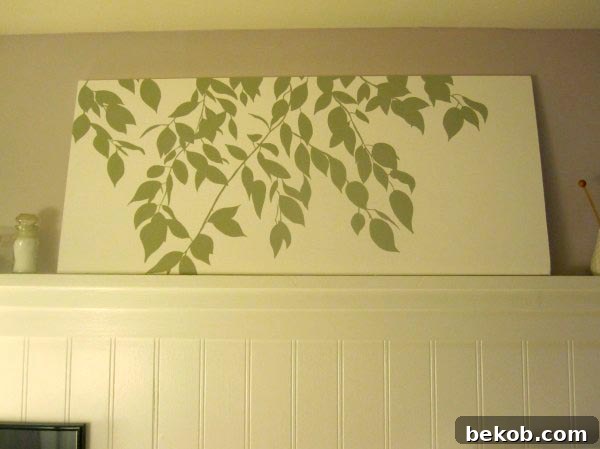
Observing the finished painting gracefully installed in its intended spot brought a deep sense of satisfaction and accomplishment. It transformed the main bathroom from a purely functional area into a space imbued with character, personal touch, and a distinct touch of artistic elegance. The subtle complexity of the leaf patterns, achieved through a simple yet effective silhouette technique, provided visual interest and depth without overwhelming the space. This project stands as a shining testament to how a bit of creativity, careful planning, and dedicated effort can significantly elevate home aesthetics on a budget, creating a truly unique environment that reflects the homeowner’s personality.
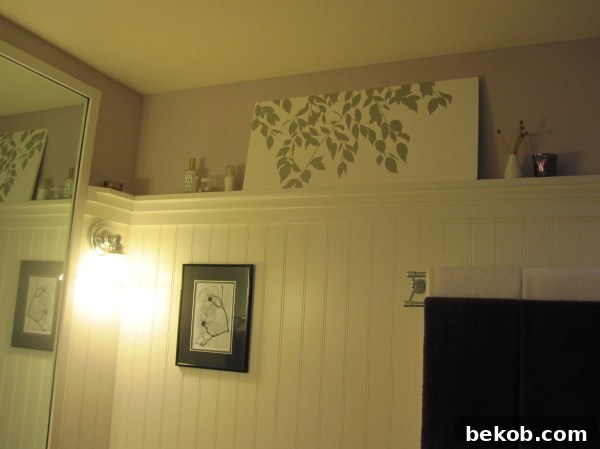
Beyond the immediate visual appeal, there’s an enduring value in handmade decor. Each time you glance at your creation, you’re reminded of the personal effort, care, and love invested in it, making it more than just an object – it’s a cherished piece of your home’s unique story and a reflection of your creative spirit.
Essential Tips for Your Own DIY Art Project
- Start Simple: If you’re new to painting or DIY art, begin with simple silhouettes, geometric patterns, or abstract designs. Building confidence with easier projects will pave the way for more complex ones.
- Gather Your Materials: Before starting, ensure you have all necessary paints, brushes of various sizes, primers, and your chosen canvas (MDF, stretched canvas, wood panel, watercolor paper, etc.) ready and accessible.
- Choose Your Canvas Wisely: Consider the specific environment where your art will hang. For humid areas like bathrooms, MDF needs thorough sealing as demonstrated, or you might opt for naturally moisture-resistant materials.
- Embrace Imperfection: Hand-painted art inherently carries unique variations and charming irregularities. Don’t strive for machine-like perfection; instead, embrace and celebrate the distinctive character of the handmade.
- Experiment with Colors: Don’t be afraid to mix custom colors to achieve the perfect shade for your space. Always test your custom blends on a scrap piece of your canvas or a similar material before applying to the main artwork.
- Patience is Key: Allow adequate drying time between coats of primer, background paint, and your main design. Rushing can lead to smudges, poor adhesion, and an uneven finish.
- Seal Your Work: For added durability, protection against dust and moisture, and enhanced longevity, especially in high-traffic or high-humidity areas, apply a clear sealant or varnish once the painting is completely dry.
Creating your own art is a fulfilling journey that adds unparalleled character and a deep sense of personal style to your living spaces. We’ve shared our experience and detailed this custom branch silhouette artwork tutorial, and we sincerely hope it sparks your own creative endeavors and inspires you to pick up a brush. Now, we turn the question to you, our creative community: How many of you actively make your own art? Whether it’s a painting, a drawing, a sculpture, a craft, or any other form of creative expression, we’d absolutely love to hear about it. Do share your projects, tips, and insights in the comments below! We are always on the lookout for fresh inspiration and love seeing what our talented community creates!
Indeed, a wonderful custom branch silhouette artwork tutorial, don’t you agree? Get creative and transform your space today!