Read the sequence from the top before cutting, painting, or moving pieces.
Handmade Mirrored Closet Door Makeover
Submitted By The Savvy Stylist
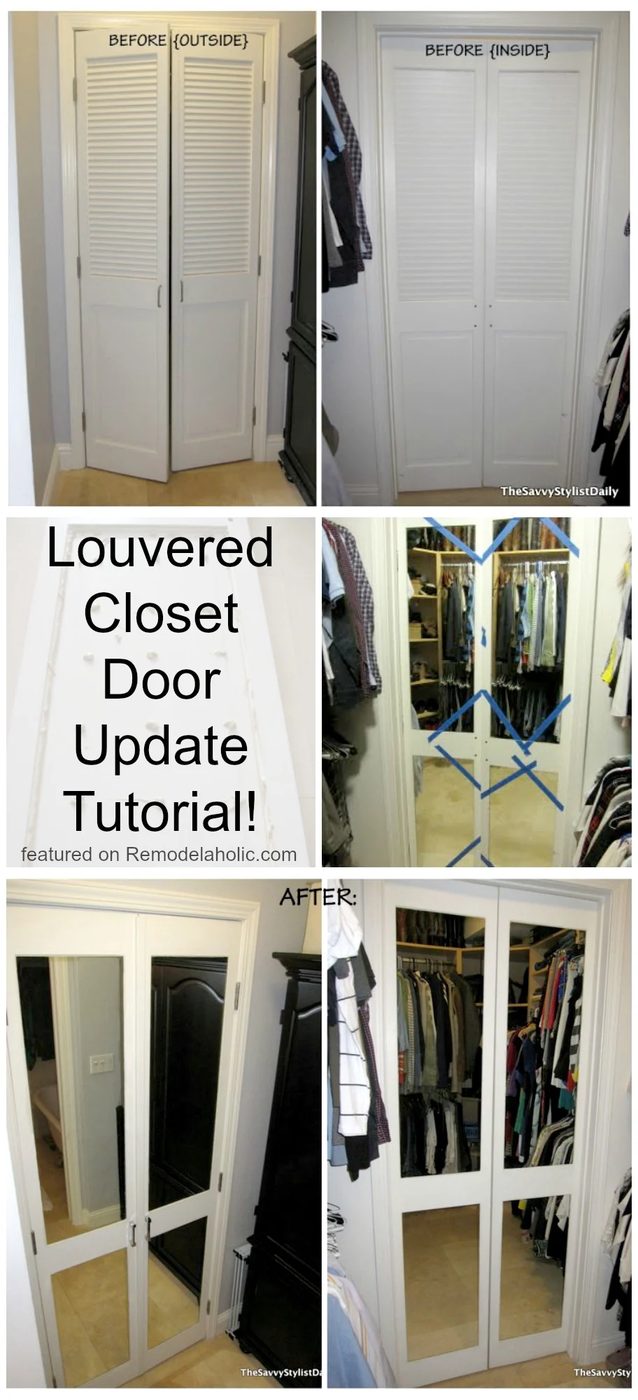
For the past 3 years, our master closet doors have been on my To-Do list for our condo. The doors were half louvered, half solid, and had blah hardware. I had called a few local places and searched the web to find doors to replace them. Apparently the door sizes were not in stock anywhere and would have had to be custom made – which we all know what that means! I was quoted $300…PER DOOR!!! Uhhh, no thanks!
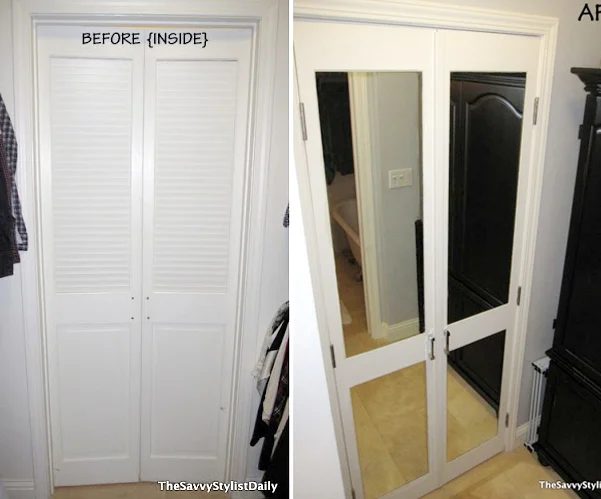
So I started thinking what I could do with the existing doors. Here they are BEFORE the makeover: I love anything mirrored…and it IS a closet! That’s it! I will have mirror cut to pop in the ‘panels’! So I measured the panels multiple times – I even had to Google ‘how to read a tape measure’ because I had never used half the marks on there! I called a few local mirror and glass companies for quotes and let’s just say this little project cost me WAY less than I would have had to pay to replace just ONE door…plus, it looks way better! I used mirror mastic to adhere the 1/8″ mirror to the doors. On my first door, I took it off the hinges to apply the mirror…but then I realized that it was unnecessary. Fast forward 8 pieces of mirror later, I let the glue dry overnight with tape to make sure the mirror didn’t fall out (don’t know how much that painters tape would have really helped though)! I also updated the hardware. Even though the mirror was a good fit, I also decided to caulk the edges of the mirror (below). After all the caulking was done, I used a razor blade to scrape off the excess on the mirror (which I had not scraped yet in photo below). And here is the final result! I love this look SO much better! The final cost was about $200 and it took me only a couple of days – waiting for glue and caulking to dry. Totally worth it! This project was contributed by one of our fabulous readers! We love to share your projects with this great blogging community. So, if you have projects from kitchen renovation options to small bathroom remodels, overhauled and repurposed furniture, spray paint updates you name it please send it in! Thanks for reading Bekob! Want some MORE options on what to do with that closet of yours? Here you go! Making Your Closet A striking Room Closet Update Turning an Unused Closet into a Built-in Reading Nook Before and After Master Closet Makeover Shoe Closet Storage: Guest Remodel