
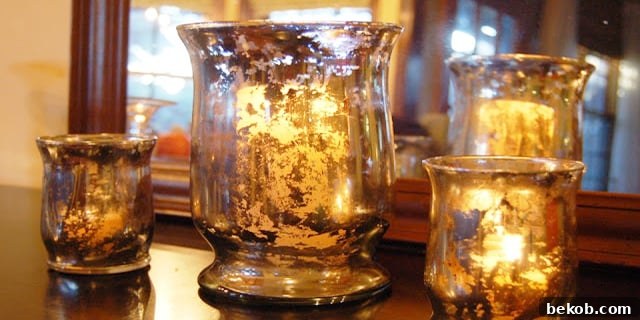
Unlock Elegance: The Ultimate Faux Mercury Glass DIY Tutorial
A Creative Guide by Anna @ Take the Side Street
Have you ever been captivated by the enchanting shimmer of mercury glass, yet shied away from its often hefty price tag? You’re not alone! The allure of antique mercury glass, with its distinctive speckled, silvered appearance, adds a touch of timeless elegance to any home décor. It’s especially popular during the holiday season, but its versatile charm makes it a perfect accent year-round. While authentic mercury glass can be quite an investment, creating your own faux version is surprisingly simple, incredibly rewarding, and budget-friendly. This detailed tutorial, inspired by the brilliant Anna from Take the Side Street, will guide you through transforming ordinary glass pieces into stunning mercury glass replicas. Get ready to add a sophisticated, vintage touch to your living space without breaking the bank!
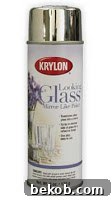
The quest for the perfect mercury glass look led to many experiments. While regular metallic spray paints might seem like a quick fix, they often fall short of replicating that unique, aged mirrored effect. The real game-changer in this DIY journey is Krylon’s Looking Glass spray paint. This specialized product is designed to create a reflective, mirror-like finish on glass, providing the ideal foundation for our faux mercury glass project. Its unique properties allow for the stunning transformation you’re about to discover.
Materials You’ll Need
Before diving into the creative process, ensure you have all your supplies ready. This preparation will make your DIY experience smooth and enjoyable.
- Glass Items: Vases, hurricanes, jars, plates, picture frame glass, or any clean glass object you wish to transform. Thrift stores are excellent places to find inexpensive and unique pieces.
- Krylon Looking Glass Spray Paint: This is the star of the show! Do not substitute with regular metallic spray paint for best results.
- White Vinegar: Standard household white vinegar.
- Water: For diluting the vinegar.
- Spray Bottle: For your vinegar-water solution.
- Soft Paper Napkins or Cloths: For dabbing and rubbing the paint to create the distressed effect.
- Protective Clear Spray (Optional but Recommended): A clear sealant spray to protect your finished work.
- Gloves: To protect your hands from paint and solution.
- Drop Cloth or Newspaper: To protect your work surface.
- Well-Ventilated Area: Crucial for safe spray painting.
Step-by-Step Faux Mercury Glass Tutorial
Step 1: Selecting and Preparing Your Glass Canvases
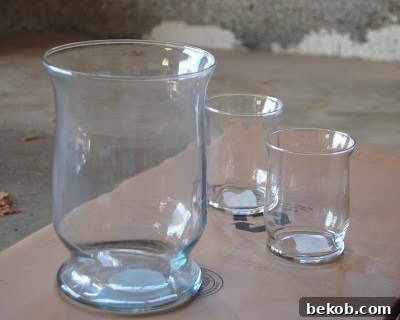
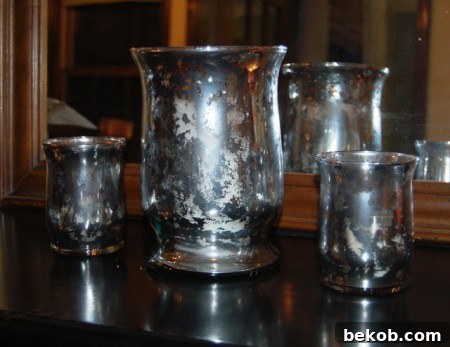
The foundation of a beautiful faux mercury glass piece is the glass itself. Choose items with interesting shapes or practical uses, such as hurricane lamps, vases, or even simple glass bowls. For this tutorial, we used a larger hurricane found at a craft or big-box store and two smaller ones from a dollar store, proving that you don’t need expensive starting materials. The key is to select glass that is clean and smooth. Thoroughly wash and dry your chosen glass items to remove any dust, fingerprints, or grime. A pristine surface ensures optimal paint adhesion and a flawless finish.
Step 2: The Magic of Mirror Spray Application
This is where the transformation truly begins. The secret to achieving the authentic mercury glass look lies in applying the Krylon Looking Glass paint to the inside surface of your glass items. This technique mimics the traditional process of silvering glass, where a reflective coating is applied to the back of the glass, giving it depth and shine.
Working in a well-ventilated area and wearing gloves, hold your glass item on its side. Apply the Looking Glass paint in quick, light bursts, rotating the glass as you spray to ensure even coverage. This paint is thin and designed to adhere smoothly, so avoid heavy applications that can lead to drips or gloppy errors. The goal is multiple thin coats, not one thick one.
After each coat, let the paint dry for approximately one minute. The paint dries remarkably fast, allowing you to proceed efficiently. The instructions on the can typically recommend five applications with a minute of drying time between each. After the first coat, you’ll notice a subtle reflective shimmer, but you’ll still be able to see through the glass. With subsequent coats, the reflectivity will intensify, gradually building up to a mirror-like finish.
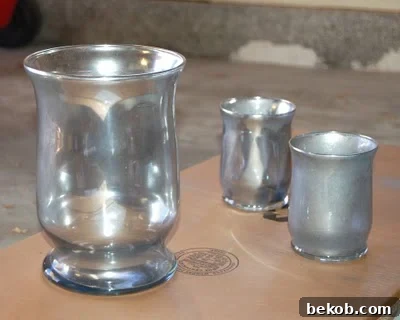
Watch in awe as the paint dries! What starts as a standard metallic spray paint transforms into a genuine mirror finish right before your eyes. The rapid drying time is one of the most exciting aspects of this project. Continue with 5-6 coats, or until you achieve the desired opaqueness and mirror effect. The hurricanes shown here received about five coats.
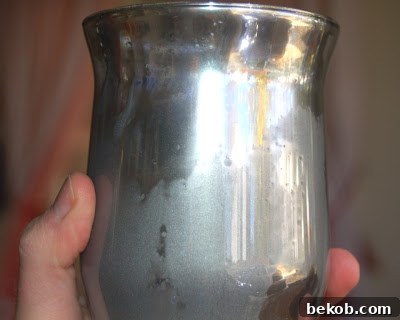
These hurricanes, after several coats, are already looking magnificent with their new reflective sheen!
Step 3: Crafting the Aged Patina (Distressing for Authenticity)
This is the crucial step that distinguishes faux mercury glass from a simple mirrored finish. The characteristic speckled, antique look of mercury glass comes from intentional distressing. The inspiration for this technique comes from the brilliant methods used by Mandi from Vintage Revivals, who achieves stunning finishes by distressing the back of mirrors. We’ll adapt her concept for our painted glass.
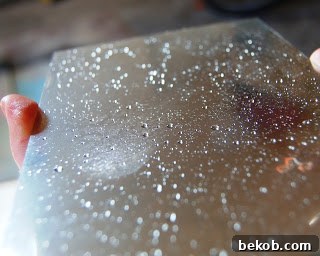
Create a simple distressing solution by mixing 50% white vinegar and 50% water in a spray bottle. Vinegar is mildly acidic, making it perfect for gently interacting with the fresh spray paint without being overly harsh. After your final coat of Looking Glass paint has dried for about 5-10 minutes (the paint should be dry to the touch but still somewhat vulnerable), lightly mist the inside of your glass item with the vinegar-water solution. Aim for small beads to form on the surface, covering it evenly.
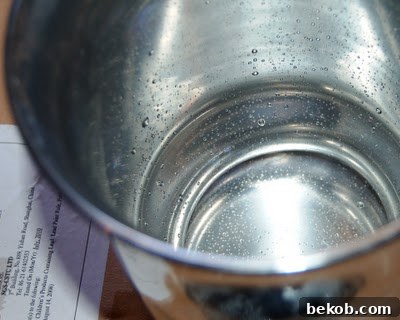
For items like hurricanes, it’s helpful to work in sections. You might spray only the bottom half initially to avoid accidentally rubbing off the finish on the top while distressing the bottom. Once you’ve completed the lower section, move on to the top.
Let the vinegar-water beads sit for approximately 20 seconds. The exact time can vary slightly depending on how long the paint has been drying; fresher paint might react faster. Now, it’s time to distress!
Detailed Distressing Process (Illustrated on a Picture Frame Glass):
- First, spray the vinegar-water solution onto the painted surface, creating little droplets as shown:

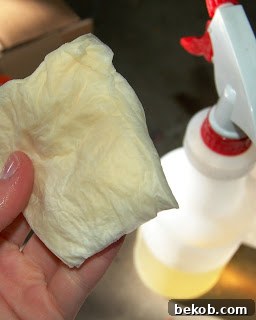
- Next, take a paper napkin, fold it, and dampen it with your vinegar-water solution. The idea is to use a soft material to gently interact with the paint, preventing harsh scratches or large flakes from coming off unintentionally. Think of it as a fine sandpaper for the paint.
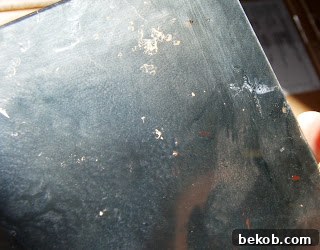
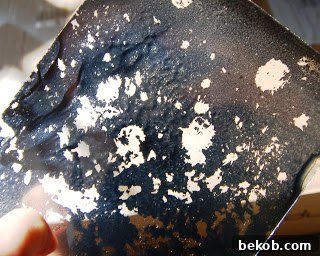
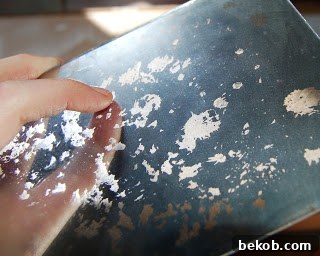
- Using the damp napkin, gently dab (an up-and-down motion, rather than side-to-side) the beads of vinegar on the surface. You’ll observe the vinegar beginning to eat away at the paint, creating the initial distressed spots. This works best when the paint has dried for only a few minutes, as drier paint will require a bit more rubbing.
- Then, gently rub the damp napkin in small circles to widen these distressed areas and slough off more paint. Using the pads of your fingers, rather than the tips, when rubbing with the napkin, helps distribute pressure and minimizes the risk of giant flakes of paint coming loose, giving you more control over the distressed pattern.
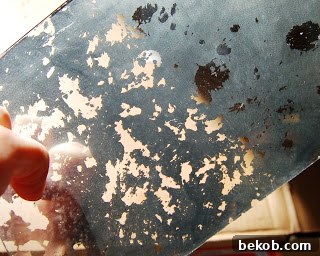
- Use your artistic judgment to achieve your preferred level of distressing. If you desire a scattering of very tiny holes in addition to larger areas, spray a bit more vinegar-water and then rub very lightly. This allows for a nuanced, authentic aged look.
- To complete the distressed look, apply one or two very light coats of the Looking Glass spray paint. This final step adds a beautiful dimension to the areas where the paint has been removed, ensuring that even the transparent spots retain a subtle glow and shimmer, enhancing the overall mirrored effect.
Step 4: Protection and Finishing Touches (Optional but Recommended)
Once you are satisfied with your faux mercury glass creation, consider applying a clear protective spray to the inside surface. This optional step helps to seal the paint and prevent scratching, ensuring your beautiful piece lasts longer. A general clear coat spray designed for crafts or home decor will work well. Remember, if you’ve sprayed the inside of a container, it is generally not safe to put live plants or food directly into it.
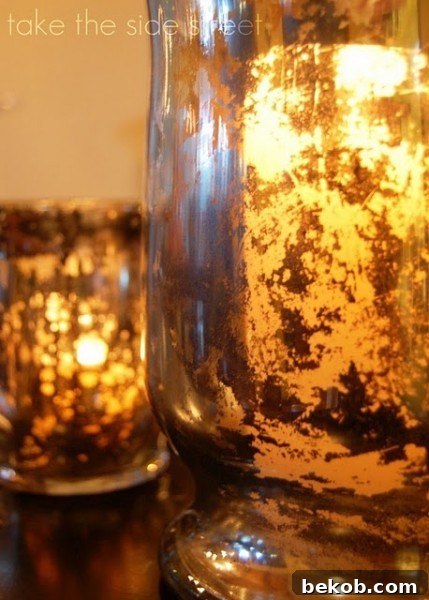
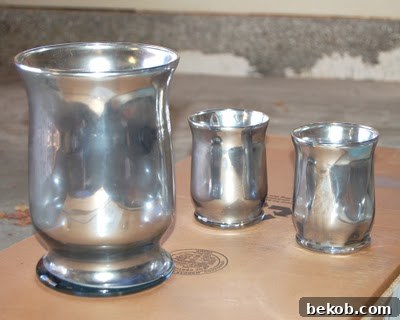
And voilà! Your stunning faux mercury glass is complete. Take a moment to admire the gorgeous transformation:
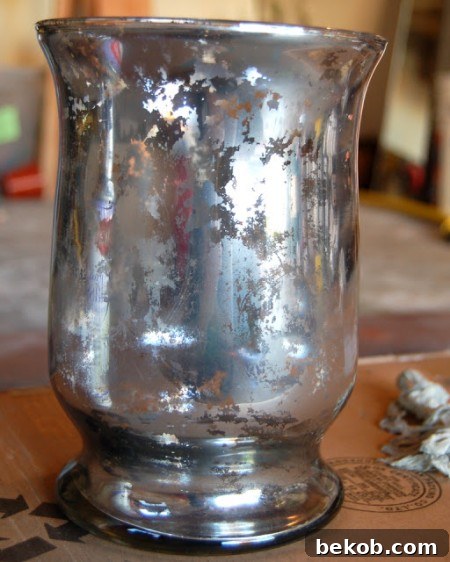
These pieces now exude the charm and sophistication of genuine antique mercury glass, ready to elevate your home decor.
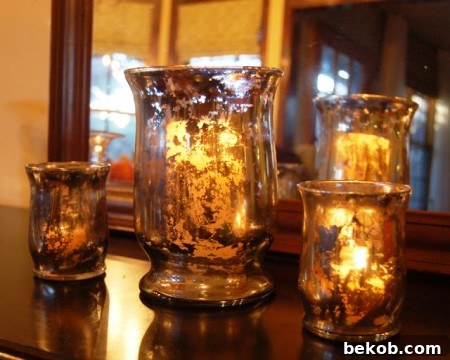
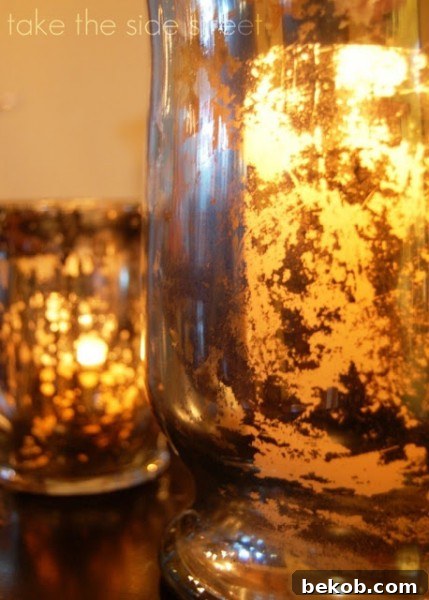
Tips for Success in Your Faux Mercury Glass Project
- Practice Makes Perfect: If you’re new to spray painting or distressing, consider practicing on an inexpensive piece of scrap glass first. This will help you get a feel for the paint application and distressing technique.
- Ventilation is Key: Always work in a well-ventilated area, preferably outdoors or in a garage with open doors, to avoid inhaling paint fumes.
- Gloves are Your Friend: Protect your hands from paint and the vinegar solution.
- Don’t Rush Drying: While the Looking Glass paint dries quickly, adhering to the recommended one-minute drying time between coats is essential for a smooth finish and proper adhesion.
- Experiment with Distressing: The beauty of faux mercury glass lies in its aged appearance. Play with how much or how little you distress to achieve your ideal vintage look. You can create fine speckles or larger, more prominent eroded areas.
- Cleanliness is Crucial: Ensure your glass is spotless before you begin. Any dust or residue will be magnified by the mirrored finish.
Creative Ways to Display Your Faux Mercury Glass Creations
Now that you’ve mastered the art of DIY faux mercury glass, it’s time to showcase your beautiful creations! These versatile pieces can enhance almost any room or occasion:
- Elegant Centerpieces: Arrange varying sizes of faux mercury glass vases or hurricanes on a dining table or console for a dazzling centerpiece, especially with candles flickering inside.
- Seasonal Decor: Perfect for adding a festive glow during the holidays, but equally stunning year-round. Mix them with natural elements like pinecones or fresh flowers.
- Bathroom Bling: Use smaller pieces to hold cotton balls or display small soaps for a touch of refined glamour in your bathroom.
- Shelving Accents: Place them on bookshelves or mantelpieces to add visual interest and a reflective sparkle, breaking up monotonous displays.
- Gift Ideas: Handmade faux mercury glass makes thoughtful and personalized gifts for friends and family who appreciate unique home decor.
- Themed Events: Ideal for weddings, anniversaries, or other celebrations where a touch of vintage elegance is desired.
Conclusion: Embrace the Elegance of DIY
Creating faux mercury glass is an incredibly satisfying DIY project that allows you to infuse your home with antique charm and sophisticated style at a fraction of the cost of purchasing genuine pieces. With just a few simple materials and this detailed guide, you can transform ordinary glass into dazzling decorative accents. The process is not only straightforward but also offers room for creative expression through the distressing technique, allowing you to achieve a truly unique, custom look.
So, gather your supplies, find some forgotten glass treasures, and get ready to add that coveted designer touch to your home decor. Your guests will be amazed by your ability to replicate such a classic look with your own hands. Happy crafting!
Update: Curious if Krylon’s Looking Glass spray paint is truly essential for this effect? For a fascinating comparison between different paint types, be sure to check out this insightful post from Take the Side Street.