

Transform Your Home: Easy DIY Craftsman Door Casing and Corbels Tutorial
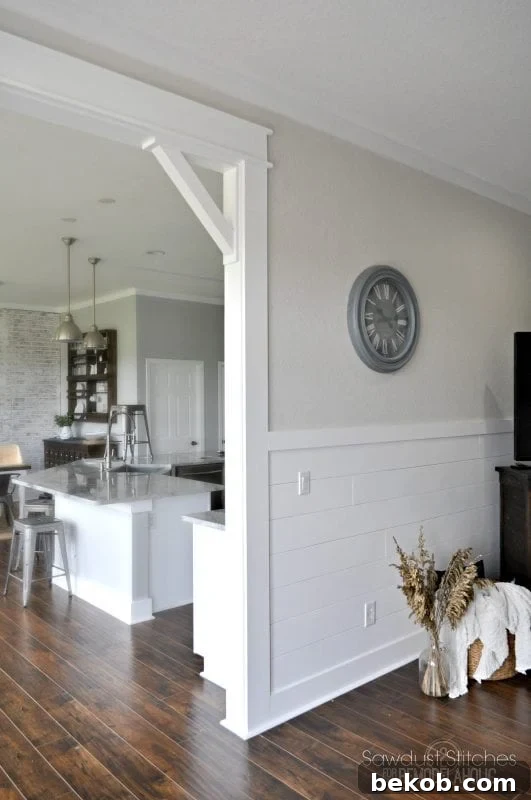
Hey there, home improvement enthusiasts! Corey here from Sawdust 2 Stitches, and I’m thrilled to share a project that will dramatically elevate the look and feel of your home: installing DIY craftsman door casing and elegant corbels. Having recently navigated the joys (and sometimes challenges!) of moving, I’ve found myself immersed in trim work, and I’m consistently amazed at the profound impact a simple architectural detail can have on a space.
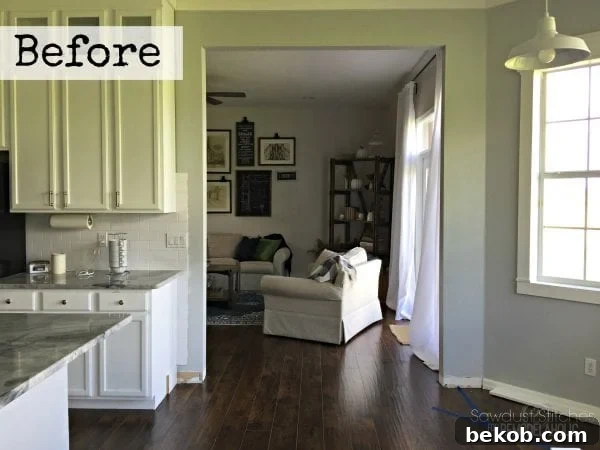
Before this transformation, our entry was perfectly functional, but undeniably “builder basic.” It lacked the character and warmth that truly make a house a home. However, once the new craftsman casing was installed, the doorway instantly became a stunning focal point, drawing the eye and adding an undeniable sense of craftsmanship. If you’re eager to infuse your living space with character and simultaneously boost your home’s value, you’ve landed in the right spot. This DIY project is a game-changer!
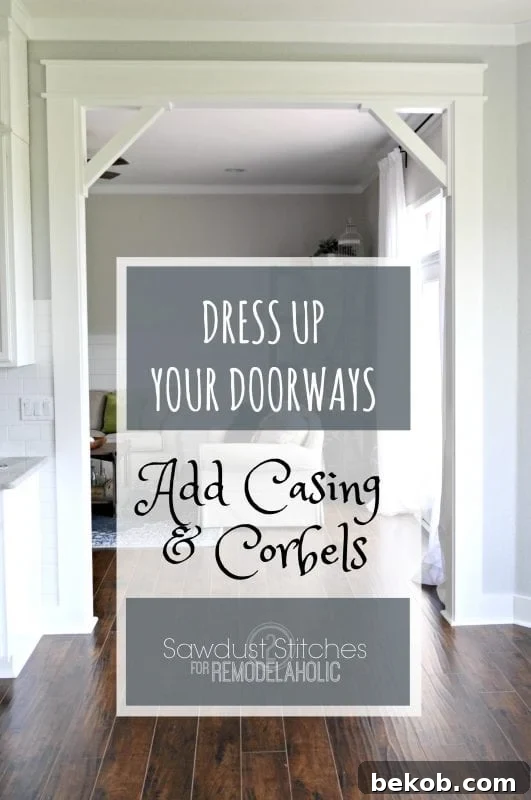
Mastering DIY Craftsman Door Trim and Easy Corbels: A Step-by-Step Guide
This comprehensive tutorial will walk you through transforming an ordinary doorway into a sophisticated architectural feature. We’ll cover everything from precise measurements and cuts to the final finishing touches. Even if you’re relatively new to woodworking, these steps are designed to be manageable and rewarding. Let’s get started on upgrading your builder-grade doorways!
To get a visual overview of the entire process, consider watching the accompanying video first:
Essential Tools for Your Doorway Transformation:
Having the right tools is key to a smooth and successful project. Here’s what you’ll need:
- Miter Saw: Crucial for accurate crosscuts, especially for the header and corbel angles.
- Table Saw: Indispensable for ripping boards to precise widths, ensuring a custom fit for your door frame.
- Nail Gun: A pneumatic or battery-powered nailer (16-gauge is recommended) will significantly speed up installation and provide a strong hold.
- Sander: For smoothing surfaces and preparing for paint. An orbital sander is ideal, but sandpaper blocks work for smaller areas.
- Mallet: Useful for gently persuading boards into place without causing damage.
- Pry Bar: Essential for carefully removing existing baseboards and trim.
- Tape Measure: For all your precise measuring needs.
- Pencil: For marking cuts and measurements.
- Level: To ensure all your trim pieces are perfectly straight.
- Stud Finder: While not strictly necessary for every nail, it’s good practice to secure into studs where possible for maximum stability.
Supplies Used for Your Craftsman Trim Project:
Gathering all your materials before you begin will streamline the process. Always read through the entire tutorial before purchasing lumber, as specific dimensions may vary slightly based on your unique doorway.
- Nail Hole Filler / Wood Putty: For concealing nail holes and imperfections before painting.
- Sandpaper: Various grits for smooth finishing.
- Caulk / Caulk Gun: Your best friend for filling gaps and creating a seamless, professional finish.
- (4) 1″ x 2″ Boards: Typically used for the decorative elements of the header.
- (9) 1″ x 6″ Boards: These will form the core of your interior and exterior casings and the main header piece. (Note: Board widths might need adjustment based on your specific door frame. Always measure your doorway’s depth and subtract any desired reveal for the interior pieces, then add for the exterior overlap.)
- (2) 1″ x 4″ Boards: Primarily for constructing the decorative corbels and their supports.
- Liquid Nails (or similar Construction Adhesive): Provides a strong, long-lasting bond between the wood and the wall.
- 2-inch, 16-gauge Nails: For securing boards with your nail gun.
- Wood Glue: For assembling the corbels and header components.
Installing the Craftsman Door Casing: A Step-by-Step Guide
The craftsman style emphasizes robust, clean lines and architectural depth. This section details how to build out your doorway frame to achieve that distinctive look.
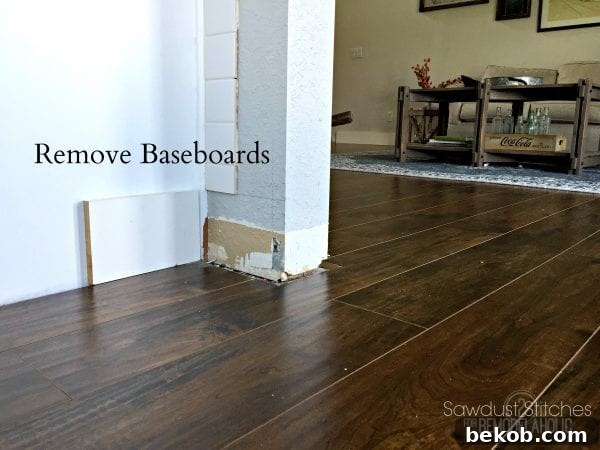
Step 1: Carefully Remove Existing Baseboards
Out with the old, in with the beautifully upgraded! For a truly custom and professional finish, the new door casing should extend directly to the floor, with the baseboard butting cleanly into the casing. To achieve this seamless integration, you’ll need to remove the sections of baseboard immediately adjacent to the door frame. This is a straightforward task, typically requiring only a pry bar and a hammer. Work slowly and carefully to avoid damaging the drywall or the baseboards themselves, especially if you plan to reuse them elsewhere or want to minimize patching later. A minute or two of effort here will make all the difference in the final aesthetic.
Step 2: Installing the Interior Top Casing Board
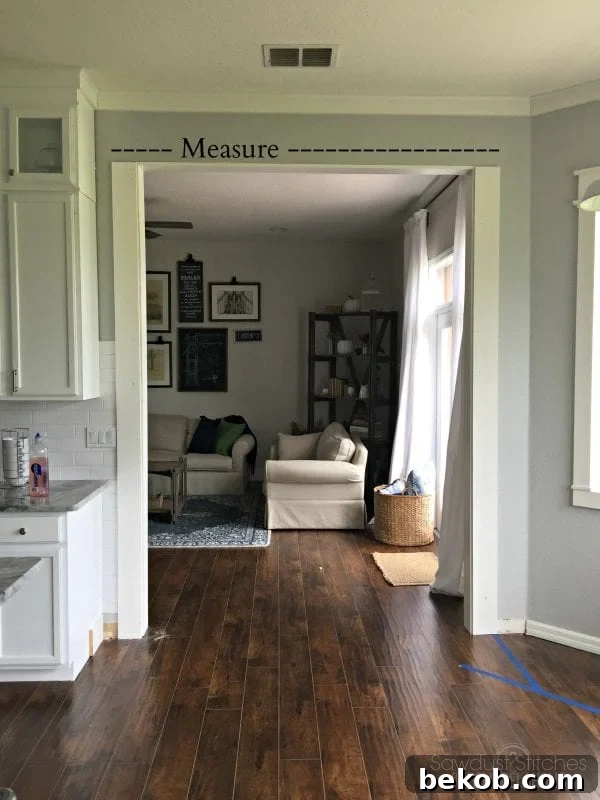
With the baseboards out of the way, we’re ready to tackle the interior casings. Begin by accurately measuring the interior width of your door frame. This measurement is crucial for a snug fit.
In my specific instance, the interior width of the door frame was 5 inches. Since lumber typically comes in standard sizes (like 1×6 which is actually 5.5 inches wide), I opted for a 1″x 6″ board. I then used my table saw to precisely rip it down to the required 5-inch width. This custom sizing is vital for all three interior faces of your door frame (the top and two sides) to ensure a consistent, flush appearance.
Once you have the board ripped to the correct width, measure and cut it to the exact length of your doorway’s interior width. My doorway measured 75 inches wide, so my custom-width board was cut to this precise length. Before committing to permanent installation, always perform a dry fit. Position the board without adhesive or nails to confirm it fits perfectly. This step allows you to make any minor adjustments before it’s too late.
If the dry fit is successful, apply a generous and consistent bead of construction adhesive, such as Liquid Nails, to the back of the board. Ensure coverage across the entire surface that will make contact with the door frame.
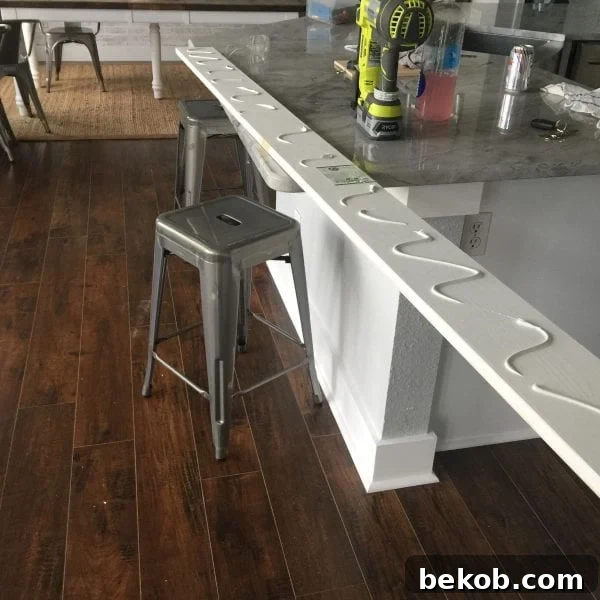
With the adhesive applied, it’s time to install the board. While the glue will provide a strong, lasting bond, I don’t always have the patience to wait for it to fully cure before moving on. To firmly secure the board immediately and ensure it stays perfectly in place while the adhesive dries, reinforce it with 2-inch, 16-gauge nails using a nail gun. Place nails every 12-16 inches, driving them into the existing door frame. This combination of glue and nails creates an incredibly robust and durable installation that will withstand the test of time.
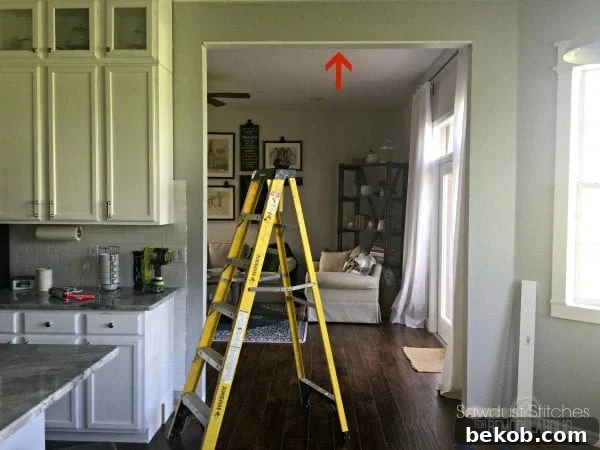
Step 3: Installing the Interior Side Casing Boards
Once your interior top board is securely in place, it’s time to move on to the side casings. The process is essentially the same as “Step 2,” but applied vertically along the sides of the door frame. Measure the exact height from the floor (or where your baseboard will meet the casing) to the underside of your newly installed top interior board. Rip your 1″x6″ boards down to the precise depth of your door frame, just as you did for the top piece, ensuring they match perfectly in width.
Perform a dry fit to confirm the length and width are correct and that the boards sit flush against the door frame. Apply a generous amount of construction adhesive to the back of each side board, ensuring good coverage. Then, carefully position each board, making sure it’s plumb (perfectly vertical) using a level. Secure them with 2-inch, 16-gauge nails, spaced evenly along the length of the board. Take your time to ensure these side pieces are straight, as they form the foundation for the subsequent exterior trim components.
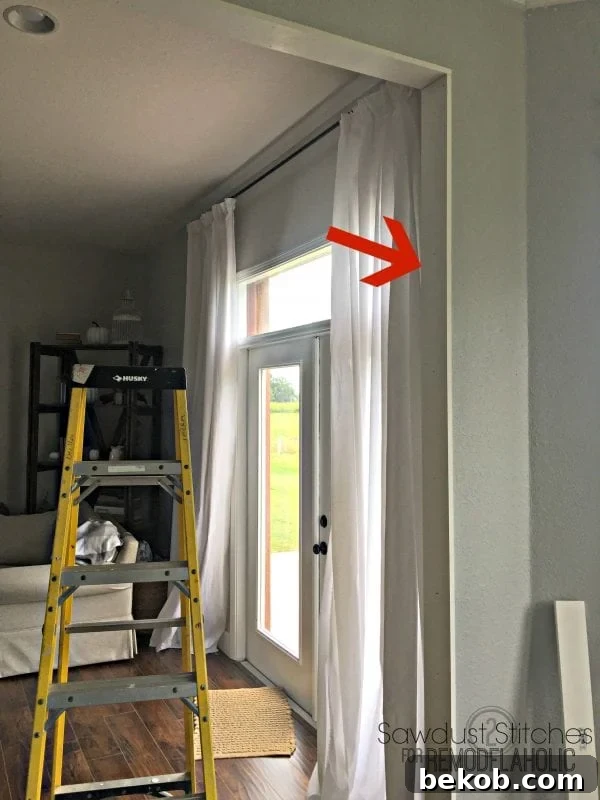
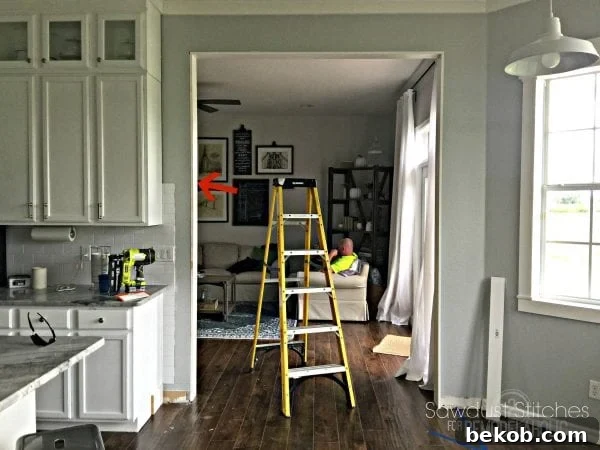
Step 4: Adding the Exterior Side Casing Boards – Defining the Craftsman Look
Now we move to the exterior boards, which are key to achieving that distinctive craftsman aesthetic! Again, I used 1″ x 6″ primed finger-jointed boards for consistency and ease of painting.
The critical detail here is the intentional offset. When installing these exterior side boards, you’ll want to create an approximate 3/8-inch reveal (or margin) of the interior trim’s edge. This means the exterior board will be positioned so that about 3/8 of an inch of the interior casing remains exposed. This deliberate overlap creates a clean, layered look and adds visual depth, which is characteristic of craftsman style. It also offers a small “wiggle room” for minor inconsistencies in your wall or door frame, making the overall finish appear more precise.
Keep this 3/8-inch offset in mind when measuring the length of your exterior side boards. To maintain this consistent reveal around the top where your side board meets the eventual header, you’ll need to add an extra 3/8 inch to your vertical measurement. For example, if the measurement from your floor to the *inside* of the top interior board is 108 inches, you should cut your new exterior side board to 108 and 3/8 inches. This ensures the 3/8-inch reveal is preserved at the top of your vertical casing, perfectly aligning with the header that will be installed later.
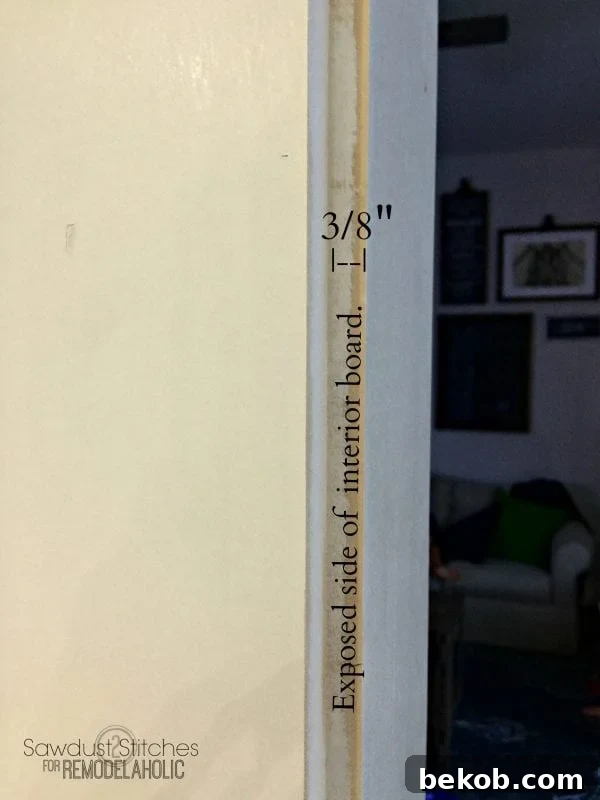
Once your calculations are complete and your boards are cut, install them with the same method used for the previous boards: apply construction adhesive to the back for a strong bond, and then reinforce with 2-inch, 16-gauge nails using your nail gun. Ensure the 3/8-inch offset is maintained consistently along the entire length of the board. Use a level to confirm the boards are plumb before nailing them firmly into place.
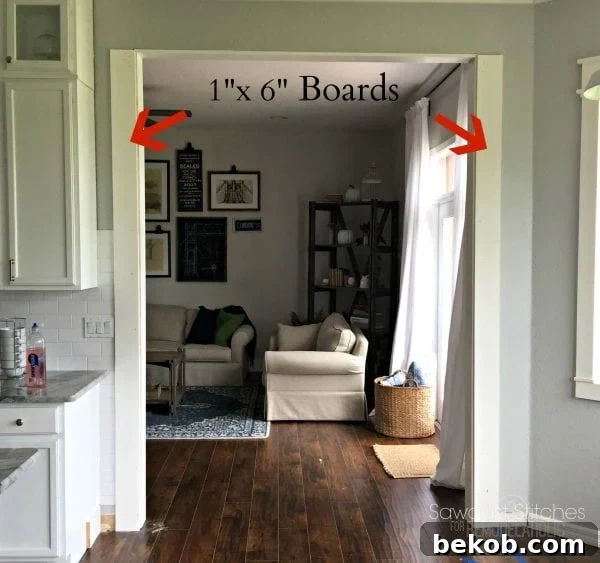
A quick but important reminder: this tutorial often shows one side of the entry for clarity. Make sure you complete both sides of the doorway for a balanced and finished appearance. Skipping a side would indeed look a little… wonky!
Step 5: Building and Installing the Decorative Header
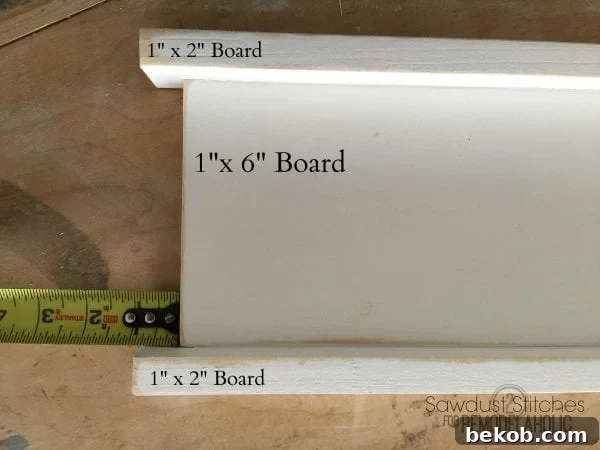
Next up is the header – the crowning glory of your craftsman doorway! For each header, I used two 1″x 2″ primed finger-jointed boards and one 1″x 6″ primed finger-jointed board. This combination creates a substantial and visually appealing top piece.
To determine the correct length for the main 1″x 6″ board, you’ll need to measure the distance from the outside edge of one exterior side casing to the outside edge of the other exterior side casing. This measurement forms the base width of your header.
The 1″x 6″ board will be cut to this exact measurement. For the two 1″x 2″ boards, you’ll need to cut them 1-1/2 inches longer than your 1″x 6″ board. For instance, if your 1″x 6″ is 85 inches long, cut your 1″x 2″ boards to 86 1/2 inches. This additional length allows for a 3/4-inch overhang on both ends, creating an elegant visual detail.
To assemble the header, apply a small amount of wood glue to the outside ends of the 1″x 6″ board. Then, carefully align and press the longer 1″x 2″ boards onto the top and bottom edges of the 1″x 6″, ensuring the 3/4-inch overhang is consistent on both sides. Reinforce these connections with 1-1/2 inch nails, driving them through the 1″x 2″ pieces into the 1″x 6″. Allow the wood glue to set for a strong bond.
Once the header assembly is complete, it’s time to install it above your door frame. Apply a generous amount of construction adhesive to the back surface of the header where it will meet the wall and the top edges of the exterior side casings. Carefully position the header, ensuring it is perfectly level and centered over your doorway. Then, reinforce its placement with 2-inch, 16-gauge nails, driving them through the header into the wall studs above the door frame and also downward into the top edges of the exterior side casings. This secures the entire assembly firmly in place.
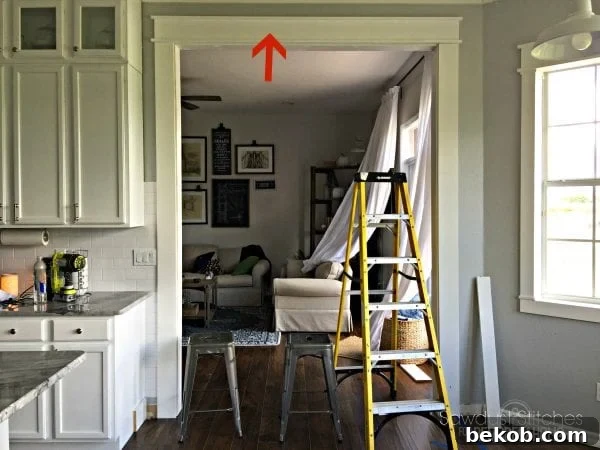
Just like with the side casings, remember to apply this header treatment to both sides of the entry point if it’s an open doorway. Consistency is key to a polished, professional look throughout your home!
Step 6: Adding Optional Base Trim (If Needed)
In many cases, your new door casing will butt directly against your finished flooring, requiring no additional trim at the base. However, due to our newly installed flooring, there was a slightly wider gap at the base that needed attention. This is a common scenario when working with existing floors or when new flooring has altered the original height.
If you encounter a similar situation, a small piece of trim can be added at the base of the casing to cover the gap neatly. Measure the width of your casing at the floor level and cut a piece of trim (often a thin, flat board or a small base cap moulding) to fit perfectly. Apply a small bead of construction adhesive to the back and secure it with a few finish nails. This small detail ensures a clean transition from the casing to the floor, even if your floor isn’t perfectly level or if there’s a slight height discrepancy.
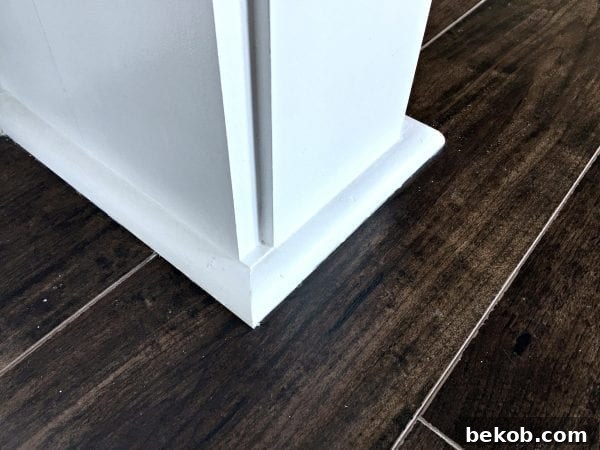
Building and Installing Decorative Corbels: Adding Architectural Elegance
Corbels are optional but highly recommended for enhancing the craftsman aesthetic, adding a touch of sophisticated architectural detail to your doorway. They provide visual support and depth to the header, elevating the entire look. If you haven’t already, review the video for visual guidance on constructing these beautiful elements.
Watch the video for a detailed guide on corbel construction and please give it a thumbs-up, subscribe to our channel, and let us know where you’d like to feature these corbels in your home!
Step 7: Crafting Your Decorative Corbels (Optional but Recommended)
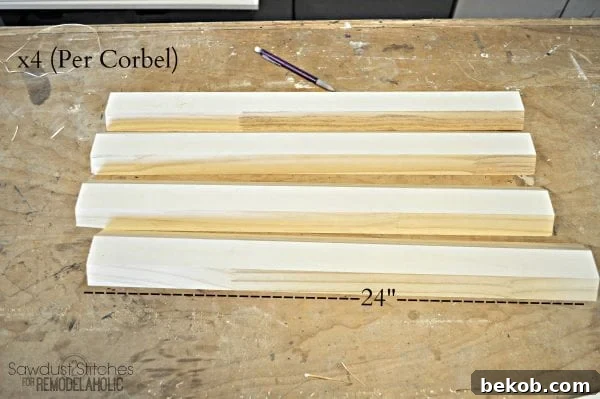
To create these stunning corbels, I used 1″ x 4″ primed finger-jointed boards. Each corbel requires four 24-inch boards, so if you’re making two corbels for your doorway, you’ll need a total of eight 24-inch pieces.
Using a table saw, the first crucial step is to cut all the edges of these boards at a 45-degree angle. This precise angle will allow them to join together seamlessly, forming a hollow box structure. Once one side of a board is cut, rotate it and cut the opposite edge at a 45-degree angle as well. This creates a bevel on both long edges of each board.
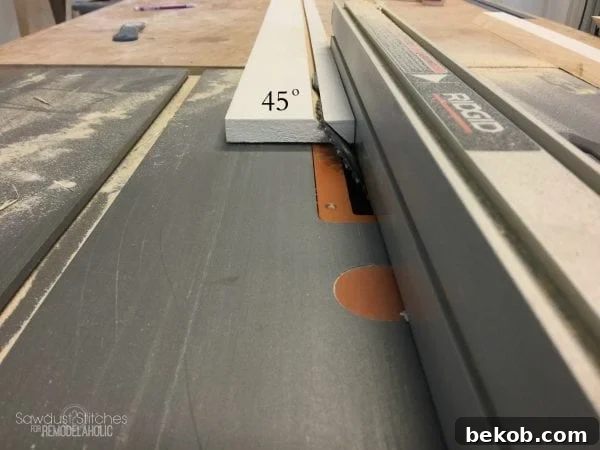
After cutting all the bevels, when you bring the four boards together, they will theoretically form a hollow rectangular box. This technique is known as a mitered box joint, and it hides the end grain for a clean, professional finish.
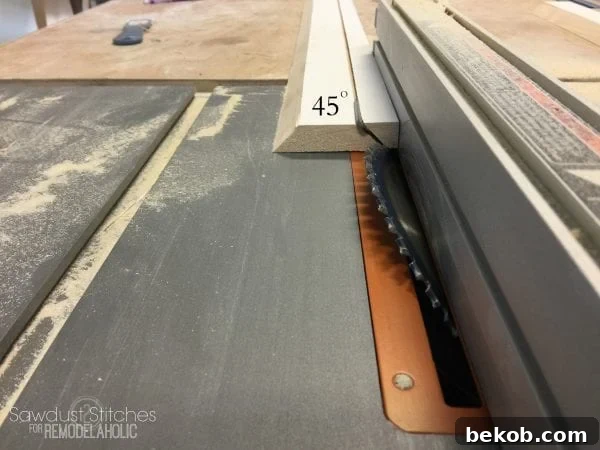
To assemble these pieces into a solid corbel, apply an instant-set glue (like cyanoacrylate glue, often called “CA glue”) along the mitered edges. This type of glue sets very quickly, allowing for rapid assembly. Apply clamps or painter’s tape to hold the pieces tightly together while the glue cures. For added strength, you can also use small brad nails through the joints.
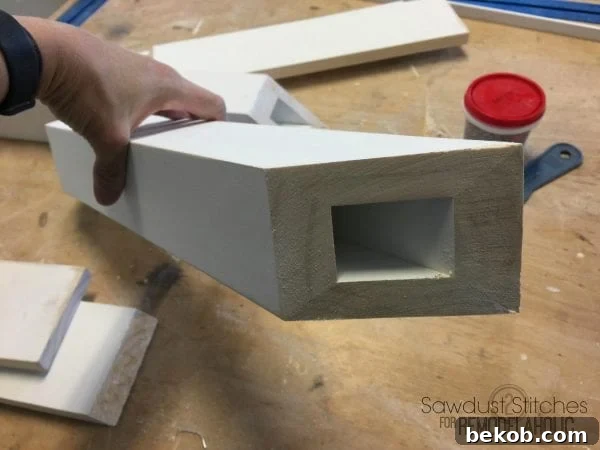
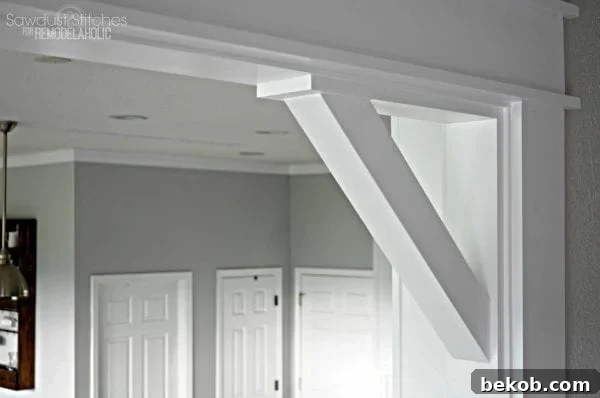
Once the glue has completely set and the corbels are rigid, you’ll cut both ends of each corbel at a 45-degree angle. This creates the classic sloped appearance of a decorative corbel. I made my corbels 24 inches from the longest point on one end to the longest point on the other. This measurement can be adjusted to suit the scale of your doorway and desired aesthetic.
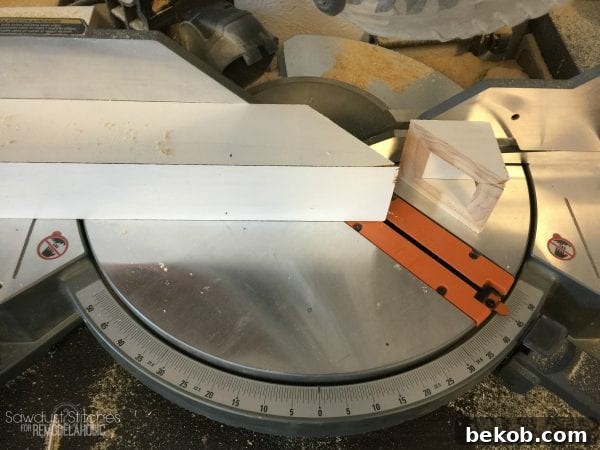
For an even more substantial and robust look, I added extra 1″x 4″ boards to the sides of the corbels. These serve to “beef up” the appearance, making the corbels feel more integrated and structurally significant. Cut these additional pieces to fit the sides of your corbels, ensuring they align cleanly with the mitered ends.
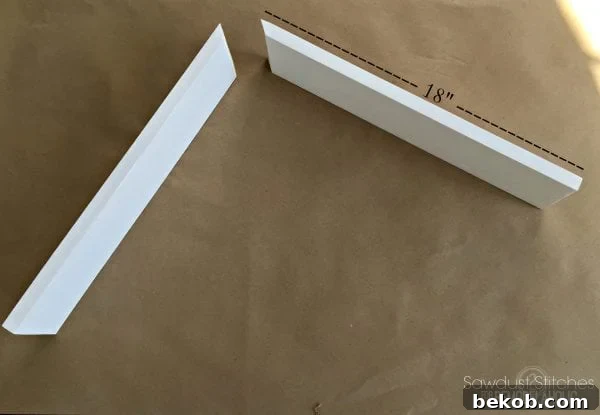
In an ideal world, all door frames and walls would be perfectly square. Unfortunately, this is rarely the case in real-world homes! Because my walls were slightly irregular, I found it beneficial to first install a 1″x 4″ support board directly to the side of the door frame, precisely where the corbel would eventually sit. This provides a perfectly flat and stable surface for attaching the corbel, compensating for any wall imperfections. I secured these support boards with both construction adhesive and screws for maximum strength, ensuring they were plumb and level.
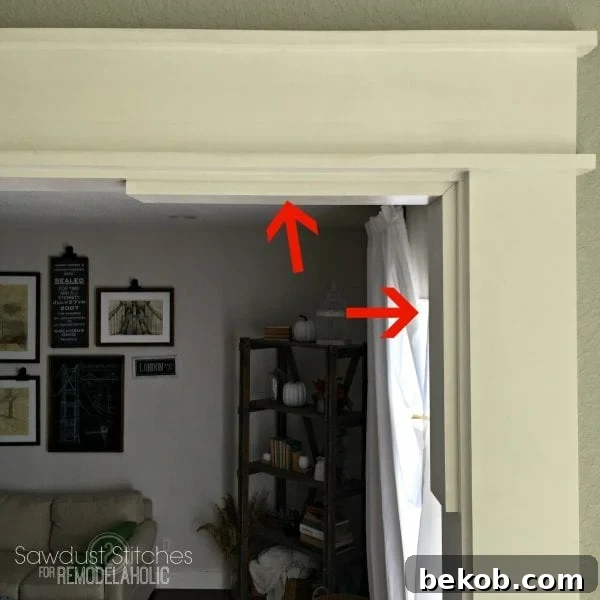
Now, with the supports in place, I was ready to attach the completed corbels. Apply a little wood glue to the 45-degree angled ends of the corbels. Carefully position each corbel, centering it on the already installed 1″x 4″ support board and aligning it neatly with the header above. Once positioned correctly, “toe-nail” the corbels into place by driving nails at an angle through the ends of the corbels directly into the secured 1″x4″ support boards. This hidden fastening method ensures a clean look without visible nails on the face of the corbels. Repeat for both sides, and watch your doorway gain an incredible new dimension!
Finishing Touches: The Key to a Professional Look
The installation is complete, but the magic truly happens in the finishing stages. Proper preparation for paint will ensure your hard work shines through with a flawless, professional result.
Step 8: Prep for Paint – Filling, Sanding, and Caulking
Next, it’s time to meticulously prepare all your newly installed trim for paint. The first order of business is to eliminate all unsightly nail holes. For this, a basic painter’s spackle or wood putty works wonderfully. Apply a small amount to each nail hole, pressing it firmly to fill the void completely. Don’t be shy about slightly overfilling, as you’ll be sanding it smooth shortly.
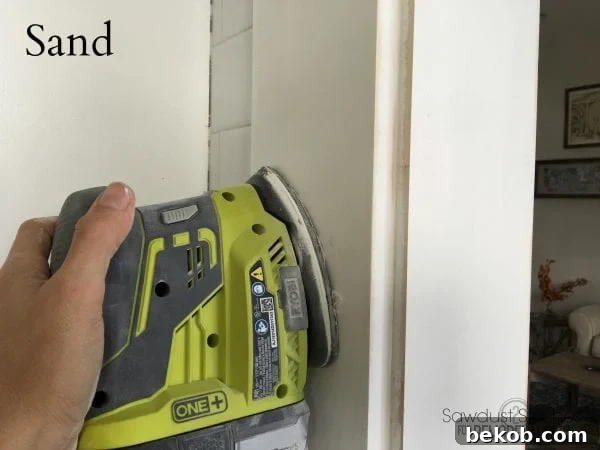
Once the filler has completely dried (always follow the manufacturer’s recommended drying times), it’s time for sanding. Use a fine-grit sandpaper (around 180-220 grit) on a sanding block or an orbital sander to smooth down all filled areas until they are flush with the wood surface. Run your hand over the sanded areas to feel for any imperfections. This step is critical for achieving a seamless, professional paint finish.
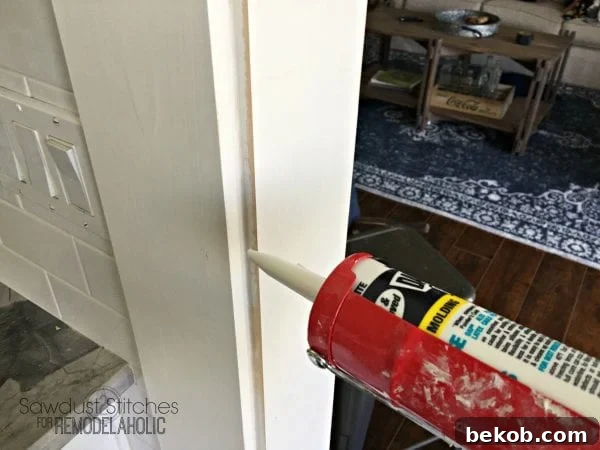
The final, and arguably most important, prep step is caulking all the seams. The reality of DIY projects (and even professional ones!) is that walls are rarely perfectly straight, and boards may not meet up absolutely flawlessly. This is where caulk becomes your best friend! Apply a thin, consistent bead of paintable caulk along every seam where the trim meets the wall, and where individual trim pieces meet each other. Smooth the caulk with a wet finger or a caulking tool to create a clean, crisp line. Caulk magically conceals any minor gaps and imperfections, giving your entire project a flawless, built-in appearance. Abracadabra!
Now, with all the prep work meticulously done, all that’s left is the satisfying task of painting your newly transformed doorway. I chose “Ultra Pure White” by Behr in a semi-gloss finish. A semi-gloss paint is ideal for trim as it’s durable, easy to clean, and provides a beautiful, subtle sheen that highlights the architectural details. Apply two to three thin coats for the best coverage and a smooth, long-lasting finish.
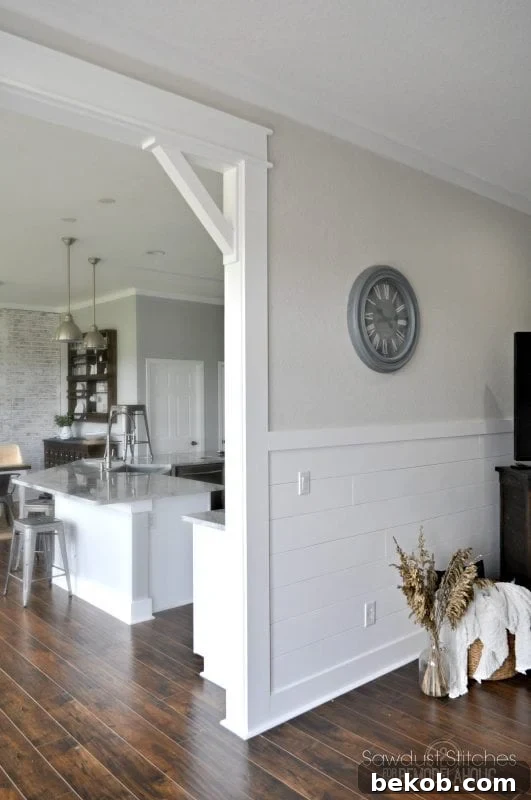
And there you have it – a completely transformed doorway that radiates character, charm, and increased home value! This project, while requiring patience and precision, is incredibly rewarding and offers a significant upgrade from generic builder-grade finishes. You’ve not only added beautiful architectural detail but also invested in the long-term appeal of your home. Enjoy your stunning new entryways!
Want to explore more of my recent home improvement projects? Here are some of my favorite new additions from Sawdust 2 Stitches that you might enjoy!
Take Luck,
Corey
|
|
|
More Creative Ways to Update Builder-Basic Doors and Windows:
If you’re looking for more ways to enhance your home’s architectural details, check out these inspiring projects:
Add a Faux Wood Beam Doorway for Rustic Charm
Install DIY Craftsman Window Trim for Cohesive Style
Build and Hang a Custom Window Cornice
Plus, discover more inspiring ways to update flat and bifold doors