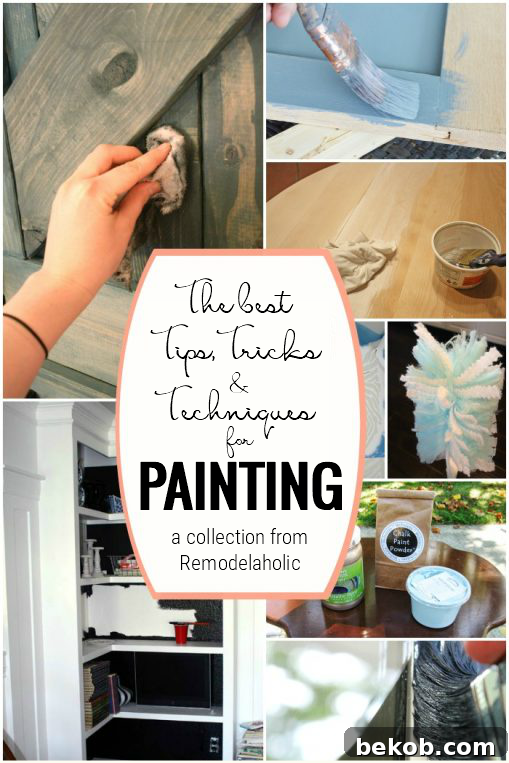
Painting stands out as one of the most impactful yet budget-friendly home improvement projects you can undertake. A fresh coat of paint isn’t just about changing a color; it’s about transforming a space, breathing new life into tired walls, or revitalizing a beloved piece of furniture. It’s an opportunity for a fresh start, allowing you to infuse your personality and style into every corner of your home without breaking the bank.
Whether you’re a seasoned DIY enthusiast or a novice eager to pick up a paintbrush for the first time, the world of painting offers endless possibilities. From subtle updates to bold statements, paint empowers you to redefine your living spaces. This comprehensive guide compiles the very best painting tips, tricks, and techniques to ensure your next project is not only successful but also truly enjoyable, allowing your creative vision to shine through.
Unlock more painting insights with our series on color and technique. Dive deeper into specific topics here:
- Essential Tips and Tricks for Every Painting Project
- How to Effectively Test a Paint Color Before You Commit
- Top Mobile Apps to Virtually Try Out Paint Colors
- Creating a Harmonious Paint Color Palette from Your Favorite Photos
- 5 Clever Tricks for Choosing the Perfect Paint Color Every Time
Mastering Your Home Painting Projects: Essential Tips, Tricks, and Techniques
Ignite Creativity with Accent Walls
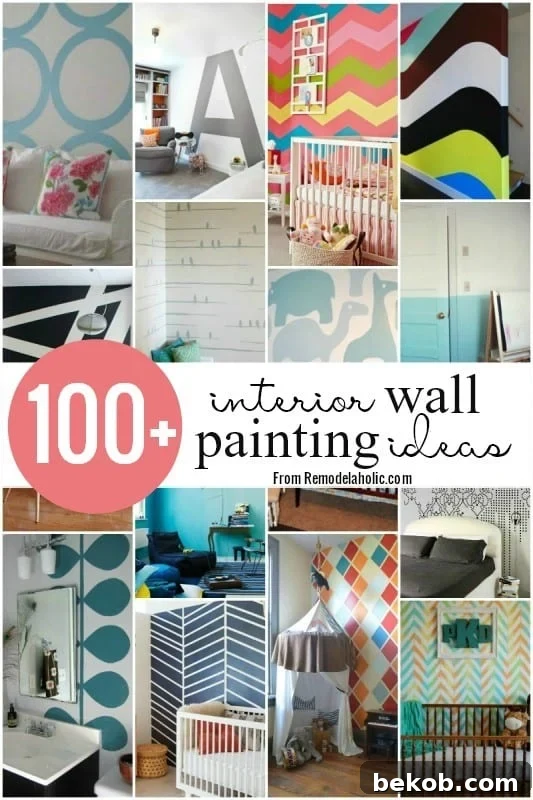
Feeling the urge to paint but unsure where to begin? An accent wall can be the perfect starting point, adding character and depth to any room without committing to a full repaint. Rather than covering every wall in a new shade, choose one focal wall to highlight with a vibrant color, a unique texture, or an intricate pattern. This simple technique can dramatically alter the perception of space, draw attention to architectural features, or simply create a stunning visual interest.
For boundless inspiration, explore our extensive collection of over 100 diverse ideas for painting interior walls. You’ll find everything from classic bold hues to subtle geometric designs, helping you envision the perfect accent wall that truly makes your space pop.
The Art and Science of Choosing a Paint Color
Selecting the right paint color can feel daunting, but it’s a critical step in setting the mood and aesthetic of your home. The ideal shade isn’t just about personal preference; it involves understanding light, room size, existing decor, and the psychological impact of color. If you’re struggling to narrow down your choices, our expert Cyndy has curated an incredible resource of diverse paint palettes designed to simplify your decision-making process. You can view her entire collection here, offering a treasure trove of inspiration.
From harmonious transitional color schemes that effortlessly bridge warm and cool tones, to strategies for an easy whole-home paint color scheme that creates a cohesive flow, and even specialized advice on selecting the perfect white paint (which, surprisingly, comes in countless variations!), these resources are invaluable. Understanding undertones, how natural and artificial light interacts with colors, and the subtle differences between finishes like matte, eggshell, satin, and semi-gloss can all dramatically impact your final look.
Furthermore, technology has made testing colors easier than ever. You can experiment with paint colors virtually using a mobile app, allowing you to visualize different shades on your walls before even buying a sample. These apps can save you time, money, and the hassle of repainting if a color doesn’t quite match your expectations in real-life lighting conditions.
Thorough Preparation for Flawless Walls
The secret to a professional-looking paint job lies overwhelmingly in the preparation. Skimping on prep work can lead to uneven coverage, poor adhesion, and a less durable finish, ultimately diminishing the impact of your chosen color. Before you even think about opening a can of paint, dedicating time to properly prepare your walls is paramount.
Begin with a meticulous cleaning: it’s crucial to give your walls a quick but thorough wipe-down. Use a soapy rag or a gentle mix of 3/4 water and 1/4 bleach (for tougher stains and mildew) to remove any accumulated dirt, dust, grime, or grease. These common surface contaminants can act as a barrier, preventing paint from properly adhering and leading to unsightly peeling or bubbling later on. Allow the walls to dry completely before proceeding.
For an exceptionally smooth, brush-stroke-free finish, consider incorporating paint conditioner into your paint. This additive helps the paint flow more evenly, extending drying time slightly to allow for better leveling and fewer visible brush or roller marks. It’s a game-changer for achieving that coveted, polished look.
If your walls aren’t perfectly smooth or have minor imperfections, this clever tip suggests using washable flat paint. The lack of sheen in flat paint is incredibly forgiving, as it minimizes the appearance of bumps, dents, and other surface irregularities, creating a more uniform visual effect. For larger cracks or holes, remember to patch and sand them smooth before cleaning and painting.
Expert Techniques for Painting Walls
Once your walls are prepped and primed, it’s time for the exciting part: applying the paint. Achieving clean lines and uniform coverage is key to a professional finish. For those seeking razor-sharp edges around trim, ceilings, and other architectural details, don’t underestimate the power of high-quality painter’s tape. Apply it meticulously, pressing down firmly to prevent bleed-through, and remove it while the paint is still slightly damp for the cleanest lines.
However, if you possess a steady hand and prefer a more challenging approach, mastering freehand painting and cutting in can save you time on taping. These techniques involve using a high-quality angled brush to precisely paint along edges without tape, a skill that improves with practice.
Beyond solid colors, consider adding intricate designs with stencils. A stenciled accent wall can introduce complex patterns and textures that mimic wallpaper but offer greater flexibility and a custom touch. These expert tips will guide you through achieving a flawless stenciled accent wall, ensuring crisp lines and beautiful motifs.
And don’t forget to look up! The ceiling is often overlooked but offers another canvas for creativity. Applying a dark shade to a ceiling can create an optical illusion, making a room feel taller and more expansive, almost as if it extends into infinity. Alternatively, a painted ceiling can add a bold splash of color and architectural interest, much like this inspiring example that effectively adds both height and color to a space.
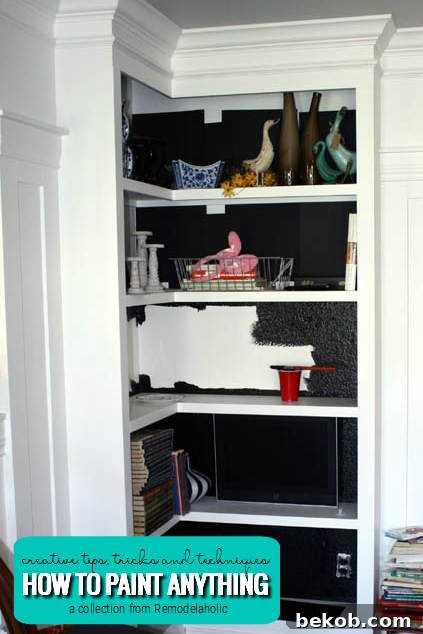
The same principle of using paint to enhance visual depth applies to smaller decorating tasks. For instance, painting the back of a bookcase in a contrasting or dark color instantly adds sophistication, depth, and a dramatic backdrop for your displayed items. This simple trick elevates the entire piece, making it feel more integrated and custom-designed. For those who love DIY, remember you can always build your own bookshelf and personalize it with paint from the ground up.
Smart Painting Breaks and Efficient Cleanup
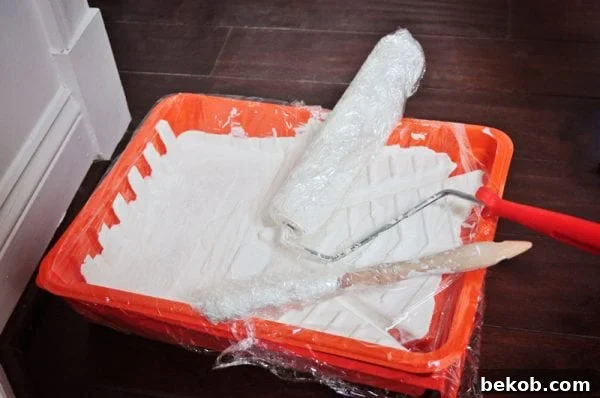
Even the most dedicated painters need to take a break. To prevent your tools from drying out and save yourself the hassle of extensive cleaning later, smart storage during pauses is essential. When stepping away from your project, whether for an hour or overnight, simply wrap your paint roller, paintbrush, and even the paint tray tightly in plastic wrap or a plastic bag. This creates an airtight seal that keeps the paint moist and workable, ready for your return without any crusty surprises.
Explore more fantastic home improvement projects by Jenny, including her kitchen makeover, smart hall closet organization, and a guide to installing trim and molding throughout an entire house.
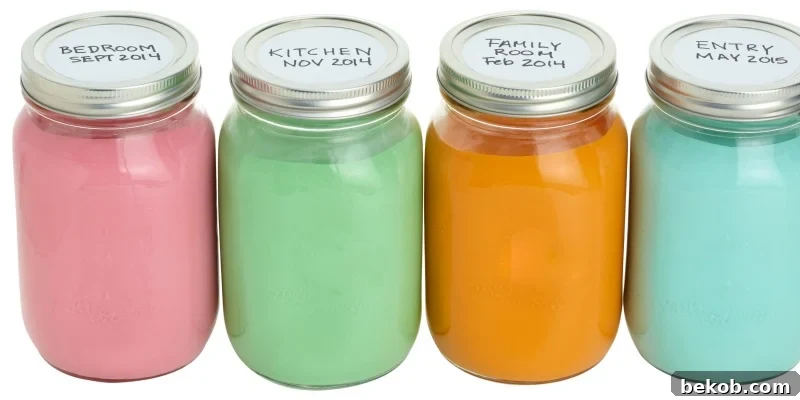
Once your painting project is complete, proper cleanup and storage of materials are crucial, both for preserving your tools and for environmental responsibility. Don’t let leftover paint go to waste. Properly seal it in labeled jars for future touch-ups, or consider donating usable quantities to local schools, community theaters, or recycling centers. Check local regulations for responsible disposal of paint that cannot be reused.
For your tools, prompt cleaning is key to longevity. After using the trick to keep them moist overnight, ensure you clean your brushes and rollers thoroughly immediately after finishing the final coat. Running a brush comb through the bristles of a paintbrush is incredibly effective for digging out stubborn paint gunk, leaving the bristles soft, flexible, and ready for their next adventure. For rollers, use a 5-in-1 tool to scrape off excess paint before washing.
Beyond Walls: Creative Painting Ideas for Every Surface
Paint’s versatility extends far beyond just interior walls, offering transformative potential for various elements throughout your home. When you’re seeking to add an immediate splash of color and character that boosts your home’s curb appeal, look no further than your front door. Painting your front door is a relatively quick project that yields dramatic results, welcoming guests with a vibrant hue that reflects your style and sets the tone for your home’s interior.
For projects where you desire a softer touch of color while still showcasing the natural beauty of wood grain, the color-washing technique is an excellent trick. This method involves diluting paint and applying it thinly, allowing the wood’s texture and pattern to remain visible beneath a translucent veil of color. It’s perfect for achieving a subtle, aged, or distressed look on furniture, paneling, or decorative items.
This versatile technique can be used to darken an already stained (but not sealed) piece, as was done on a Dutch barn door to seamlessly match other painted doors in a home. It’s equally effective on fresh, raw wood, lending a charming character to projects like a yellow Swedish mora clock or an easy carved sign, where the chosen color truly brought the piece to life.
And of course, whitewashing remains a timeless finishing technique, operating on a similar principle to color washing but specifically with white paint. It’s ideal for achieving a classic, airy, or subtly aged look on furniture and wood surfaces. Follow these detailed tips to master the art of whitewashing and achieve that perfectly soft, weathered aesthetic.
Revitalizing Furniture and More with Paint
Furniture refinishing is a rewarding way to update old pieces and give them a second life. When tackling a furniture project, consider the magic of chalk paint. Renowned for its matte, velvety finish and minimal preparation requirements, chalk paint is a fantastic choice for creating both smooth contemporary looks and charming distressed aesthetics. The best part? You don’t have to rely on store-bought options; you can easily make your own chalk paint in virtually any color, allowing for complete customization.
However, chalk paint is just one of many options. The world of furniture painting offers a variety of paint types, each suited for different finishes, surfaces, and desired effects. To make an informed choice for your specific project, consult this comprehensive guide to 5 different types of paint, detailing when and why you should use each for painting furniture. Understanding the characteristics of latex, oil-based, enamel, chalk, and milk paint will empower you to select the best product for durability, coverage, and the perfect aesthetic.
For an instant pop of color combined with a unique rubberized texture, explore the possibilities of Plasti Dip. This versatile coating can be applied to virtually anything, from tool handles to small decorative items, offering a durable, protective layer that’s surprisingly peelable. Its removable nature means you can experiment with colors and textures without permanent commitment, making it ideal for temporary updates or testing out bold statements.
Creative Transformations: Painting Upholstery and Textiles
The idea of painting fabric might seem unconventional, but it’s an ingenious way to update worn or outdated upholstered pieces and textiles without the expense and labor of re-upholstering. Want to give an old chair a vibrant new look? Instead of traditional fabric, consider a whimsical approach: splatter-paint a canvas drop cloth and then use it to upholster any chair. This creates a playful, custom design that’s entirely unique.
If the upholstery fabric is in good condition but simply needs a color refresh, you can directly paint it! Yes, you can paint a fabric chair! This technique involves mixing acrylic paint with a fabric medium to ensure flexibility and prevent the paint from stiffening or cracking. It’s a remarkably effective way to extend the life of beloved furniture pieces.
The creativity doesn’t stop at chairs. You can also paint curtain panels to achieve a bespoke drapery style at a fraction of the cost of custom curtains. This opens up a world of design possibilities, from hand-painted patterns and geometric motifs to ombre effects that perfectly complement your room’s decor. Discover more innovative ideas for DIY painted curtain styles here.
And for those truly seeking a unique statement, what about a rug? Why yes, you absolutely can paint a rug! This technique allows you to customize store-bought rugs with patterns, stripes, or solid colors that perfectly match your interior design scheme, offering an incredibly personalized touch to your flooring.
Elevating Your Space with Painted Cabinets
While undoubtedly a significant undertaking, painting your cabinets is one of the most cost-effective ways to completely overhaul the look and feel of a kitchen or bathroom. Instead of spending thousands on new cabinetry, you can save substantially by utilizing your existing cabinet boxes and doors. With the right techniques and a bit of patience, a DIY cabinet paint job can achieve a professional-grade finish that looks custom and expensive. Follow these amazing tips to navigate the process, from proper cleaning and sanding to successful paint application.
To enhance the durability and longevity of your cabinet finish, consider employing a tinted primer. By using a primer tinted to a shade close to your final paint color, you create a more uniform base. This not only improves coverage but also provides a double layer of color protection, minimizing the visibility of any minor chips, dents, or dings that might occur over time.
For an impeccably smooth and professional cabinet finish, don’t overlook specialized tools. Investing in a ridiculously simple must-have tool can significantly elevate the quality of your work. While the specific tool may vary, these typically aid in achieving even paint distribution, eliminating brush marks, or ensuring proper drying for a flawless, factory-like appearance.
Finally, to give your painted cabinets a truly custom, built-in, and professional appearance, consider a small but impactful detail: painting a piece of trim to perfectly fill the toe-kick space beneath the cabinet. This subtle addition eliminates any gaps, creating a seamless transition from cabinet to floor and contributing significantly to that coveted high-end look.
Do you have a painting project on the horizon? Before you pick up that brush, explore this incredible collection of the best tips, tricks, and techniques for transforming any space! Share your inspiration and projects on Pinterest! #Remodelaholic #paintideas #remodelideas #walldecor
For even more detailed painting tips and happy-ending project inspiration, be sure to check out the latest issue of HGTV Magazine — available now on newsstands and packed with invaluable advice!
Still seeking more inspiration and deeper dives into painting topics? Explore these additional resources:
Painting Furniture? Essential Tips for Using 5 Different Types of Paint
Discover the 5 Top Color of the Year Paint Trends
Explore The Most Popular Black Paint Colors for Modern Interiors