The steps below follow the order of the work for this workshop project.
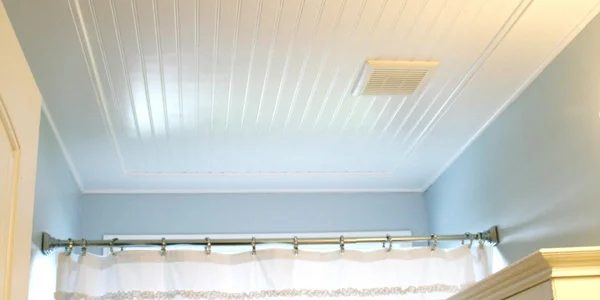
I love beadboard, even on the ceiling, a beadboard ceiling!! How lovely! See how House of Smith’s did it
This has got to be my MOST go-to project that we have done to date. I LOVE the way it turned out. I’ve gotten lots of emails about this bathroom ceiling… so here ya go!
 Before
The ceiling was a bit to big for a sheet of beadboard ceiling. So whe planned for a big frame instead.
They bought some 7 inch board… and cut a basic 45 degree angle frame
This is the whole thing… cut… before we painted and installed it.
I painted all the pieces white before we installed anything.
Some liquid nails on the back of each piece
First piece secured with a few nails from the nail gun.
Now you can see the frame up on the ceiling
Up goes the beadboard! Cut to fit the size of the frame. Just some glue and nails, and a few helpers..
This isn’t just a one man/woman job… it takes a little “crew”… and a photographer.
On goes the trim piece, inside to cover any gaps.
We just used liquid nails for this step, and some tape to hold it in place while it dried… we didn’t want to split the thin wood
With some spackling fill the crack and sand.
Before
The ceiling was a bit to big for a sheet of beadboard ceiling. So whe planned for a big frame instead.
They bought some 7 inch board… and cut a basic 45 degree angle frame
This is the whole thing… cut… before we painted and installed it.
I painted all the pieces white before we installed anything.
Some liquid nails on the back of each piece
First piece secured with a few nails from the nail gun.
Now you can see the frame up on the ceiling
Up goes the beadboard! Cut to fit the size of the frame. Just some glue and nails, and a few helpers..
This isn’t just a one man/woman job… it takes a little “crew”… and a photographer.
On goes the trim piece, inside to cover any gaps.
We just used liquid nails for this step, and some tape to hold it in place while it dried… we didn’t want to split the thin wood
With some spackling fill the crack and sand.
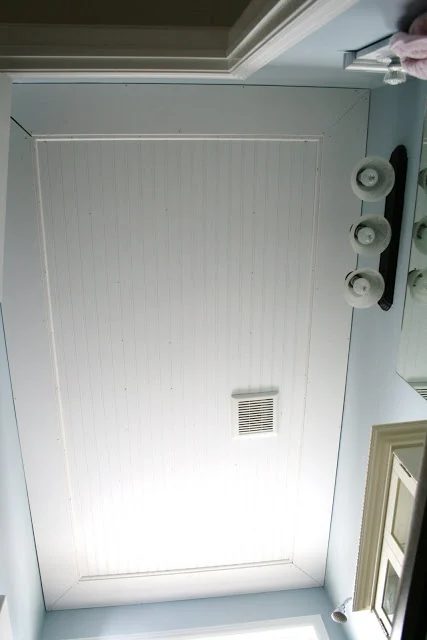
Here is the view from the ground…
What do you think?