
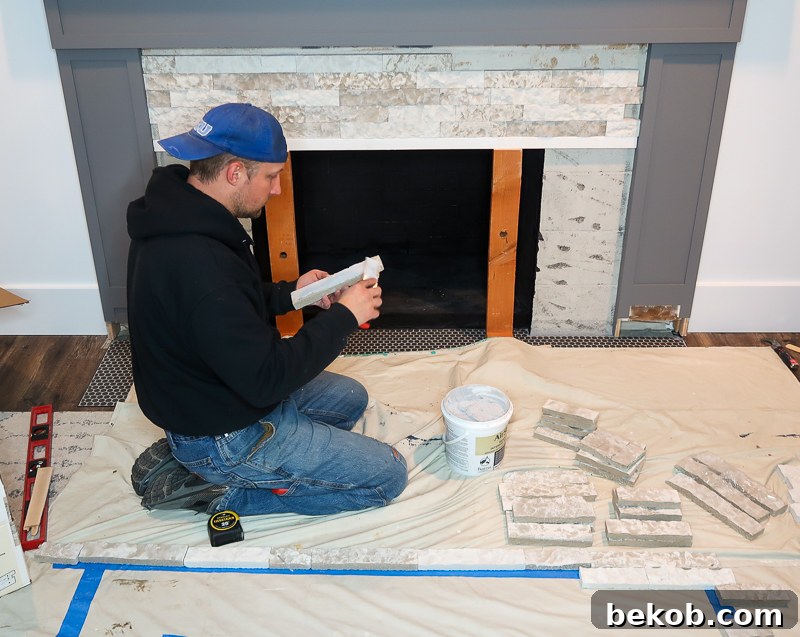
This is a sponsored post written by me on behalf of AirStone. All opinions are 100% mine. Read our full sponsorship and affiliate disclosure policy here.
Dreaming of a stunning fireplace transformation? Discover how effortlessly AirStone faux stone veneer can elevate your home, making DIY a joy. Join us for the final, most exciting part of our fireplace makeover series!
The Grand Finale: Installing AirStone for a Fireplace Masterpiece
If you’ve been following our DIY fireplace makeover journey, you know we’ve been working tirelessly to transform our living space. We’ve tackled the molding, meticulously prepped, and beautifully painted the mantel, setting the stage for something truly spectacular. Today, we’re reaching the pinnacle of this project, adding the defining element that brings everything together: AirStone faux stone to the fireplace surround. This isn’t just an addition; it’s the “pièce de résistance” that finishes the look with unparalleled elegance and warmth, making our fireplace a breathtaking focal point.
Choosing AirStone for this crucial final step was an easy decision. Its lightweight nature and straightforward installation process make it an ideal material for DIY enthusiasts looking for professional-grade results without the professional price tag or complexity. Beyond fireplace surrounds, AirStone is incredibly versatile. Imagine transforming your home’s exterior foundation, creating a sophisticated outdoor kitchen, or adding rustic charm around your pool or deck. Indoors, AirStone can redefine spaces as a kitchen backsplash, a captivating accent wall in a living room, basement, or bathroom, or even along a staircase. Its adaptability means the possibilities for enhancing your home’s aesthetic are virtually endless. To explore the full range of finishes and project ideas, we encourage you to visit the official AirStone website after reading about our experience.
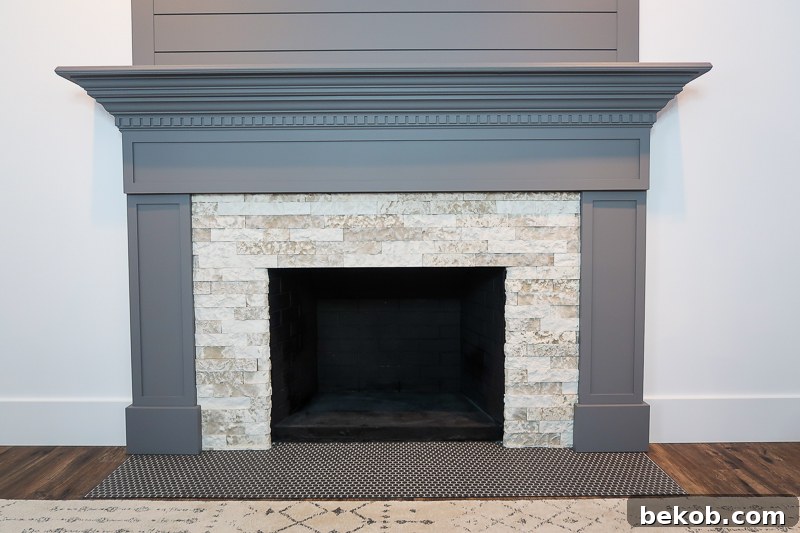
Why AirStone is the Ultimate Choice for Your Fireplace Makeover
When embarking on a home renovation project, especially one as central as a fireplace, selecting the right materials is paramount. We were captivated by AirStone’s ability to deliver the authentic look and feel of natural stone without the associated weight, mess, or complex installation requirements. Traditional stone can be incredibly heavy, often requiring structural reinforcement, specialized tools, and professional masons. AirStone, however, is engineered for accessibility. Its lightweight composition means it can be applied directly to most structurally sound surfaces, making it a perfect solution for DIY projects. The ease of cutting and adhesion dramatically simplifies the process, empowering homeowners to achieve stunning results on their own. This innovative faux stone offers a timeless aesthetic, ensuring your renovated fireplace will be a source of pride for years to come.
This particular phase of our fireplace series was the one I anticipated most, yet I was utterly unprepared for just how much I would adore the final outcome. This transformation underscores the profound importance of patiently refining your vision and choosing materials that truly resonate with your aesthetic goals. If you’re new to our journey, catching up on the previous installments will provide a comprehensive overview of how we reached this exciting point. Our fireplace makeover has been an ongoing labor of love, too extensive to condense into a single post, ensuring each step received the attention and detail it deserved.
- Updating the Molding on the Mantel: The foundational steps of refreshing the mantel’s structure.
- Priming and Painting the Mantel: Essential preparation for a flawless, long-lasting finish.
Essential AirStone® Products for a Seamless Installation
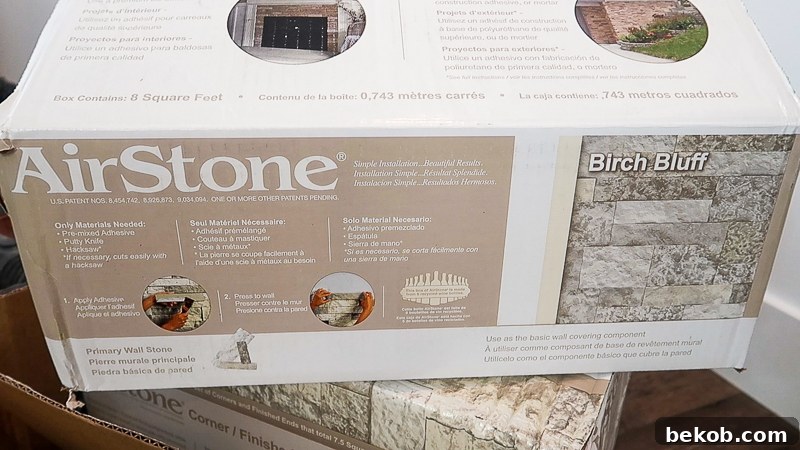
To ensure a flawless and professional-looking AirStone installation, having the right materials is key. AirStone simplifies this by offering a concise range of specialized products designed to work in harmony. For our fireplace project, we carefully selected these components to achieve a durable and visually appealing finish:
- AirStone® Corner/Finished End Stone:
- This specialized stone is crucial for creating crisp, professional-looking corners and edges. It provides a seamless transition, giving your project a high-end, finished appearance.
- One carton effectively covers approximately 6 linear feet and 7.5 square feet, ensuring ample coverage for most corner applications.
- Each box contains 4 variations of color and texture, allowing for a natural, non-repetitive corner pattern.
- AirStone® Primary Wall Stone:
- These are the main flat pieces that make up the body of your stone wall or surround. They are designed to interlock beautifully, creating a realistic stone façade.
- A single carton covers an impressive 8 square feet, making it efficient for larger surface areas.
- Similar to the corner stones, each box offers 4 distinct variations in color and texture, vital for achieving an organic and authentic stone look.
- AirStone® Interior Wall Adhesive:
- This is a specially formulated, premixed adhesive designed for optimal bond with AirStone products on interior surfaces. Its consistency is perfect for easy application and strong adhesion.
- Supplied in a convenient one-gallon bucket, it’s ready to use straight from the container, saving time and effort.
All these high-quality AirStone materials are readily available at Lowe’s. Should your local store not have them in stock, the entire range can be conveniently ordered online, ensuring you have access to everything you need for your project.
Choosing Your Aesthetic: AirStone Color Collections
AirStone offers a curated selection of three distinct color collections, each designed to evoke a different mood and complement various interior design styles. The choice of stone color is pivotal in defining the overall ambiance of your space, influencing everything from perceived warmth to modern sophistication.
- Birch Bluff: This collection features a beautiful neutral palette, often characterized by subtle grays, creams, and soft tans. It’s an excellent choice for those seeking a light, airy, and contemporary feel, offering versatility that blends seamlessly with diverse decor themes. It was our chosen collection for its timeless and elegant neutrality.
- Autumn Mountain: As the name suggests, this collection embodies the rich, earthy tones of a fall landscape. Expect deeper browns, warm reds, and muted golds, perfect for creating a cozy, rustic, or traditional atmosphere that exudes comfort and natural beauty.
- Spring Creek: This palette typically features a mix of cool grays, lighter browns, and occasionally hints of green, reminiscent of stones found by a babbling brook. It’s ideal for achieving a serene, organic, and slightly cooler aesthetic, lending a refreshing touch to any room.
We ultimately selected the Birch Bluff collection for our fireplace surround. Its inherent neutrality and sophisticated blend of colors provided the perfect backdrop, allowing the fireplace to stand out as a central feature without overwhelming the room’s existing decor. One of AirStone’s significant advantages lies in its use of large, naturally sized stone pieces, which create a much more authentic and classic look compared to the often-dated appearance of stone panels made from smaller, scrap stone fragments. This attention to natural proportion and texture is what truly elevates AirStone above other faux stone options.
Tools for a Smooth AirStone Installation
While AirStone is celebrated for its DIY-friendly installation, having the right tools can significantly enhance efficiency and the quality of your finished project. Below is a list of tools we found indispensable, including some optional power tools that can save considerable time and effort:
(Affiliate Links)
- Putty Knife: Essential for applying the adhesive evenly and consistently to the back of each stone.
- Blue Painter’s Tape: Useful for marking, holding things in place temporarily, or protecting adjacent surfaces.
- Drop Cloth: Absolutely necessary for protecting your floors and furniture from adhesive drips and stone dust during the layout and cutting phases.
- Reciprocating Saw (optional): While not strictly necessary, a reciprocating saw with the right blade drastically speeds up cutting AirStone pieces to size.
- Masonry Blade (optional): When using a reciprocating saw, a masonry blade is critical for making clean, efficient cuts through the faux stone material.
- Tile Saw (optional): For very precise, intricate, or high-volume cuts, a tile saw can provide unparalleled accuracy and speed.
One of AirStone’s greatest advantages is its accessibility to beginners. You don’t need to be a seasoned professional to achieve a beautiful stone finish. The stones can be cut by hand using a simple hack saw, making the project achievable even without power tools. However, for those looking to expedite the process and minimize physical effort, investing in power tools like a reciprocating saw or tile saw will undoubtedly save time and make the job even easier. The core principle remains simple: apply the specialized adhesive, press the stone firmly into place, and enjoy the transformation.
Step-by-Step Guide: Installing AirStone® on Your Fireplace Surround
Transforming your fireplace with AirStone is a rewarding DIY project that can be completed in just a few steps. Follow this comprehensive guide to achieve a stunning faux stone surround.
Visual Aid: The AirStone Installation Process Video
For those who prefer visual instructions, AirStone has created an excellent official installation video. We highly recommend watching it to gain a clear understanding of the techniques involved before you begin.
Step One – Meticulous Surface Preparation
The foundation of any successful AirStone installation is a clean, well-prepared surface. Begin by thoroughly cleaning the area where the stone will be installed. It is absolutely crucial that the surface is dry and completely free of any dirt, dust, grease, oil, loose paint, wallpaper, or residue from existing adhesives. Any lingering contaminants can compromise the adhesion of the AirStone, leading to future issues. In our particular project, we were installing the stone directly onto cleaned cinder blocks, a surface that had previously supported old tile. After removing the tile, we ensured the blocks were scrupulously clean and smooth, providing an ideal base for the new stone veneer.
Step Two – Crafting a Strategic Layout Template
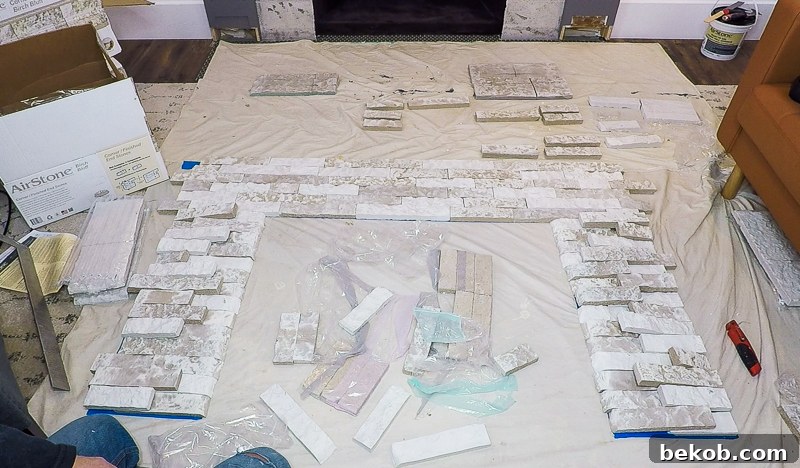
Before applying a single stone to the wall, meticulous pre-planning is essential for a natural and aesthetically pleasing result. We found it incredibly beneficial to create a template by taping off an area on a drop cloth laid out on the floor, matching the exact dimensions of the surface to be covered. Within this taped-off area, we then carefully arranged all the AirStone pieces exactly as we envisioned them on the fireplace. This “dry run” allowed us to ensure a great variety of colors and shapes were distributed evenly, preventing any undesirable patterns or repetitive looks. It also provided an opportunity to experiment with different arrangements, ensuring the overall aesthetic was organic, balanced, and truly reflected the beauty of natural stone. This step is invaluable for visualizing the final outcome and making any necessary adjustments before the adhesive comes into play.
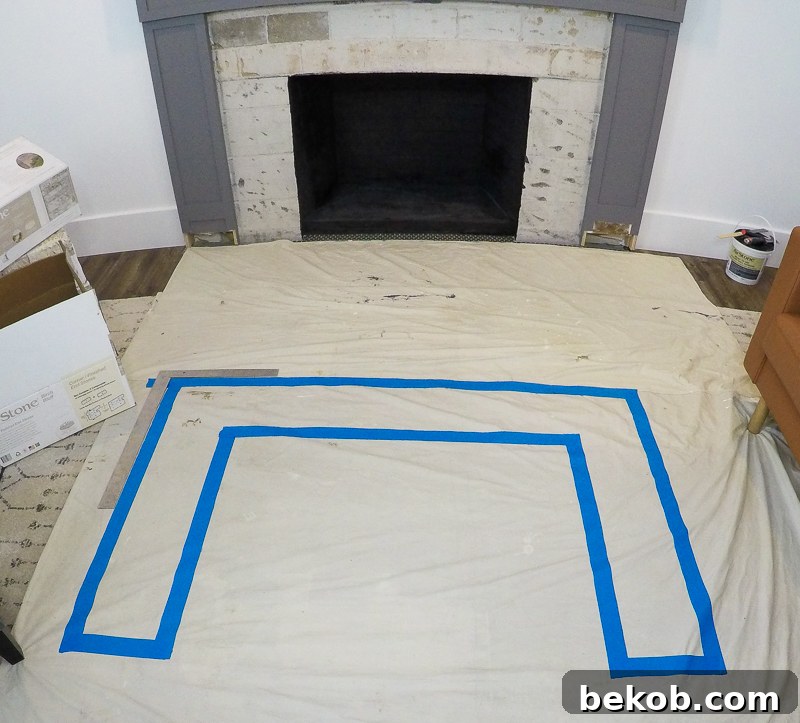
Step Three – Thoughtful Stone Layout and Patterning
Once your template is ready, begin the crucial process of laying out all the stone pieces, paying close attention to color variations and sizes. This stage provides an excellent opportunity to familiarize yourself with the full range of pieces available in your cartons and to strategize how to best stagger your joints. Staggering joints is critical for creating a natural, professional appearance, avoiding unsightly vertical lines that can detract from the stone’s authenticity. Each AirStone box contains 4 variations of tones, often indicated by different colored labels on the packaging to help you keep track. As you arrange your pieces over the template, consciously select a good mix of these different colored stones, distributing them throughout your project. We started by separating our AirStone® pieces into piles based on their color variations, then carefully selected from each pile as we laid out the pattern, ensuring a truly diverse and harmonious blend.
Step Four – Supporting Stones During Adhesion
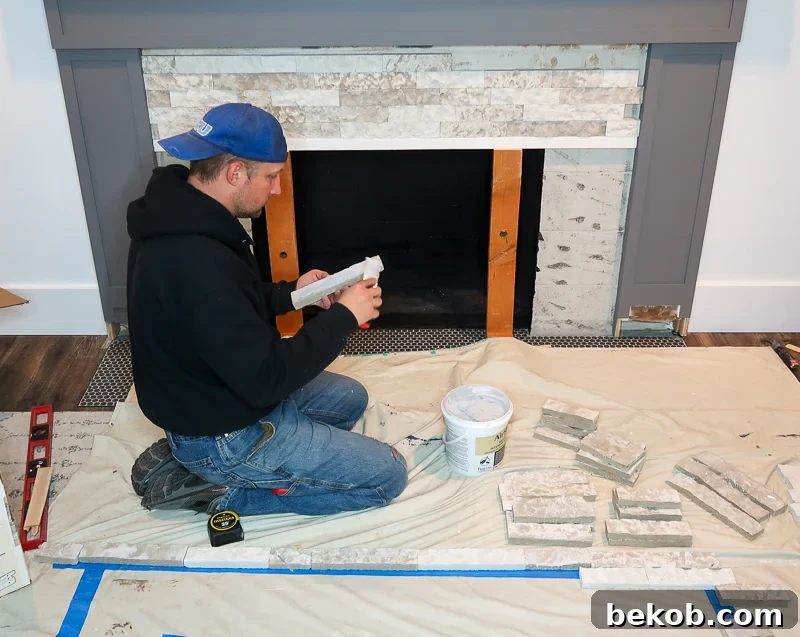
While the conventional wisdom for stone installation often suggests starting from the bottom and working upwards, our fireplace project presented a unique advantage. We opted to begin at the top opening of the fireplace, as this provided a perfectly level and stable reference line. To facilitate this top-down approach, we constructed a simple yet effective temporary ledger. This temporary ledge was designed to support the initial row of stones, holding them securely in place while the adhesive cured. The beauty of this ledge was its simplicity: it required no permanent attachment to the wall, resting instead on the floor, and comprising just a few 2x4s for legs (with added feet for stability) and a level board screwed across the top. Once the initial row of stones was glued above this temporary support, we allowed it to dry for over an hour, ensuring absolute immobility before proceeding.
Applying the adhesive is straightforward: aim for a consistent thickness of about 1/8″ to 3/16″ on the back of each stone. Think of it like frosting a cupcake – smooth, even, and sufficient to create a strong bond without excessive squeeze-out. This controlled application ensures optimal adhesion and minimizes clean-up. Once the top row was secure, we were able to work our way down, knowing our starting point was perfectly level and locked in place.
Step Five – Precise Stone Cutting for a Perfect Fit
For the vertical sides of the fireplace surround, we found it highly efficient to pre-cut all the necessary stone pieces before beginning the gluing process. This allowed us to maintain a consistent workflow and ensure each piece fit perfectly into its designated spot. We primarily used a reciprocating saw equipped with a masonry blade, which made quick work of cutting through the AirStone. The power tool offered both speed and precision, dramatically reducing the time and effort required for cutting. While a hack saw can be used for manual cutting, a power tool is undoubtedly an advantage for larger projects or more intricate cuts.
Given our decision to start from the top of the fireplace opening, we had to work swiftly when gluing the stones on the sides to maintain consistent spacing and ensure the tiles didn’t shift before the adhesive set. This meant applying adhesive, positioning the stone, and temporarily bracing it if necessary, all while managing a top-down gravity challenge. If possible, for those new to AirStone, starting from the bottom and working your way up is generally a more forgiving method, as gravity assists in holding the stones in place as the adhesive cures. Regardless of the starting point, the cut pieces allowed for a custom, tailored fit around the fireplace opening, giving the entire surround a professionally installed appearance.
Project Timeline and Unrivaled Satisfaction
We were thrilled to complete this entire AirStone fireplace surround installation within a single day. Our specific fireplace surround encompassed approximately 10 square feet of surface area. The most time-consuming aspects of the project were the initial layout of the stone pieces and the necessary cuts, particularly those intricate ones around the fireplace opening. This pre-planning and preparation phase, while demanding, proved invaluable for a smooth installation. The actual gluing and application of the stones to the wall was surprisingly the fastest part of the entire process, a testament to AirStone’s user-friendly design and quick-setting adhesive.
The final reveal of the stone surround has left us absolutely delighted. The transformation is nothing short of amazing! Adding the AirStone® to the fireplace surround truly brought the entire makeover to a glorious conclusion. It wasn’t just an improvement; it was the element that unified all our efforts, creating a cohesive, warm, and inviting focal point in our living room.
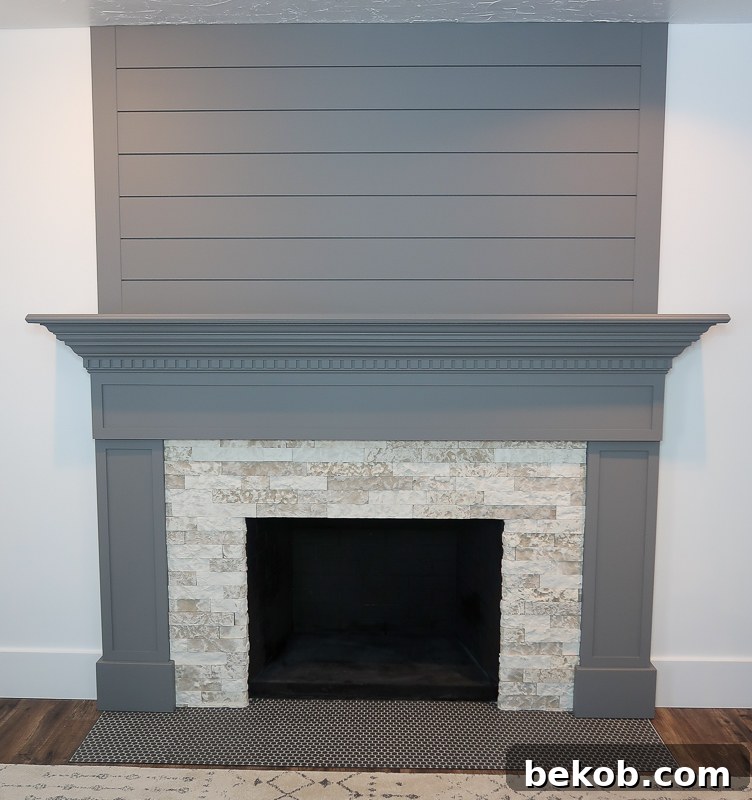
We extend our sincere gratitude to AirStone® for their invaluable support of our blog and for creating such an outstanding product. We couldn’t be happier with the results of this project; every time I walk into my living room, the transformed fireplace brings me immense joy and satisfaction. We wholeheartedly encourage you to explore this fabulous product further by visiting AirStone on Facebook and Instagram for endless inspiration and project ideas. Elevate your home with the timeless beauty and effortless charm of AirStone!