
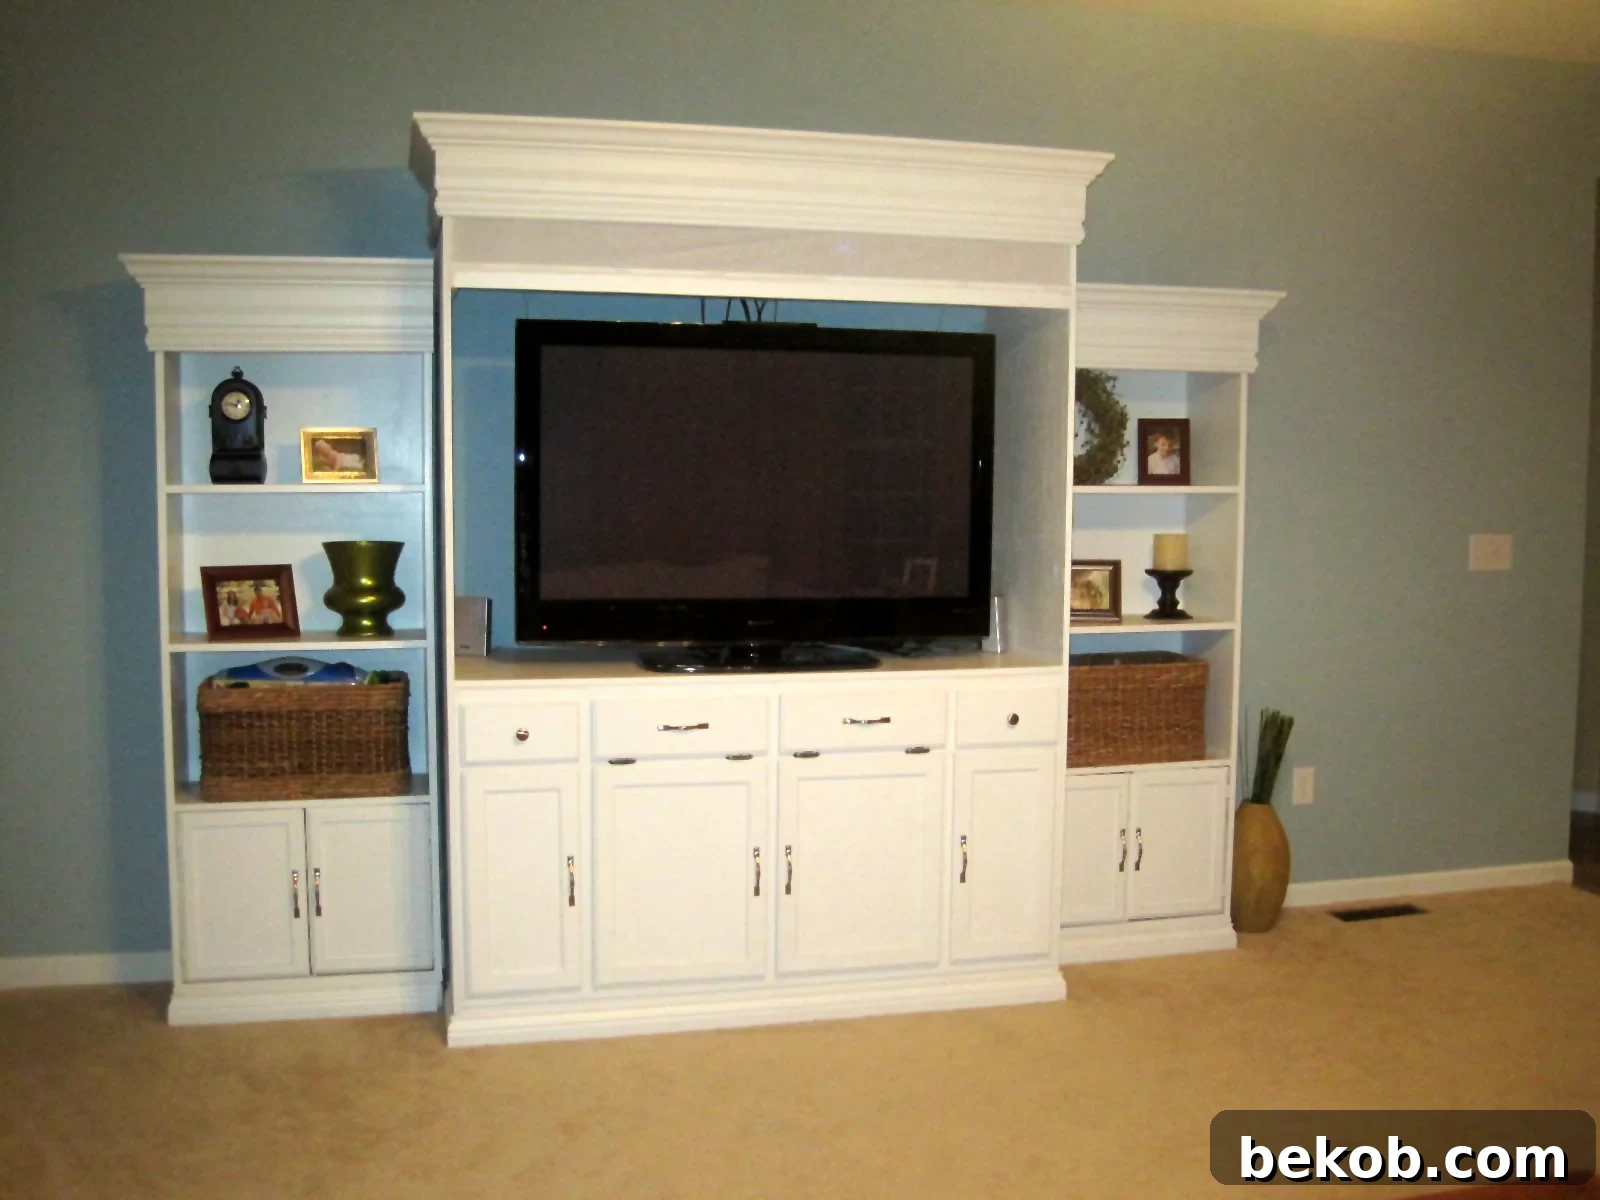
From Unused Vanity and Thrifted Bookcases: Crafting a Custom DIY Entertainment Center
Submitted by Designed to Dwell
Moving into a new home often brings a cascade of exciting possibilities, but it can also present a few unexpected challenges. One such challenge we faced after leaving our previous house, which boasted a fantastic built-in entertainment center, was figuring out how to accommodate our expansive 52-inch television. For far too many months, our large TV sat precariously on our coffee table, a temporary solution that was neither practical nor aesthetically pleasing. We knew we needed a permanent fix, but the thought of purchasing an expensive, pre-made unit that might not perfectly fit our space or style felt unappealing.
Our vision extended beyond a simple TV console. We dreamed of a media center that was not only functional, providing ample storage for all our electronic equipment and discreetly hiding the inevitable clutter of kids’ toys and games, but also a beautiful, integrated piece of furniture that would enhance our living room’s decor. We sought a solution that combined affordability with custom design, a project that would truly reflect our personal style without breaking the bank. The quest for inspiration led me down the rabbit hole of online classifieds, specifically Craigslist, where a serendipitous discovery sparked the idea for our perfect, custom-built entertainment center.
The beauty of DIY lies in its ability to transform the ordinary into the extraordinary, and this project is a testament to that philosophy. By combining a few unlikely candidates – an unfinished bathroom vanity and a pair of thrifted bookcases – we were able to construct a robust, stylish, and highly functional media console that perfectly met all our requirements. This isn’t just about saving money; it’s about crafting a piece that tells a story, tailored precisely to your home’s needs and aesthetic.
The Hunt for Hidden Gems: Sourcing Our Core Components
The journey began with those “hideous” bookcases I stumbled upon on Craigslist. Priced at a mere $60 for three, they represented an incredible bargain, despite their questionable original design. While some might have passed them by, seeing only their initial flaws, I immediately recognized their potential. With a little imagination, these humble bookshelves could be transformed into the elegant side towers of our future entertainment center. My apologies if these exact bookcases grace your home, but rest assured, with a few modifications, they can be remarkably versatile!
The plan was simple yet ambitious: flank our television with two of these bookcases, creating integrated storage and display areas. For the central component, the crucial piece that would house our TV and primary media devices, we decided on an unfinished 60-inch bathroom sink base from a local home improvement store. Opting for an unfinished piece was a strategic choice, as it allowed us complete control over the final finish and ensured a seamless match with the modified bookcases. The raw wood offered a blank canvas, ready to be customized and elevated into a central design element.

Transforming the Vanity: Crafting the Central Hub
The unfinished bathroom vanity, while sturdy, needed significant modifications to transition from a sink base to a sophisticated media console. My husband, ever the skilled craftsman, took the lead on this transformation. The first step involved adding finished plywood to the top and sides of the vanity. This created a solid, continuous surface, replacing the typical open sink cutout and providing the necessary support and aesthetic for an entertainment unit. A separate top piece was then added, giving the central console a robust and finished appearance.
Next, the architectural details began to emerge. Crown molding was meticulously added around the top edges, instantly elevating the piece from utilitarian to elegant. While we don’t have in-between pictures for every step, subsequent additions included a new internal shelf within the vanity, more trim applied to the cut edges of the plywood for a polished look, and base molding around the bottom to complete its foundation. Crucially, the faux drawers, originally designed to conceal plumbing beneath a sink, were ingeniously repurposed. Hinges were installed, turning them into functional cabinet doors, and an internal shelf was added, creating a dedicated, hidden space for our video game systems and DVD player. This thoughtful modification ensured all our electronics were neatly organized and out of sight, fulfilling one of our primary design goals for a clutter-free living space.

The Bookcase Metamorphosis: Achieving Cohesive Design
Once the central vanity was taking shape, our attention turned to the bookcases. Our initial thought was that we would have to construct entirely new doors to match the style of the vanity. However, a closer inspection by my husband revealed a wonderful surprise: the “crazy design” on the front of the bookcase doors was merely a plastic overlay, easily removable! This discovery saved us a significant amount of time and effort.
With the plastic removed, the bookcase doors became a blank canvas. To mimic the sophisticated profile of the vanity doors, molding was carefully applied around the perimeter of each cabinet door on the bookcases. This simple yet effective detail instantly unified the design. Further enhancements included removing the scalloped trim piece, a common feature on older, more decorative bookcases, and replacing the top of each bookcase with matching crown molding. This critical step ensured visual continuity across the entire unit, making the individual pieces appear as if they were always meant to be together. Finally, base molding was added to the bottom of the bookcases, mirroring the central vanity and grounding the entire structure. These meticulous adjustments transformed the thrifted finds into custom-built components of our grand media center.

The Finishing Touches: Bringing the Vision to Life
With all the structural modifications complete and the individual components seamlessly integrated, the final steps involved preparing the entire unit for its grand unveiling. This stage is where the true character of a DIY project shines through, as priming, painting, and adding hardware dictate the aesthetic appeal.
The entire structure was thoroughly primed, creating a uniform surface that would ensure excellent paint adhesion and a smooth finish. Choosing the right primer is crucial, especially when working with different wood types and previously finished surfaces. After the primer dried, the unit was carefully painted. We opted for a durable, high-quality paint that would withstand daily use and complement our living room’s color scheme. This step often requires multiple coats, with light sanding in between, to achieve a professional, factory-like finish. Finally, elegant hardware was selected and installed on all the new cabinet doors, adding a touch of sophistication and making the unit feel truly custom-made.

As with many DIY projects, there was one minor design element that initially felt a little “off.” One of the internal shelves, despite our best efforts, seemed a bit plain or visually disjointed within the overall design. Instead of leaving it as is, we embraced this opportunity for further customization. We decided to cover the shelf with a complementary fabric, adding texture and a soft visual element. To finish it off and give it a polished look, we added a piece of molding to the front edge of the fabric-covered shelf. This small, creative solution transformed a minor imperfection into a unique design feature, demonstrating the flexibility and problem-solving spirit inherent in custom crafting.

The End Result: A Custom Media Masterpiece
Today, our living room is graced by this magnificent, custom-built entertainment center. It stands as a testament to imagination, resourcefulness, and the power of DIY. Gone are the days of our TV precariously perched on a coffee table. In its place is a beautifully integrated unit that not only holds our 52-inch television perfectly but also provides ample, organized storage for all our electronics, media, and, most importantly, keeps the kids’ toys and games neatly tucked away.
This project proves that you don’t need to spend a fortune to achieve high-end custom furniture. By repurposing readily available items like a bathroom vanity and bookcases, and applying a bit of elbow grease and creativity, you can create a piece that is uniquely yours. The satisfaction of knowing we built this unit ourselves, tailored to our exact specifications and style preferences, is truly immeasurable. It’s more than just a media center; it’s a focal point, a conversation starter, and a perfect example of how thoughtful design and DIY ingenuity can transform a house into a home.
Ready to Tackle Your Own DIY Media Center Project?
If this project has sparked your own creative ambitions, here are a few tips to get you started:
- Plan Meticulously: Before buying anything, measure your space, your TV, and all the equipment you plan to store. Sketch out your design and determine the dimensions of your components.
- Source Smart: Keep an eye on Craigslist, Facebook Marketplace, and local thrift stores for affordable furniture pieces that can be repurposed. Look beyond the immediate appearance and envision their potential.
- Embrace Unfinished: Unfinished cabinets or furniture pieces offer the ultimate flexibility for customization. You can paint, stain, or distress them to perfectly match your decor.
- Invest in Good Tools: A few essential power tools (like a miter saw for clean cuts on molding) and quality hand tools will make the process much smoother and yield professional results.
- Don’t Fear Molding: Molding is a secret weapon in DIY. It adds architectural interest, hides imperfections, and can instantly elevate the look of a simple cabinet into a custom piece.
- Patience is Key: Rushing through steps like priming and painting can lead to a less-than-perfect finish. Take your time, allow for proper drying, and apply multiple thin coats for the best results.
The satisfaction of creating something beautiful and functional with your own hands is truly rewarding. We encourage you to look around your home, identify a need, and see what possibilities lie hidden in overlooked furniture pieces or budget-friendly finds. Your next custom masterpiece might be just a thrift store visit away!
Explore More DIY Entertainment Center Inspirations:
Television Media Center DIY Project
Living Room Renovation With DIY Entertainment Center for Flat Screen TV
Entertainment Center Transformed Into a Bench; Guest