Materials and the sequence of the job sit together on this page.
Brandy at Life of Perks wanted to share with us what she has accomplished with building her wood buffet.There haven’t been many times in my life that I could point to something and say “I did that.” Let’s face it, mostly when I do something the last thing I want to admit is responsibility. But this time I accept full responsibility for what I’ve done, with a little help from a truly solid lady, Ana @ Knockoff Wood After a few weeks of fruitless searching I gave up. This is the south, it’s hot out there. I had more fun things I wanted to get to.
So, I decided I could just build a buffet for the dining room. Cue sidelong look & smirk from Hubs when that revelation was made. Not that he didn’t think I could do it, he just knows how impatient I can get. He’s pretty handy, I’m sure he thought he would end up doing it.
I declared, a bit too loudly, that “I would do this & for free.” Using only scraps left over from previous projects. So I printed up Ana’s plans for bookcases and drew all over them. Modifying the height, dividing the shelves, and adding doors.
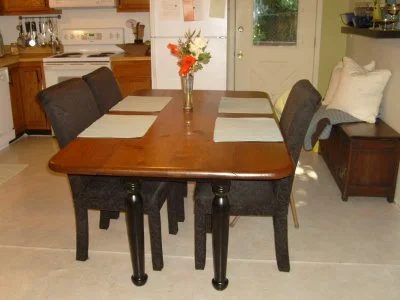
I wish I had taken a picture of the pile of wood stacked in the garage before I started…. It never occurred to me. I used 1×3’s for the top so it would look like planks to match my dining room table, kind of a farmhouse table? I guess? Glued the planks together and clamped them tight. I only dropped the top on my foot once. Not bad, cause this gal’s an accident lookin’ for a place to happen. (I once broke my toe while painting. Don’t ask) If you look very closely you can see where I had to write “front” with an to remind myself which way would be the front. Hey whatever works, right?!
I used MDF for the sides and shelf, the legs and trim on the front are 1×2’s. Not to bad so far, right?!?! For a girl with a clearly handy Hubs, I’ve helped with a lot of projects. But this is the first one I was on my own with.
The sander died on me while trying to make the top well fitted. Hubs said the cost of the new sander should be added to the cost of the project, I disagree.
I’ve never built a door before, and this took some trial and error. I did end up making a few trips to Home Depot at this point. But the actual molding on the doors was leftovers from another project.
Some may laugh, but the hinges were hard for me!! Way hard, added almost another week to finishing this project. I just couldn’t get it to work in my mind. I thought I knew what I needed and then I’d head to Lowe’s & Home Depot only to become utterly confused. I ended up going through the house taking hinges off different things (sewing table, armoire, bathroom cabinets) until I figured out what would work. Don’t laugh…. at least not as loud as some people did. This world of hidden, unhidden, mortised, non-mortised hinges baffled me.
When I figured it all out, it seemed too direct to have been confusing. Part of the problem……. I finally figured out that on the hinge display at Lowe’s, all the hinges were hung backwards. It totally confused me. I know, I’m weird.
At this point you’re probably wondering if I should be allowed to cross the street alone. Sometimes you really can think about something TOO MUCH!!
I used Gorilla Glue for the molding on the doors. Love this stuff, it works fast!!! I made quite mess of the bottle!!! Drag that puppy inside and let the paint party begin!!! I had the black paint left over from the bathroom remodel.
My much thought about doors even open and close properly. I did it!! I think I want some pretty glass pulls for the door, but I am holding out for something that really “speaks” to me. It’s not ornate or fancy but it goes well with the rest of the dining room furniture. I DID THAT!!!! Is it possible to be in love with a piece of furniture??? Yes! Something about knowing that you built it from a pile of scrap wood is very exhilarating. The big question is to distress or not to distress? The rest of the dining room furniture is lightly distressed. So far I just have not been able to bring myself to take a piece of sandpaper to this baby. Now did I finish this for free? (Like I so stupidly proclaimed at the beginning) Uh…No. I got a bit carried away running my mouth off to the Hubs. I didn’t even think about the hinges, doors, and thin piece I would need for the back. So yes, I did have to spend some money. Total cost for my new buffet $20.58
Wow! She did that herself. Great Job! How do you like her new buffet?