The steps below follow the order of the work for this our remodeled homes & projects project.
–
Usually on this blog we focus a lot on the pretty stuff. Your basic before and after. What I would consider the fun stuff… but if you were to break down our projects into percentages… I would say usually they are 80% foundation, functional, not pretty work and 20% cosmetic, fun stuff…
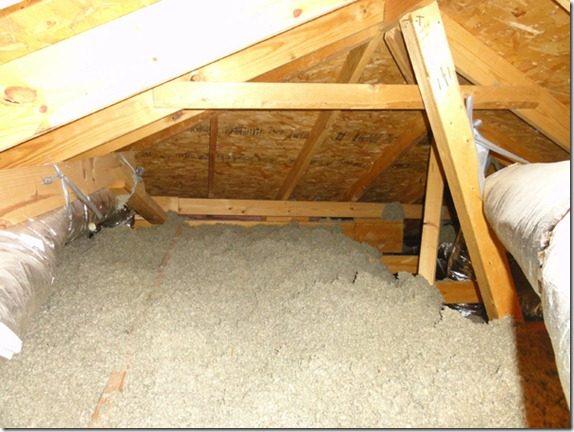
This project is definitely in the 80%… but totally, absolutely, positively essential… You’ll understand the reason for all the adjectives in a second!
Since moving Etta to her own bedroom, we have had huge temperature control issues. If our upstairs family room is 73 degrees, her bedroom is 68. At night, in the winter her room is freezing! Even when wearing a one piece fleece jammies suit, with socks and a shirt underneath, plus we wrap her up with her little afghans… We still had to resort to a space heater, which makes my Mommy heart almost sick with worry.
I am embarrassed to say that we haven’t tried to figure out the real problem. And yesterday it became totally clear what was wrong.
First, just a little more back story, a few months back I was asked if I wanted to try out Owens Corning’s new Eco-Touch Insulation product.
Eco Touch is a batt insulation which is made from natural materials, is formaldehyde free and contains 70% recycled content. An solid Handmade insulation product because installing EcoTouch is straightforward. First, grab your protective glasses and work gloves for cutting. With EcoTouch, no masks are required! To install either fill the joist cavities if they aren’t already full or lay the new batts perpendicular to the full joist. Being sure to follow the manufacturers instructions for recessed lighting fixtures and from any metal chimneys, gas water heater.
So that sounded straightforward enough, and if it saved us money on heating bills I was totally game. And actually more than saving money, the first thing I thought, is, “I bet that would TOTALLY help Etta’s room stay warmer, if we added some more insulation…” little did I know the actual issue. So I jumped on the offer to try it out…
Well, I took down my Christmas trees and décor yesterday… I know I am a total Grinch! I would take down the tree on Christmas day if I could, I just get overwhelmed by all the junk… uh décor. Anyway, we decided to store our Christmas trees in our attic. We have some other random junk up there too. (which means we have been up there before…) BUT in my defense, also residing in our attic we have our huge HVAC units, two huge air conditioner/heater units, and TONS of ducts…So, we’ve never really looked around.
(see it is hard to see what is going on.)
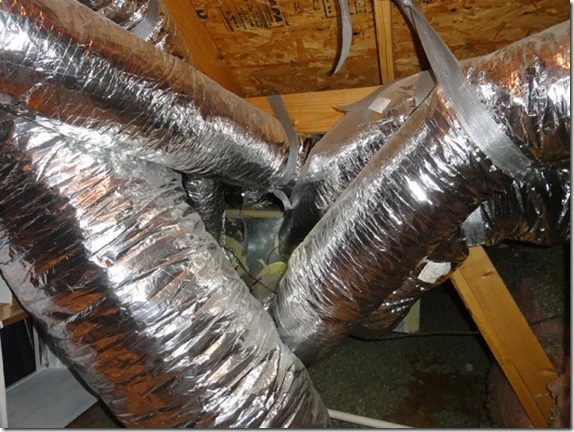
Well yesterday, we decided to do some rearranging. While up there Justin checked out what is behind these huge ducts (and um… random chairs) since we had insulation on the mind.
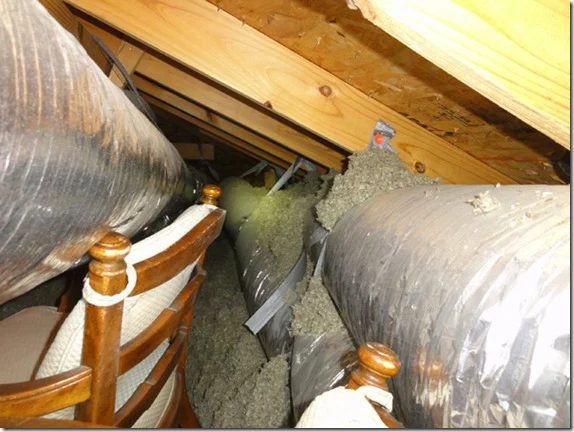
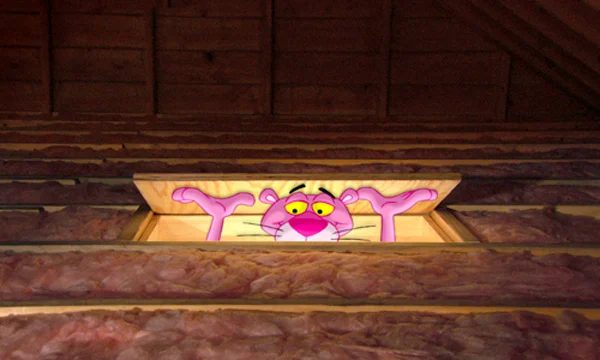
Below is what we saw when Justin peered through a small gap above a wall of ducts blocking our view to Etta’s ceiling. What did he find?
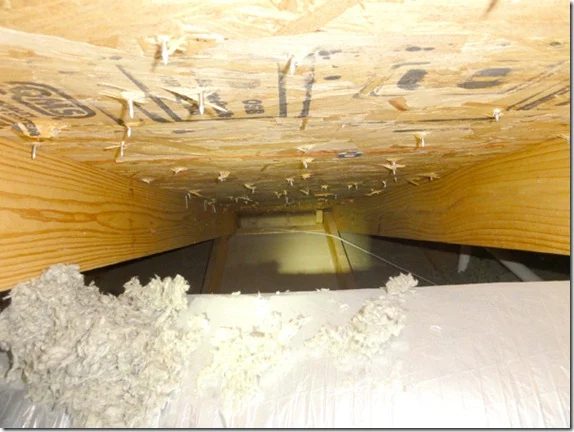
NOTHING!
There is NOT A SINGLE INCH OF INSULATION OVER A WHOLE1/4 of our house…. NOT a single inch!? What the heck! How in the world did our house pass code? I seriously want to sue the city for crappy inspecting. Our house in only 10 years old, this wasn’t built in the days before insulation. And yet, they just decided, to NOT insulate, Etta’s room, our upstairs bathroom, and two walk in closets (which include the playhouse) here are some more pictures, so you can really see how bad it is.
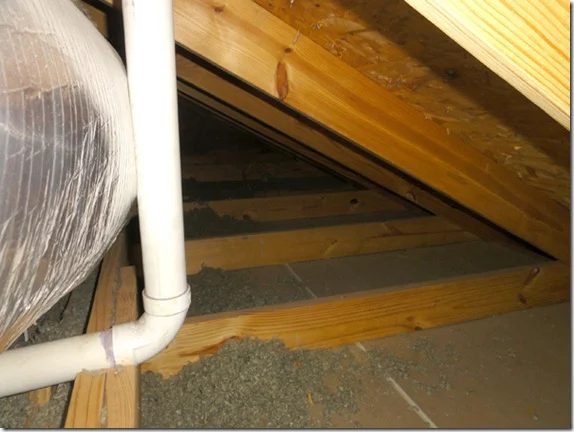
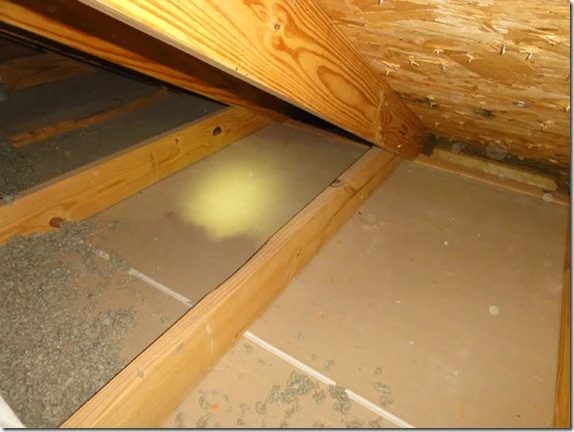
We are going to have some major work ahead of us… luckily Justin has the week off.
We also found some other small issues, that we can address more easily like insulation batts that were missing…
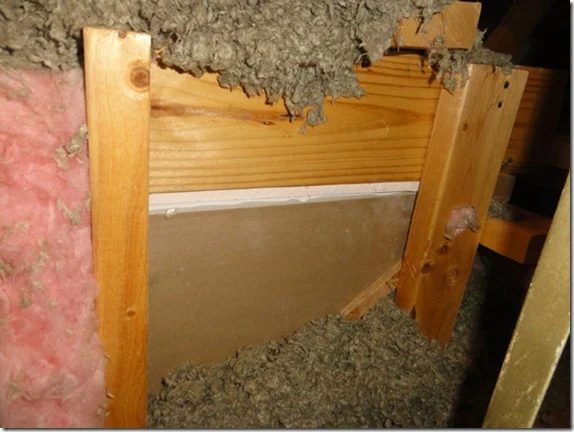
But while looking into this awful insulation issue, we learned some other things too… We ran to Home Depot to price things out and get some guidance… luckily we have one less than 1/4 of a mile away!
First, did you know that there are recommended levels of R values for different areas. Go and look at this quiz to see what your insulation needs are. And here is a calculator when purchasing. But, without being or needing a professional’s help, a general rule, if you can see the floor joints in your attic, chances are that your insulation is not thick enough! (Uh, yeah, I’d definitely say we can see the floor joists.)
Where we live, because to the heat and cold, we are supposed to have an R value of 30-60. Right now, we measured and we have approximately an R-value of 13… which is almost less than nothing… well of course, we also have that whole section of nothing! What does that mean? It means we are wasting TONS of money to heat and cool our home.
There are tons of options out there for insulation, and by doing it ourselves we can save a ton of money, both in labor and later in heating and cooling bills. We just have to be sure that we read all directions, especially when it comes to installing around recessed lights and heating exhaust pipes. Hopefully we will get this resolved by tomorrow or Thursday. We are going to have to see how we move forward… but move we will, cuz I am tired of my sweetie pie freezing her hide every night or having to use a space heater.
Have any of you been looking into getting some attic insulation?
**I was provided me with a gift certificate to cover the cost of trying out this product, but the opinions expressed in this post are mine.