Read the sequence from the top before cutting, painting, or moving pieces.
Master Bathroom Before – After (and in between!) by AlyssaHi, I’m Alyssa from Sweet Sewn Stitches! I have been blogging for a few years, but just recently have been inspired to kick it up a notch and dedicate more time to my story.
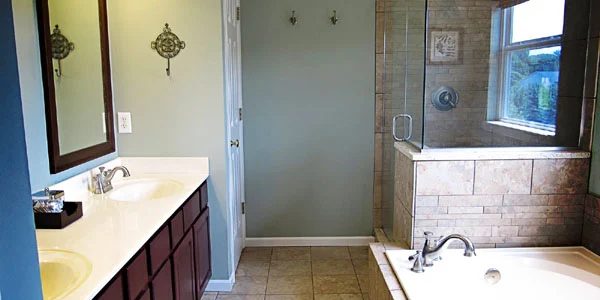
I hope to share what is real in my life – as a wife of an memorable hubby, a momma of two under three, who still loves ME time, someone who thirsts for unique tutorials and artsy projects, as a planner, and as a momma who is always looking for more inspiration!I am absolutely thrilled to have the opportunity to share on Bekob! Giving our master bath a facelift was on the ‘to do’ list for a LONG time. I despised the ‘dressing room’ lightbulbs, the 6 feet long, wall sized mirror, and the grubby acrylic shower with etched and corroded glass enclosure. It was finally the pregnancy hormones and nesting instincts that sparked motivation to remodel the space. Here is a peek at the transformation!
| BEFORE |
| AFTER |
| AFTER the FIRST REMODEL in 2008 |
| BEFORE |
| AFTER |
3} Reinforce the threshold using metal lath. Prep with floor mix and add ¼” slope for proper drainage.
4} Install cement board on surrounding walls down to the shower pan.
7} TILE! Grout and seal…Ta Da!
The shower niche gave us fits! I chose a large niche from Redi-Niche. It installed well, but using the provided adhesive to cover with tile did not work. We were able to pull the tile off the next morning! It was a rough road, but we purchased more of an epoxy adhesive and FINALLY had a finished niche!
It was also a challenge to lay the mosaic muretto tile we chose for the shower accent wall and tub surround. The muretto pieces were backed with paper mesh instead of plastic. Once the mesh became moist from the wet saw, the panels began to fall apart! This made hanging the muretto on a vertical surface extremely frustrating. We persevered, and I would not change it for anything! Once the tile was finished, we chose a piece of scrap granite for the shower threshold, bench seat, and return ledge. Once we installed the granite, it was finally time for the last step ~ the shower enclosure! We opted for a semi-frameless style in brushed nickel finish to match plumbing fixtures. The glass is also treated with ShowerGuard that prevents corrosion of the enclosure. A few finishing touches and this was the magnificent end result! We have enjoyed our master bath now for over a year and it still makes me smile. I absolutely love it and am so glad we took the plunge to remodel!
Thank you again to Bekob for having me! I hope you have enjoyed our master bath remodel, and invite you to stop by Sweet Sewn Stitches anytime to see what’s new!
If you like this post please look at some of our other bathroom remodels: Powder Room Transformation, Complete Handmade Transformation, Farmhouse Style Bathroom, French Country Bathroom Remodel, Striped Walls BathroomSocial Retargeting by Chango