
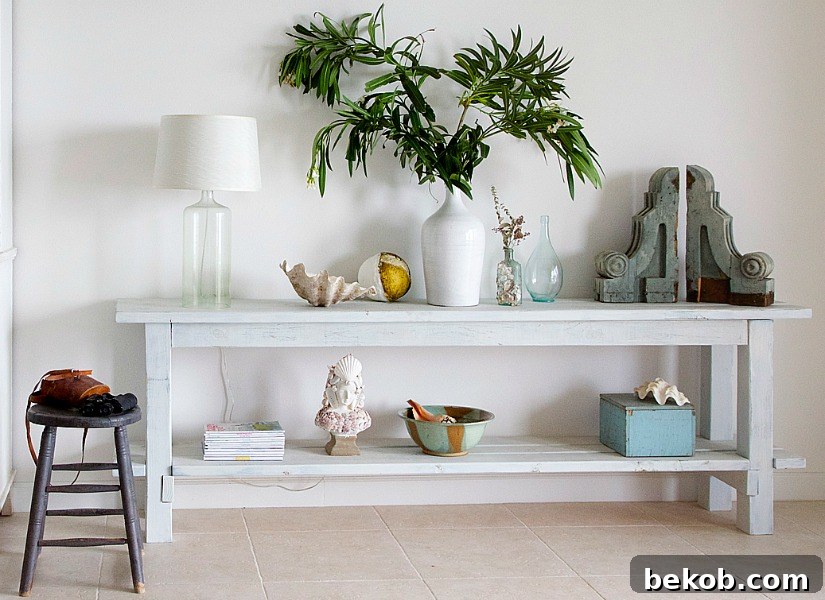
DIY No-Nails Console Table: Easy Beach House Style with Layered Milk Paint
Welcome to our very first #TurningTablesDIY feature! We’re thrilled to host our talented friend Janet from Shabbyfufu, whose exquisite style and captivating photography consistently inspire. Today, Janet and her ingenious husband are here to unveil their brilliant creation: a no-nails console table designed perfectly for their beach house. This innovative construction method allows for effortless disassembly, making it incredibly convenient for transportation – an absolute game-changer for anyone building at home but needing furniture elsewhere. This versatility makes it an ideal solution for renters, military families, or even those who frequently rearrange their living spaces or host events!
But the clever design doesn’t stop there. Janet’s signature technique for layering milk paint imbues the table with an exquisitely beachy, beautifully distressed finish that perfectly complements any coastal-inspired decor. Get ready to discover how you can create this stunning and highly practical piece for your own home.
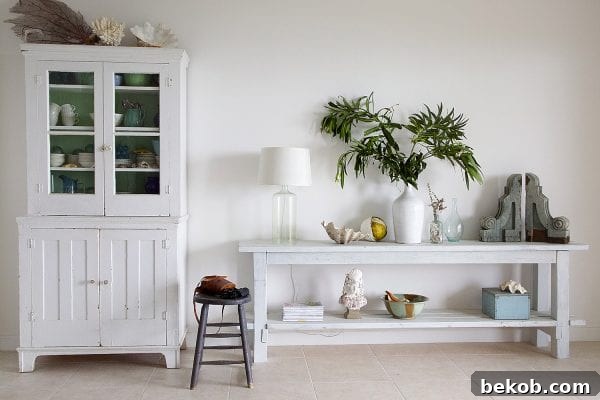
Janet’s husband masterminded the robust construction of this table, and together, they graciously provided us with all the necessary insights to develop comprehensive building plans. Now, you can easily replicate this charming and functional console table yourself. Janet is here to guide you through every detail of the project, from assembly to her unique painting method. Don’t forget to stay connected with us by subscribing via email or RSS, and following us on Facebook. You won’t want to miss any of the inspiring Turning Tables DIY projects we have lined up for you!
Mastering the No-Nails Console Table: A Shabbyfufu Original
by Janet from Shabbyfufu
The Inspiration: From Obsolete Entertainment to Coastal Charm
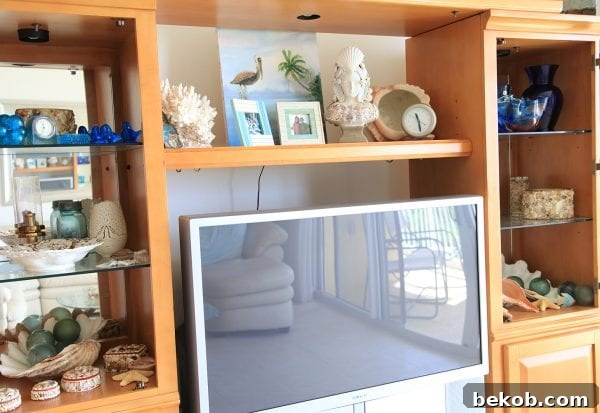
As trends evolve, so does our living room furniture. Many of us can recall the days of large projection screen televisions, often housed within massive, immobile wall units. While popular for a time, these cumbersome setups quickly became obsolete with the advent of sleek flat-screen TVs. At our beach home, we had one of these “beast” televisions taking up valuable space in the living room, and I was absolutely delighted the day we finally decided it had to go! I successfully convinced my husband that the room didn’t need a TV at all, freeing up the perfect spot for a custom piece. With a vision in mind, I sketched out a simple console table that would transform the space and complement our relaxed beach aesthetic.
This tutorial will provide you with comprehensive instructions to build your own elegant console table, along with a detailed guide to my unique painting technique, designed to achieve that coveted pale, beach cottage look.
Building Your Own No-Nails Console Table
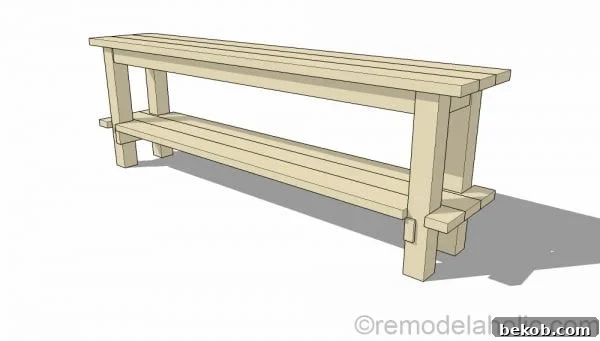
Designed by Shabbyfufu | Building Plans by Remodelaholic
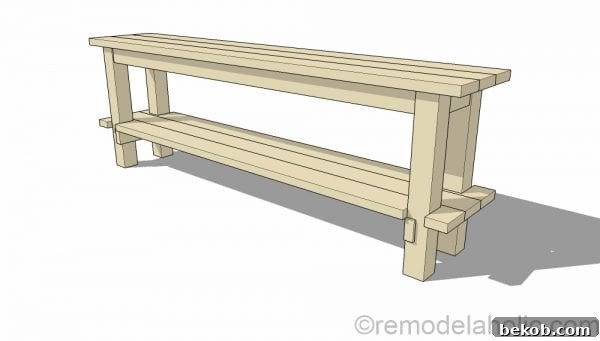
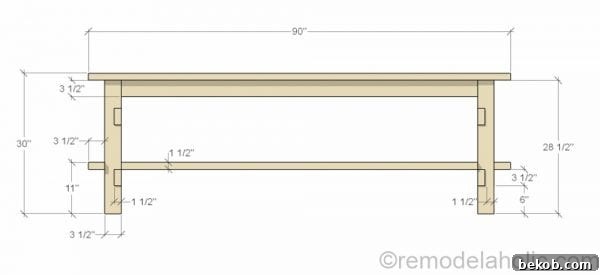
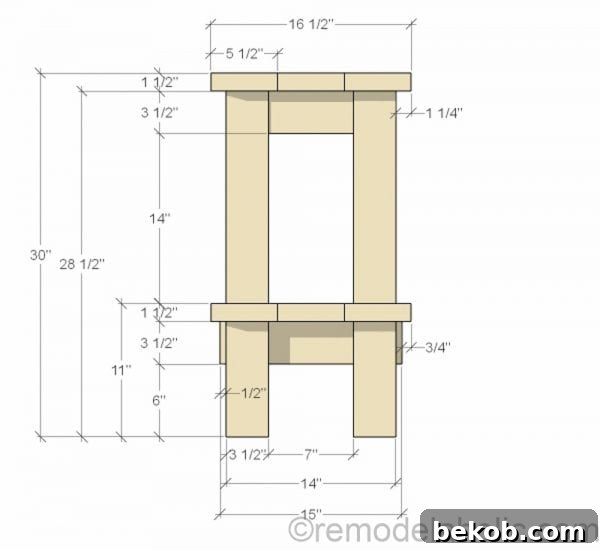
Materials Required:
For the primary wood components, we opted for clear fir, but southern yellow pine is an excellent alternative. When selecting your lumber, consider the desired grain visibility through your chosen paint or stain finish, and, of course, what is readily available in your local area. Quality wood will make a noticeable difference in the final product’s appearance and durability.
- (6) – 2 x 6 x 8′-0″ – for the table top & shelf planks
- (3) – 2 x 4 x 8′-0″ – for the side frames & apron
- (2) – 4 x 4 x 8′-0″ – for the sturdy legs
- (1) – 1 x 4 x 8′-0″ – for table top braces
- (8) – 4″ by 1 1/2″ – robust inside metal angle brackets
- (box) 1 1/4″ wood screws – for securing brackets and smaller components
- (box) 2 1/2″ wood screws – for structural connections
Precise Cut List: (actual dimensions Length x Width x Thickness)
Accurate cuts are crucial for a sturdy and well-fitting table. Double-check all measurements before cutting.
- (4) – 28 1/2″ x 3 1/2″ x 3 1/2″ – Legs (Note: The example model features a 30″ total table height, including the top. Adjust leg length to achieve your desired final height.)
- (2) – 7″ x 3 1/2″ x 1 1/2″ – Side Supports
- (2) – 6′-4″ x 3 1/2″ x 1 1/2″ – Apron Pieces
- (3) – 90″ x 5 1/2″ x 1 1/2″ – Top Planks
- (4) – 10 1/2″ x 3 1/2″ x 3/4″ – Top Braces
- (3) – 90″ x 5 1/2″ x 1 1/2″ – Shelf Planks
- (2) – 15″ x 3 1/2″ x 1 1/2″ – Shelf Support Crossbars
Essential Tools for Construction:
- Drill – for pre-drilling and driving screws
- Miter Saw (Chop Saw) – for precise, square cuts (highly recommended for leg cuts)
- Chisel – for creating neat notches (if opting for this detail)
- Hammer – for tapping pieces into place or securing nails (though this is a no-nails table, a hammer can still be useful)
- Pencil – for marking measurements and cut lines
- Sander (Orbital or Hand) – for smoothing surfaces and preparing for paint
Step-by-Step Construction Guide: Building Your Portable Console Table
Follow these instructions carefully to construct your durable and easily disassembled console table:
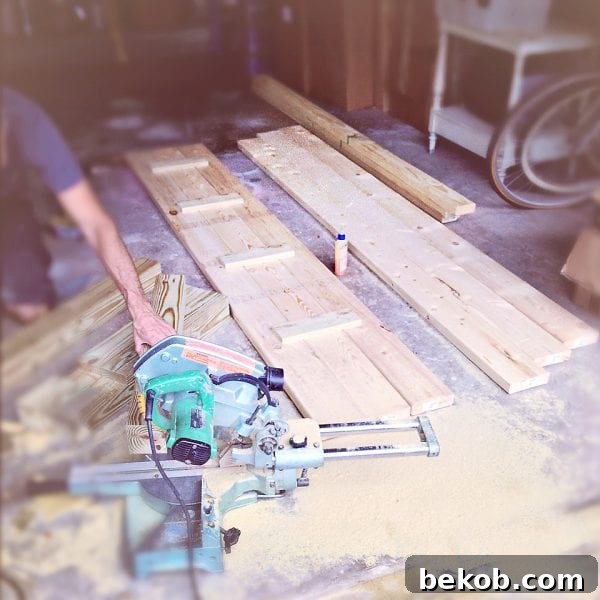
- Prepare the Legs: Using a chop saw for maximum precision, cut your four 4×4 pieces to the desired height for your table’s legs. Remember to account for the 1 1/2″ thickness of the tabletop when determining the leg length, ensuring your finished table reaches your preferred height.
-
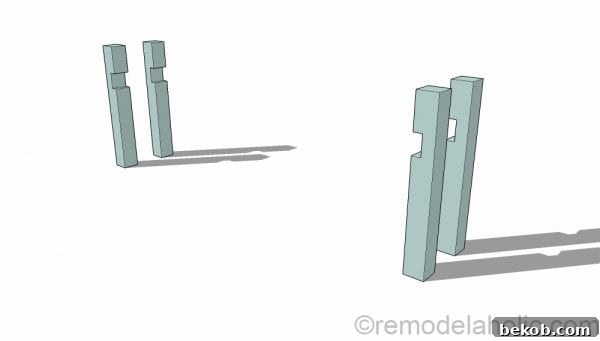
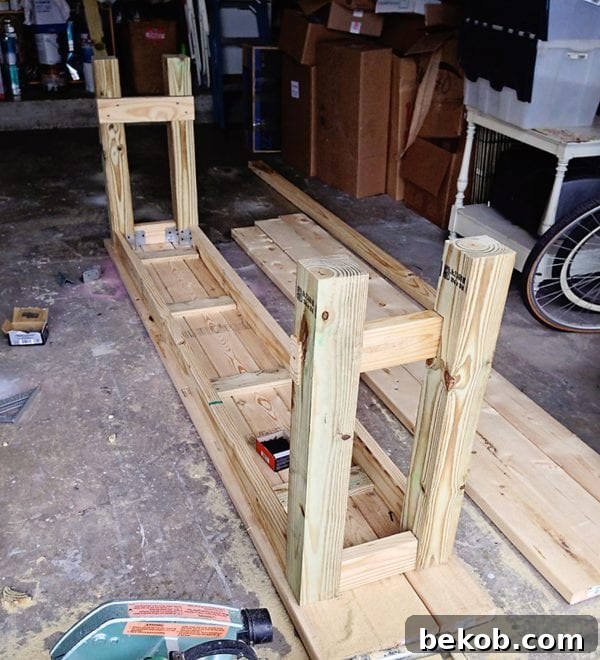
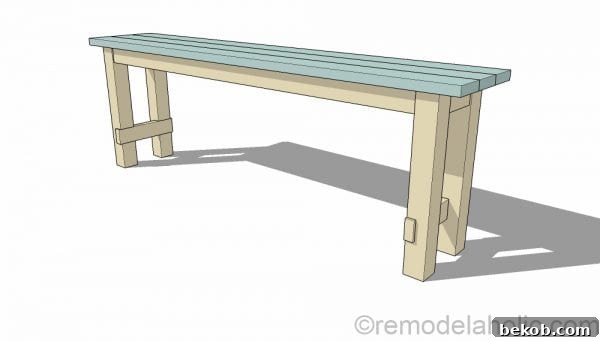
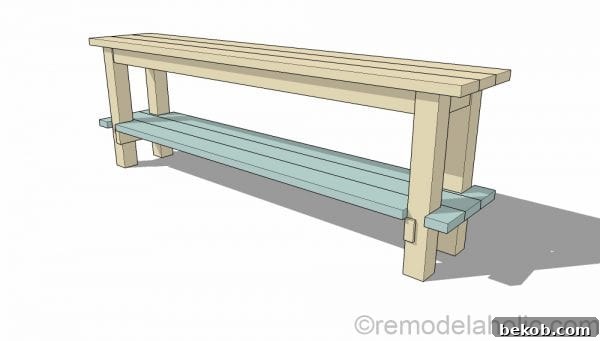
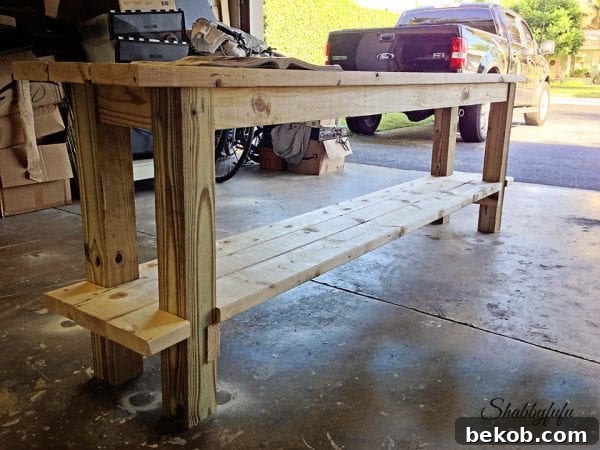
Create Leg Notches: Next, carefully notch each of the four 4×4 legs. These notches should be approximately 1 1/2″ deep and positioned about 6″ to 8″ from the bottom of the leg. These will serve as a secure resting place for the bottom shelf, as illustrated in the accompanying photo. While not strictly mandatory for function, these notches provide a cleaner, more integrated look.

- Cut Frame Components: Precisely cut two 2×4 pieces to 6′-4″ in length. Cut two additional 2x4s to exactly 7″ long, and two more 2x4s to 15″ long. These pieces will form the structural frame and supports for your table.
-
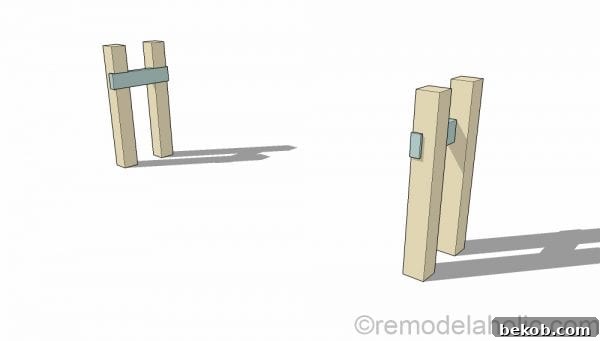
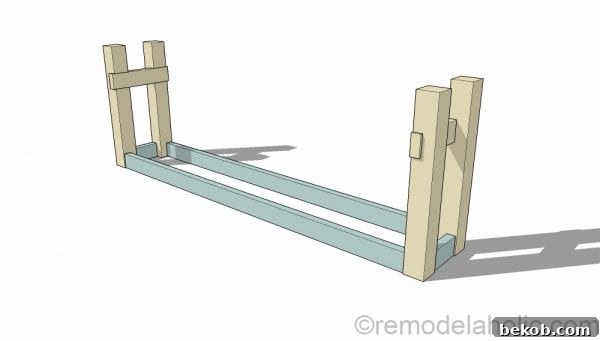
Assemble Leg Supports: Lay two of your prepared legs on the floor, parallel to each other, maintaining a distance of fifteen inches between them. Ensure the notches are facing upwards. Take one of the 15″ 2×4 pieces and firmly screw it into the notches of these two legs. Repeat this process for the other pair of legs.
*NOTE: The notch provides a more polished and integrated appearance. Alternatively, you could surface-mount the 15-inch 2×4 directly onto the flat surface of the 4×4, though the notched method offers slightly greater stability and a cleaner aesthetic.
-
Construct the Upper Frame: Utilize the two 6′-4″ pieces and the two 7″ pieces to form the upper frame of the table. Attach these to the 4×4 legs using the 4″ x 1 1/2″ inside metal angle brackets. Secure them with 1 1/4″ screws. For a refined look, position the boards approximately 1/4″ from the outside edge of the legs. These brackets are key to the no-nails, easy-disassembly feature.
-
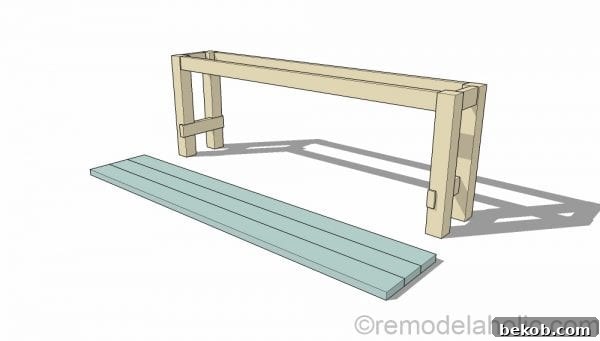
Prepare the Tabletop: Lay your three 90″ – 2×6 pieces upside down on a flat surface. These will form the main surface of your console table.
-
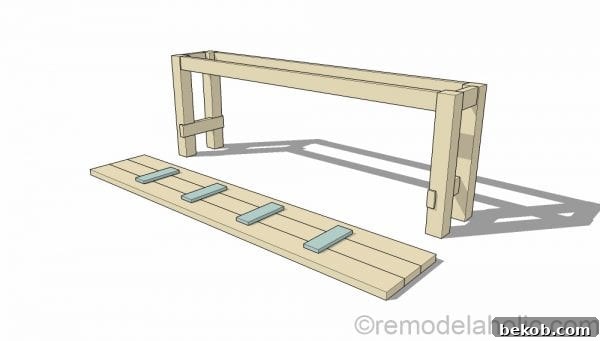
Assemble the Tabletop Structure: Cut four (or five, if preferred for extra rigidity) 1×4 pieces to approximately 10 1/2″ long. These boards will be attached perpendicular to the three 2×6 tabletop planks, forming the underlying support structure for the top. Ensure these 10 1/2″ 1x4s fit securely between the 6′-4″ 2×4 frame that you previously assembled. Adjust their length as necessary for a snug fit. This completes the robust tabletop assembly.
-
Position the Tabletop: Carefully turn the main table frame right-side up. Then, invert your assembled tabletop and gently place it on top of the frame, aligning it perfectly. The tabletop should rest securely on the upper frame components.
-
Construct the Bottom Shelf: Use your remaining 2×6 pieces for the bottom shelf. You will need to notch two of these 2x6s to precisely fit around the 4×4 legs. Each notch should be approximately 1 1/2 inches deep, mirroring the earlier leg notches. These two notched pieces will form the outer edges of your shelf. The third, center shelf plank should fit snugly between these two outer pieces. If necessary, make small adjustments to ensure a perfect fit.
- Final Assembly Note: The brilliance of this design lies in its entirely nail-free construction. All connections are made with screws and brackets, allowing the table to be easily disassembled whenever you need to move it, store it, or transport it to a new location. This unparalleled portability makes it a truly versatile piece of furniture.
Layering Milk Paint for a Beachy Distressed Furniture Finish
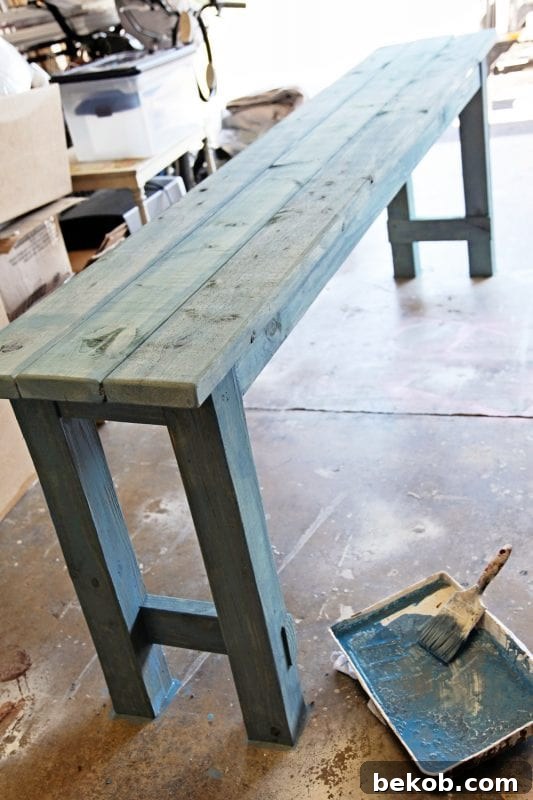
My primary objective for this console table was to give it a softly distressed, quintessential beach house look, ensuring it would seamlessly integrate into the existing furnishings of the room without drawing undue attention. Having worked with milk paint before, I particularly appreciate its versatility; it can be thinned with water to achieve virtually any desired consistency. For this project, I chose to start with a base coat of Miss Mustard Seed French Enamel blue, followed by a topcoat of the classic MMS Ironstone.
Mixing Milk Paint: Tips for Success
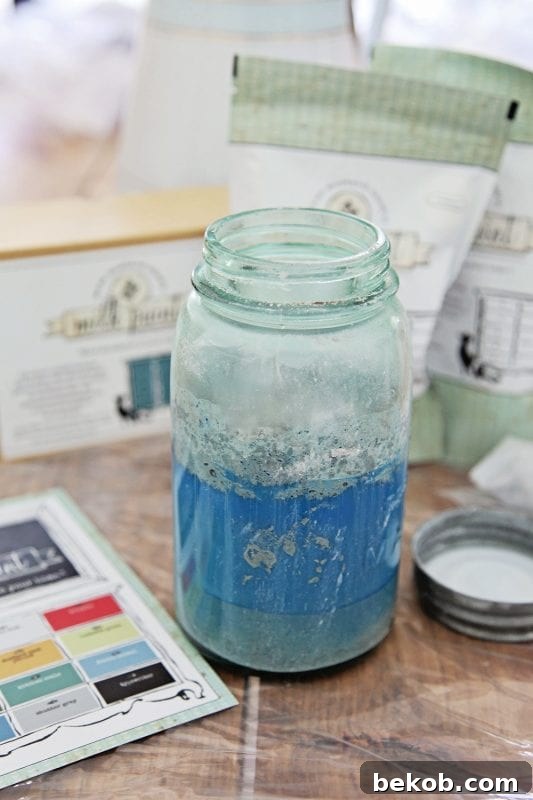
Miss Mustard Seed Milk Paint comes in a powder form and requires mixing with water. There are several ways to achieve a smooth consistency. For smaller batches, I often use the “shake method” in a Mason jar, vigorously shaking until most of the lumps dissipate. However, for larger projects or a truly silky mix, the most effective method is to use a spare blender jar dedicated solely to paint. Unfortunately, I didn’t have one on hand for this particular project, but it’s a worthwhile investment for serious milk paint enthusiasts!
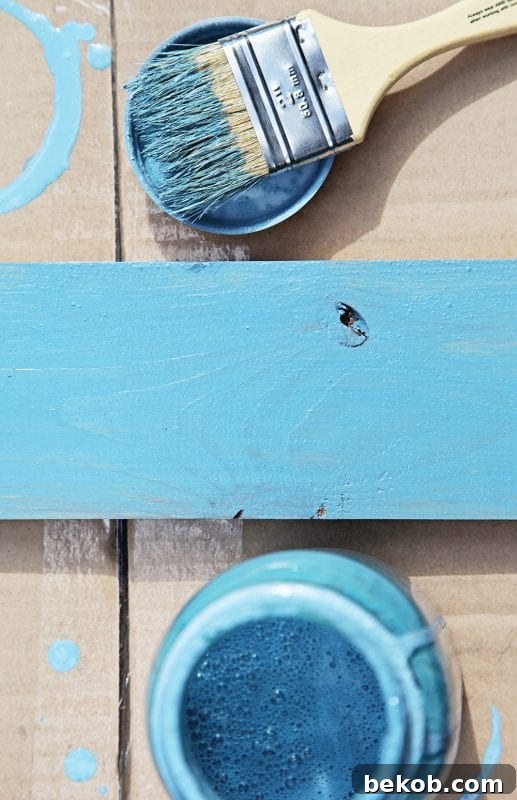
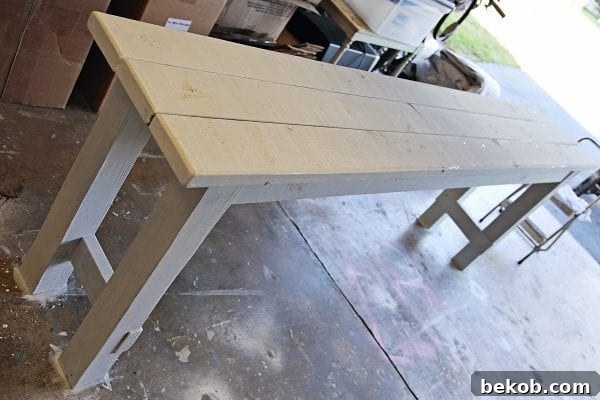
Given the “no-nails” design, the table’s top boards could be easily removed for painting, which I found to be a convenient option. While milk paint can sometimes have small lumps initially, they typically settle and disappear after application, resulting in a smooth finish. For my initial coats, I mixed the paint at a ratio of approximately 25% paint to water, creating a thinner consistency. I then applied two thin coats of the French Enamel blue. The thinned paint dries remarkably quickly, allowing me to apply the second coat just about an hour after finishing the first.
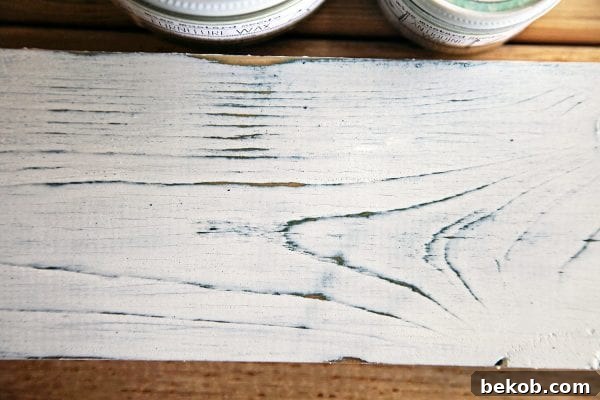
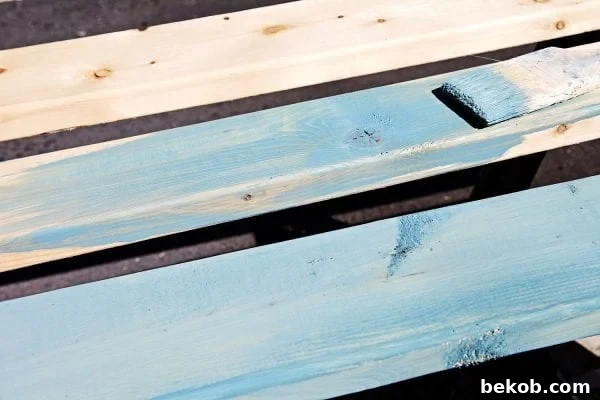
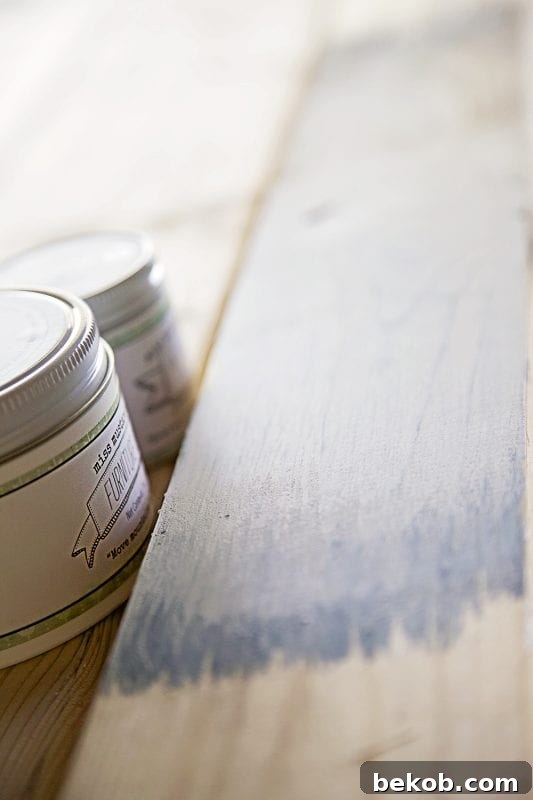
Once the initial blue paint was completely dry, I applied a thicker, generous coat of the Miss Mustard Seed Ironstone Milk Paint. As you can see, this coat provides excellent coverage, yet it beautifully allows subtle hints of the underlying blue and the natural wood grain to peek through, contributing to the distressed effect.
The Art of Distressing: Revealing Character
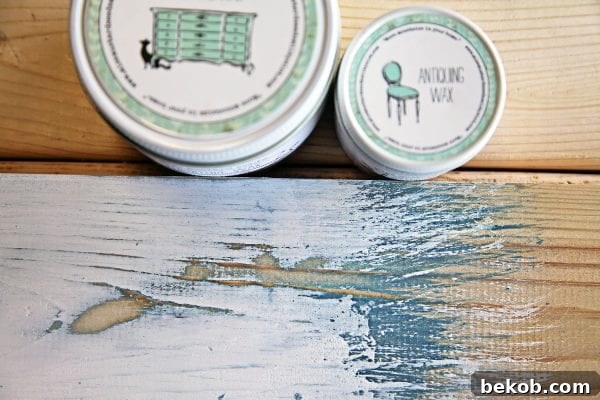
The next step involved a light sanding using a small orbital sander. The goal here wasn’t aggressive removal, but rather to gently reveal some of the underlying wood grain and the French Enamel blue. The accompanying photo is greatly enlarged to showcase the intricate detail. I prefer to lightly “hit” only those areas that are naturally raised or exposed due to the inherent character of the wood, creating an authentic, worn look rather than an artificially distressed one.
Protecting Your Masterpiece: The Wax Finish
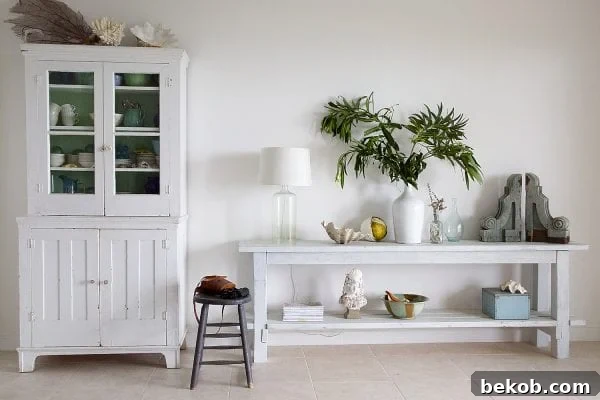
The final, crucial step in completing this project was waxing the table. This protective layer not only adds depth and a beautiful sheen to the paint, but it also provides essential protection against daily wear and tear. I used Miss Mustard Seed Antiquing Wax, applying it with a clean rag. Once dry, I buffed the surface with additional clean rags until a soft luster emerged. Given that this table would reside in a beach environment, where humidity and use might be higher, we decided that two coats of wax would offer optimal protection. I allowed the first coat to dry overnight before applying the second, ensuring maximum durability and a lasting beautiful finish.

Project Cost Breakdown:
The total expenditure for this beautiful and functional console table project was surprisingly affordable:
- Lumber and essential hardware: $75
- Miss Mustard Seed Milk Paint: Happily provided for this creative project! (Note: Paint costs can vary, so factor this into your budget if purchasing.)
This project demonstrates that achieving high-end, custom furniture doesn’t have to break the bank, especially when you embrace the DIY spirit.
Isn’t this console table absolutely lovely and ingeniously designed? A huge thank you to Janet and her clever husband for generously sharing their expertise with us. We highly encourage you to visit Janet over at Shabbyfufu and follow her on Facebook. You’ll instantly fall in love with her relaxed, elegant style and countless inspiring home decor ideas!
Be sure to explore all the incredible projects from our #TurningTablesDIY series right here. And don’t forget to subscribe to our email newsletter or RSS feed, and connect with us on Facebook. You won’t want to miss upcoming posts featuring stunning transformations like this one: