The steps below follow the order of the work for this furniture project.
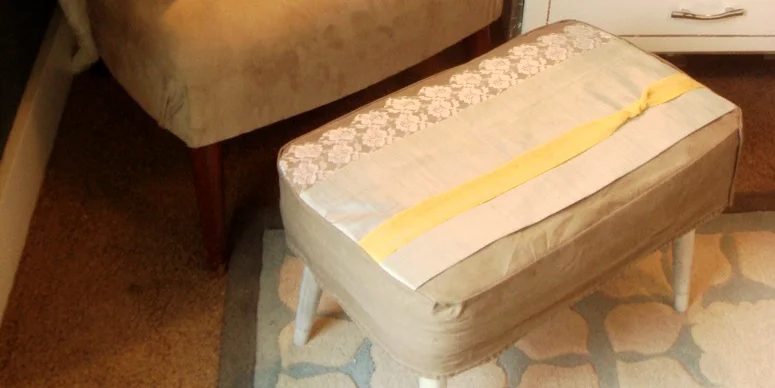
Updated Ottoman option from karapaslaydesigns.blogspot.com.
This old ottoman (below) has doubled as a stool during the 2 year long renovation of our home. It’s covered in joint compound and paint splatters, giving evidence of its obvious misuse. No doubt it is time for a major makeover. I could have striped the old fabric and opted for a complete overhaul, but I chose to create an “oh, so straightforward” slip cover! First, I chose scrap pieces of fabric and laid them out over the ottoman changing their positions until I was pleased with the look. Next I used chalk to outline exactly where the fabric hit the edge of the ottoman. Then I cut the fabric leaving about 1 inch of play. Then I sewed. . . .OK, OK, I used the fusible iron-on tape! BUT, I will sew it all together eventually. . . probably. . . maybe. Anyway I “attached” it all together.After everything was secure, I placed the “top” back on the ottoman. Last, I took a strip of the brown fabric and wrapped it around the ottoman using pins and the extra 1 inch play to secure the top of the slipcover to the “skirt.” Since I was using the fusible tape I found it easier to iron the fabric together a few inches at a time WHILE it was still on the ottoman.Finally I painted the legs white and distressed them a bit.
And there you have it, an updated ottoman option, furniture practically for FREE!