The steps below follow the order of the work for this furniture project.
Becky at Tea Party, has made a nice ottoman from scratch for a lot less than buying one.
So if you guessed from yesterday’s post, dear hubby and I built an ottoman this weekend. After purusing them for some time, I just couldn’t justify spending $1,500 on an ottoman. Nor would hubby let me… So, after seeing this ottoman from Restoration Hardware, I knew what I wanted.
I considered the option of fabric, but after remembering that i have a toddler, two dogs and a husband who gets dirty on a daily basis, this wasn’t a very good option unless I wanted to cringe every time my 2 year old walked over and stuck her sucker on it or decided it was a striking pallete to draw with her crayons on. So leather it would be. So, after I found this walkthrough from Michelle over at Three Men and a Lady (which I might add is a very talented and sweet lady), I figured “I can do this”. I used the walkthrough as a guide for what materials I would need, but we ended up adding more supplies and taking it a little further. I had looked for coffee tables to recover and use, but because we live in such a rural area, I have to drive an hour and a half just to get to the city to pick up thrift or craigslist finds. Everytime I found one, it was gone before I could get there. So I started getting everything I needed, using my 50% off coupon at Joann’s saved me huge. I told dear hubby what I wanted it to be and for him to work his magic. He laughed at me when I said “how hard can it be, it’s an ottoman.” On sunday I was eating my words and praying for cheese fries (more on that another time!) I’ll just point out now, this project is in no shape or form an straightforward one…and I’ve done a lot of projects, and this one had me almost in tears toward the end. So here’s some pics from the project. It helped tremendously that dear hubby used to have a leather shop and built boots and repaired saddles, so his awl and wax thread, along with his imagination came in VERY handy…as with all our projects.
Here is hubby measuring the tufting holes, getting ready to drill.
This is the start of the frame. We did extra supports and brackets in the corners as well, so this thing is STURDY.
Drumroll please…here it is first time in the house.
Here’s a closeup of the legs. I wanted a turned leg with brass casters. Beings my love for all things Restoration Hardware and Pottery Barn, these babies were the icing on the cake for me.
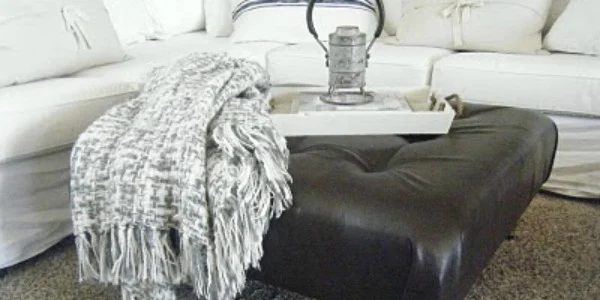
And here she is…in all her glory!
I wanted to add that my initial plan was to adorn her with nailhead trim on the bottom, but after she was done, I think I like her the way she is, but hubby thinks I should put the nailhead on. What are your thoughts??
Hope you like her as much as I do…I love how she grounds the white in my home. I promise a walkthrough a little later!