Read the sequence from the top before cutting, painting, or moving pieces.
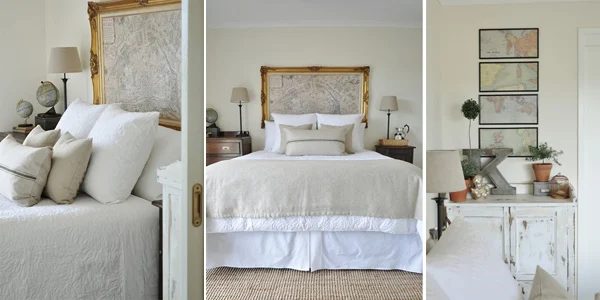
Painted Hive Master Bedroom: A Wealth of Furniture Redos and Great Vision contributed by Kristine @ The Painted Hive Some interesting wall angles and the need for tonnes of storage really dictated the design for our master bedroom. Function and modest-cost were high priorities so I decided to work ‘pretty’ around ‘practical’. The neutral palette combines loads of natural texture with vintage elements for a relaxed yet fresh feel. While there are still a few additions I’m considering (bench seat, gilt mirror, another piece of art or two – oh, and my task lamps!) I’m pretty happy with how it’s coming along. I’m also waiting to put some finishing touches on the built-in robe doors and will share the after pics of them soon too. So, here’s the floor plan just to give you an option of the room’s weird shape (BED 1): And here’s the space before (cringe!): Well, that was after we already simplified the canvas by painting out the green walls and brown trim (Dulux Chalk USA on the walls, Dulux White Watsonia on the trim), replacing the dirty old carpet and removing the completely translucent ultramarine blue curtains! If you’ve been following this makeover from the beginning, aside from being incredibly patient :-), you should also recognise a fair bit of the decor. (If you missed any or all of the lead-up posts you can catch them here where you can read about, amongst other things, how I created the massive map, made my linen throw and cushions, came up with an attractive blackout window treatment solution and used gift wrap for wall art). Pretty much all of the decor has been thrifted, bought on clearance or hand-made and every piece of furniture in the room is second-hand. Here it all is pre-makeup: (To avoid a massively lengthy post I’ll cover each refurb in more detail in separate posts shortly). Now, if like me you love a good before and after you’ve come to the right place! Before After Before After Before After Before After Before After Before After And just cause I can’t help myself here are a few little detail shots too: If you’re interested in some further info about this room makeover, including the item origins and cost breakdown, keep an eye out for some separate future posts. Linking this makeover with some of these parties.Have a great week everyone!