The steps below follow the order of the work for this furniture project.
–
Submitted By It All Started With Paint
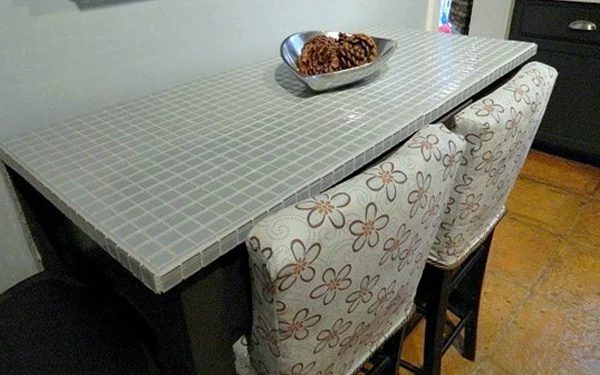
In part one, I told you how I tiled the kitchen table (read about it here). Part two tackles the chairs. They started out looking something like this …
They were never comfortable or inviting. But at this point in the kitchen renovation, funds were running low. In an ideal world, I would’ve purchased some parson-style bar height stools and called it a day.
But I live in the real world. An alternate plan was called for.
I started with foam and batting …
I didn’t glue it to the chair but instead used some heavy duty Velcro tape I had left over from another project. I put a thick piece of foam on the seat …
And a thinner one on the back …
I probably should have put a second foam pad on the back. Oh well, I’ll just add that to my ever-growing list of 99% finished projects.
I painted the frame black many years ago. Surprisingly, the paint really stood up over time. And, quite frankly, at this point in the kitchen renovation I was pretty sick and tired of painting (you can read about why here) … so black they stayed.
I custom made the slipcovers. THAT project involved a lot of trial and error and ripping out of stitches.
I’d like to claim that we now use our re-purposed table and chairs like this …
… and this …
But truthfully the only time it’s used as a dining table is when my daughter and her friend make themselves some hot chocolate and a snack.
Mostly it’s where we put the morning paper (only, in real life, the table is much more cluttered with papers and receipts and such) …
… and occasionally on weekends, my husband sets up his laptop here (that’s my laptop filling in as a stunt double).
The best part: this project was relatively inexpensive. I found the fabric at JoAnn’s for about $3-a-yard. The tiles ran $3.99 per square foot. The foam was probably the priciest part … can anyone shed any light on why foam is so expensive?