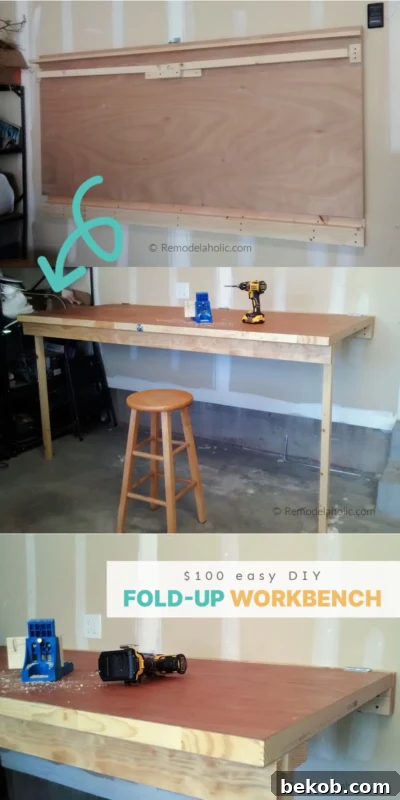
Transform your cluttered garage into an organized and efficient workspace with this incredible DIY folding workbench! This comprehensive guide provides beginner-friendly plans to build a robust, wall-mounted folding table using a solid core door and affordable lumber, all for under $100. Perfect for woodworking projects, general DIY tasks, or simply as a versatile utility surface, this workbench offers an ideal solution for maximizing space in any garage or small workshop.
Looking for other handy workshop additions? Consider building a large, portable folding work table for ultimate flexibility or enhance your garage workshop with a DIY table saw workbench featuring integrated storage. These projects are designed to boost your efficiency and keep your creative space tidy.
Build Your Own Space-Saving DIY Folding Workbench for the Garage
Do you have a love-hate relationship with your garage? Most DIY enthusiasts do! There’s nothing quite like the satisfaction of a clean, organized garage where you can easily find your tools and even park your car. Yet, for many, the reality is a space that quickly becomes a “dumping ground” for tools, materials, and forgotten projects, often for the majority of the year.
I certainly understand the frustration. My old, paint-covered folding table, once intended as a dedicated workspace, inevitably morphed into a chaotic repository for anything and everything. After almost every project around the house, the remaining tools and parts would find their way onto that table, transforming it into an unusable mess. The sight was, frankly, a bit embarrassing!
Finally reaching my breaking point, I decided it was time for a change. The old table was cleared out, creating an immediate need for a functional workspace. But instead of buying a new one, why not build a workbench that truly met my needs?
My requirements for a new work table were surprisingly simple, yet crucial:
- Easy to put away: To prevent clutter from accumulating, the workbench needed to fold away effortlessly, reclaiming valuable floor space.
- Sturdy and strong: It had to be robust enough to handle heavy-duty tasks, from assembling furniture to intricate woodworking projects.
- Large working area: A spacious surface was essential for spreading out materials and working comfortably without feeling constrained.
After a quick dive into the vast ocean of online inspiration, I found the perfect solution: **The Wall Mounted Folding Table Workbench**. This design not only meets all my “must-haves” but also introduces several innovative features that make it a standout choice for any DIYer.
I’m excited to share all the details on how you can build your very own space-saving workstation. Keep reading for detailed assembly instructions, material lists, and even a clever DIY hack for an even faster setup!
This post contains affiliate links, which means we may earn a small commission if you make a purchase through our links, at no extra cost to you. Learn more and read our full disclosure policy here.
Why This DIY Wall-Mounted Folding Workbench is Both Affordable and Easy
This minimalist DIY folding workbench or desk stands out thanks to its smart design and material choices. It offers an optimal blend of functionality, durability, and cost-effectiveness, making it an excellent project for beginners and seasoned crafters alike:
- Easy to build: Forget complicated joinery or advanced techniques. This project is designed with simplicity in mind, requiring no over-engineering.
- Effortlessly folds up: When not in use, the workbench neatly folds against the wall, instantly clearing up valuable floor space in your garage or workshop.
- Provides a large, solid work surface: Despite its compact folded form, it offers an expansive and sturdy surface when deployed, perfect for a wide range of tasks.
- Amazingly affordable: The best part? You can construct this entire functional workbench for under $100 in materials, making it an incredibly budget-friendly upgrade.
The true secret behind this fast, easy, and affordable wall-mounted folding table is the innovative use of a solid core wood door as the tabletop instead of traditional plywood.
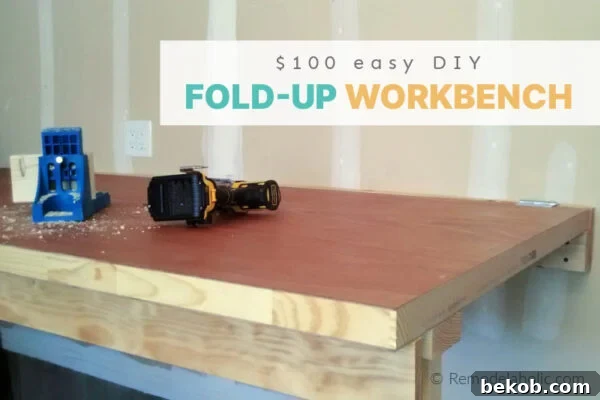
A solid wood door (unbored) presents an ideal and often overlooked solution for a workbench surface. Its inherent smoothness and impressive strength make it superior to many plywood options. Crucially, it typically requires no cutting, saving you time and effort. Beyond convenience, solid core doors offer remarkable durability and stability, standing up to the rigors of heavy use much better than most budget plywood sheets, all while being a surprisingly affordable alternative. This choice significantly contributes to keeping the project cost-effective without compromising on quality.
With just a few additional pieces of inexpensive lumber and a couple of robust hinges, you can quickly transform a simple door into a large, fold-up workbench. This versatile design isn’t limited to garages; it’s also perfect for sheds, utility rooms, or any space where a sturdy, drop-leaf table is needed to maximize floor area.
This design is incredibly versatile. You can easily adjust its dimensions to create a standing desk for your home office, a compact laptop computer table for a study room, or even a space-saving dining table for a small apartment or narrow kitchen. Imagine the convenience of a sturdy, drop-down folding table in your laundry room, perfect for folding clothes or sorting linens without taking up permanent floor space!
This project eliminates the need for casters, cumbersome shelves, or complex mechanisms. It’s simply a strong, reliable, and space-saving wall-mounted folding table that vanishes when you don’t need it, leaving your floor clear and unobstructed.
While a pocket hole jig is recommended for cleanly attaching the front table skirt, most other cuts can be made with basic tools. A miter saw and nail gun will certainly speed up the construction process, making the build even faster. However, if you’re just starting your woodworking journey and don’t own these power tools, you can absolutely achieve great results using a trusty hammer and a hand saw with a miter box. For those ready to upgrade their toolkit, this project might be the perfect excuse to invest in a versatile circular saw or miter saw!
Pro Tip: Simplified Wall-Mounted Folding Table Hardware Hack
For an even simpler wall-mounted folding desk that requires absolutely ZERO woodworking tools, consider this clever hack: use a pair of heavy-duty folding shelf brackets (24″ / 61 cm) and a smaller 24″ or 28″ solid core door. A few well-placed screws into your wall studs and the desktop, and you’re done! This provides a quick and robust folding surface without needing to cut a single piece of lumber.
Important Note: The solid core door itself will weigh at least 20 pounds, so it is absolutely critical to ensure that your chosen hardware is high quality and heavy-duty, with a high maximum load capacity (500+ lbs / 250 kg) like this set. ALWAYS attach the brackets directly to wall studs to ensure maximum safety and stability.
Workbench Dimensions and Custom Adjustments
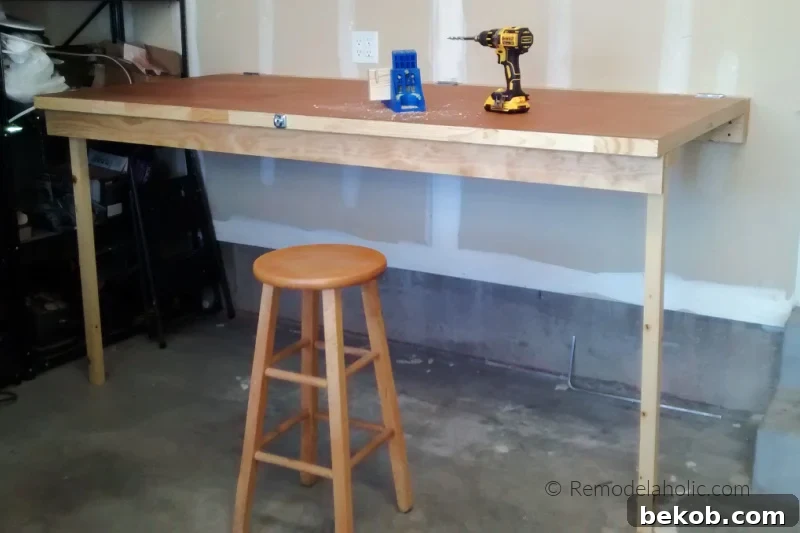
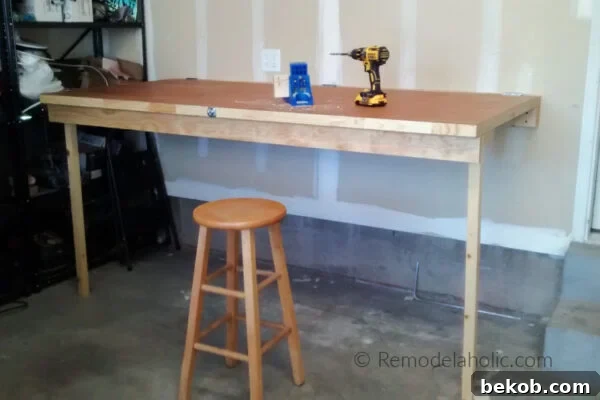
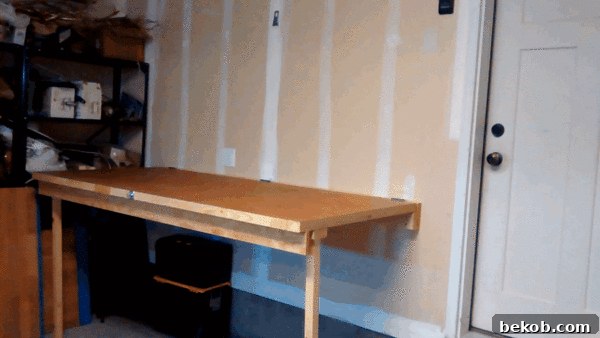
When constructed according to these plans, the finished DIY folding workbench boasts generous dimensions of 36 inches (D) x 80 inches (W) x 41.25 inches (H) when fully extended. This provides a substantial surface area for almost any project you can imagine. One of the great advantages of a DIY project is the ability to customize it to your specific needs and available space:
- For the tabletop, I utilized a standard 36×80 non-bored solid core hardwood slab door. This size offers ample working area. However, if your available wall space is different, you can easily adjust the workbench’s width and depth by opting for a 78″ or 84″ solid core door. Remember to adjust the lengths of your 80″ lumber cuts accordingly to match your chosen door size.
- The specified height for the folding workbench surface is 41-1/4″, which is a comfortable standing height for many individuals, allowing for ergonomic use of power tools and manual tasks. You can effortlessly adjust this height to match your ideal standing desk preference. Simply modify the length of the legs and the mounting height of the ledger board on the wall.
- While standard bar height is often 42″, I found a slightly shorter height to be perfect for my average stature, providing comfort while standing but also allowing the use of a standard barstool when needed.
- When adjusting the height, ensure that you can comfortably reach the top edge of the table when it’s folded vertically against the wall, as you’ll need to easily secure the latch.
DIY Folding Workbench Material List
Building your own fold-up garage work table is simpler than you might think. The core components are straightforward: a solid core door for the top, four essential lumber boards, and a selection of hinges and basic hardware. You might even find some of these materials already in your scrap pile, further reducing costs and promoting sustainable DIY practices!
Searching for a bargain? Don’t forget to check your local Habitat For Humanity ReStore or similar architectural salvage yards. They are excellent sources for reclaimed building materials and hardware at often significantly reduced prices!
Lumber Requirements
- 1 – 2x6x8 board (will be cut to 80″ for the ledger)
- 1 – 2x4x8 board (will be cut for workbench support, leg support, and hinge supports)
- 1 – 2x2x8 board (will be cut for the legs)
- 1 – 1x4x8 board (will be cut for the table skirt)
When selecting your lumber, it’s crucial to follow these top tips and tricks to choose the best and straightest boards. This careful selection is especially important when you’re using more inexpensive cuts, such as common furring strips, to ensure the structural integrity and aesthetic appeal of your finished workbench.
Other Essential Materials and Hardware
- 1 – 36″x80″ solid core door (new or reclaimed, ensures a robust tabletop)
- ~20-30 – 2-1/2″ or 3″ wood screws (for ledger, workbench support, and hinge supports)
- ~8-12 – 1-1/2″ wood screws (for small hinges and other attachments)
- 10-12 – 2-1/2″ pocket hole screws (for securing the table skirt and leg support)
- 2 – 1-1/2″ small hinges (for attaching the folding legs)
- 3 – 3″ door hinges (for attaching the tabletop to the ledger board)
- 1 – 3-1/2″ safety hasp* (for securing the workbench in its folded position)
*Note on Security: There are various methods you can use to secure your fold-up workshop table to the wall when it’s in the upright position. Common alternatives include simple hook and eye latches, custom-cut pieces of scrap wood that act as stops, or a robust barrel bolt lock. I specifically chose the heavy-duty hasp for this project due to its superior strength, ease of installation, and reliable locking mechanism, which adds an extra layer of security and peace of mind.
Recommended Tools for an Efficient Build
- Compound Miter Saw or Circular Saw (for precise and quick cuts)
- Drill/Driver (essential for pre-drilling holes and driving screws)
- Air compressor and Finish nail gun (with 2-1/2″ finish nails, for fast and strong temporary holds)
- Pocket hole jig (like a Kreg Jig) (for concealed, strong joints on the table skirt)
- Level (critical for ensuring your workbench is perfectly flat and stable)
- Pencil (for accurate marking)
- Clamps (optional, but highly recommended for holding pieces in place during assembly)
Detailed Cut List
Before you begin assembly, make sure to cut all your lumber to the specified dimensions:
- Ledger: Cut 1 – 2×6 @ 80″
- Workbench Support: Cut 1 – 2×4 @ 80″
- Leg Support: Cut 1 – 2×4 @ 6″
- Hinge Supports: Cut 2 – 2×4 @ 2″
- Legs: Cut 2 – 2×2 @ 38″
- Table Skirt: Cut 1 – 1×4 @ 80″
Parts Preparation for Durability and Ease of Assembly
Proper preparation of your lumber pieces will ensure a smoother assembly process and a more durable finished workbench:
- Leg Support Pocket Holes: On the leg support piece (the 2×4 cut @ 6″), drill three pocket holes strategically along one of its long edges. These will be used later for a strong, hidden connection.
- Hinge Support Pre-Drilling: For each of the two hinge support pieces (the 2×4 cut @ 2″), pre-drill three holes. This step is crucial to prevent the wood from splitting when you later drive screws through them, especially in such small pieces.
- Table Skirt Pocket Holes: On the table skirt piece (the 1×4 cut @ 80″), drill pocket holes approximately 2 inches from each end. Then, continue drilling pocket holes every 8-10 inches along the entire length of the board. This pattern will provide robust attachment points for the tabletop.
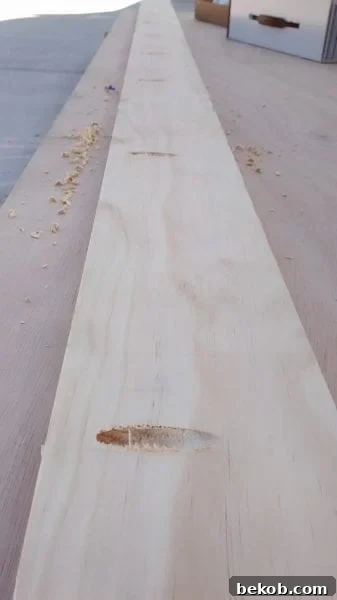
Once all cuts are made and holes are pre-drilled, lightly sand all your lumber pieces. This will remove any splinters, rough edges, and prepare the wood for finishing. Optionally, you can apply a coat of polyurethane sealant now to protect the wood, or you can wait until the entire workbench is built.
How to Build a DIY Folding Workbench: Step-by-Step Instructions
Step 1: Mark The Wall, Ledger, and Wall Studs Accurately
Before attaching anything to the wall, meticulous measurement and marking are essential for a stable and properly aligned workbench:
- Locate Center: Begin by identifying the precise center of the wall space where your folding workbench will be installed. Double-check that your 80″ wide table will fit comfortably in this area, allowing enough clearance on both sides. Mark this 40″ center point clearly on the wall.
- Determine Height: Next, mark the desired height for the top edge of your 2×6 ledger board, which will serve as the primary wall support. For a standard workbench height as shown, this will be 41-1/4″ from the floor. Remember, this is your opportunity to adjust the workbench height to your personal preference for standing work. If you modify this height, you will also need to adjust the length of your 2×2 folding workbench legs accordingly.
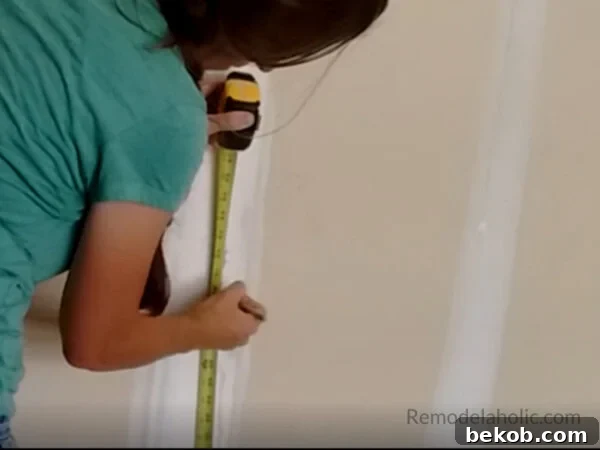
- Mark Ledger Center: Find and mark the exact center (40″) on your 2×6 ledger board that you cut @ 80″. This mark will align with the center mark on your wall.
- Locate Wall Studs: Using a stud finder, carefully locate and mark the positions of all wall studs behind where your 2×6 ledger board will be mounted. These strong anchor points are crucial for the stability and safety of your folding workbench. If your garage walls are unfinished or unpainted, like mine were, you might be able to visually identify the studs more easily.
Step 2: Securely Hang the Ledger Board
This step is critical as the ledger board will bear the primary weight of your entire DIY folding workbench. Ensure it’s perfectly level and exceptionally well-secured to the wall studs using heavy-duty fasteners. Having an extra set of hands for this step will make the process much safer and easier.
- Align and Level: Carefully match the center mark on your 2×6 ledger board with the center mark you made on the wall. Position the top edge of the 2×6 at your desired height (e.g., 41-1/4″ from the floor). Place a level on top of the board to ensure it is perfectly horizontal before proceeding.
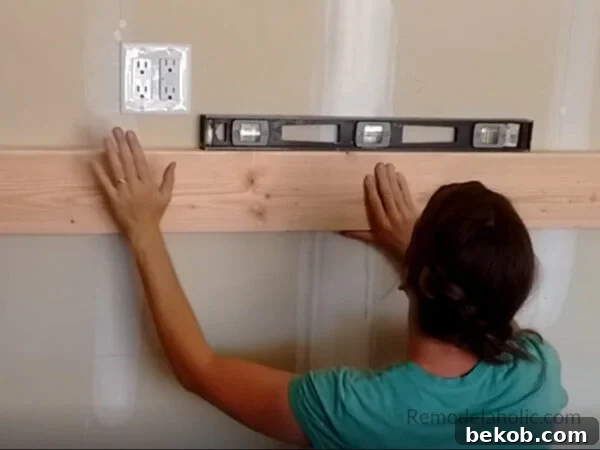
- Temporary Fastening: Using your finish nail gun, drive 3 or 4 nails through the 2×6 ledger board directly into the wall studs you marked. These nails provide a temporary hold, keeping the board in place while you install the more permanent fasteners.
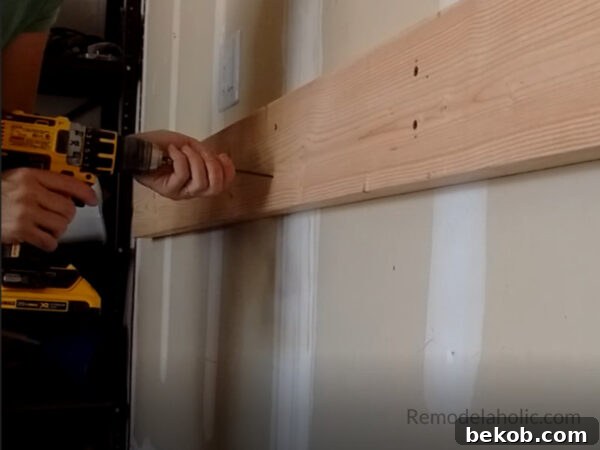
- Permanent Fastening: Now, for robust security, drill two 3″ wood screws through the 2×6 at each wall stud location. Ensure the screws are long enough to pass through the 2×6 and any drywall to securely embed into the center of the wall studs. This double fastening method (nails for position, screws for strength) ensures your ledger board is incredibly stable.
Step 3: Install the 2×4 Workbench Support
The 2×4 workbench support piece adds a critical layer of stability to your folding table when it’s in use, providing a ledge for the tabletop to rest upon.
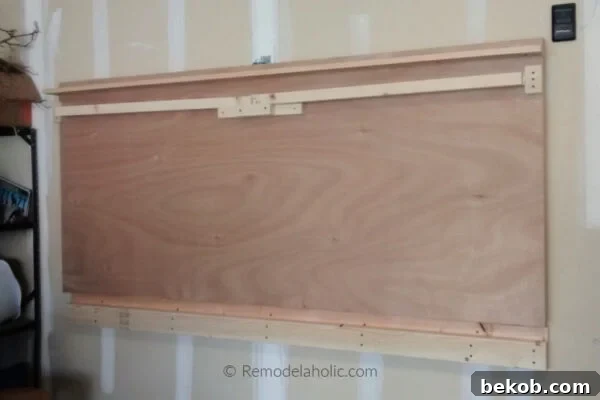
- Measure Down: Measure exactly 1-3/4″ down from the very top edge of the 2×6 ledger board you just installed. This measurement determines the precise mounting height for your 80″ 2×4 workbench support. When the folding table is in its open position, it will sit firmly on this 2×4, significantly increasing its stability and load-bearing capacity.
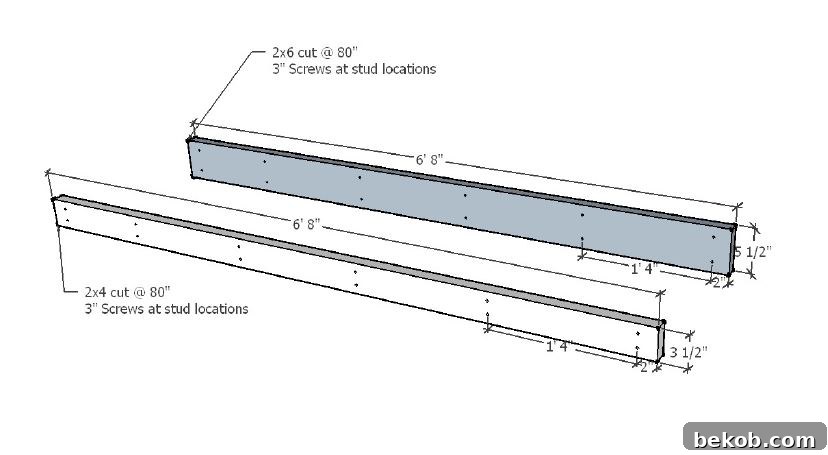
- Align and Secure: This step mirrors the process of hanging the 2×6 ledger. Position the top edge of your 80″ 2×4 on the 1-3/4″ mark you just made. Ensure that the ends of the 2×4 are flush with the ends of the 2×6 ledger board. Use your level to confirm the 2×4 is perfectly horizontal. Once aligned, temporarily attach it with 3-4 nails driven into the wall studs, just as you did with the ledger.
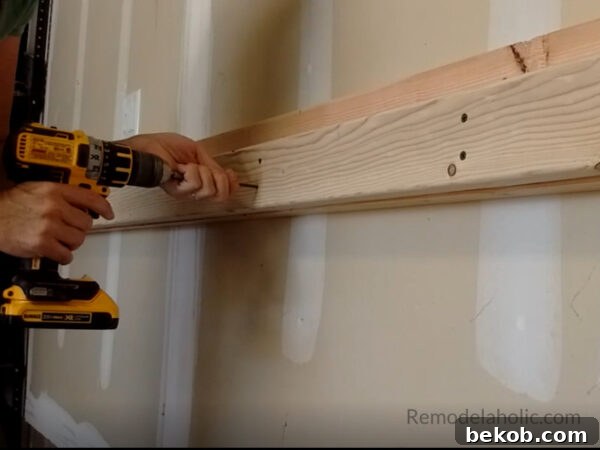
- Final Fastening: Complete the installation by drilling two 3″ screws through the 2×4 at each stud location, securing it firmly into the 2×6 ledger board and directly into the wall studs behind. This creates a strong, integrated support system.
Step 4: Attach Hinge Supports to the Table Top
With the wall infrastructure in place, it’s time to work on the actual tabletop!
Unless you possess superhuman strength, you will definitely want assistance moving your solid core door to a suitable work area. For me, this often meant working in the driveway because my garage was still a work in progress! Sawhorses are an invaluable addition to any workshop, providing a stable, elevated surface that makes working on large projects like this much more comfortable and precise.
- Position Supports: On the underside of your door, measure 3-1/2″ in from the front corner on both the left and right sides. This marks the placement for your 2x4x2″ hinge support pieces. Carefully place these support pieces behind your marks. If available, use clamps to hold them firmly in position, ensuring they don’t shift during fastening.
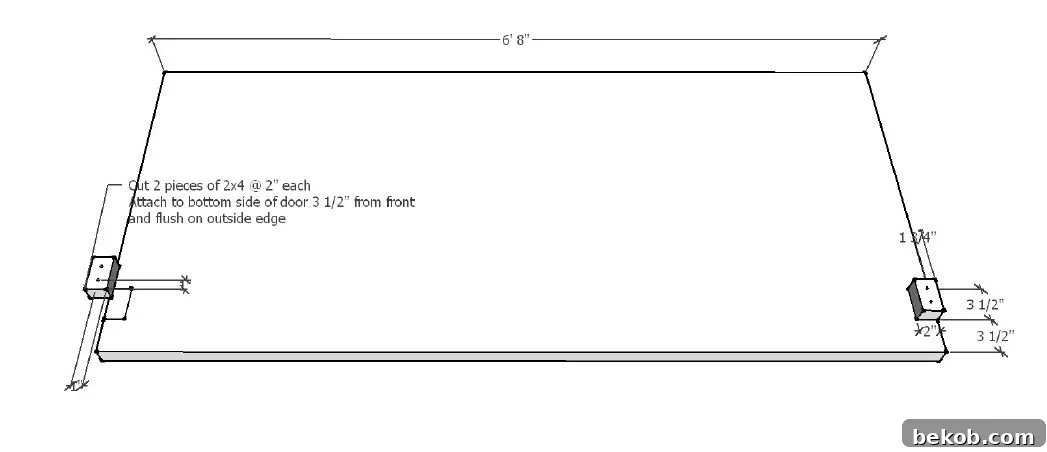
- Secure Supports: Drive 2-1/2″ or 3″ screws through the hinge support pieces and into the solid core door. Remember those pre-drilled holes? They’re essential here to prevent the small 2×4 pieces from splitting. For an even stronger bond and added longevity, you can apply a bead of wood glue to the mating surfaces before driving the screws.
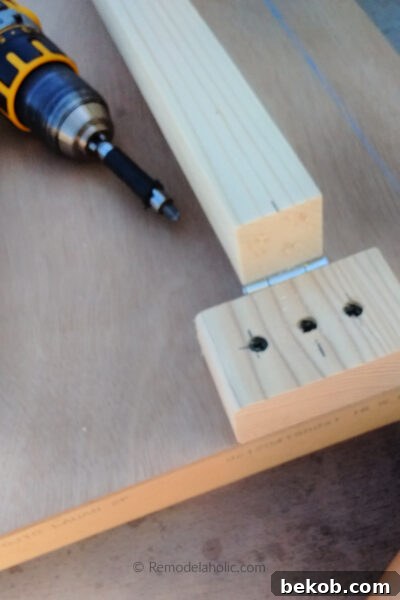
Step 5: Attach the Table Skirt for a Clean Finish and Added Rigidity
The table skirt not only gives your workbench a more finished appearance but also adds significant rigidity and strength to the front edge of the tabletop.
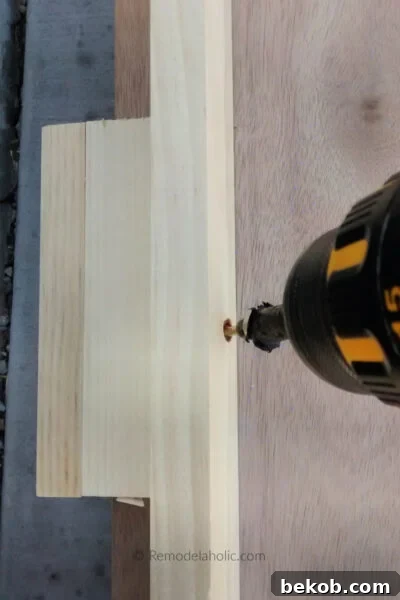
- Position and Fasten: Position the 1×4 table skirt piece to the underside of the workbench top. Ensure it is set back 1-1/2″ from the very front edge of the door. Using the pocket holes you pre-drilled, drive pocket hole screws through the skirt and into the tabletop.
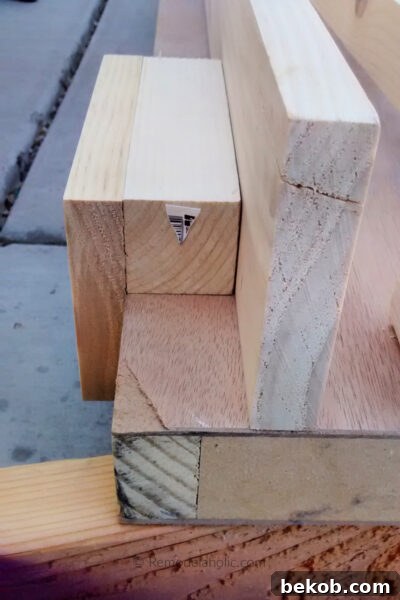
- Jig for Precision (Optional but Recommended): To expedite and improve the precision of installing the front skirt piece, I created a simple jig. This involved nailing a leftover piece of 2×2 to a piece of 1×4. I then placed the 2×2 side of the jig on top of the door, and pressed the table skirt against the jig as I drove the pocket hole screws into the underside of the table. This trick ensures a consistent 1-1/2″ setback. Before you begin attaching with pocket hole screws, always ensure your skirt’s ends are perfectly flush with the sides of your door for a professional look.
Step 6: Integrate the Workbench Legs and Hinges
The folding legs are what make this workbench so versatile and space-saving. Proper hinge installation is key to smooth operation.
- Mark and Align: Attach the small 1-1/2″ hinges to the top of your 2x2x38 legs. Mark the exact center on the side of each leg opposite the hinge. Similarly, mark the center on the outside surface of the 2x4x2 hinge support blocks that are already mounted to the underside of the table.
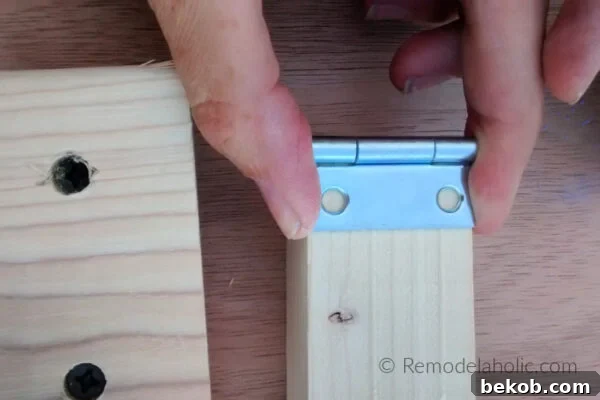
- Attach Hinges: Carefully line up the center marks on the leg and the hinge support block. Then, attach the other side of the small hinge to the inside face of the 2x4x2 block using 1-1/2″ wood screws. I initially used the shorter screws provided with the hinges, but found they allowed for too much “play” or movement when lowering the door. To ensure a more secure and stable connection, I replaced them with sturdier 2″ screws.
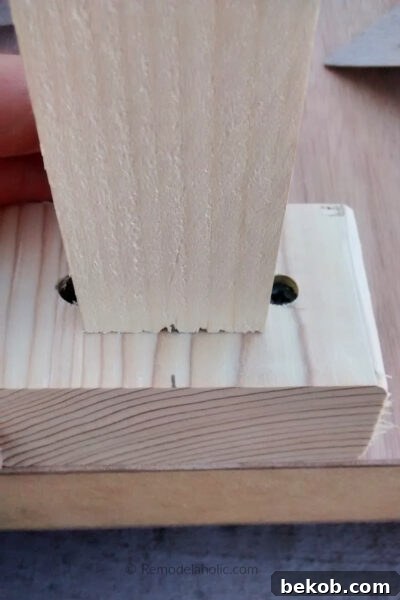
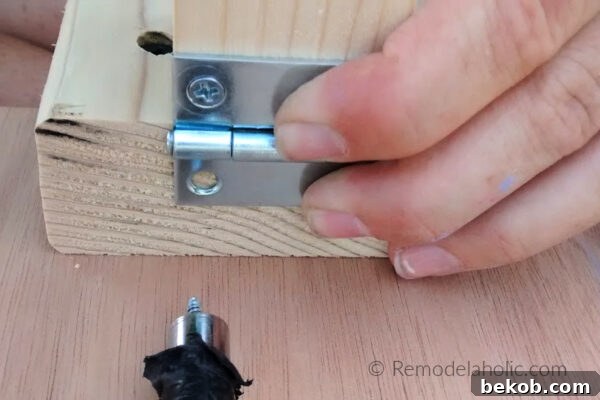
Step 7: Attach the Leg Support for Folded Stability
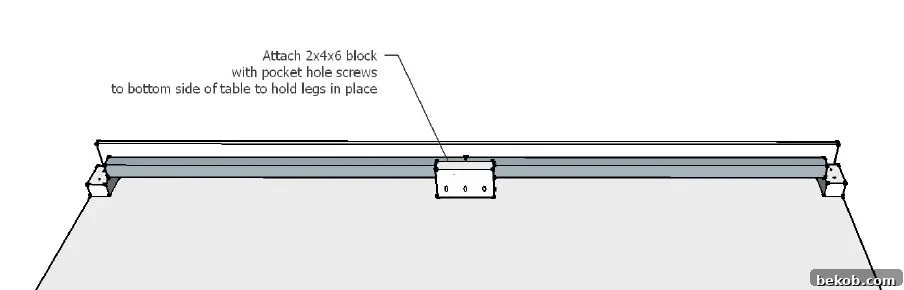
The leg support piece is essential for holding the workbench legs securely in place when the table is folded up against the wall, preventing them from dangling or swinging open unexpectedly.
- Position and Secure: Fold your newly hinged legs so they rest flat against the underside of the table. Now, position the 2x4x6 leg support piece so it sits snugly against the folded table legs. Using pocket holes and 2″ screws, attach this support piece firmly to the underside of the table. This provides a designated resting place for the legs, ensuring a neat and compact folded profile.
Step 8: Attach the Table to the Ledger with Main Hinges
This is a pivotal step where the workbench truly comes to life, connecting the tabletop assembly to the wall-mounted ledger. Remember to call in your heavy-lifting helper for this stage!
- Position the Table: With your helper, carefully carry the assembled workbench (with legs folded against the underside) to the wall. Align the back edge of the table with the ledger board you previously installed. Allow the legs to fold down to their open position. The back of the table should rest firmly on the 2×4 support, and the legs should extend to the ground. You may need to make minor adjustments to ensure the legs sit flush on the floor and against the 2×4 blocks on the underside of the table, creating a perfectly level and stable work surface.
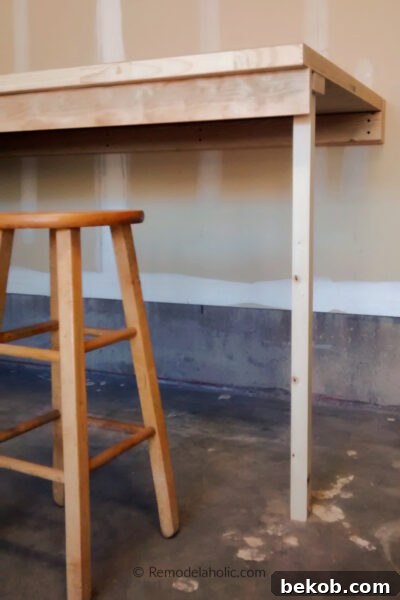
Pro Tip for Uneven Floors: If your garage floor isn’t perfectly level, you might find that one leg doesn’t make full contact with the ground. A simple solution is to place a large washer or a thin shim underneath the shorter leg to ensure a completely secure and wobble-free workbench.
- Set the Gap: Before attaching the main hinges, measure and maintain a 1/2″ gap between the top of the 2×6 ledger board and the very back edge of the table. This small clearance is crucial as it allows the hinges to pivot freely, ensuring smooth folding and unfolding without binding.
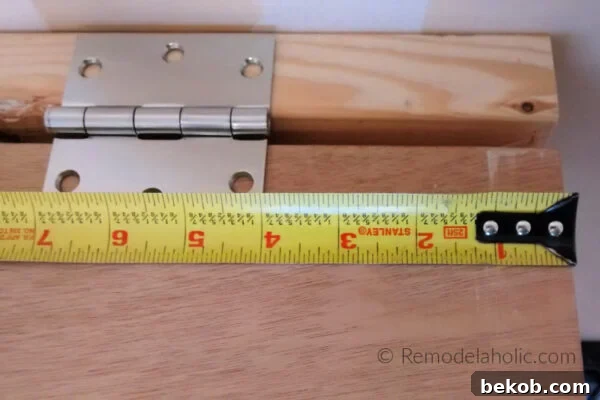
- Install Main Hinges: Attach the three 3″ door hinges to both the table and the 2×6 ledger board. I found that installing two hinges approximately 4″ in from each end of the table, and one hinge precisely in the center, provided excellent support and even weight distribution. Use sturdy screws appropriate for hinge installation.
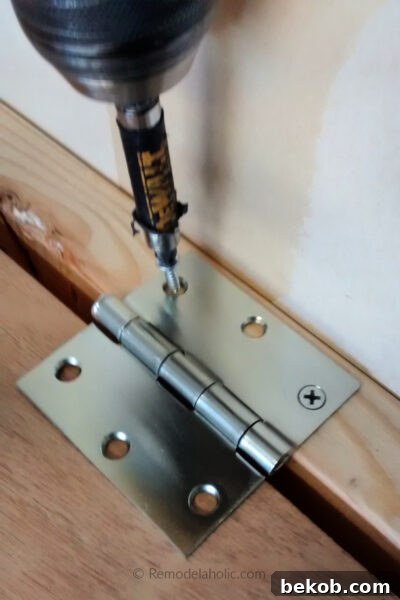
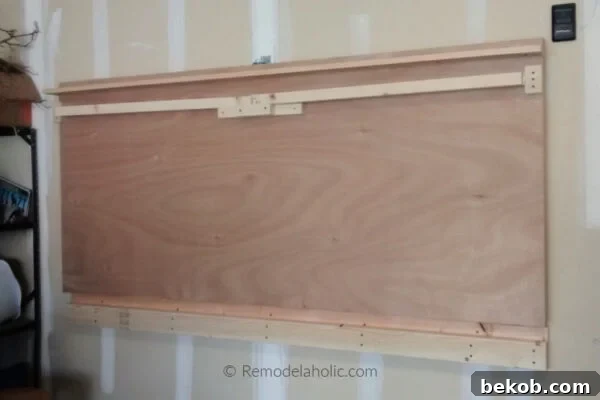
- First Fold Test: With your helper, carefully test out those newly installed hinges! Gently fold your workbench up against the wall. Mark the point where the top edge of the table meets the wall, ensuring this mark is on a wall stud as close to the center of the table as possible. This mark will guide the placement of your security hasp. Lower your table down again – it’s quite satisfying to see it work, isn’t it?!
Just two more final touches, and your functional workbench will be complete!
Step 9: Install the Security Hasp for Folded Storage
The hasp and latch mechanism is the defining feature of the “fold-up” part of this DIY workbench, keeping it securely stored against the wall when not in use.
- Attach Twisting Piece to Table: The twisting component of the hasp attaches to the side of the work table. Measure where the wall stud you marked in the previous step is in relation to the end of your table. Transfer that exact measurement to the front edge of your table. This will be the ideal spot to attach the twisting piece of the hasp. Ensure it’s securely fastened with appropriate screws.
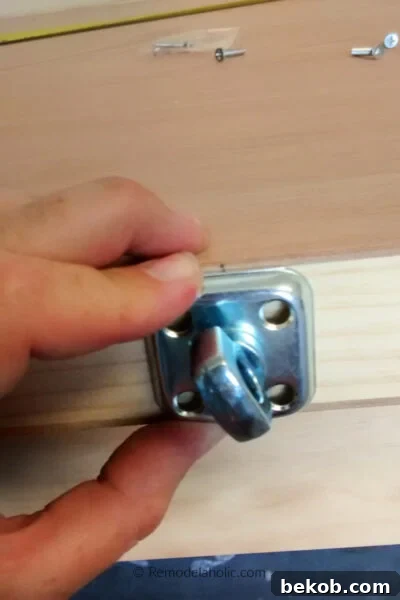
- Attach Hinged Piece to Wall: The hinged part of the hasp (the loop) needs to be installed on the wall, directly into the wall stud for maximum security. Position this piece 1/2″ above the line you marked in the previous step (where the table’s top edge meets the wall) and maintain the same distance from the end of the table as your twisting hasp piece. Fasten it firmly to the wall stud.
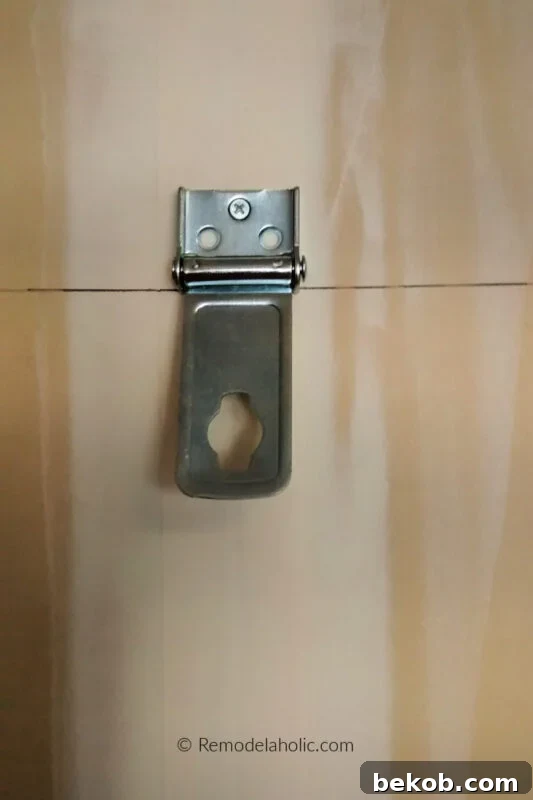
- Final Test: Now, for the moment of truth! Fold your table up against the wall and engage the hasp. It should twist and lock securely in place, holding your workbench neatly out of the way. Try it out a few times to get a feel for its smooth operation!
Step 10: Apply a Protective Finish Coat (Optional but Recommended)
The final step is entirely optional but highly recommended for protecting your investment and ensuring the longevity of your new workbench.
- Apply Polyurethane: I chose to brush on a durable coat of polyurethane to protect my tabletop. This clear finish creates a resilient barrier against scratches, moisture, and common workshop spills, making the surface easier to clean and preserving its appearance for years to come. You can choose a matte, satin, or glossy finish based on your preference. Allow adequate drying time according to the product instructions.
Congratulations! You’ve successfully built your very own space-saving, incredibly sturdy, and perfectly functional DIY folding workbench. I hope you enjoy your new, incredibly CLEAN workspace! It’s amazing how much more motivated you become when your garage is organized.
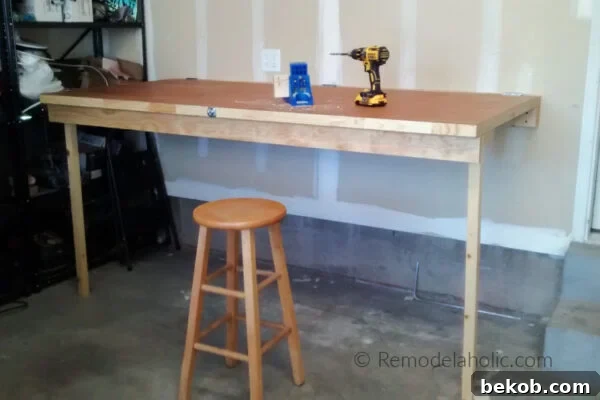
Next on my list is a thorough cleaning of the surrounding garage space. I’m also seriously considering adding a pegboard system directly above or below the workbench to store extension cords, hand tools, and other low-profile materials, further enhancing organization and accessibility. The possibilities for a streamlined workspace are endless!
More Clever Space-Saving Solutions for Your Garage & Workshop
Maximizing space and efficiency in your garage doesn’t stop with this folding workbench. Explore these other fantastic DIY projects and organization ideas to keep your workspace tidy, functional, and inspiring:
- Easy 2×4 Bar Stool Step Ladder for the Garage Workshop: A dual-purpose essential for reaching high shelves and taking a quick break.
- Quick and Easy DIY Power Tool Organizer for Drills and More: Keep your drills, drivers, and batteries neatly organized and readily accessible.
- Workshop Upgrade: Mobile Dust Collector & Clamp Rack: Combine dust management with clamp storage for a cleaner and more efficient shop.
- 16 Favorite Garage Organizing Tools: Discover essential tools and products that make garage organization a breeze.
- 15 Tips to Organize Your Garage: Practical strategies and clever hacks to transform your chaotic garage into an orderly haven.