Materials and the sequence of the job sit together on this page.
We hope you all had a very Merry Christmas! Next up in our Holiday Guest Series, we have a striking built-in bed nook that we found over on Instagram! Be sure to tag your best photos with #imaBekob so we can find you, too!
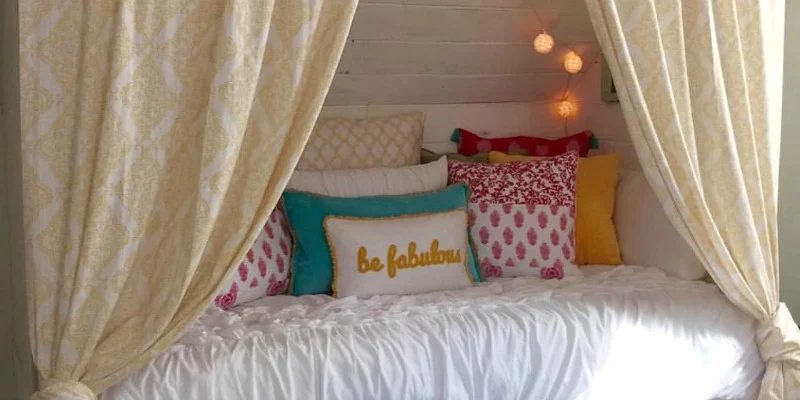
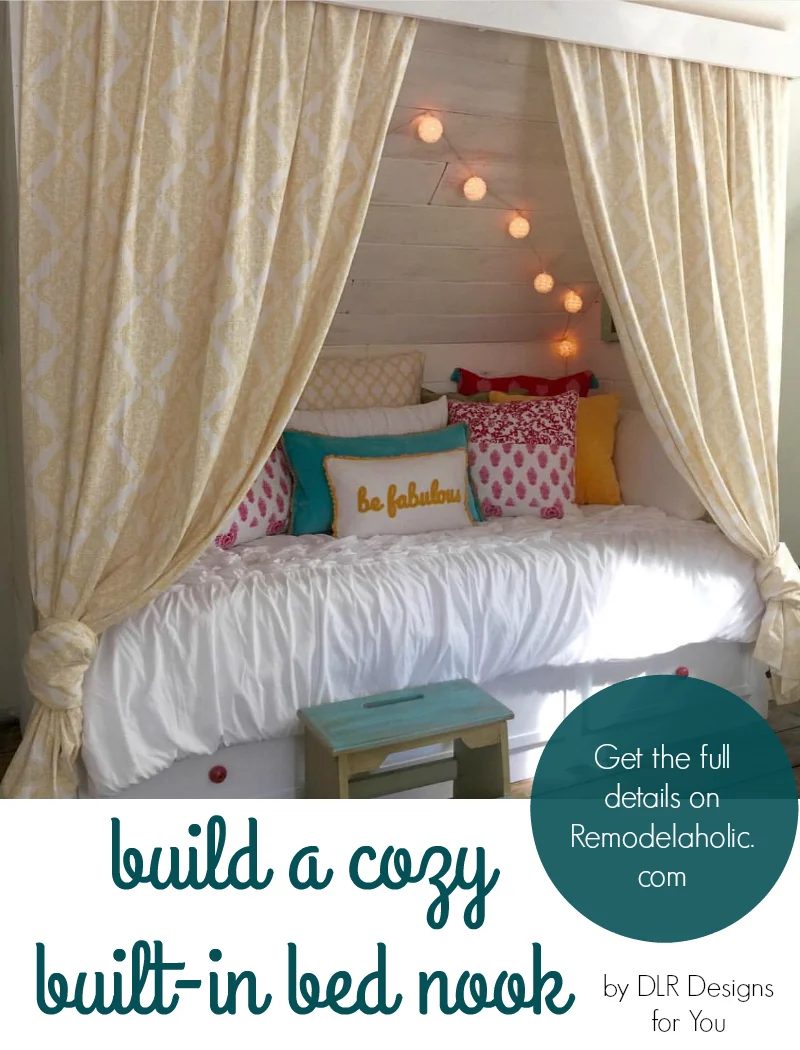
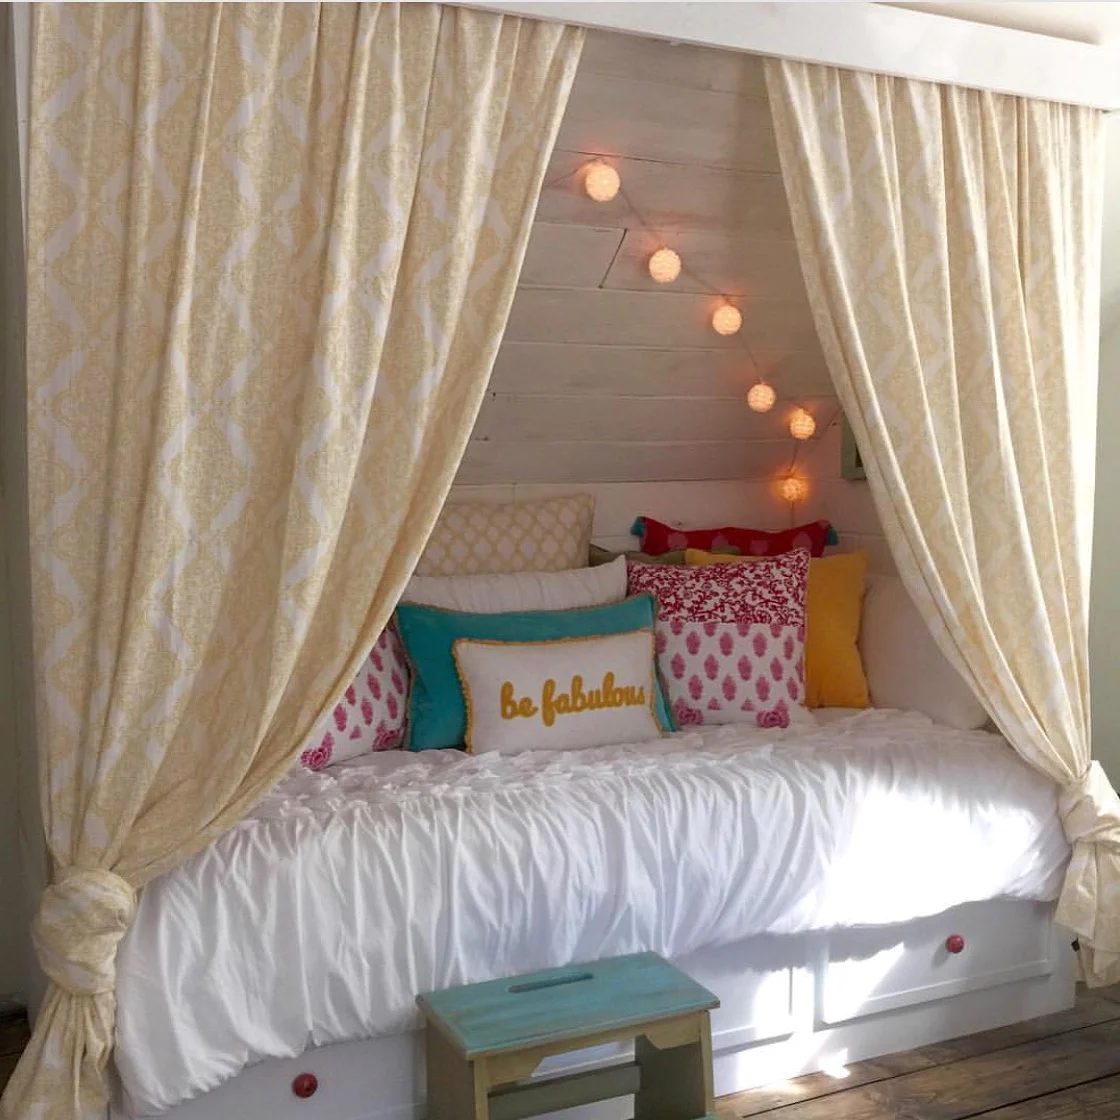
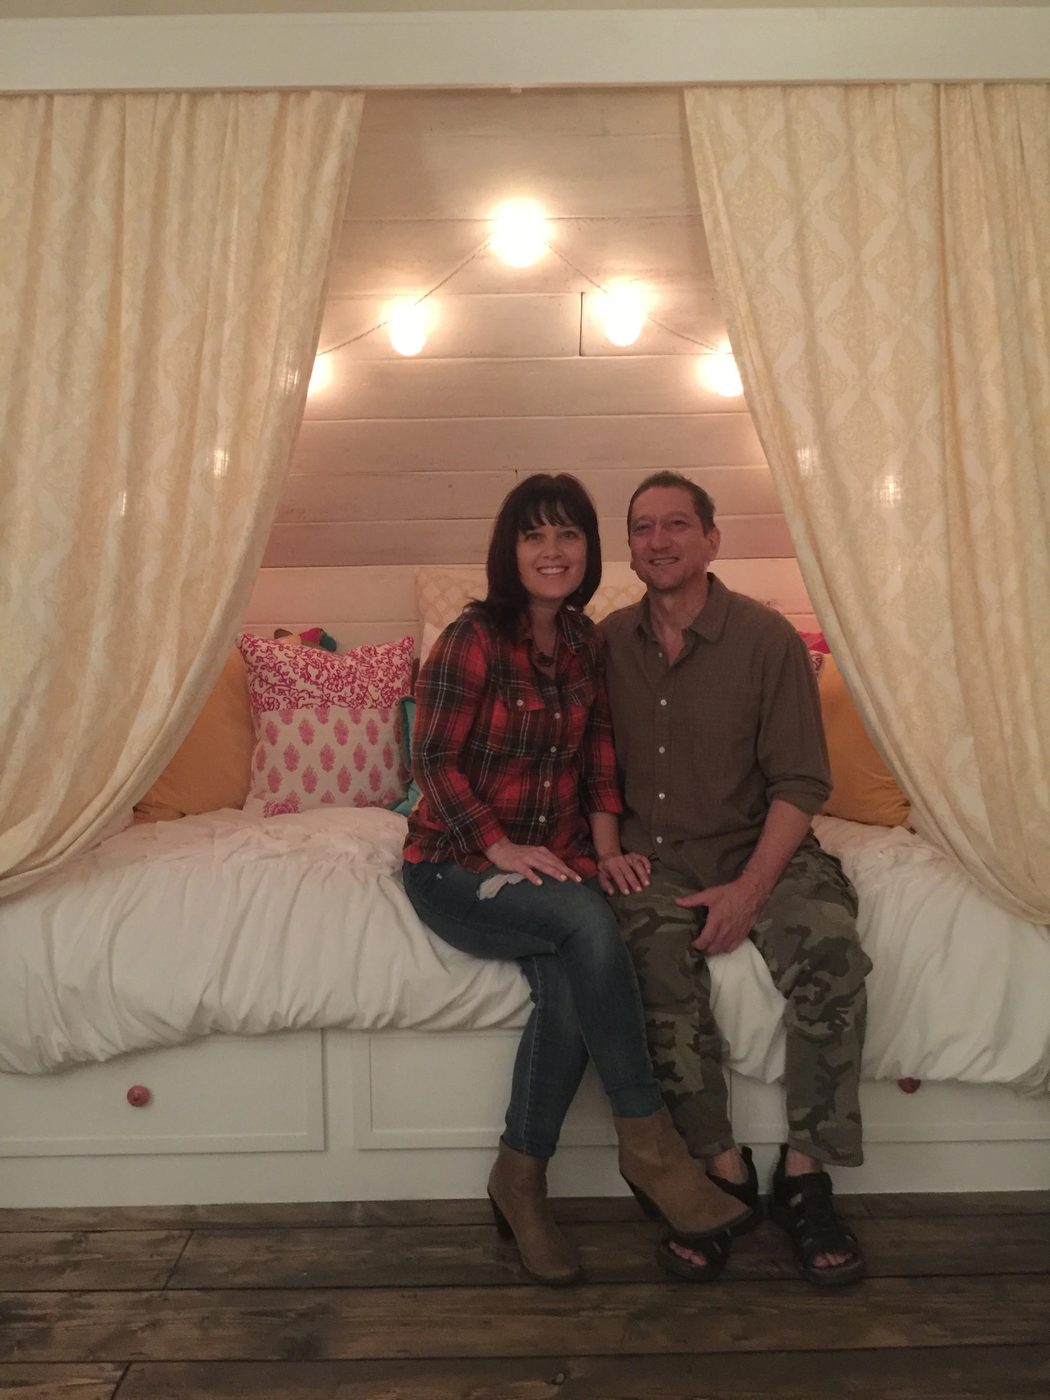
The built-in storage bed that Debi and her husband built for their daughter is striking and Debi did a great job decorating it:
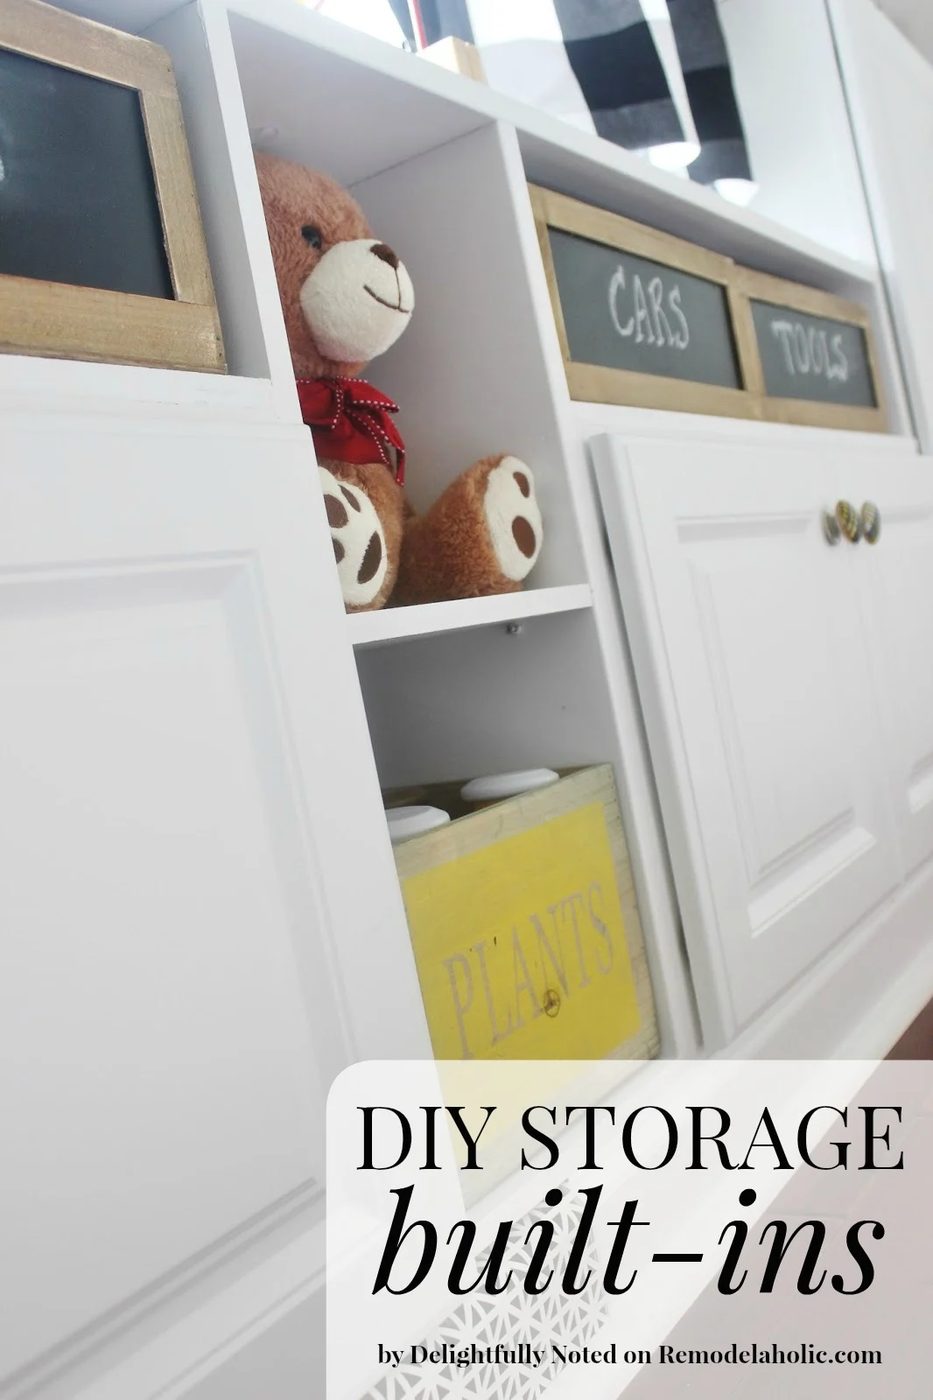
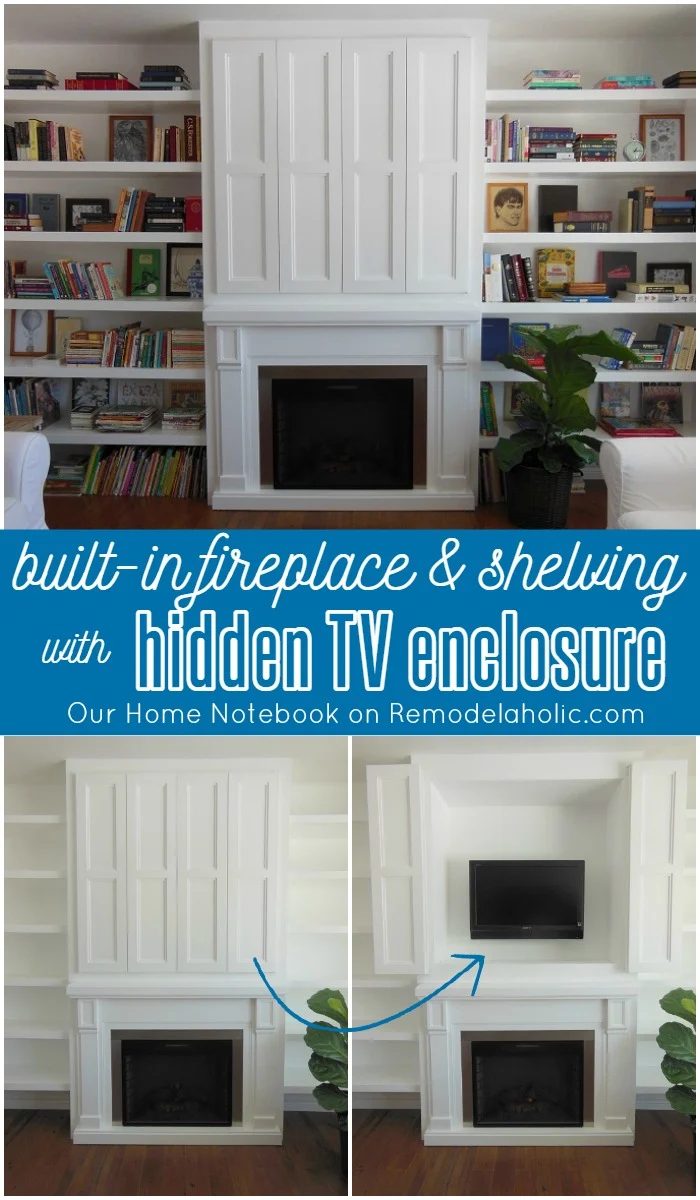
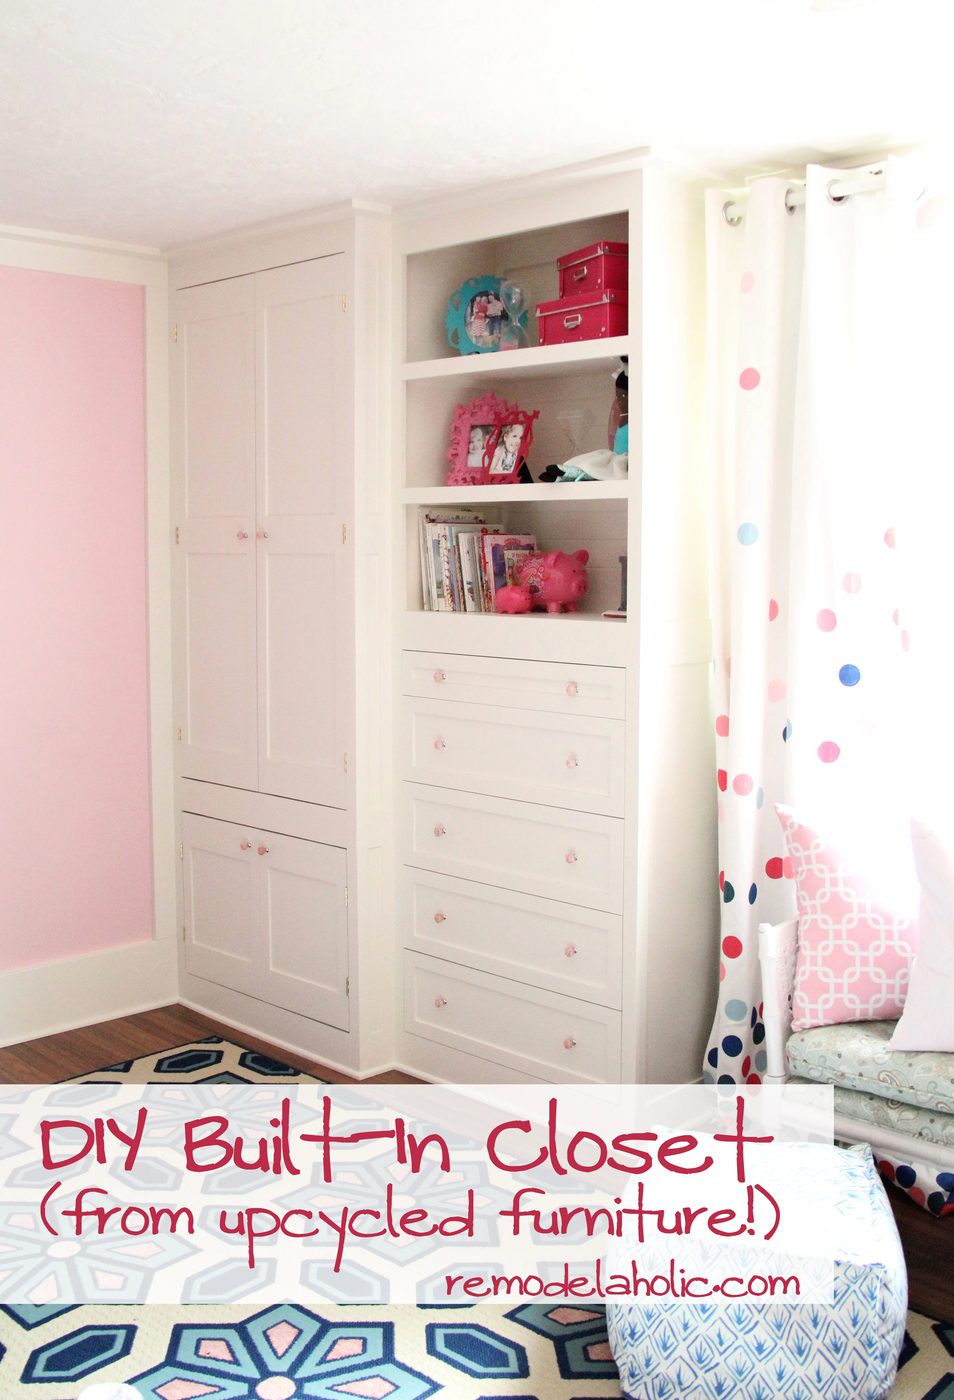
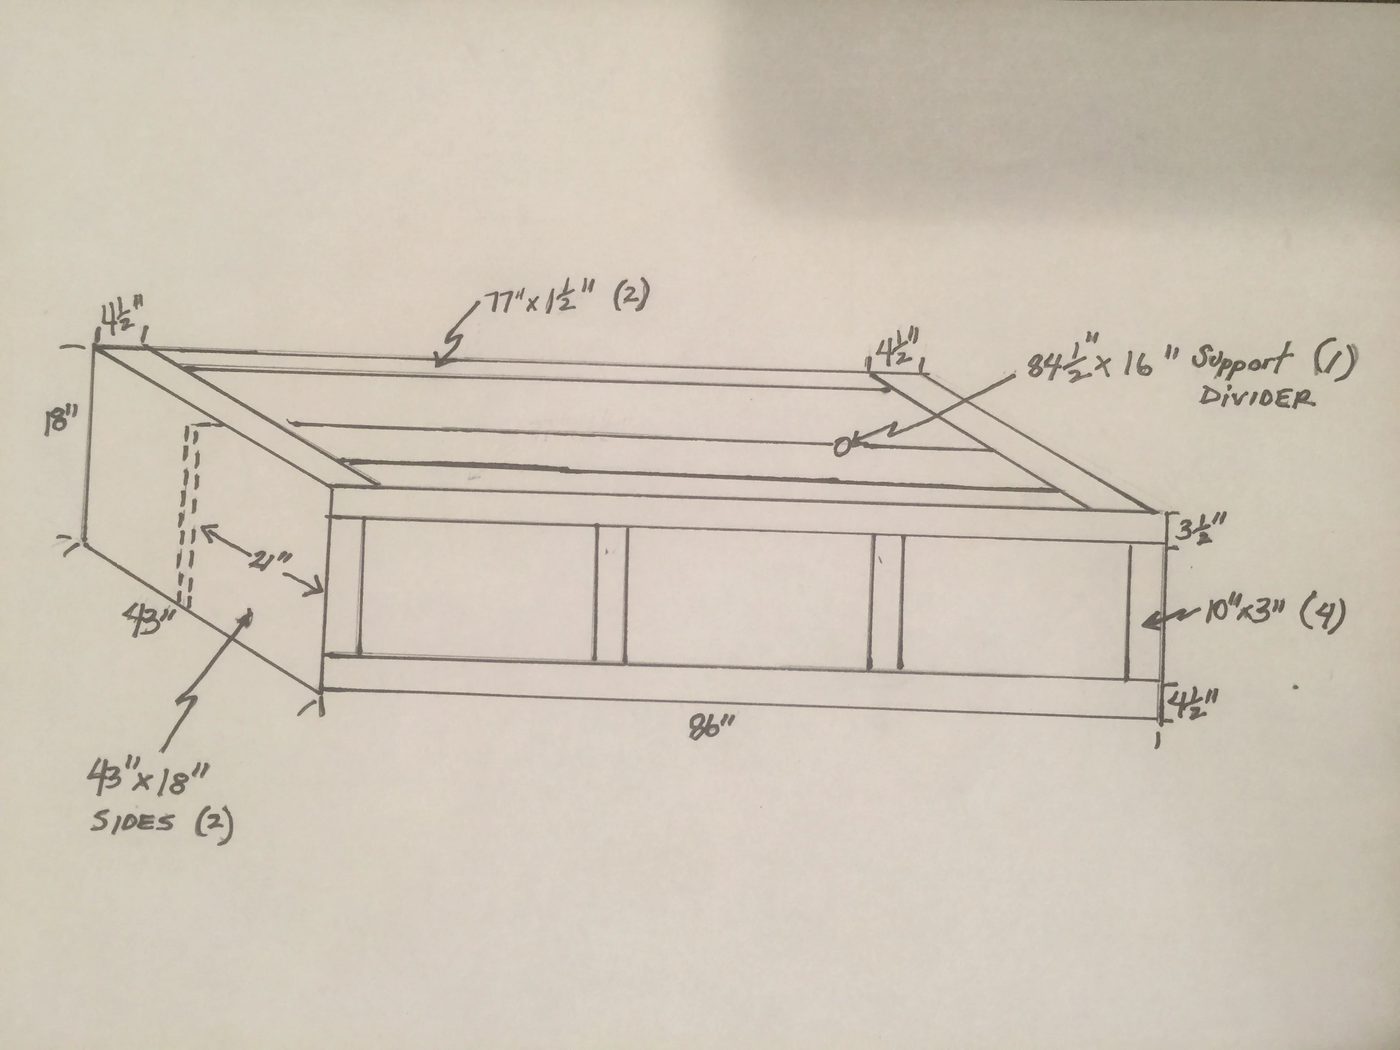
Debi was kind enough to share the details with us so we could draw up some sketches for you (below) — and browse these other striking built-ins as you scroll down….
Here’s Debi with the details of her daughter’s striking built-in bohemian style bed nook!
Handmade Built-In Bed Nook
by Debi of DLR Designs For You
building plans by Bekob
This post contains affiliate links. See our full disclosure policy here.
Hi, my name is Debi. I’m so excited to share the built-in bed nook that my husband Mike and I created for our youngest daughter. I have always loved decorating but it’s become a real passion within the past several years. My home has been my main outlet for this passion but I think my next step needs to be branching out and helping others find and enjoy their design style because as my husband often jokes, how many times can you redecorate our master bedroom (I stopped counting after 4 ) You can visit me on Instagram at DLRDESIGNSFORYOU to look at all my other projects.
BUILT-IN BED NOOK PROJECT PLANS ARE AT THE BOTTOM OF THE POST
Our daughter Emily wanted a bed nook that would go nicely with the bohemian/hippie style that she chose for her recent room renovation.
I explained the vision of this bed nook to my hubby Mike: that it needed sides with drapes in front that she could close when she wanted. We have a smallish home and space is at its premium so Mike likes to use a ‘built-in’ style for his carpentry projects. He came up with the option to add 3 spacious drawers underneath because we all know teenage girls can never have too much drawer space.
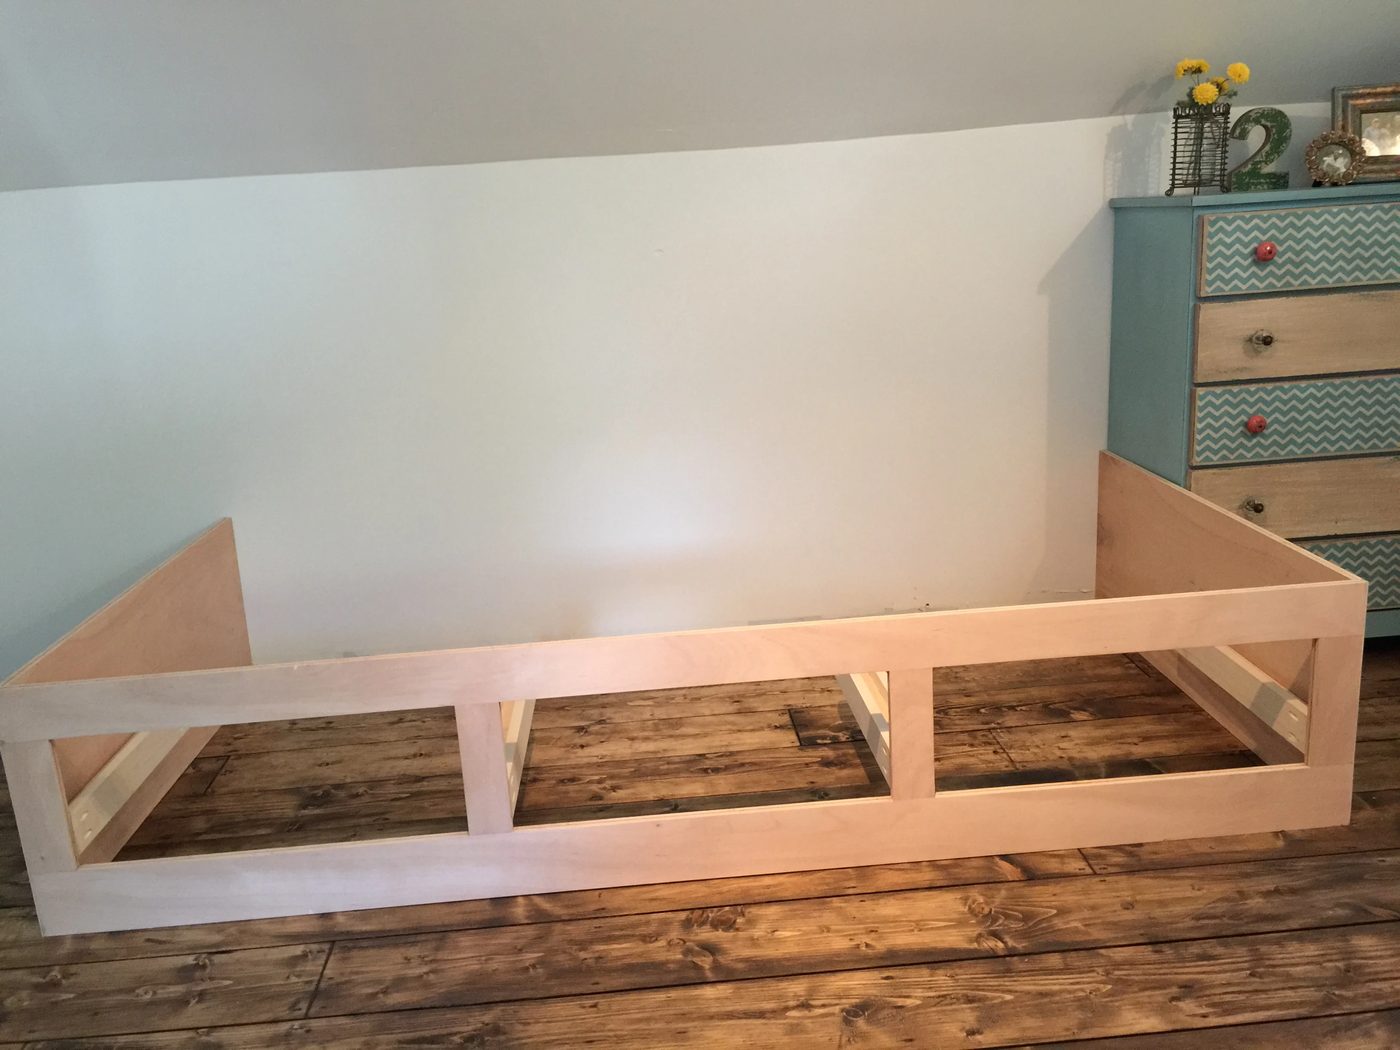
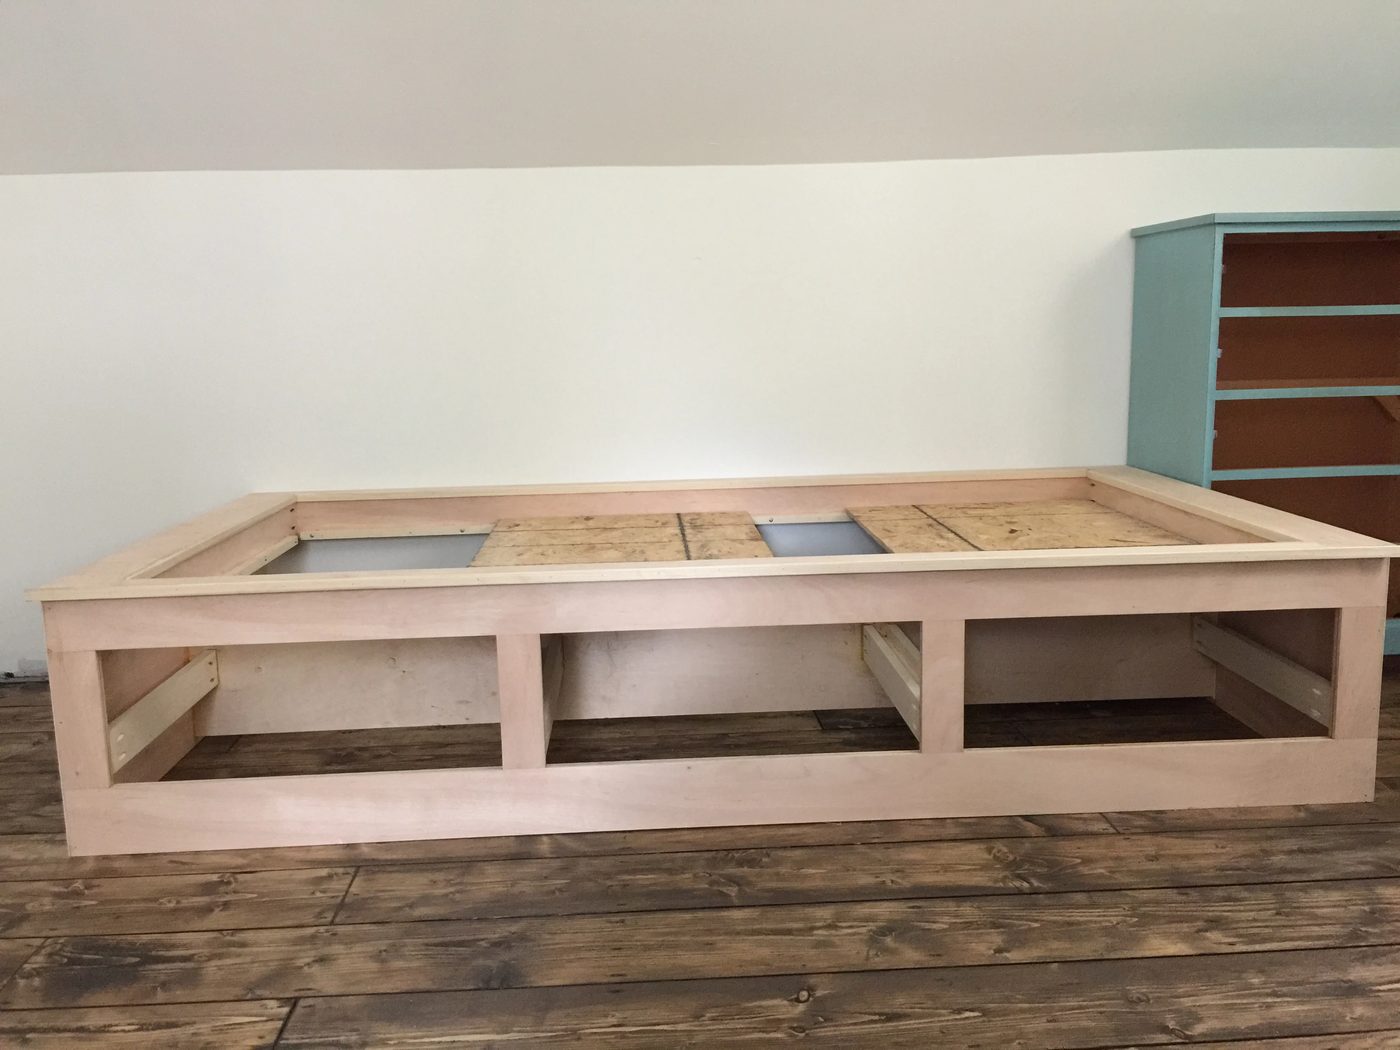
We started the bed nook plans using a twin size mattress for basic dimensions. Mike sketched up the design & measurements and headed off to Home Depot for the needed lumber and supplies. He likes to use poplar lumber since it takes paint well & is more durable than traditional pine. Mike cut the boards to size using his table saw and did all the pre-sanding in his workshop. Since the staircase leading to the bedroom is quite tight, Mike had to do most of the assembly in Emilys room. He likes to use pocket joinery (Kreg Jig) and glue, since it makes the actual building fast, straightforward & very strong.
While Mike spent his time building and sweating the details, I spent hours in one of my go-to home stores, (Home Goods) finding all the right pillows because if bohemian style is what Emily wanted it meant a lot of comfy cozy pillows! This was a challenge for me, since using multiple patterns and brights pops of color put me a bit out of my comfort zone.
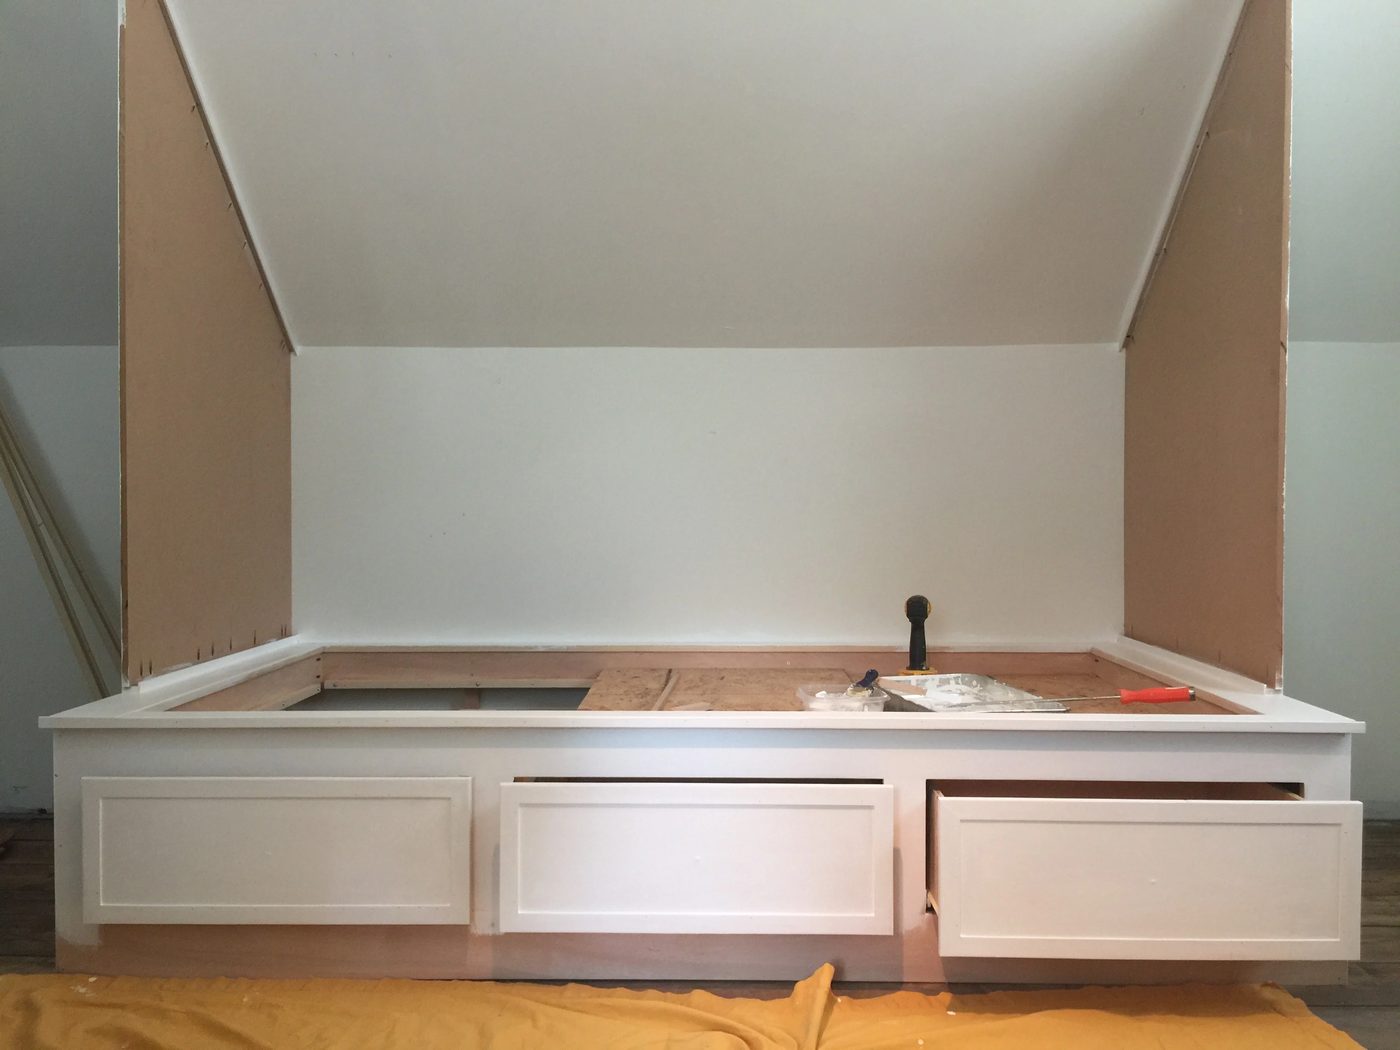
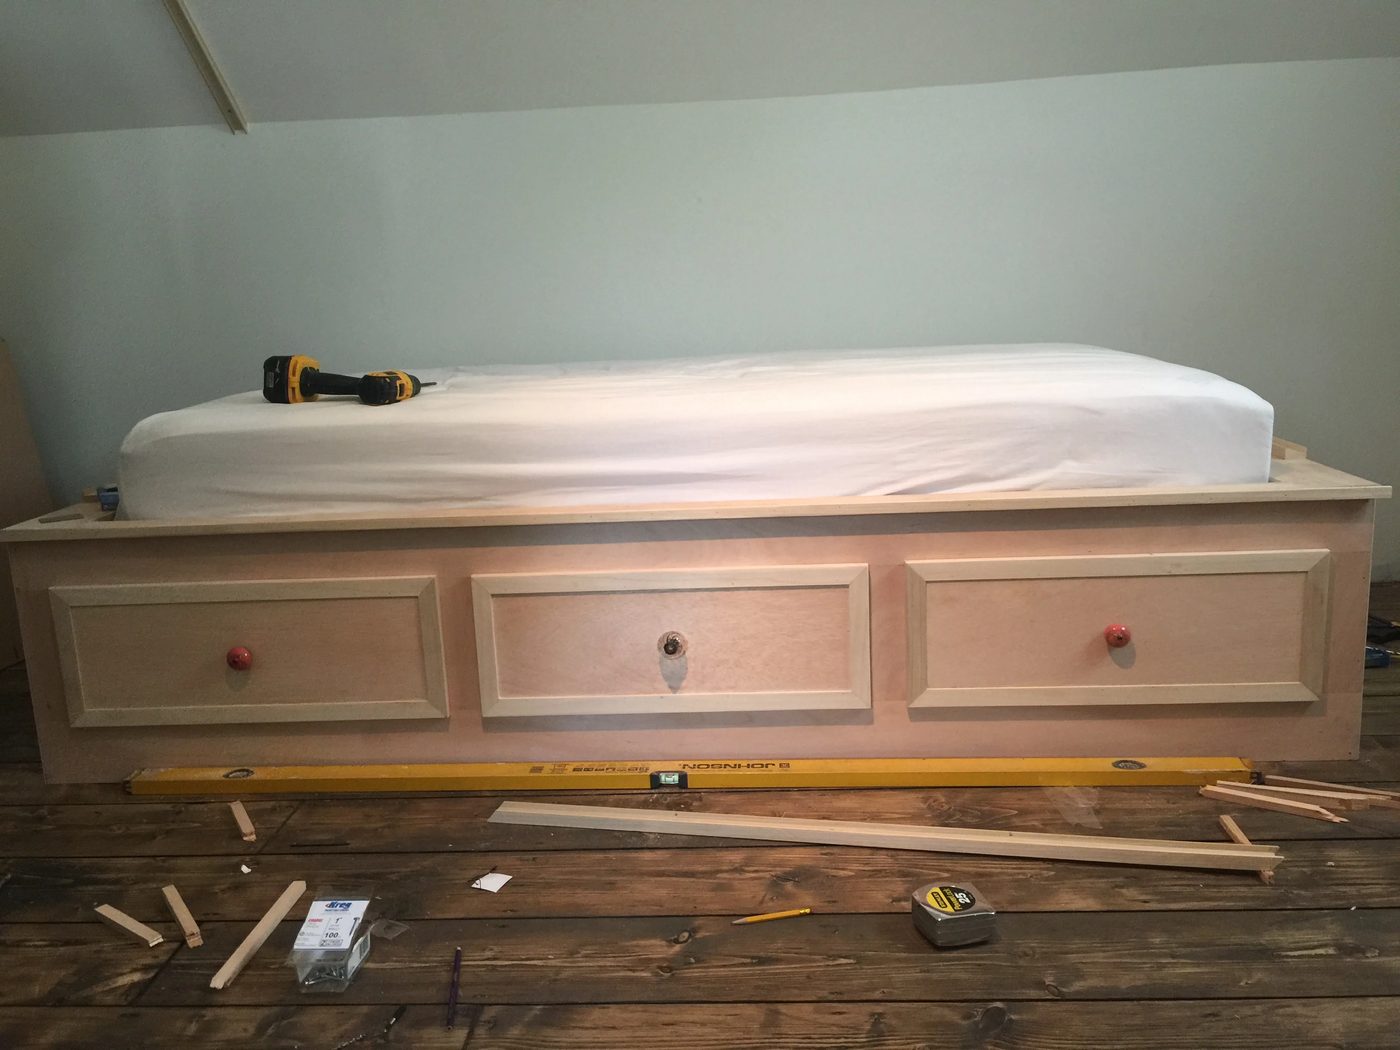
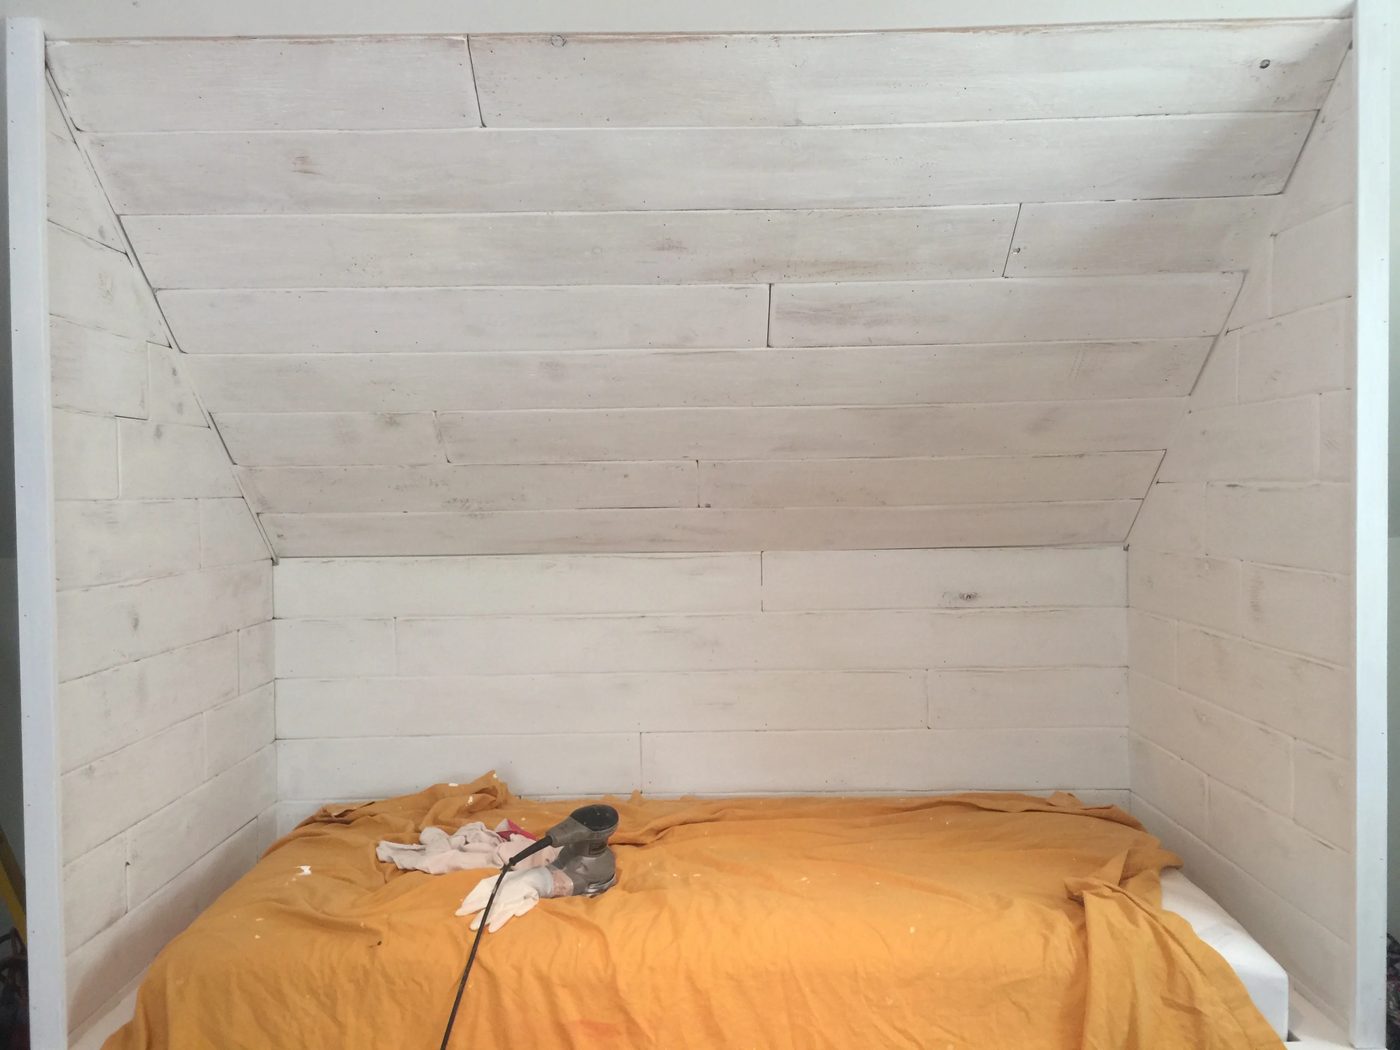
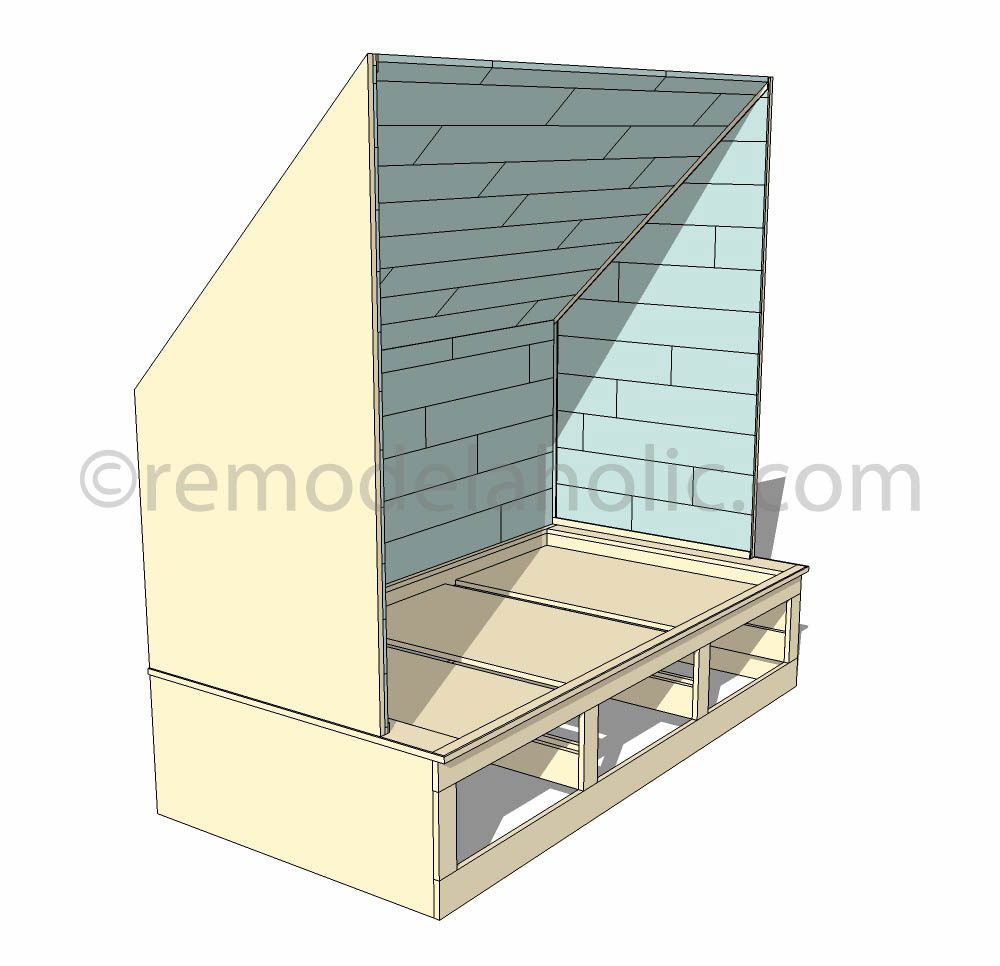
Once the bed was put together we knew the back of the bed needed more texture , so we went with adding a shiplap look for that rustic feel. To keep the costs down Mike created the shiplap boards using 3/8” low grade knotty plywood cut in 6” strips with the corners knocked and sanded to give an aged look. Once that was complete, I had the task of painting. We used a white milk paint (General Finishes – Snow White) for the frame and sides of the bed, its durable and straightforward to clean with a very flat natural look. Then I used a chalk paint from Joann’s Craft Store for the wood panels. I chose a color with a little bit of a shade difference, just to add some depth. Once that was dried it was all about the hand sander & making those boards look old.
Once the bed was completed, I then went to town adding all the finishing touches…..pillows, curtains, lights, a wooden shelf and distressed wood letters. What really softened the slab look of the drawers were the knobs that I pulled from my collection. Its funny how sometimes the smallest of items can make such a big impact. All that, took it from striking to giving it the WOW factor. It really went beyond what either one of us imagined it would look like!
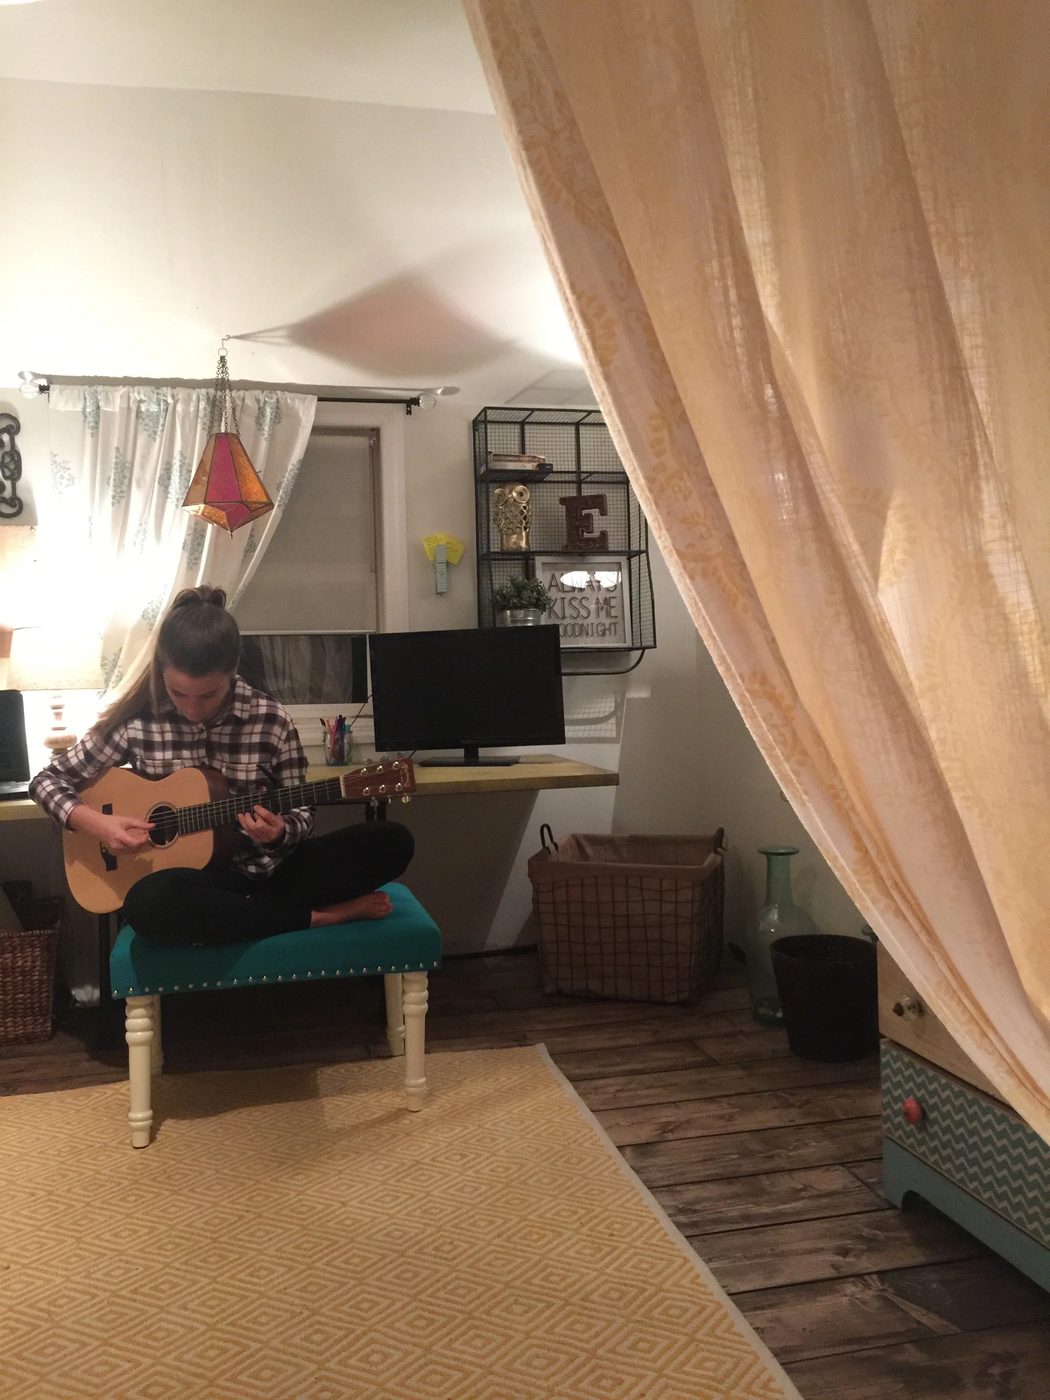
It is now Emily’s go-to spot to hang whether she’s texting, reading or playing her guitar. It’s also my husbands go-to place, since I have found him up there working away on his laptop, as Emily studies.
Thanks so much for sharing with us, Debi! Such a wonderful addition to your daughter’s room!
Bekob, be sure to pop over to Instagram to see what Debi’s been up to lately!
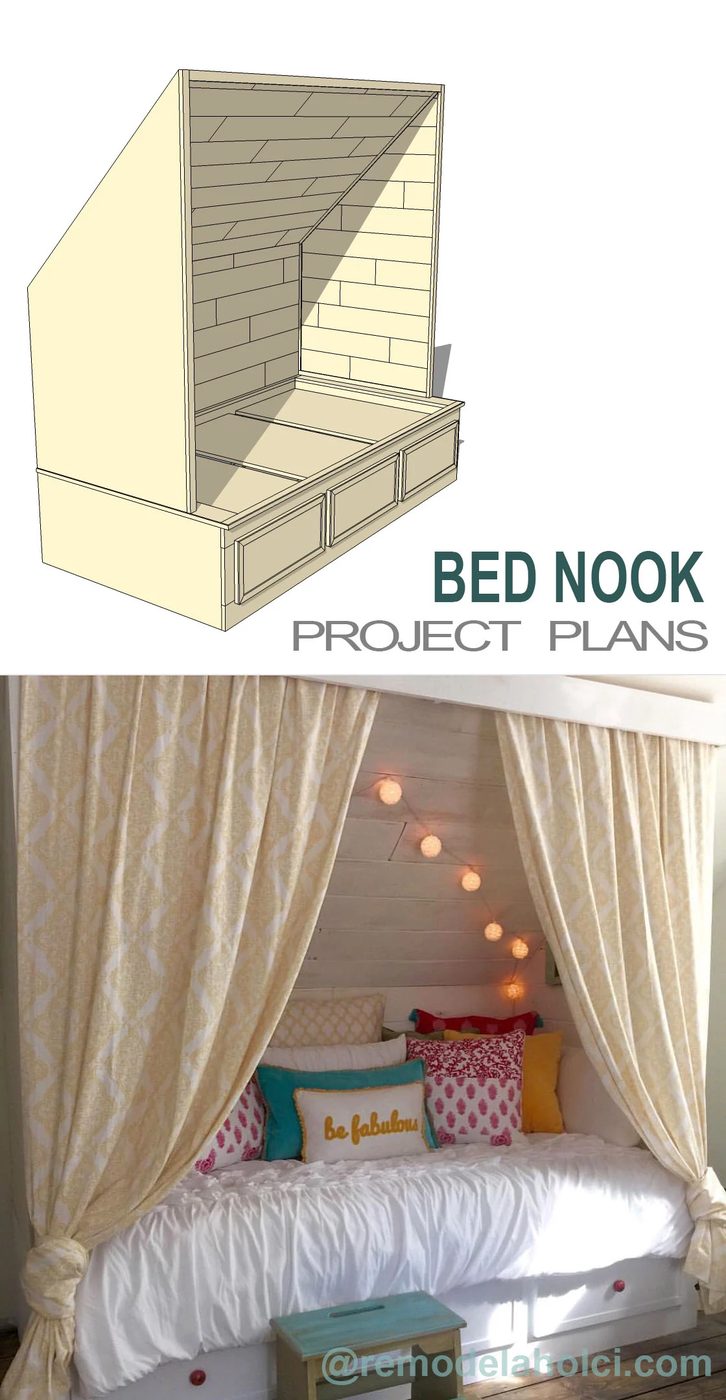
Building Plans: Built-in Bed Nook
Please note: This is a rough sketch with dimensions, so please measure and double check for your bed and space. We did our best to match our plans to Debi’s bed nook, but your built-in bed nook will most likely require different materials and dimensions for the top wall portion of the nook, and the shiplap walls. Please measure and plan accordingly to fit your space.
Tools List
- Table Saw
- Miter Saw
- Nail Gun
- 1 1/4″ Brad nails
- Drill
- Kreg Jig
- pocket hole screws
- Wood Glue
- Sand Paper
Materials Used
- 3/8” low grade knotty plywood for the shiplap look in the nook
- 1/2″ MDF
- 3/4″ plywood
- 3/4″ poplar
- 1/4″ poplar
- 2×4’s
- paint
Dimension Views
Front View
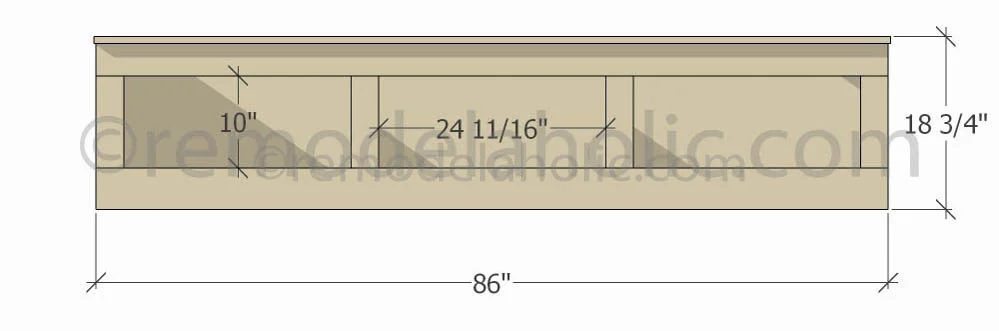
Front View
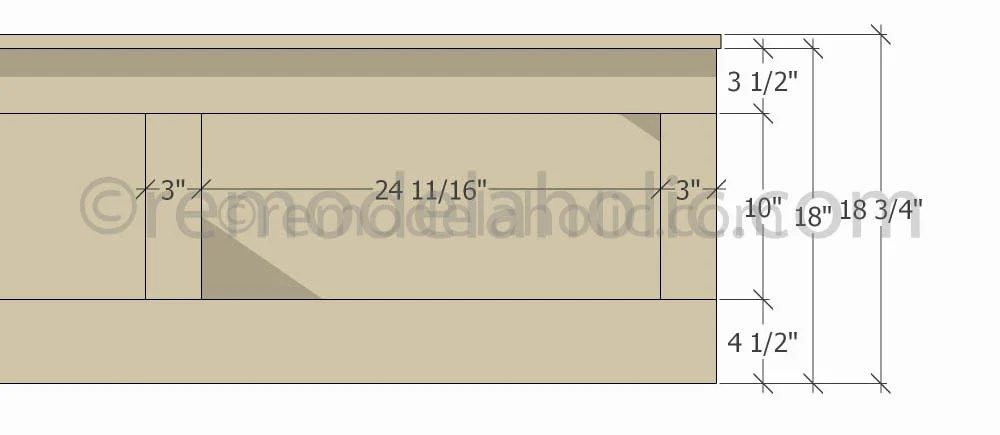
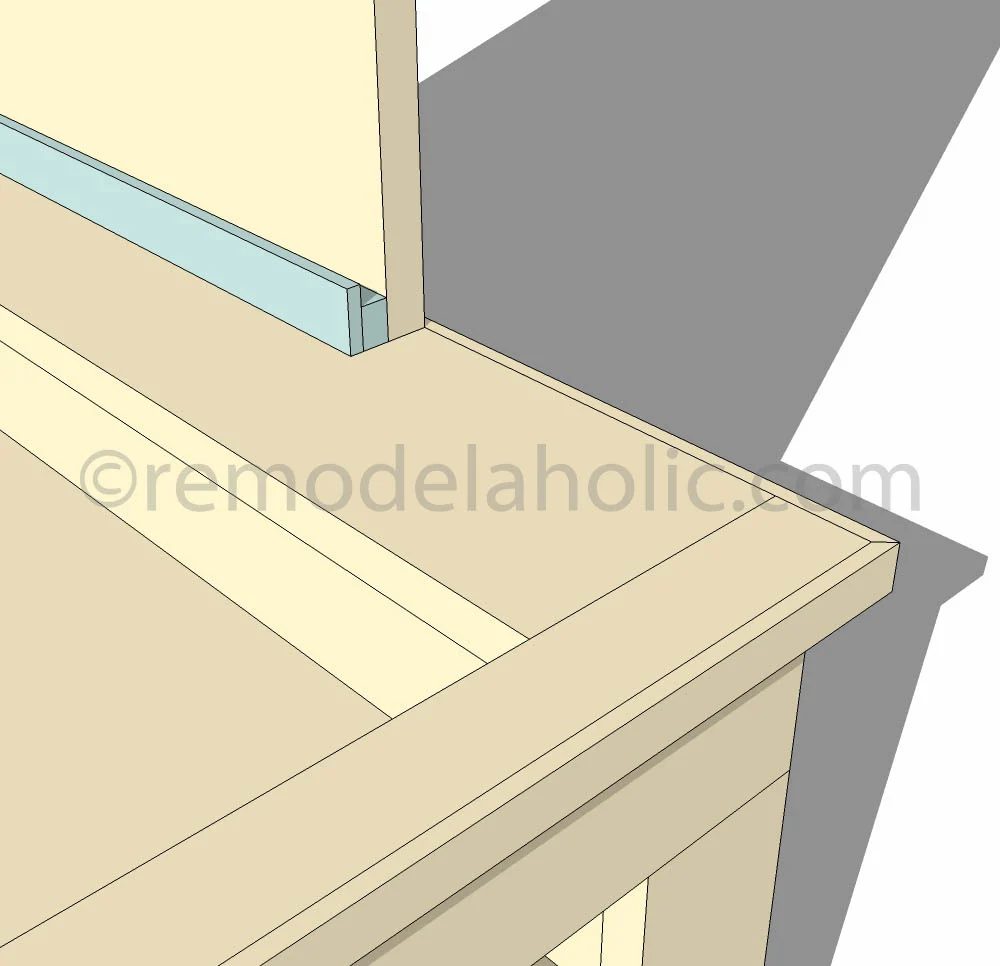
Close up of front view corner with face frame on.
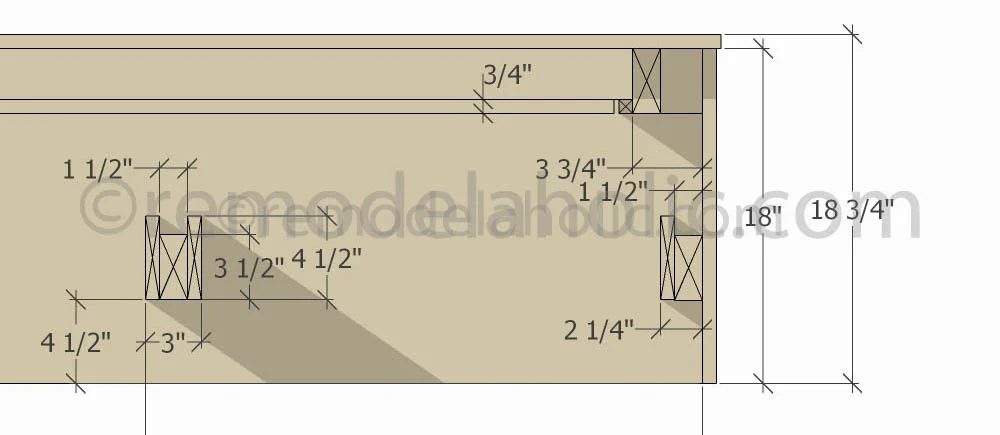
Close up the of front view without face frame on.
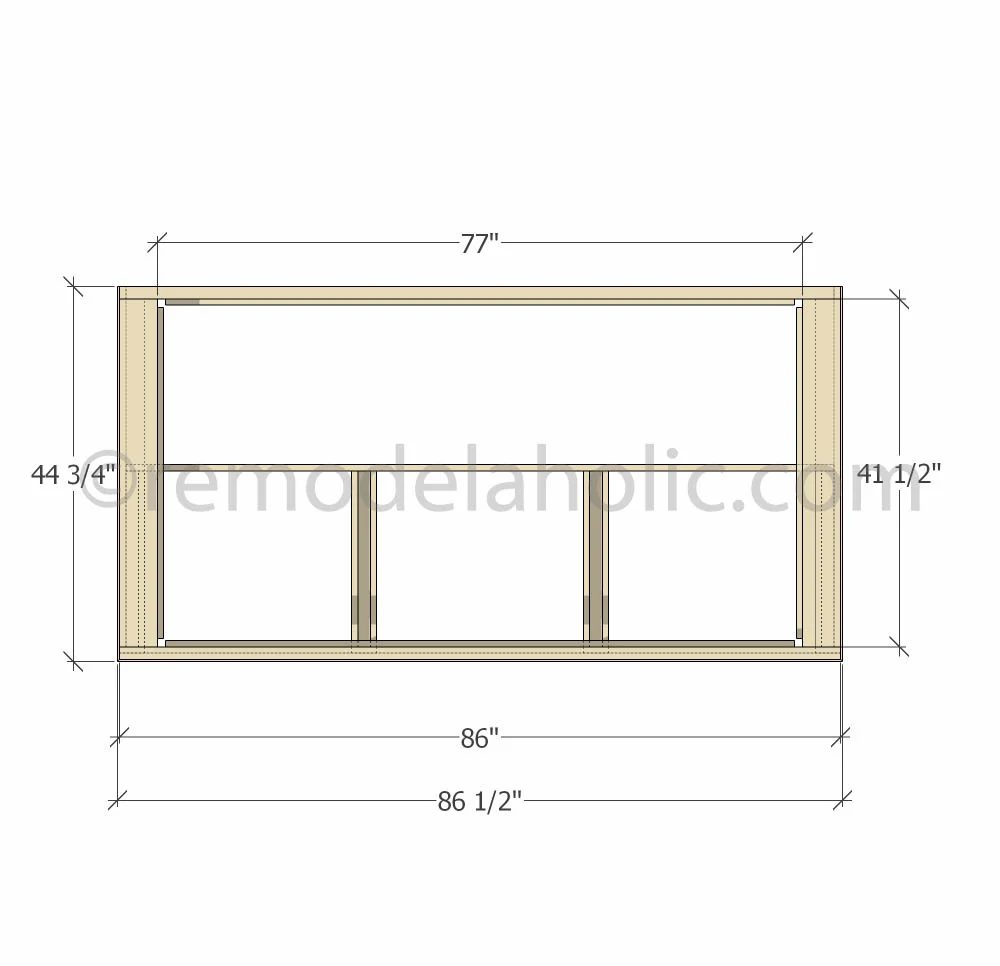
Top View
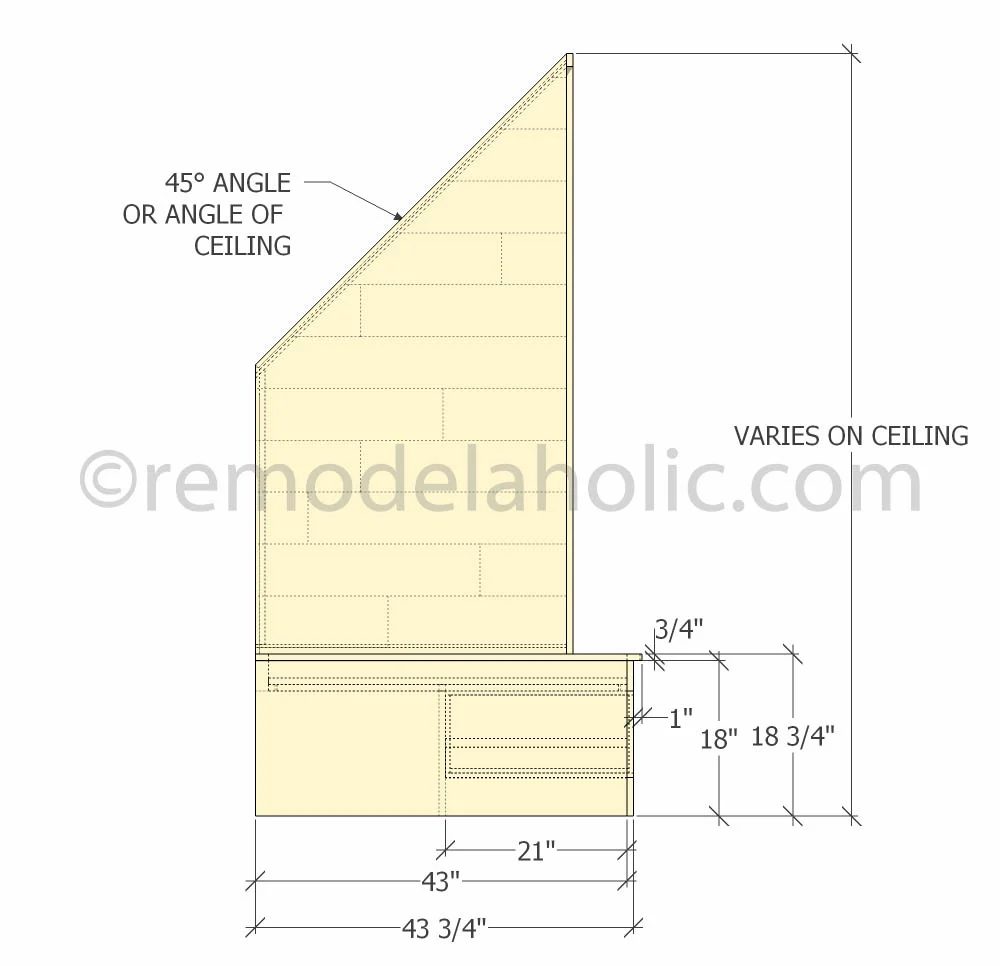
Side View
Cut List
See construction steps below and dimension view above for more info.
Bed Base
- 84 ½” x 15 ¼” x ¾” – Middle Support
- (2) 43” x 18” x ¾” – Sides
- 1 – 86” x 3 ½” x ¾” – Top Rail
- 1 – 86” x 4 ½” x ¾” – Bottom Rail
- (4) 10” x 3” x ¾” – Stiles
- (4) 21” x 3 ½” x 1 ½” – Middle Drawer Supports
- (6) 21” x 4 ½” x 1 ½” – Side Drawer Hardware Supports
- (1) 84 ½” x 3 ½” x 1 ½” – Back Frame
- (2) 42 ½” x 3 ½” x 1 ½” – Side Frames
- (2) 39 ½” x ¾” x ¾” – Side Lip
- (2) 75” x ¾” x ¾” – Front and Back Lip
- (2) 86” x 1 ½” x ¾” – Front and Back Top Trim
- (2) 41 ½” x 4 ½” x ¾” – Top Trim Sides
- (2) 44 ¾” x 1 ⅛” x ¼” – Side Edge Trim
- (1) 86 ½” x 1 ⅛” x ¼” – Front Edge Trim
- (3) 41 ½” x 24” x ¾” – Mattress Supports
Enclosure
- (2) 69 ½” x 36” x ¾” – Enclosed Sides
- (2) ~52” x 1 ⅛” x ¼” – Top Track Outside
- (2) ~52” x 3/8” x ¾” – Top Track Inside
- (2) 36” x 1 ⅛” x ¼” – Bottom Track Outside
- (2) 36” x 3/8” x ¾” – Bottom Track Inside
- Various Length x 6” x ½” – Nook Boards for Shiplap look
- (2) ~32” x 1 ⅛” x ¼” – Back Corner Trim
- (2) ~62 ½” x 1 ½” x ¾” – Side Front Trim
- (1) 83” x 1 ½” x ¾” – Top Front Trim
Drawers
- (6) 20 ¾” x 9” x ½” – Drawer Box Sides
- (6) 23 11/16” x 9” x ½” – Drawer Box Front and Back
- (3) 22 11/16” x 20 ¾” x ½” – Drawer Box Bottom
- (3) 25 11/16” x 11” x ¾” – Drawer Front
- (6) 25 11/16” x 1 ⅛” x ¼” – Drawer Front Top and Bottom Trim
- (6) 11” x 1 ⅛” x ¼” – Drawer Front Side Trim
Bed Nook Construction
See the dimension views above for placement on each construction step. Secure pieces using pocket hole joinery and/or brad nails.
Step 1: Middle Support
Cut: 84 ½” x 15 ¼” x ¾” – Middle Support
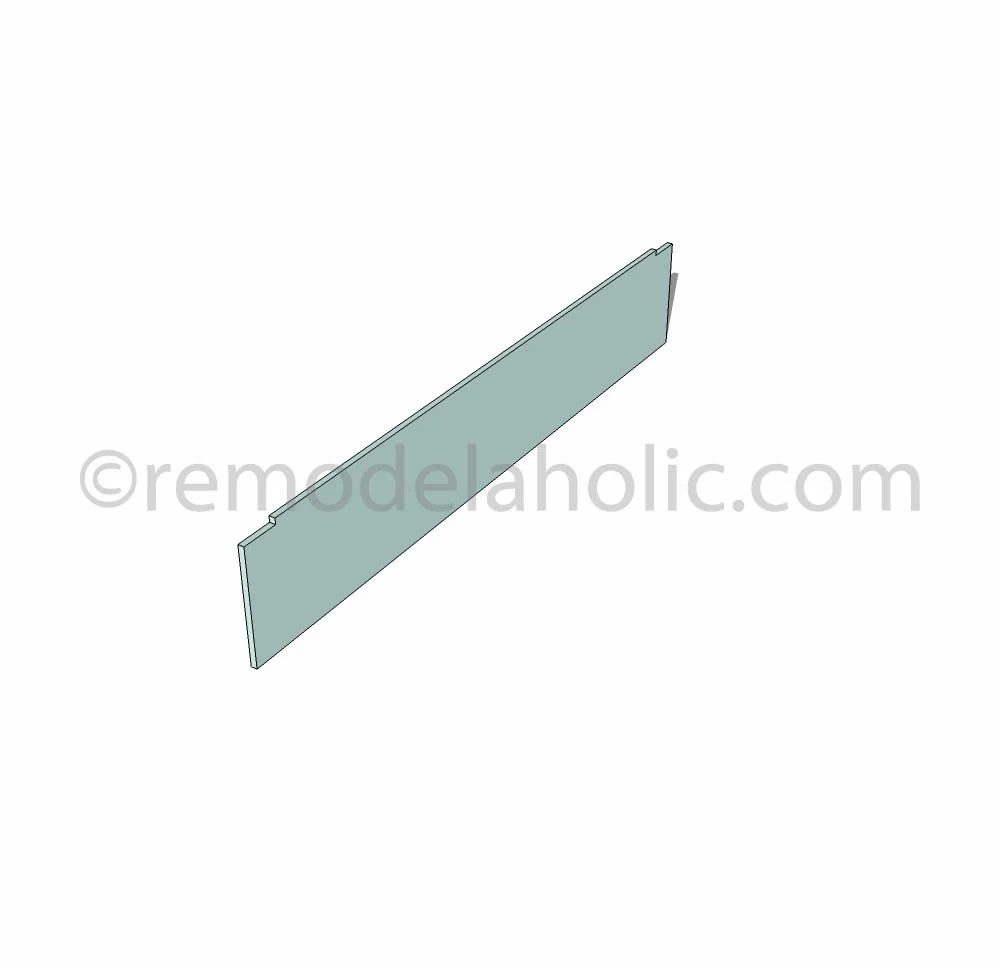
Cut out notches on each top corner 4 1/2″ long by 3/4″ deep
Step 2: Sides
Cut: (2) 43” x 18” x ¾” – Sides
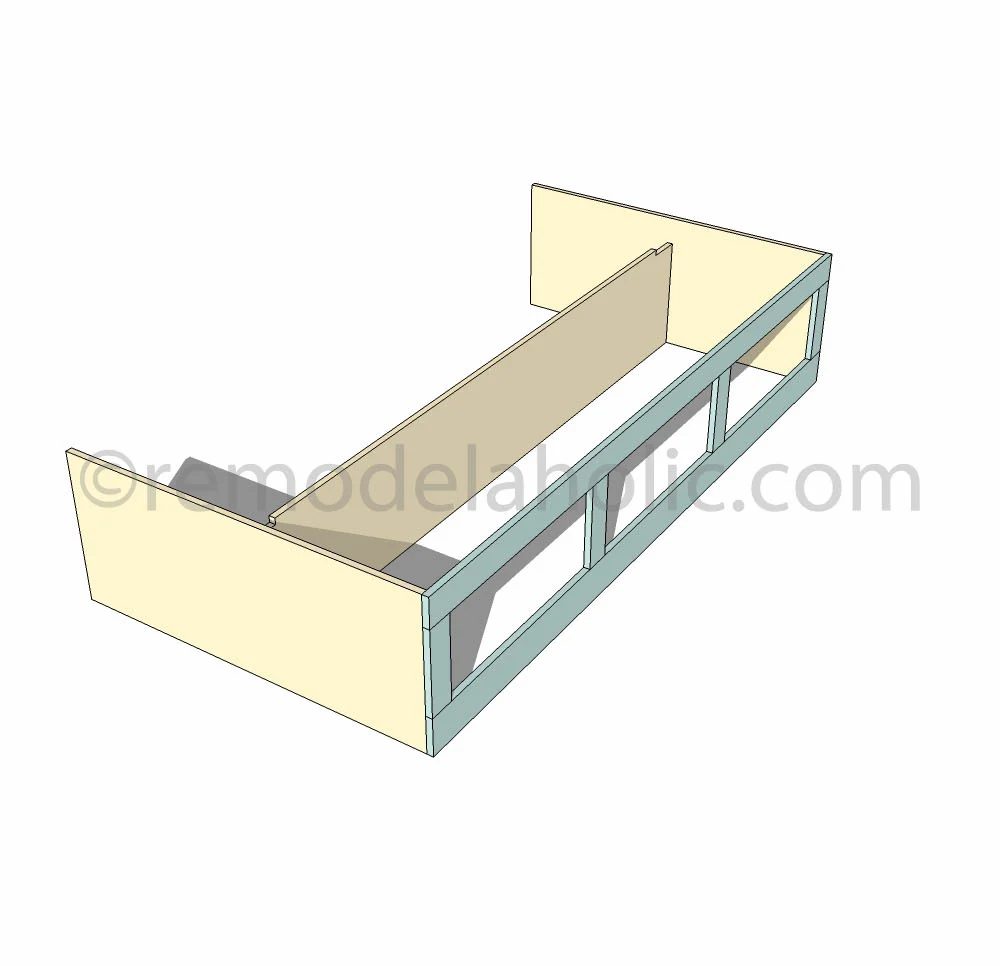
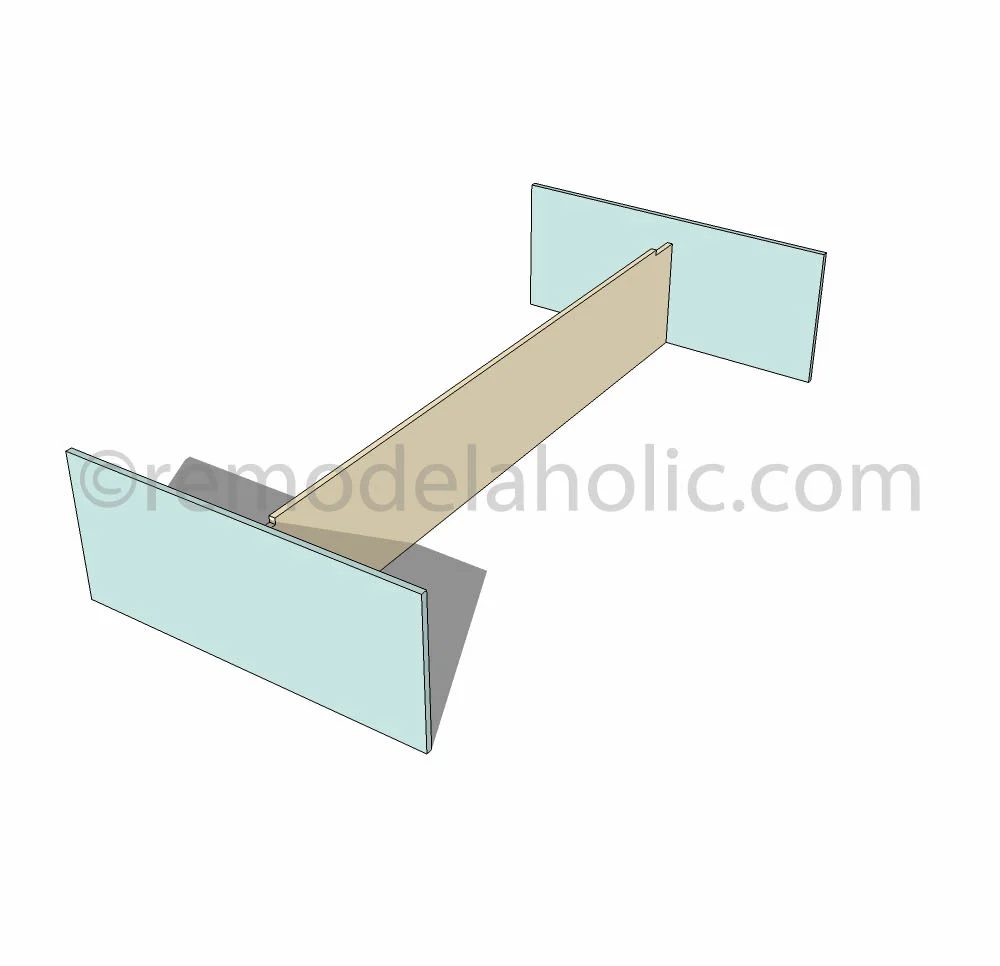 Step 3: Front Rails and Stiles
Cut:
- 1 – 86” x 3 ½” x ¾” – Top Rail
- 1 – 86” x 4 ½” x ¾” – Bottom Rail
- (4) 10” x 3” x ¾” – Stiles
Step 4: Middle Drawer Supports
Cut: (4) 21” x 3 ½” x 1 ½” – Middle Drawer Supports
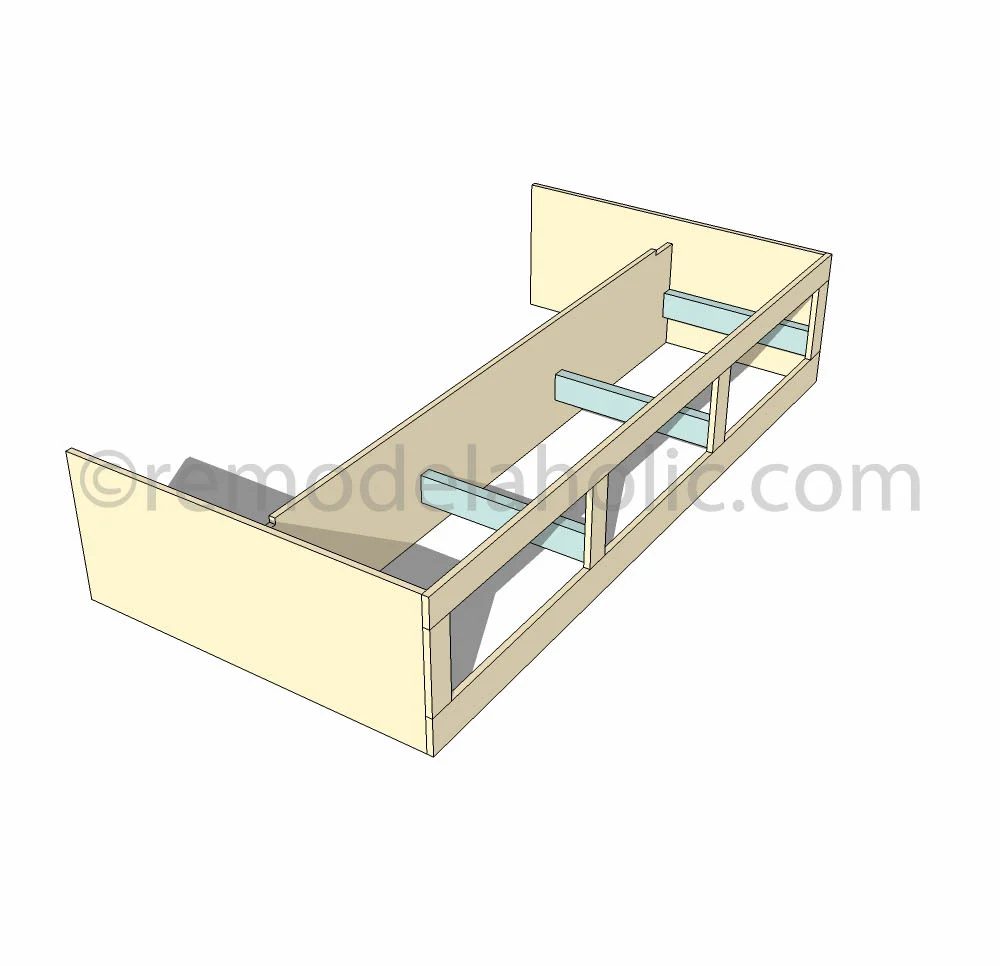
Step 5: Hardware Supports
Cut: (6) 21” x 4 ½” x 1 ½” – Side Drawer Hardware Supports
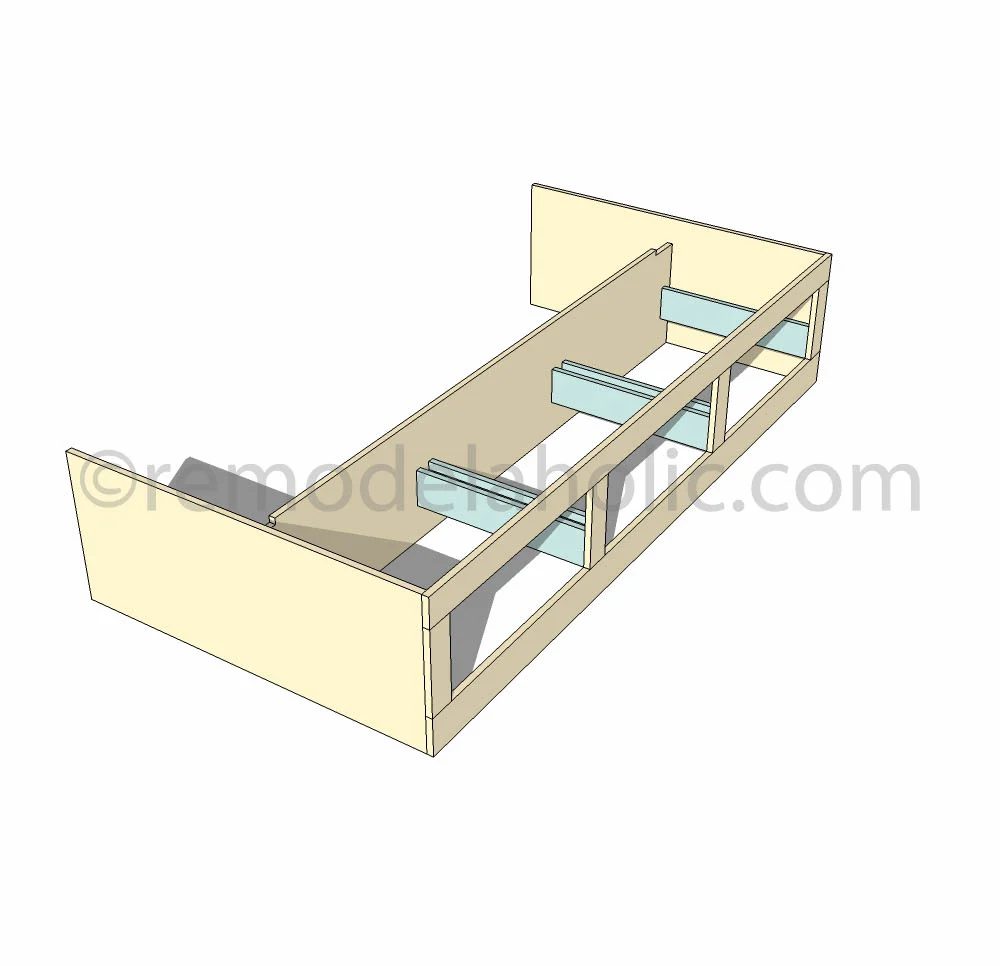
Step 6: Back and Side Frames
Cut:
(1) 84 ½” x 3 ½” x 1 ½” – Back Frame
(2) 42 ½” x 3 ½” x 1 ½” – Side Frames
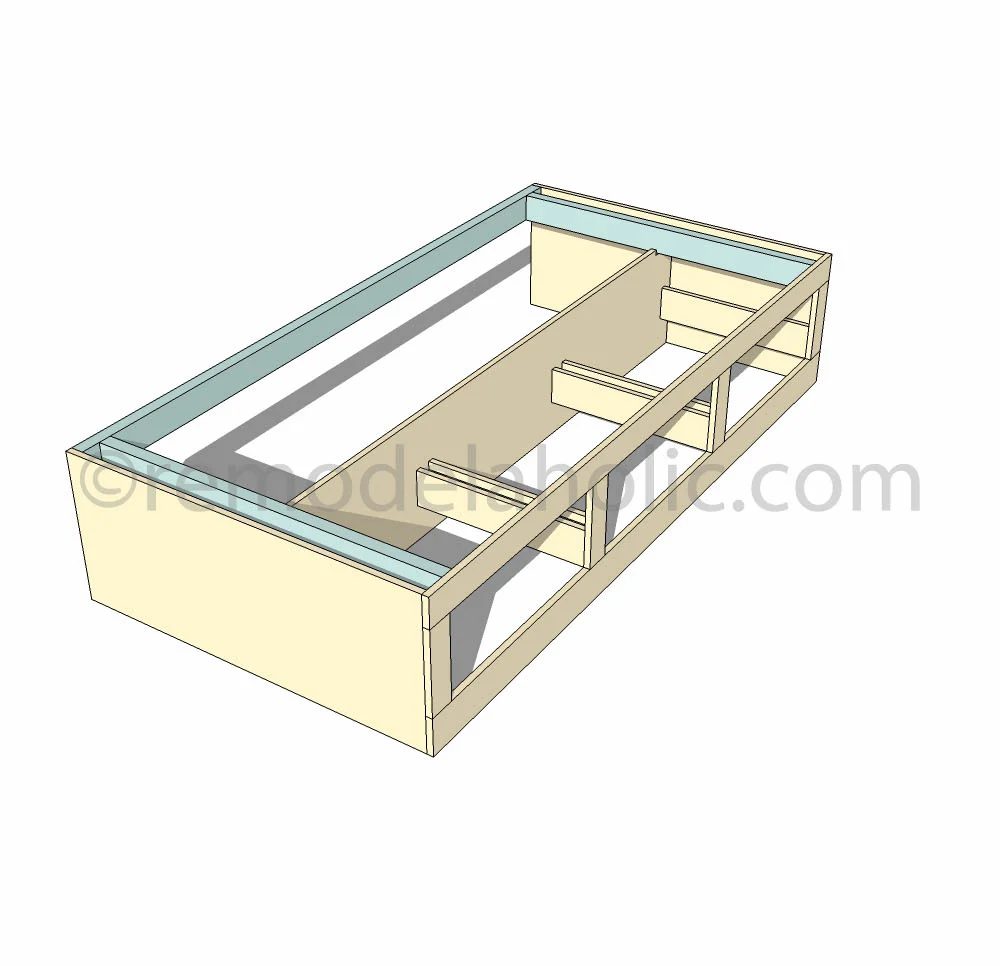
Step 7: Bed Rail Support Lips
Cut:
(2) 39 ½” x ¾” x ¾” – Side Lip
(2) 75” x ¾” x ¾” – Front and Back Lip
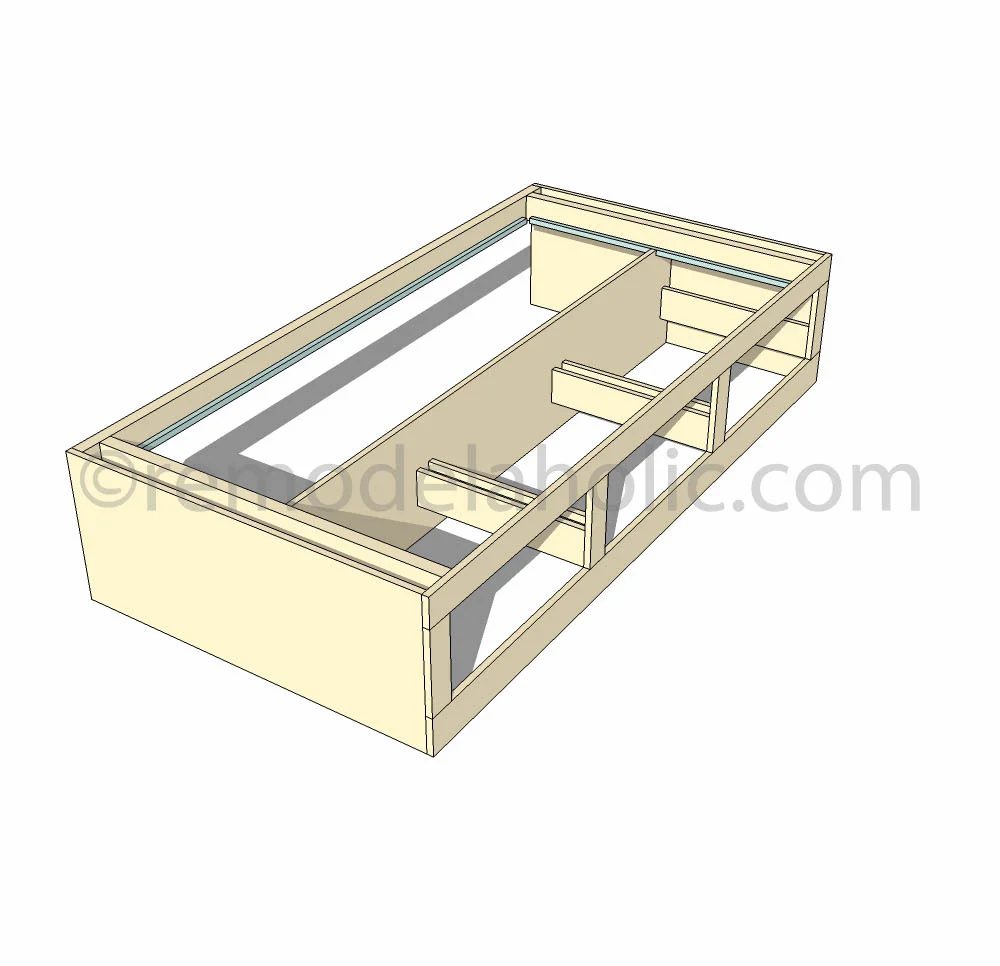
Step 8: Top Trim
Cut:
(2) 86” x 1 ½” x ¾” – Front and Back Top Trim
(2) 41 ½” x 4 ½” x ¾” – Top Trim Sides
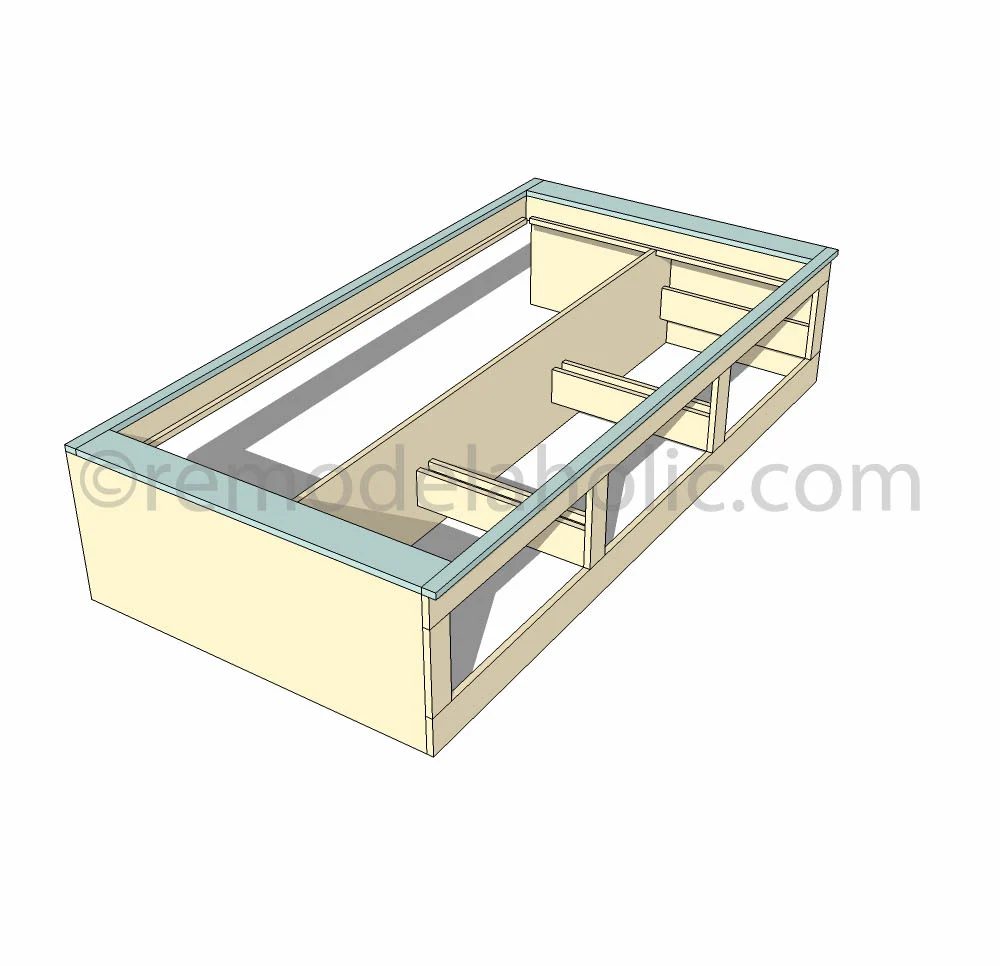
Step 9: Additional Trim
Cut:
(2) 44 ¾” x 1 ⅛” x ¼” – Side Edge Trim
(1) 86 ½” x 1 ⅛” x ¼” – Front Edge Trim
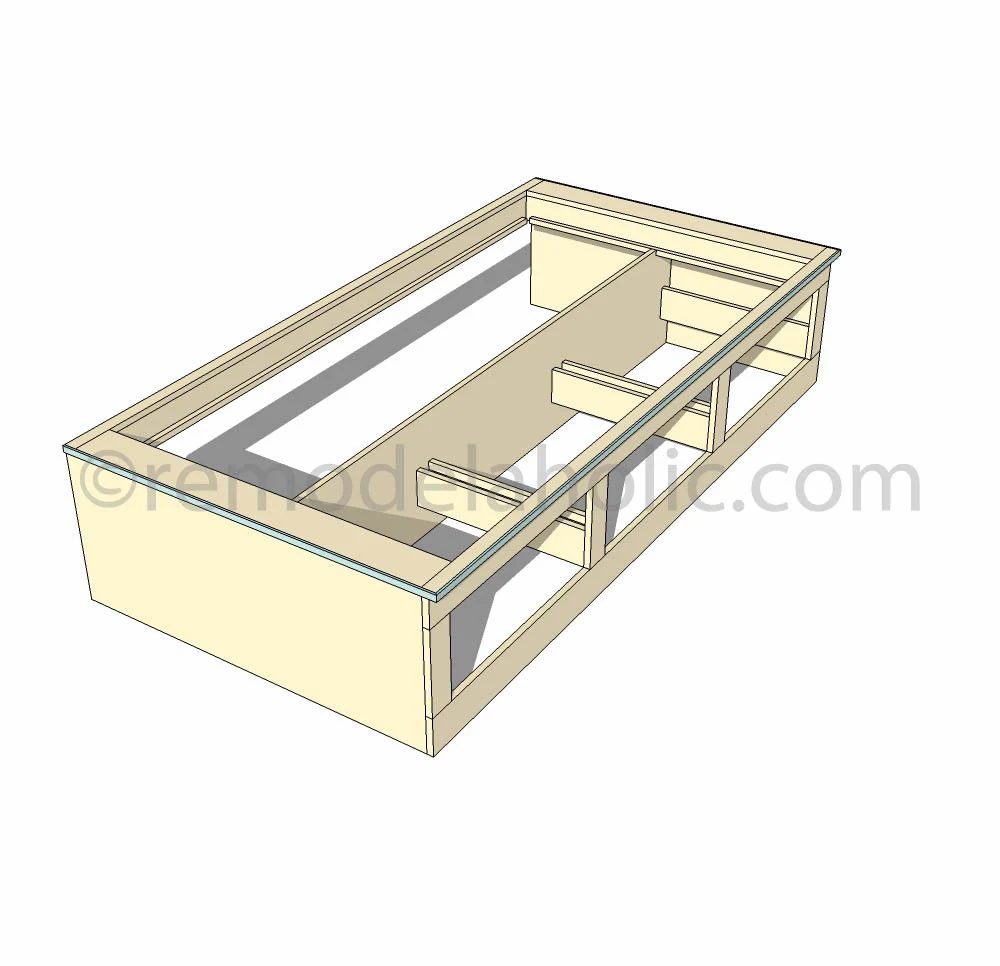
Step 10: Mattress Supports
Cut: (3) 41 ½” x 24” x ¾” – Mattress Supports
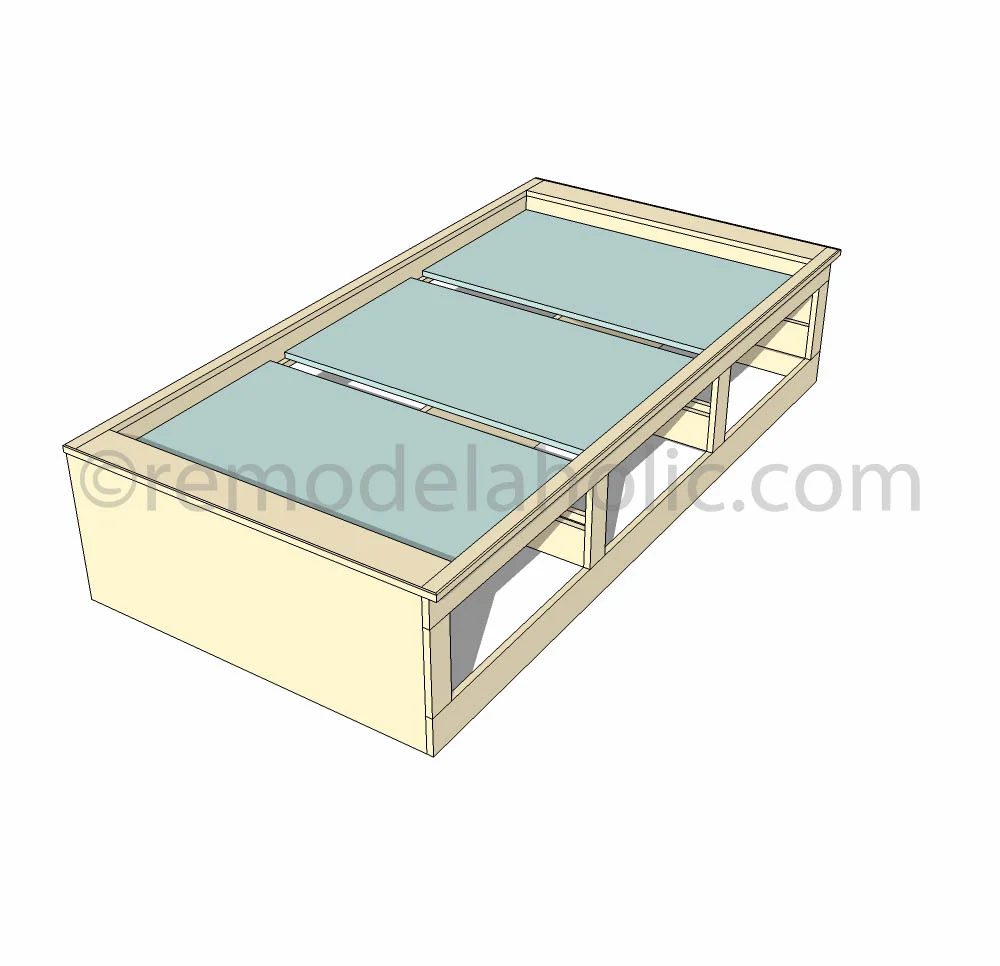
Steps 11-14 cover building the enclosure; modify these dimensions as needed to fit your space.
Step 11: Enclosure Sides
Cut: (2) 69 ½” x 36” x ¾” – Enclosed Sides
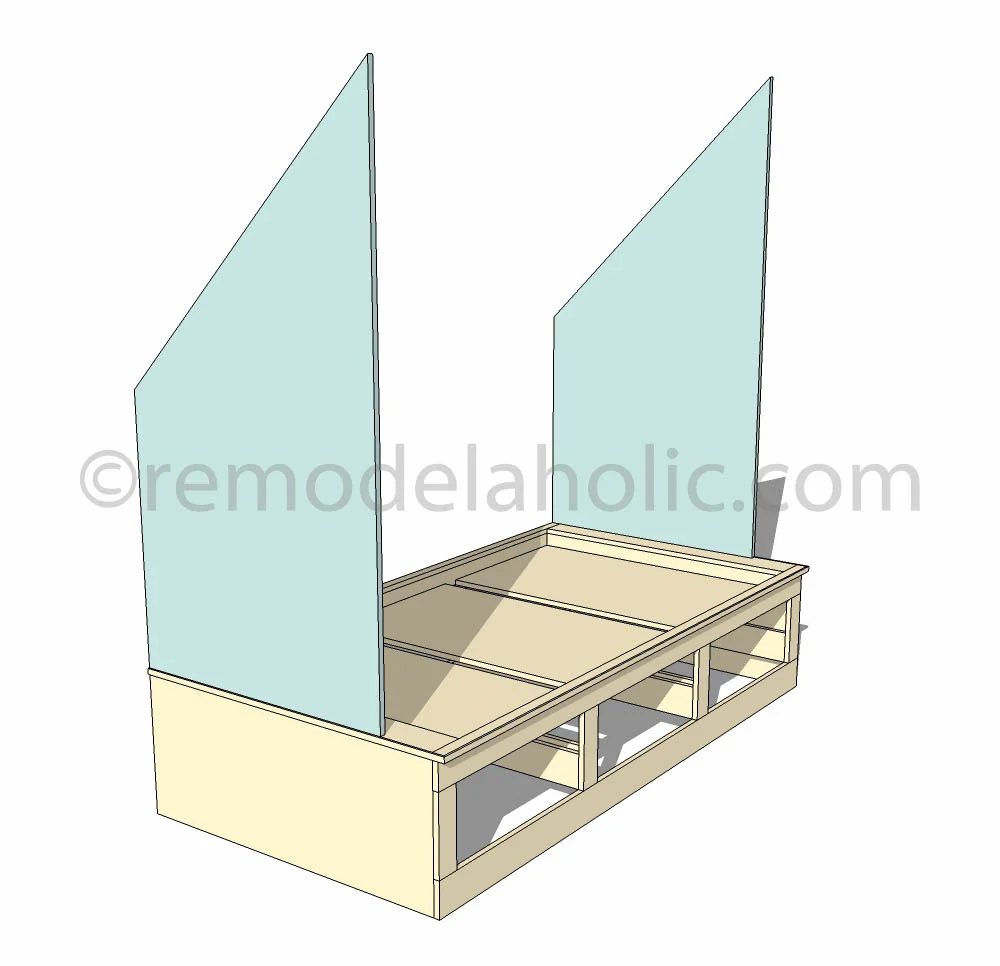
Step 12
Cut:
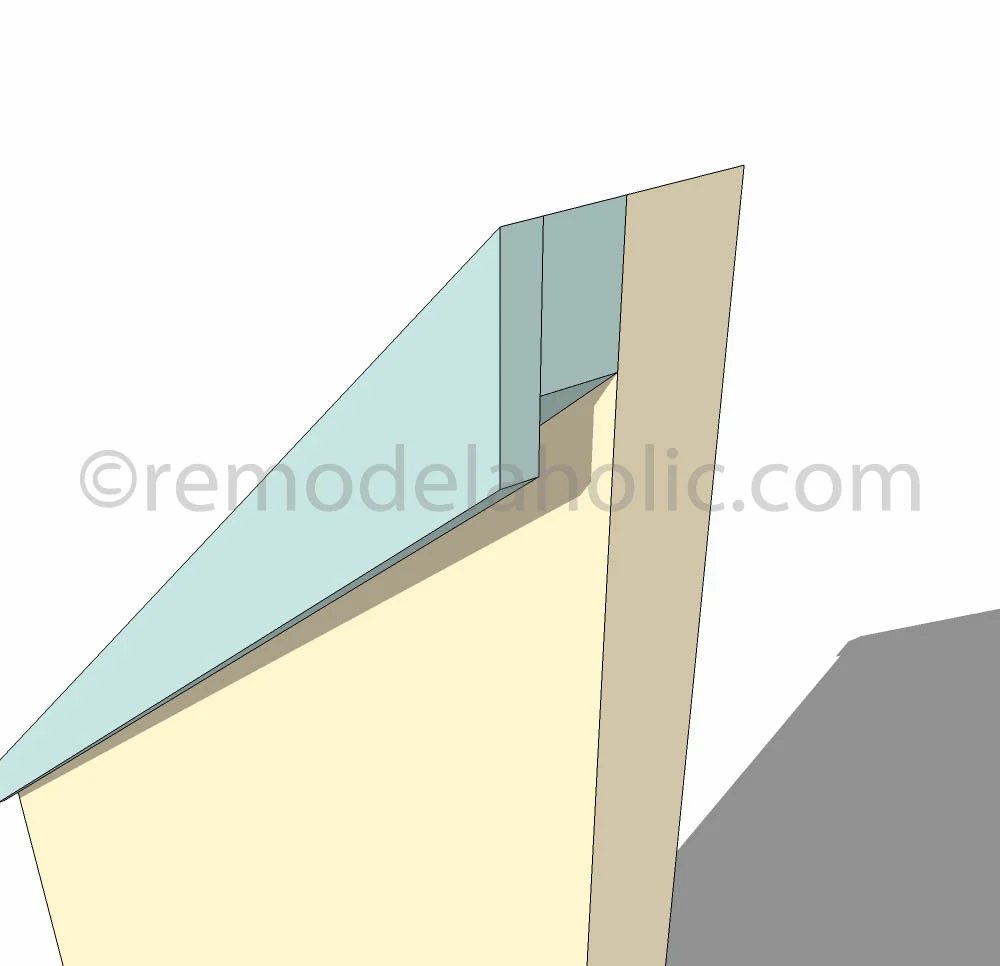
(2) ~52” x 1 ⅛” x ¼” – Top Track Outside
(2) ~52” x 3/8” x ¾” – Top Track Inside
(2) 36” x 1 ⅛” x ¼” – Bottom Track Outside
(2) 36” x 3/8” x ¾” – Bottom Track Inside
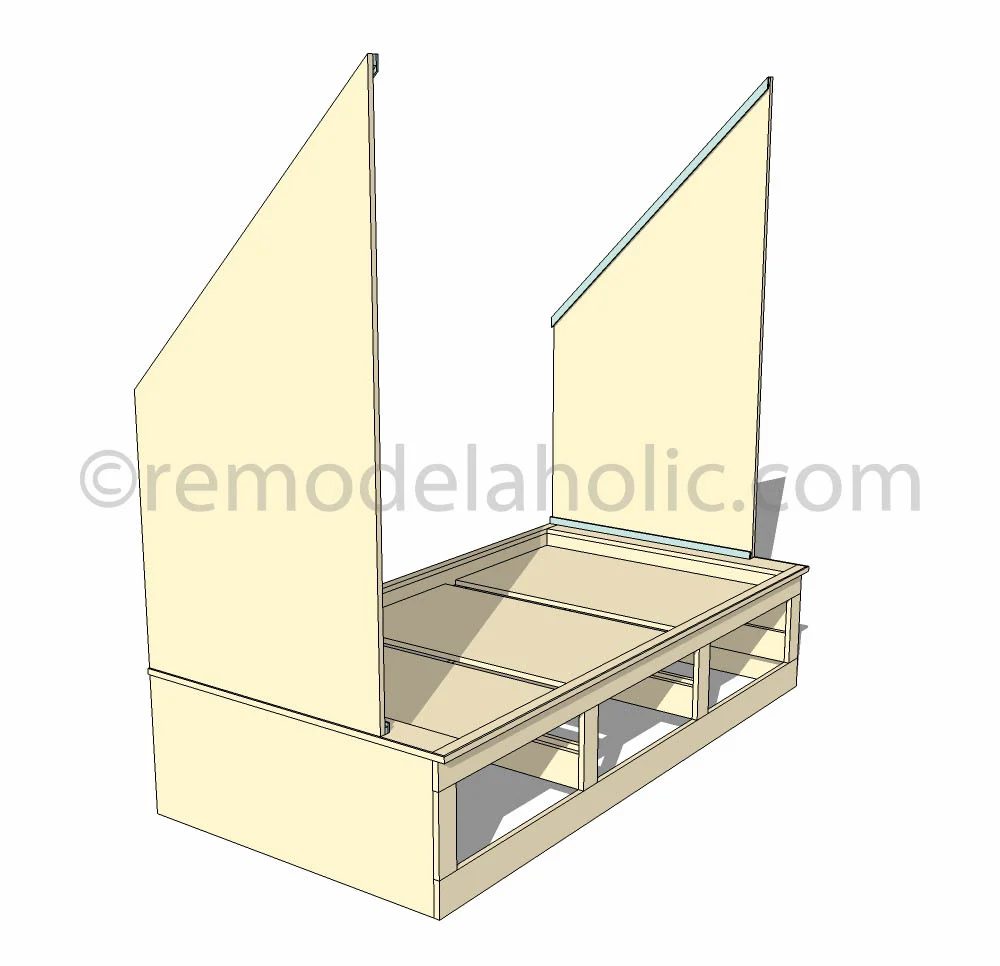
Step 13: Enclosure Details
Cut:
Various Length x 6” x ½” – Nook Boards for Shiplap look
(2) ~32” x 1 ⅛” x ¼” – Back Corner Trim
Step 14: Enclosure Trim
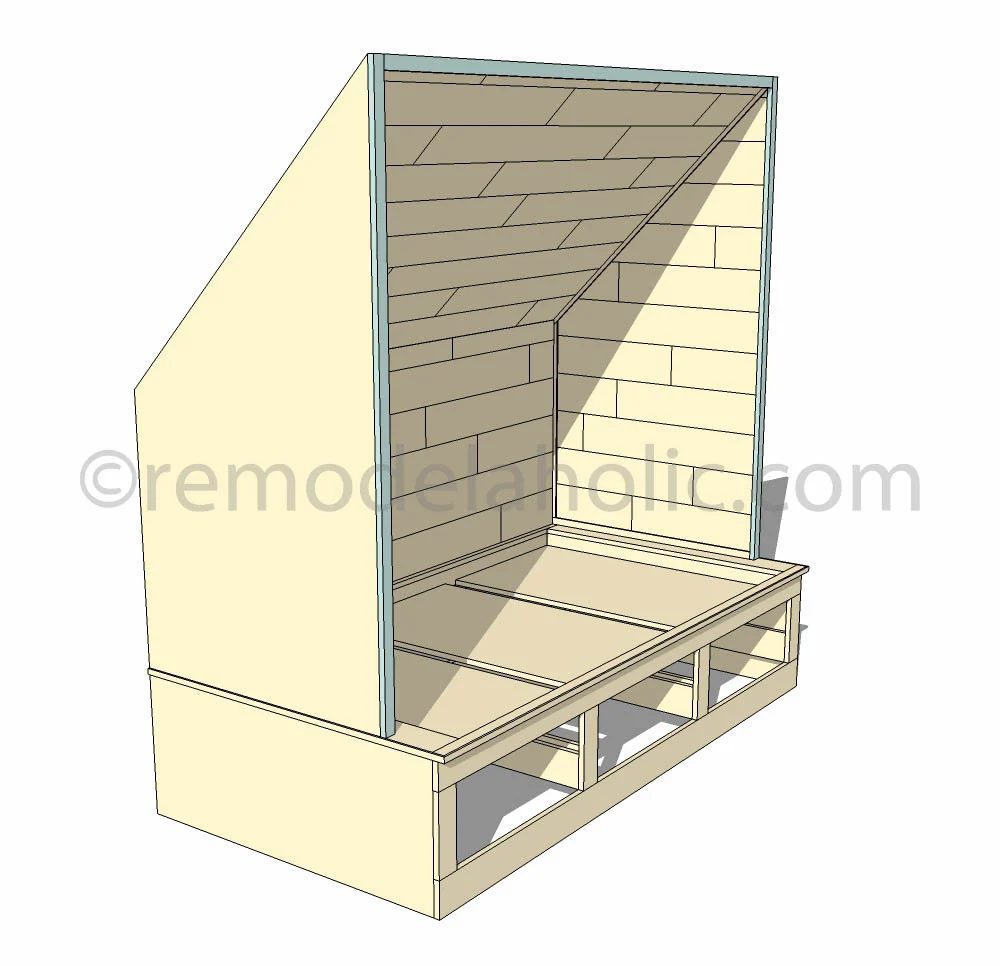
(2) ~62 ½” x 1 ½” x ¾” – Side Front Trim
(1) 83” x 1 ½” x ¾” – Top Front Trim
Step 15: Drawer Boxes
Cut:
(6) 20 ¾” x 9” x ½” – Drawer Box Sides
(6) 23 11/16” x 9” x ½” – Drawer Box Front and Back
(3) 22 11/16” x 20 ¾” x ½” – Drawer Box Bottom
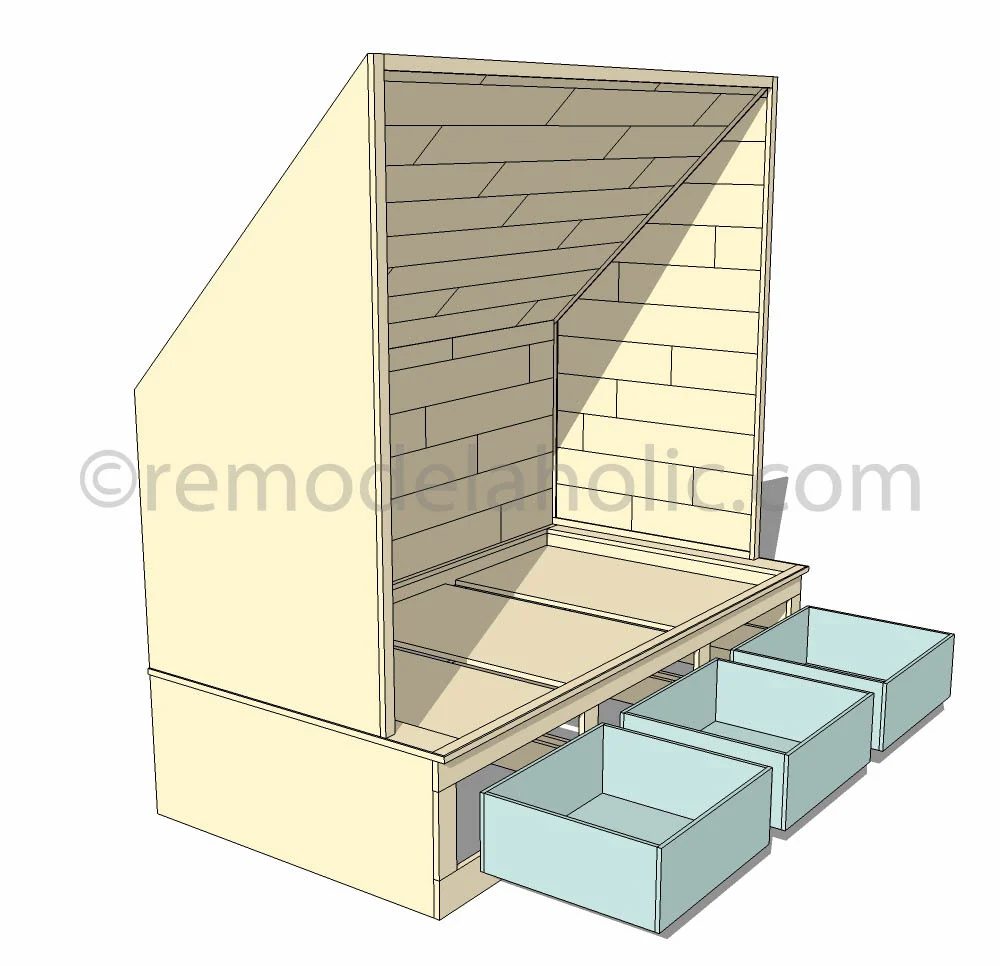
Step 16: Drawer Fronts
Cut: (3) 25 11/16” x 11” x ¾” – Drawer Front
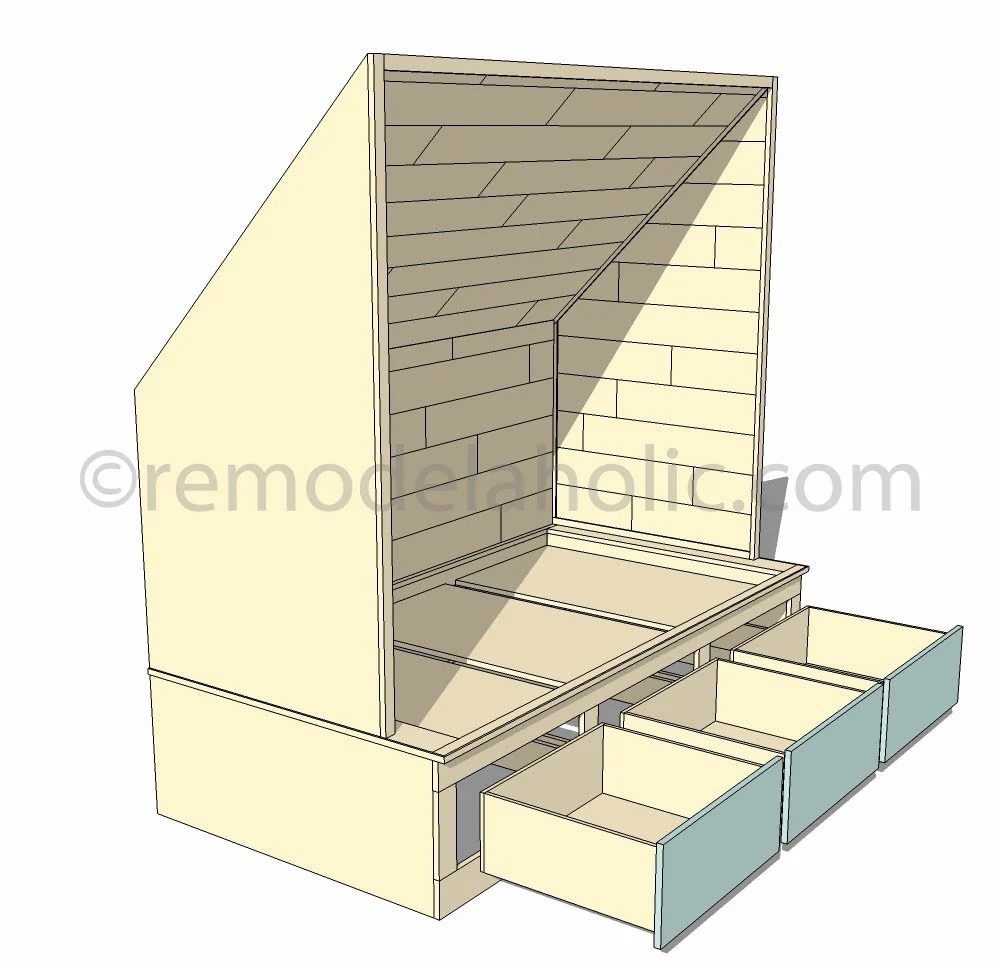
Step 17: Drawer Trim
Cut:
(6) 25 11/16” x 1 ⅛” x ¼” – Drawer Front Top and Bottom Trim
(6) 11” x 1 ⅛” x ¼” – Drawer Front Side Trim
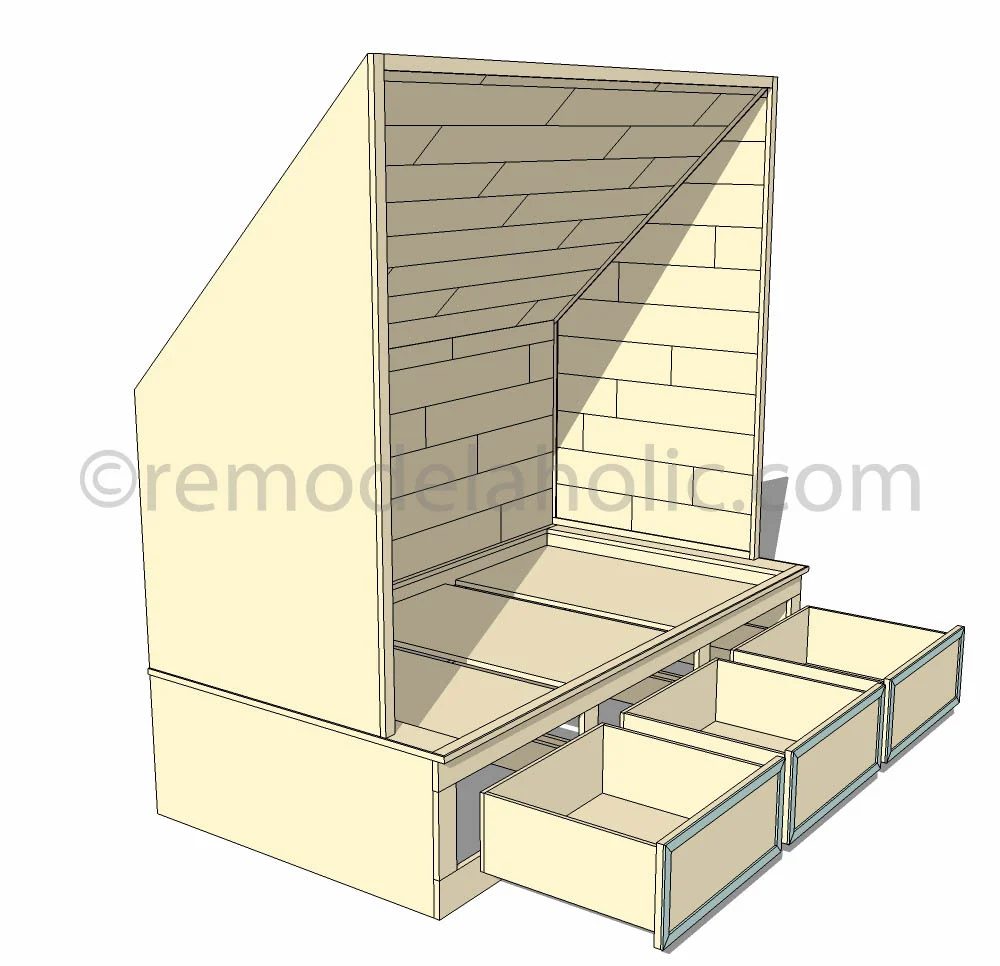
Final Bed Nook Assembly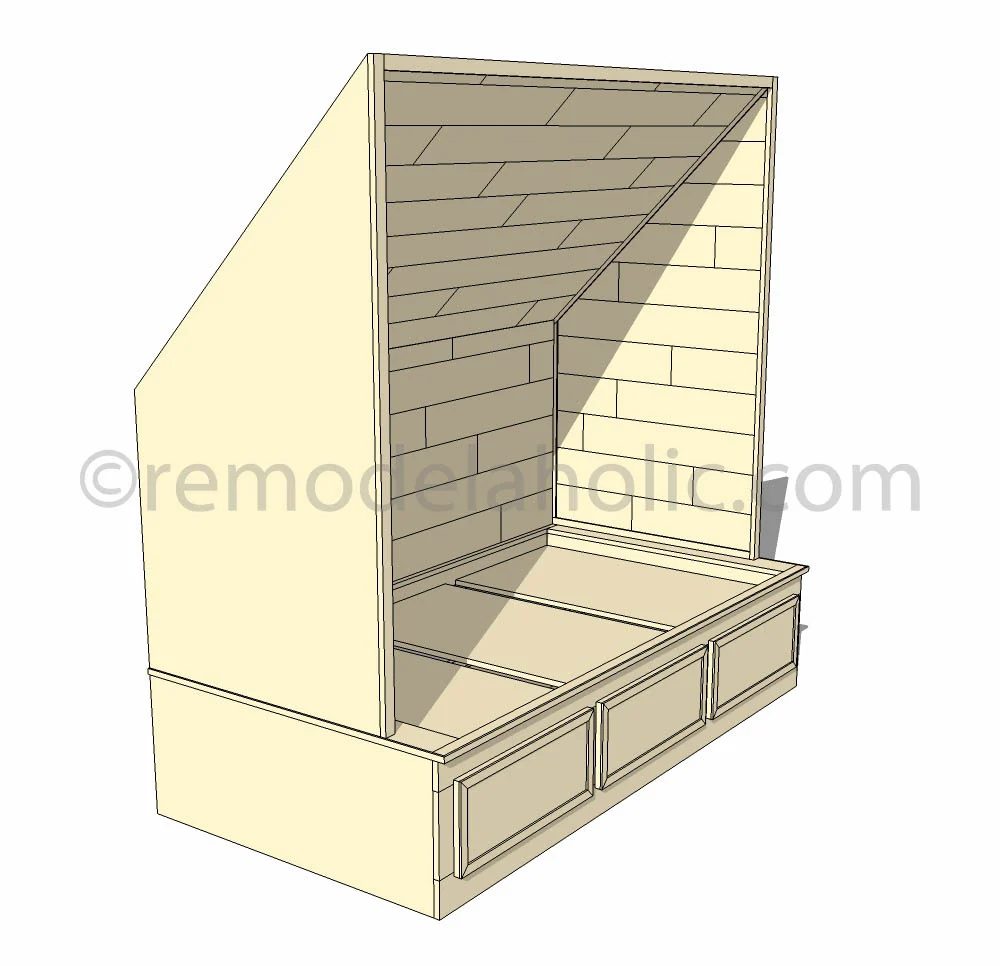
There you have it. Now you can go and make your own bed nook.