Read the sequence from the top before cutting, painting, or moving pieces.
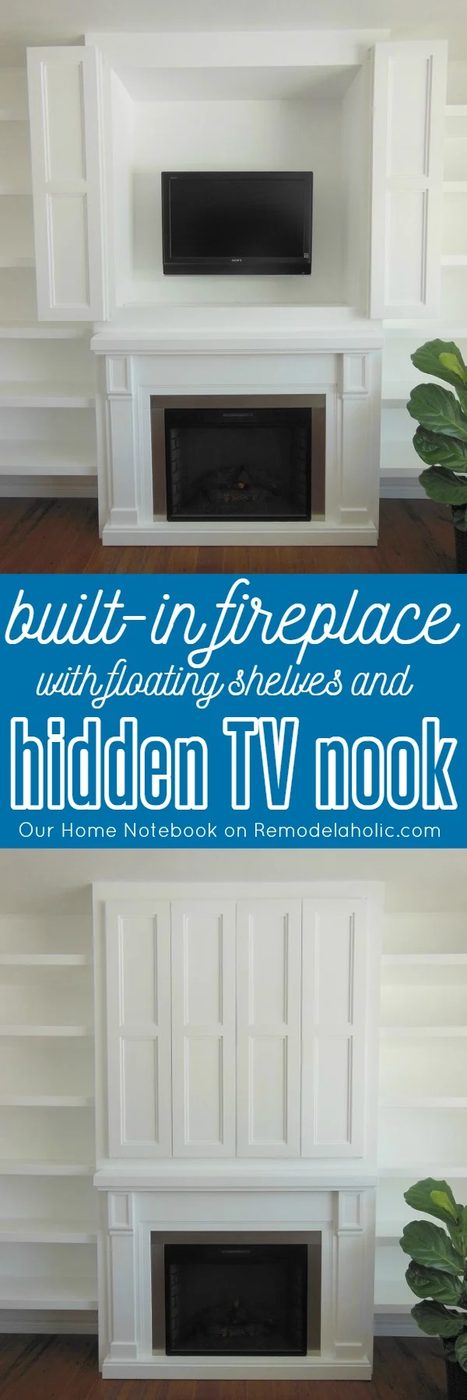
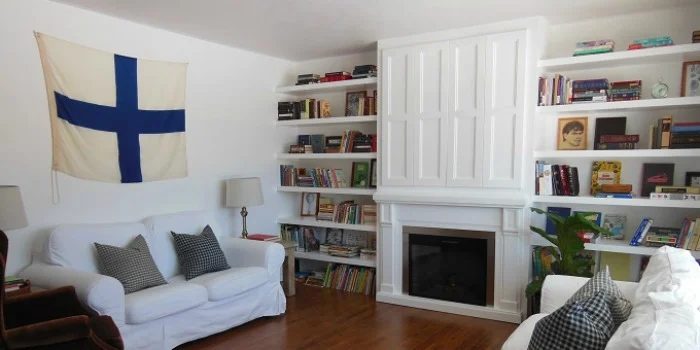
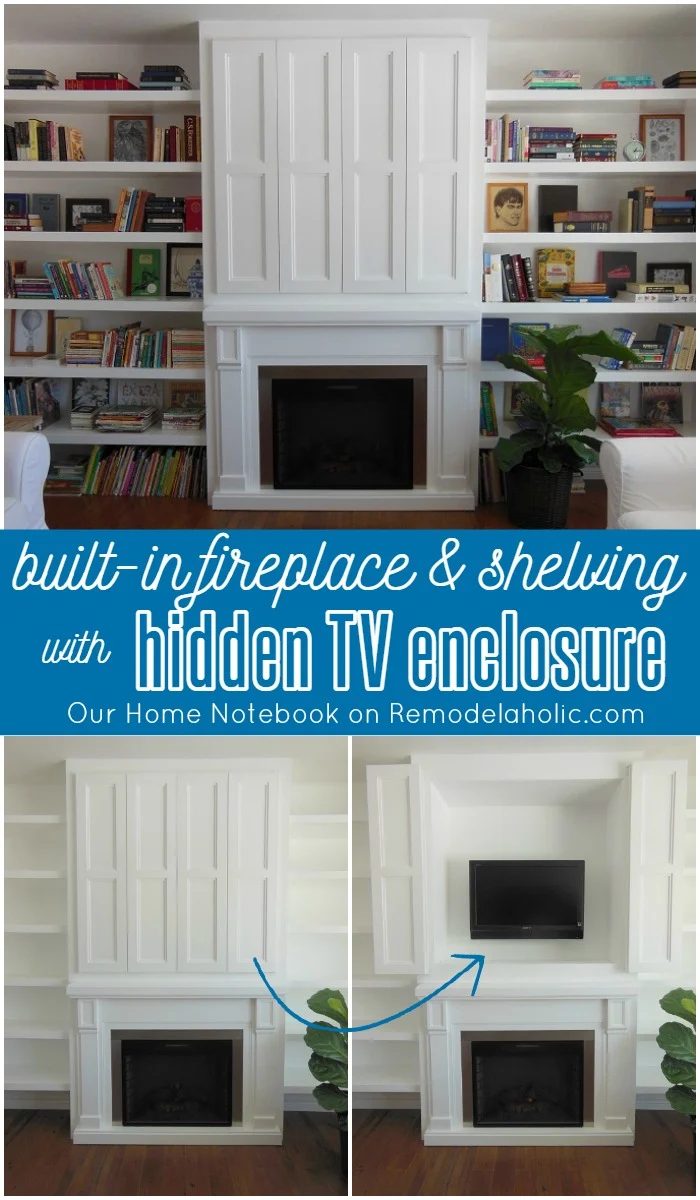
If you’ve followed along for very long, you’ll know that we are big fans of built-in shelving, and also of fireplaces and mantels… and also of hiding our TV a bit (in plain sight or in a little weirder spot). So when Shannon shared this at our link party, it was like a jackpot! look at her memorable built-from-scratch fireplace surround, with plenty of nice open shelving and a little secret — a beautifully hidden TV nook!
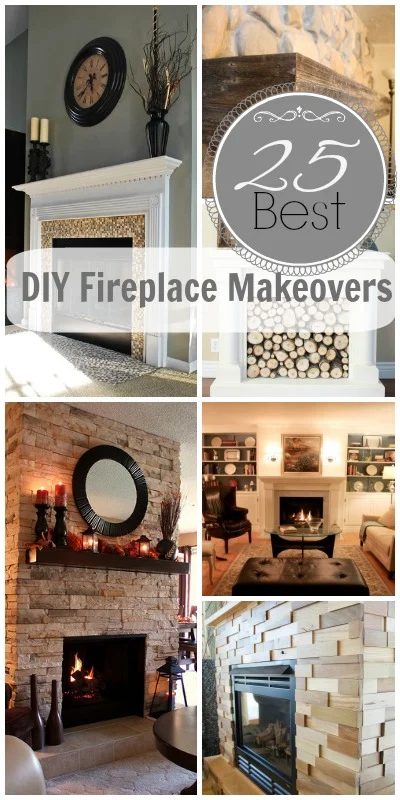
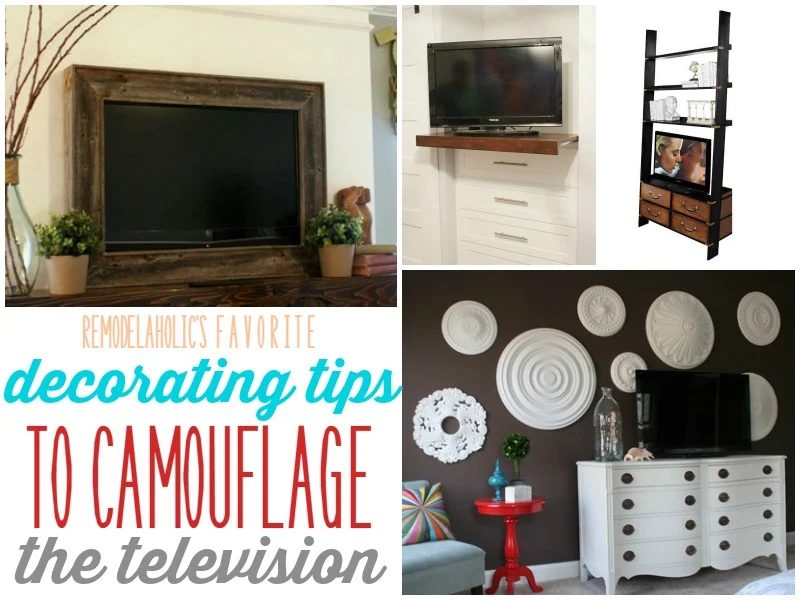
and get some great options for hiding your TV here (did you know we share all sorts of tips over on eBay, too? Follow us there to get even more Bekob!)
Give Shannon a warm Bekob welcome —
How to Build a Fireplace Surround and Hide Your TV
by Shannon from Our Home Notebook
Hello! I’m Shannon from Our Home Notebook and I’m so happy to be here with you today to share our fireplace and built-ins. I love creating and working on our home with my husband, one project at a time. Some of my go-to things we’ve worked on have been building a bunk bed for our kids, hanging a direct large scale poster map and building storage crates on casters.
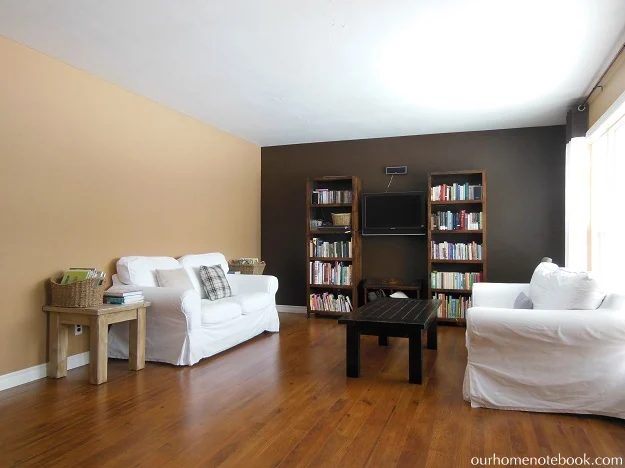
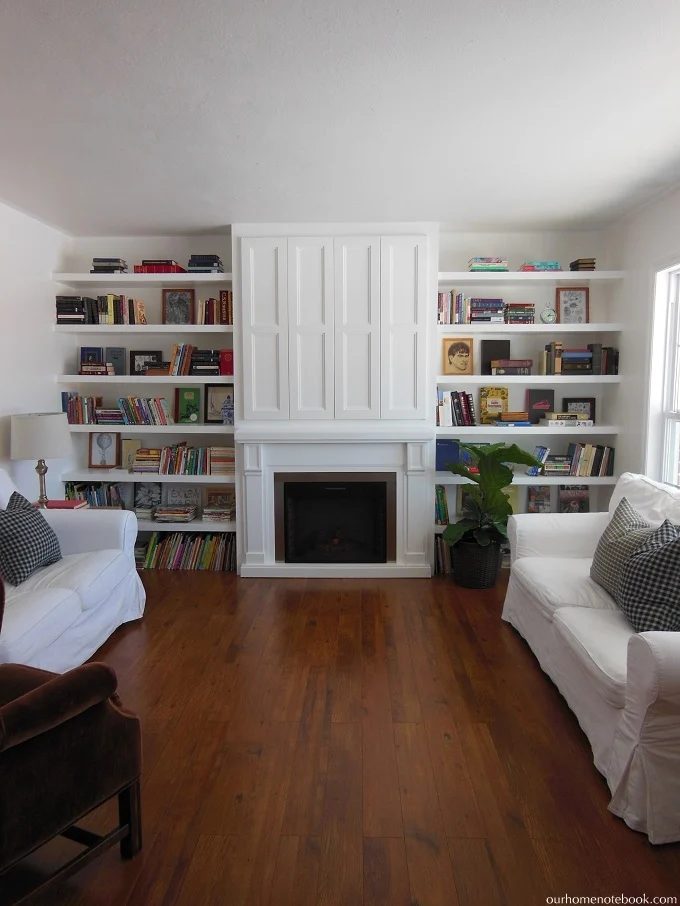
Our most recent project has been our living room fireplace and built-ins. Our living room started out pretty basic, but we really needed more storage so we started planning some built-ins to utilize all the wall space. We also wanted to add an electric fireplace to the room to replace the electric baseboard heater and add a hidden TV nook above the fireplace for our TV and media.
So we started planning.
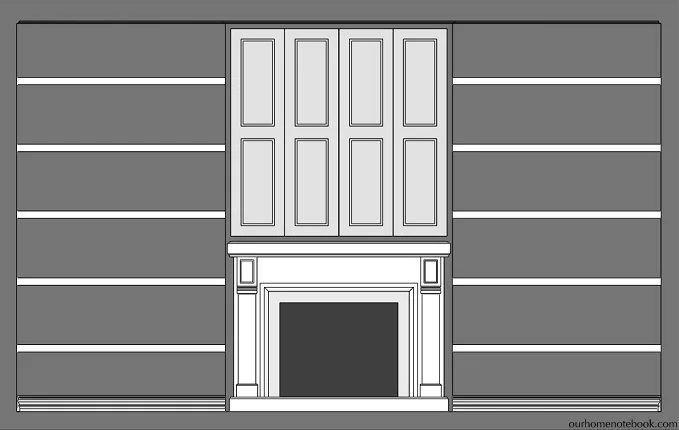
We decided to build out the middle section of the wall for the fireplace and TV nook above it. Then we planned to add built-in floating shelves on each side of it. Here’s how we did it:
1. Framing the Build Out
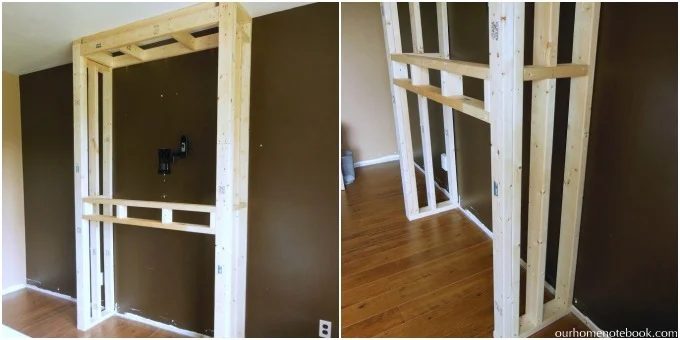
We started by framing the build out with 2 x 4’s. We wanted it to be a few inches wider then our mantle on each side so we made it 55 1/2″ wide and centered it on the space. We made the depth 16″ so it would be deep enough for our TV nook and shelving.
2. Drywalling the Build Out
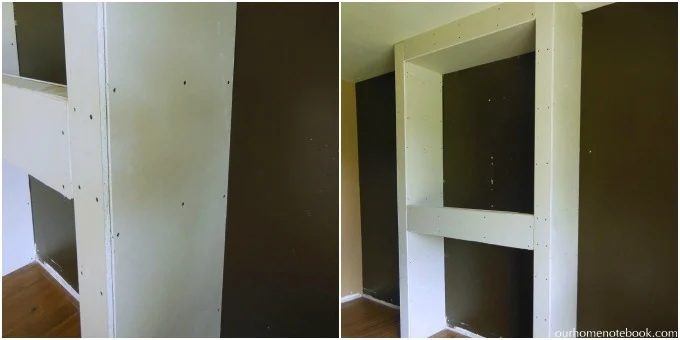
Our next step was to measure and cut the pieces of drywall for each surface of the build out and screw it onto the framing. Cutting the drywall seemed to work best running a utility knife along a straight edge, scoring the front face, then snapping the sheet along that seam. This splits the gypsum in the middle, but leaves the backing paper, which can then be easily cut with the utility knife. We used standard 1 -1/4″ drywall screws, fastening roughly every 12″ along the edges of each piece and down the middle, where possible.
3. Installing Outlets and Cord Conduit in the Build Out
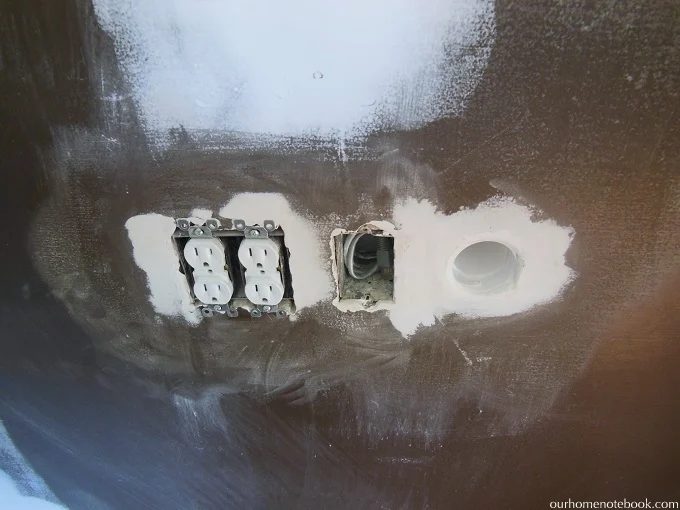
We knew we would need some new outlets in the build out behind the mantle so we could plug in the fireplace and TV. My husband installed a couple new plugs and a network cable for connecting to the TV. We also decided to add a conduit in the wall from the middle of the build out where the TV would mount to behind the fireplace where the outlets are. We used a short chunk of central vacuum PVC tubing for this conduit, along with a couple of 90° fittings. With the conduit in place we would be able to run all the wires for the TV behind the drywall down to the outlets so they would be out of sight and organized.
4. Adding Corner Bead, Taping the Joints, Mudding and Sanding the Build Out
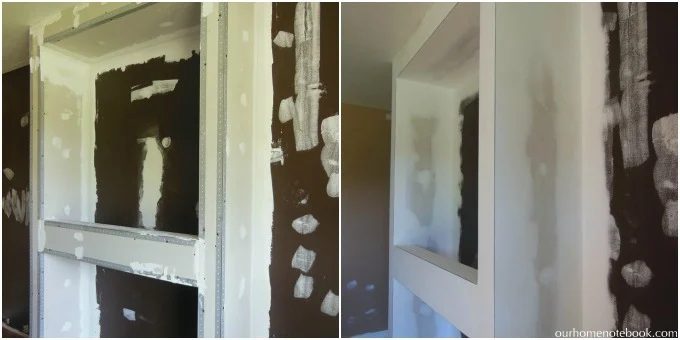
Next we added corner bead to all the outside edges of the build out to give us nice, sharp corners. We fastened this with drywall screws, being sure that they were recessed enough to cover with mud. Then we taped the joints and mudded all the edges, joints and screw holes. It took about 24-36 hours to dry and then we sanded it all smooth. It needed a good three coats of mudding and sanding before we had a nice smooth finish.
5. Priming and Painting the Walls
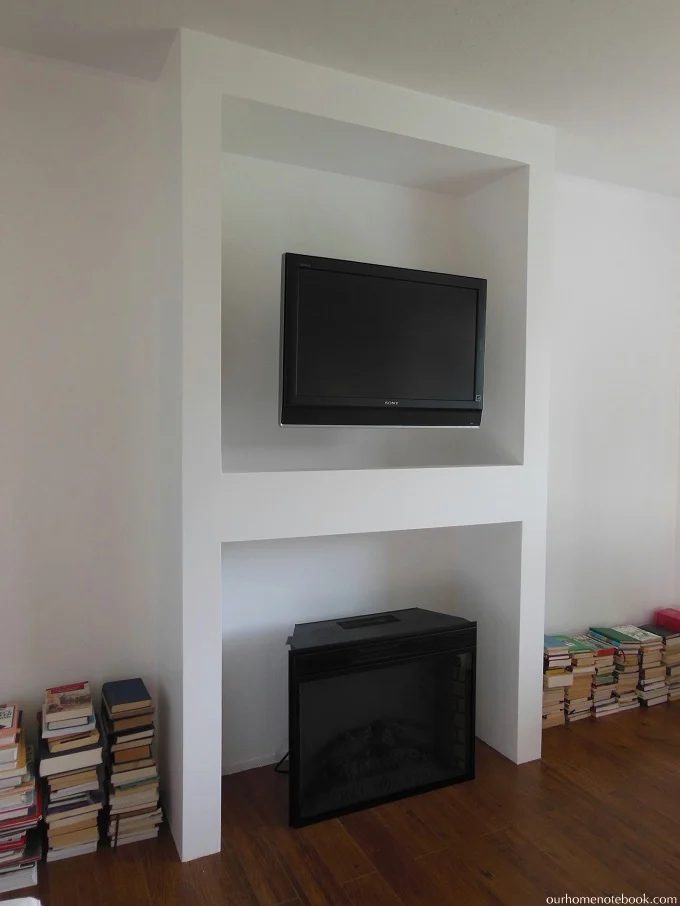
We primed all the walls and painted them in Behr’s off the shelf white, Ultra Pure White in an eggshell finish. It took two coats of Behr’s Paint and Primer In One (after a single coat of primer) to get full coverage.
6. Cutting and Installing the Fireplace and Surround
We bought a stand alone 28″ electric fireplace unit for $150 off Kijiji.ca and decided to use the fireplace surround as well as the fireplace insert.
We thought it would work best to mount the fireplace to the face of the build out so we cut the depth of the fireplace unit down from 16″ to 4″, sanded the original high gloss finish and primed it with an oil based primer. We painted it with Behr’s Ultra Pure White in semi-gloss with an electric paint sprayer, doing several thin coats over the course of a few evenings. We set up a painting tent with plastic drop sheets in our basement so we didn’t have to worry about over-spray.
After letting it cure for a couple weeks we mounted it to the face of the build out with “L” brackets screwed into the back from inside the build out. We caulked the gap around the outside and touched up our caulk line with paint.
7. Adding the TV Nook Doors
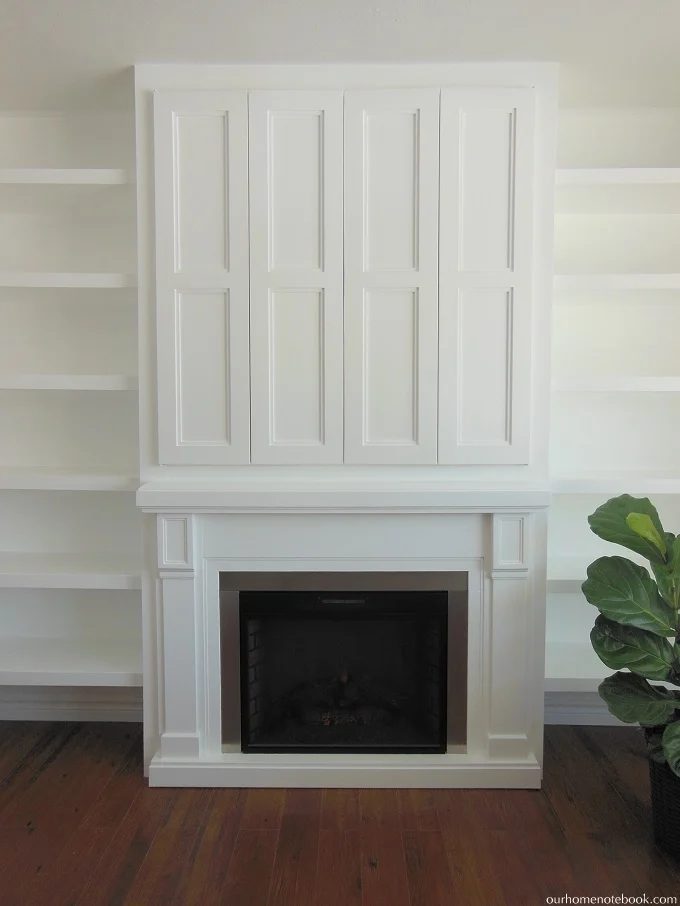
Next we turned our focus to the doors for the TV nook. We wanted something that would visually cover most of the space above the fireplace and mimic the design on the fireplace surround so it would all feel more like one unit. We decided to design them as bi-folds so they would be straightforward to open and not take up too much visual space when we’re using the TV.
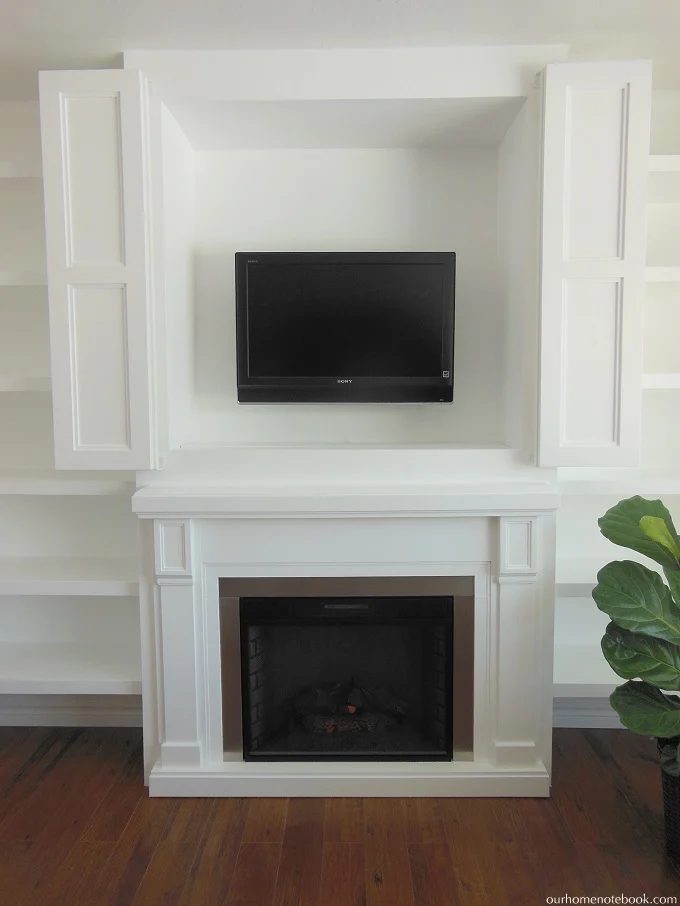
We cut the base of each door from 1/2″ sanded pine plywood and trimmed out the edges of the doors with 2 1/2″ x 5/8″ MDF. My husband customized each trim piece by notching it out to make a stepped edge, mimicking the post design on the fireplace surround.
We glued and air nailed the trim boards in place and then filled the nail holes and cracks with wood filler and sanded them down. We primed the doors with oil based primer and then painted them with the same Behr’s Ultra Pure White in semi-gloss in several thin coats with the paint sprayer over the next few days.
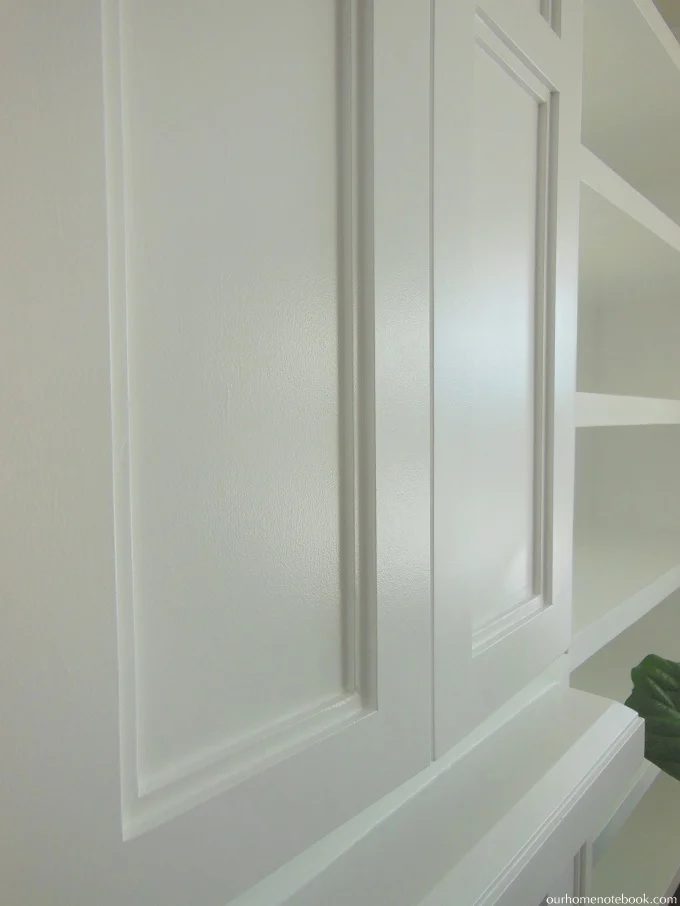
The base door hinges are at the top and bottom of each door so they are hardly noticeable. We bought a few different options for hinges and ended up using these. We spray painted them white before installing. The slotted mounting holes on these hinges made small adjustments to the fit and alignment of the doors much easier. Between the sections of the bi-fold we used these non-mortise hinges, also spray painted white.
8. Adding a Removable Shelf and Setting Up the Cord Conduit
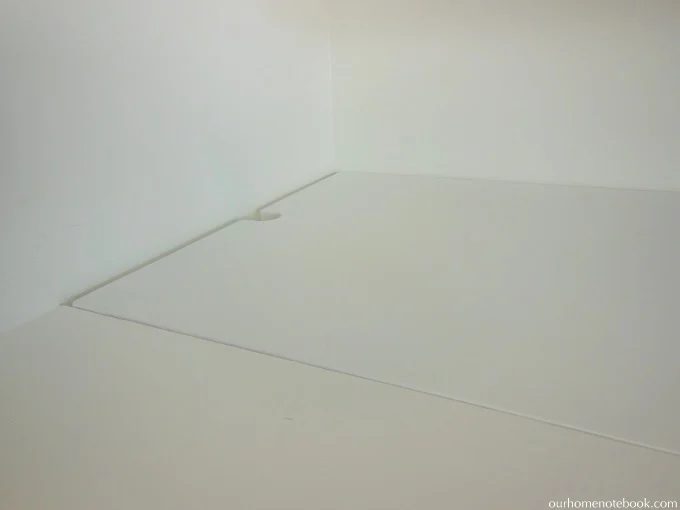
We added a shelf underneath the TV for media player storage but we made it removable so we can pop it out when we need to get at the outlets behind the fireplace where everything is plugged in.
We cut it to size from a piece of painted pine plywood with a couple notches out of the edges to make it easier to pick up and remove when needed. We cut and painted direct pine wooden ledges for it to rest on.
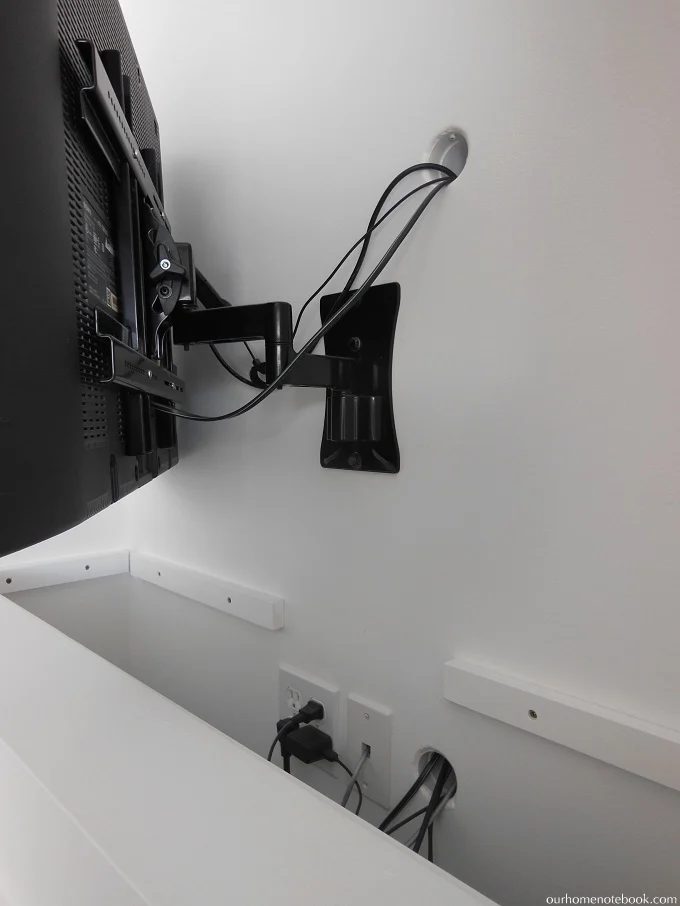
The conduit in the wall works wonderfully to organize and hide all our cords through the wall behind the TV and then down below the shelf to the outlets.
9. Building the Floating Shelves
We wanted the shelves to be thick enough to not look out of place given the width of the opening (50 1/2″), but we also didn’t want them to be really chunky. After trying out some options on the computer model we decided we wanted to go with a 2″ thick shelf. We talked through a couple different building options and finally decided on what is called a torsion box.
This is essentially a frame of low-cost spruce lumber covered with 1/2″ plywood on three sides. Using this method required a bit more work, but it seemed to be the best method that wasn’t clearly expensive. Which was important to us for such a big project.
Here’s how we assembled them:
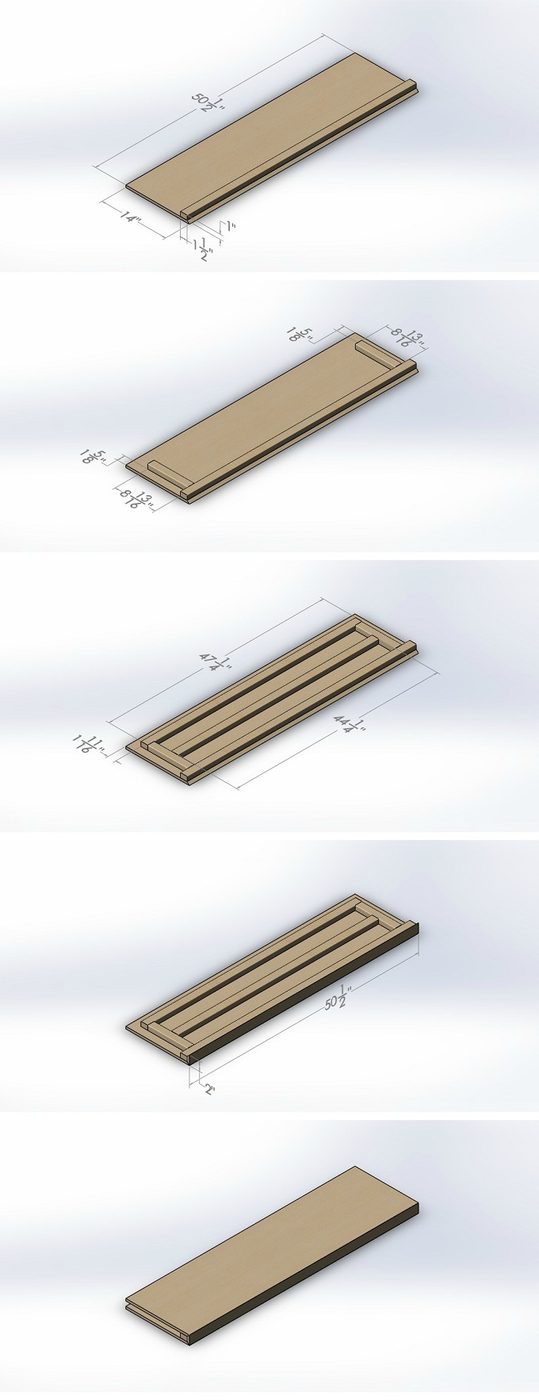
My husband pre-cut all the wood and then we built each shelf, gluing and air nailing each piece as we went. After that we filled any little imperfections and nail holes on the shelves with wood filler and sanded them smooth.
10. Painting and Installing the Floating Shelves
After the shelves were all assembled we painted them in our spray painting tent in the basement. We first primed the raw wood with oil based primer using a small foam roller. After that we set up the paint sprayer and put on several thin coats of the same Behr’s Ultra Pure White paint in semi-gloss.
After we were done painting them we set them up in the basement for two weeks so the paint would have time to cure and harden before installing them.
Next we measured, cut and screwed in the shelf support ledgers to the wall on all three sides so the shelving would fit snugly onto them. Then my husband fit each shelf, trimming any extra length so that they fit in the nook snugly.
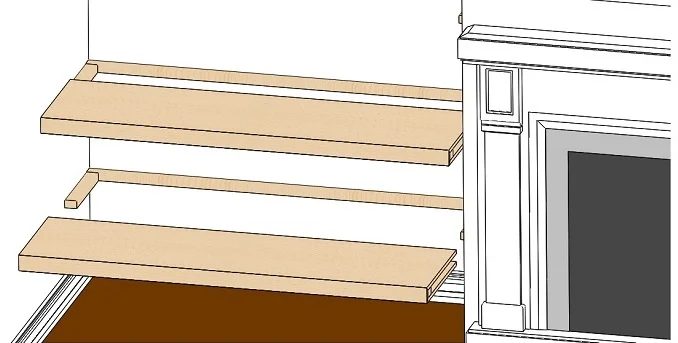
To finish them off we caulked all the seams along the wall and I went over the caulk line with a couple coats of paint.
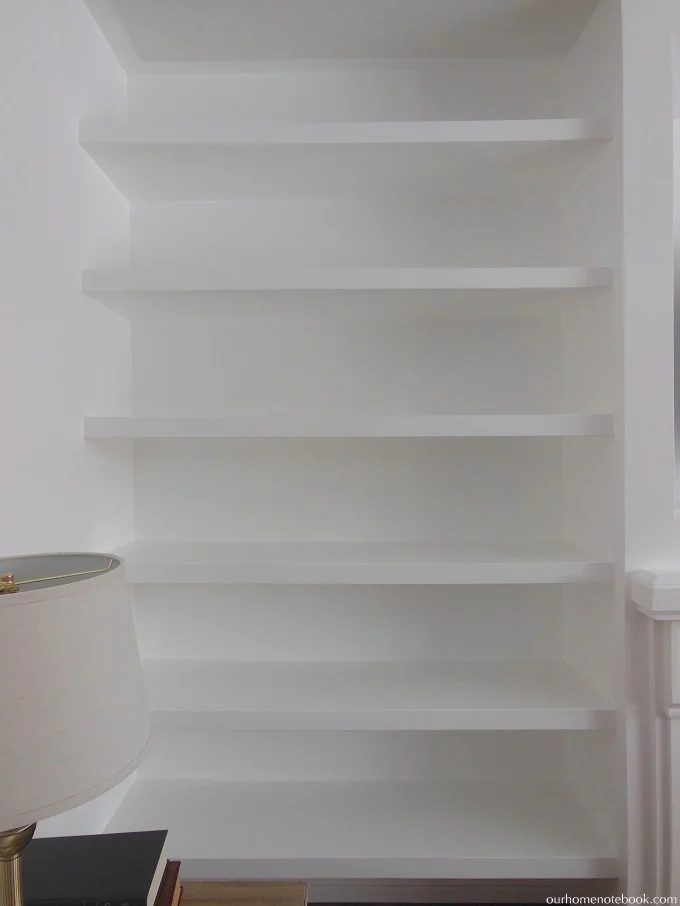
After they were installed we still thought the paint on the shelving was a little soft so we gave them another two weeks to cure to be on the safe side before loading them up with books.
And now they’re done!
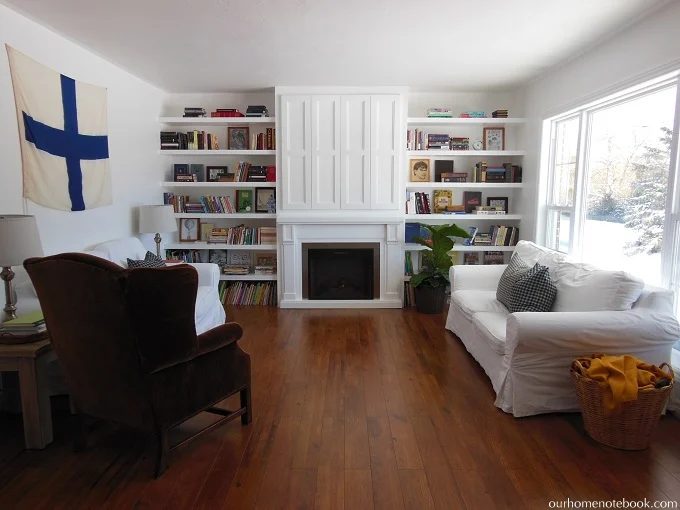
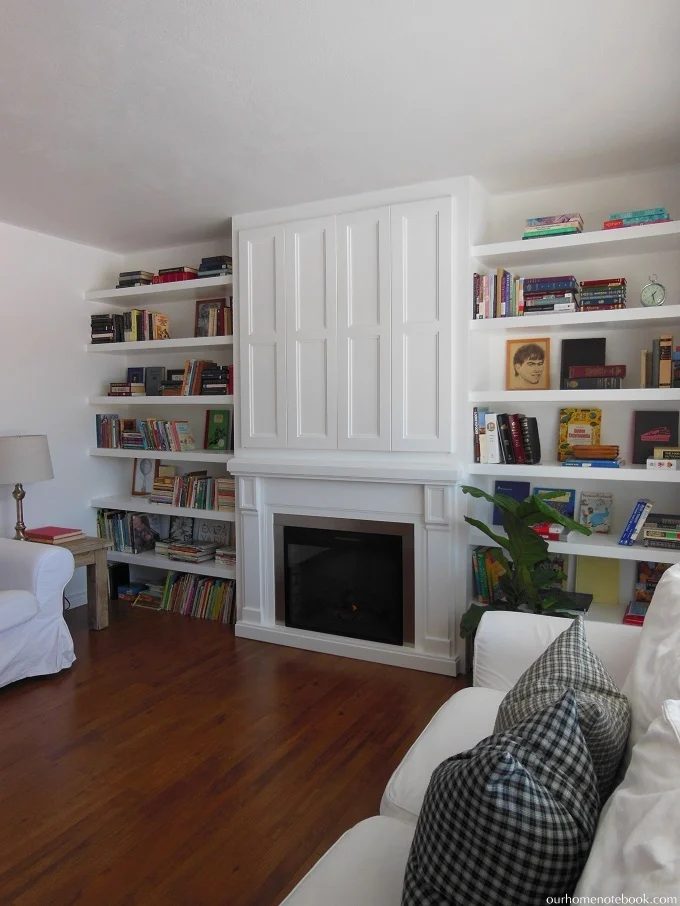
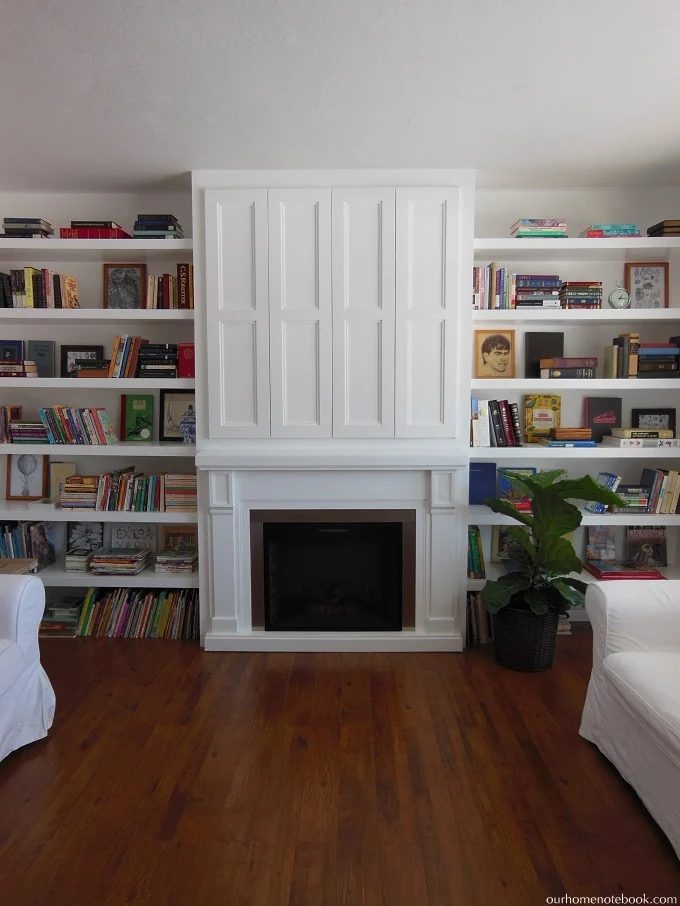
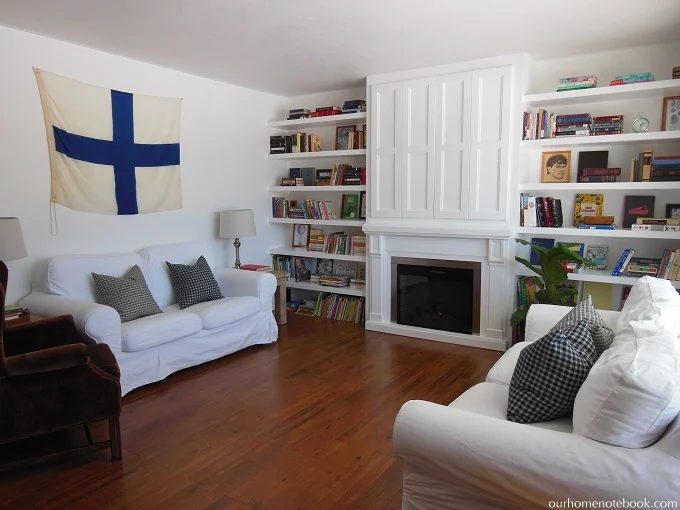
All the extra storage on the shelving is memorable and we love hanging out in this room so much now! It’s the well fitted place to rest and play.
We completed this project a little at a time over about five months. We first built and painted the walls, then later added the fireplace. After that we built and installed the TV nook doors and lastly the shelving. Spacing it out really made it so much easier for us to tackle such a large project.
Approximate Cost Breakdown
Fireplace: $340
TV Nook: $280
Floating Shelves: $420
———————————
Shannon, thank you so much for being our guest today. memorable work for a striking home!
Bekob, go visit Shannon at Our Home Notebook to see more, like her cute kids room redo with these straightforward book shelves.