Materials and the sequence of the job sit together on this page.
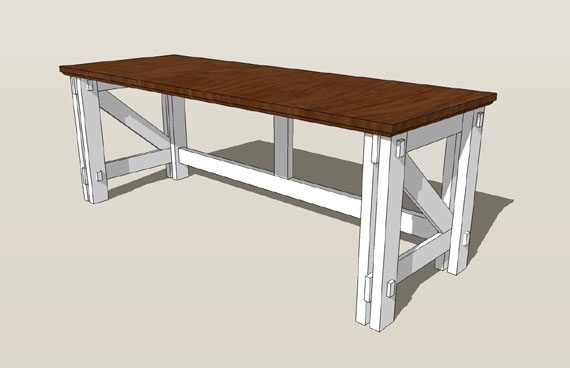
I am so excited to share with you our new, custom computer desk plans. Since we work on this blog together a lot, we desperately needed an office desk that would sit two people comfortably.
One thing that we love to do at our house is use old things in new ways, it is a great modest-cost saver and less wasteful. We were able to use parts of an old walnut desk that we received for free. At the time I took the desk, I did not know exactly how I was going to use it, but I knew that it had potential.
After some thought of what we wanted in a new computer desk I realized that I could use the top of the old desk for our new desk. It is very strong and can easily span six feet without any middle supports. Because, we wanted it as open as possible for plenty of leg room and no supports to bump our knees on.
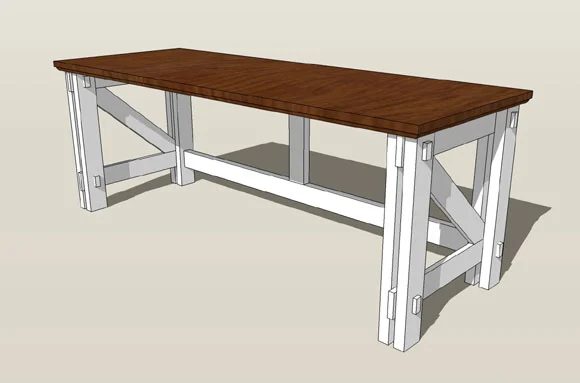
Today, I wanted to only show you our design and we will be posting about the final product soon. So stay tuned to see how the actual desk turned out.
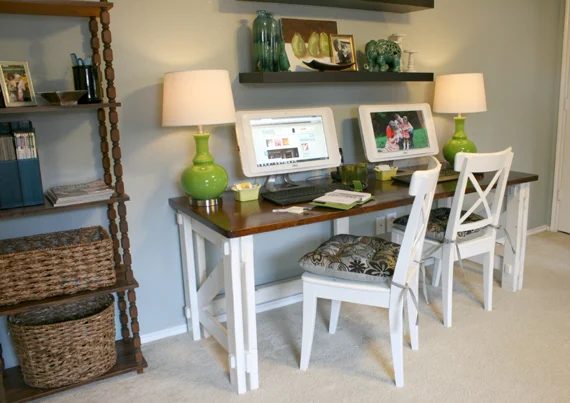
Below is a list of the tools and materials that I used on this project. You will also find the steps that I used to assemble the desk
List of tools used:
- circular saw
- miter saw
- Kreg jig
- orbital sander
- drill
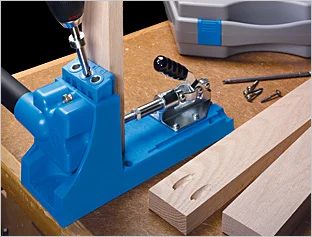
List of materials used:
- old wood desk top
- 2×4 lumber
- 1×4 lumber
- white latex paint
- walnut stain
- polyurethane
- angle brackets
- screws
Below I have attached images of the steps that I used, for you to see how I assembled my custom computer desk.
Assembly instructions:
step 1
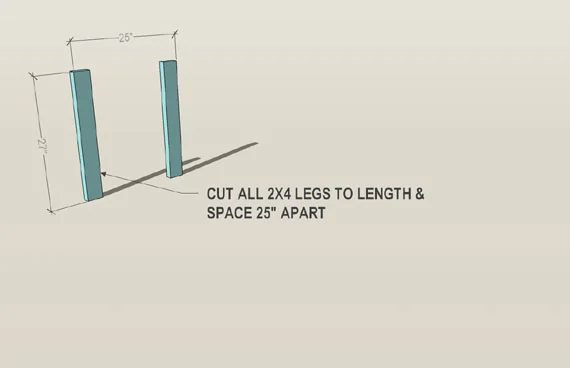
step 2
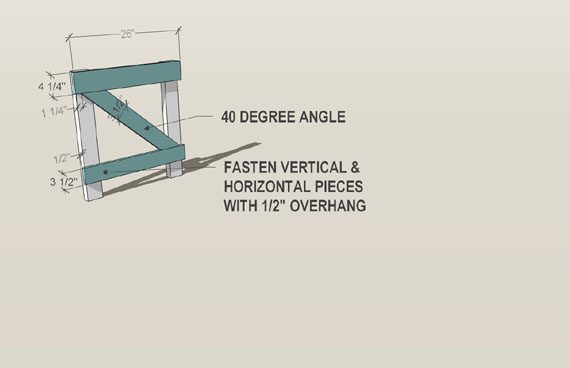
step 3
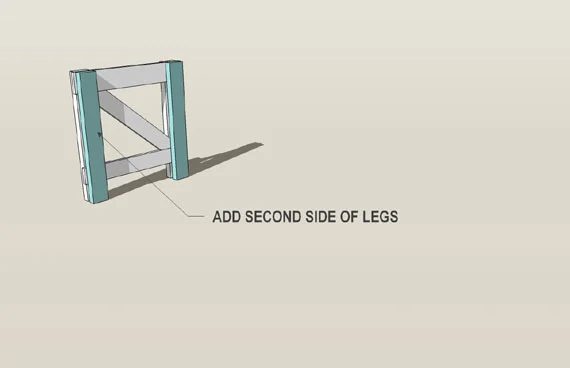
step 4
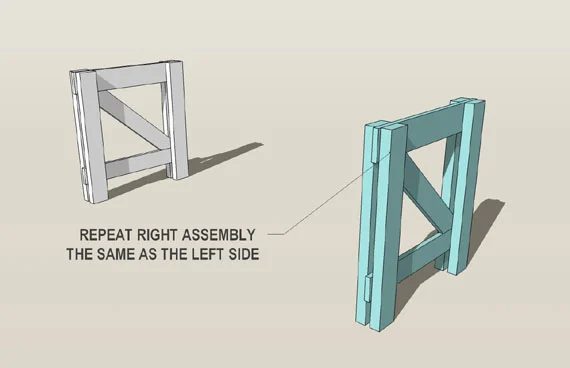
step 5
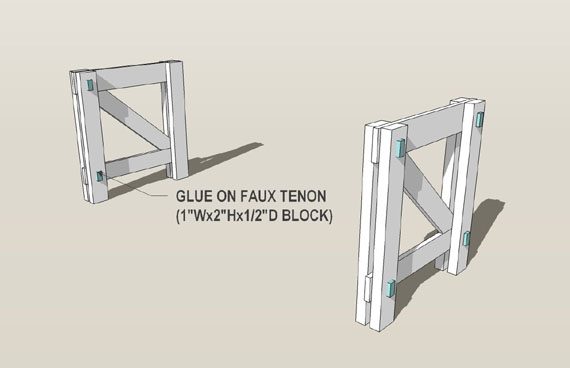
step 6
This length is optional, depending on how long you want your desk. Mine are 67″ long.
This is where the Kreg Jig for pocket hole joints comes in handy. I used pocket holes here because I wanted to disassemble the desk to make it straightforward to move around the house, since it is a big desk.
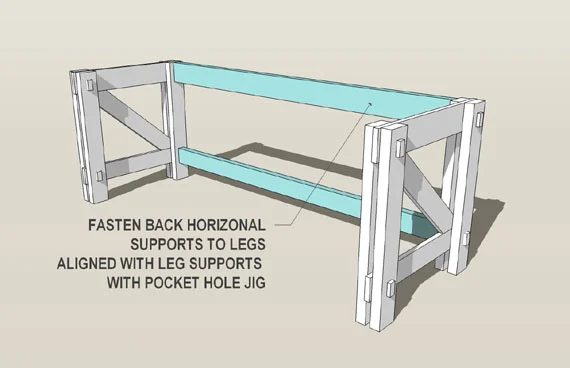
step 7
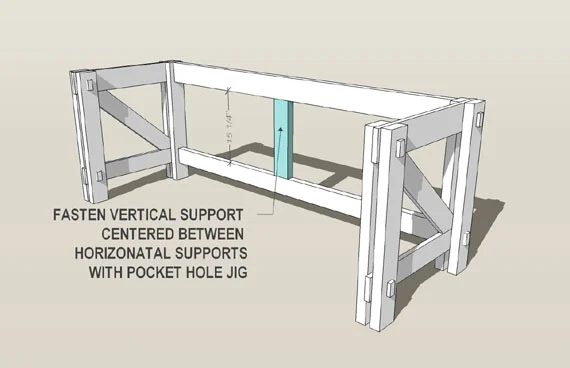
step 8
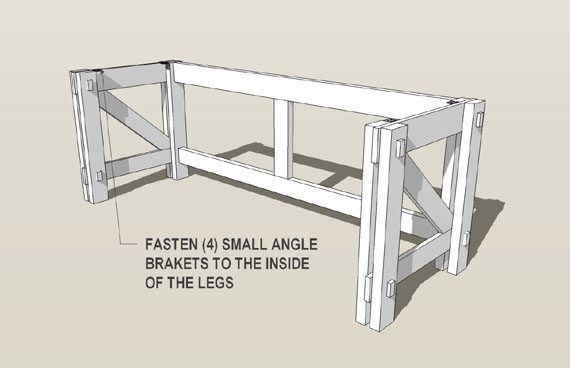
step 9
My desk top is 75″ long with a one inch overhang on the sides and front.
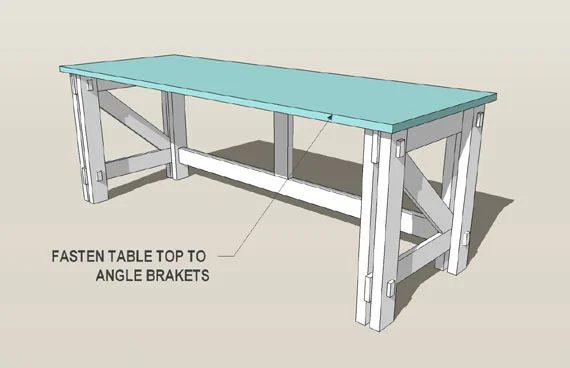
step 10
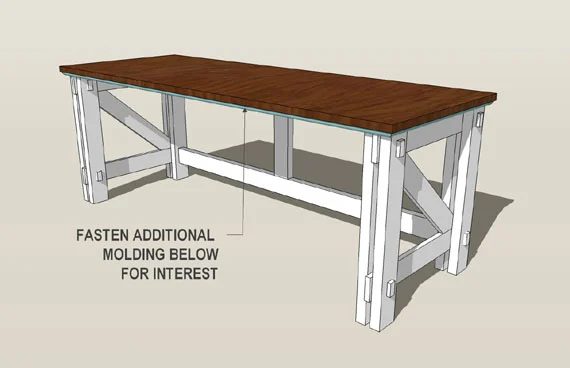
the final custom computer desk