Materials and the sequence of the job sit together on this page.
Submitted by Everyday a la Mode
The thumping of my heart today is for our Master Closet Redo! We have been struggling with closet space since I remarried 2 1/2 years ago . We quickly discovered the Master Closet did not meet both of our needs.
Here is the reveal if you like to read the end of the book before the engaging plot!…
For more on the Before/During/After bits, read on!….
Before the Redo
The original closet (GAG!) we had was built by the builder.
Here is the before is in all of its embarrassing glory…
Left side of closet
Right side of closet
The closet is rectangle-sized (about 124 inches by 73 inches). As you can see, I had an old discount store shoe rank. My husband’s side was cluttered with piles. His smalls (socks and what-nots) weren’t even in the closet. They were stored in the bedroom in the tv cabinet. (I suppose men don’t call them smalls, but whatever.) It had the blah globe light from the builder. You get it the picture…..basically, it was very normal, underachieving, mess-of-clutter closet. YUCK! …..until this project.
Empty before
Empty before
I designed a new layout for the closet and ordered it online from an assemble-on-your-own site. The reason I choose this closet company was: they cost alot less than the other closet companies of similar quality and I have used them before in a prior house several years ago and was happy with the results.
The new paint color and hanging the vertical panels on the track
The project was drama-filled. When lifting one of the tall vertical pieces, my husband hit the exposed light bulb and it shattered. So, instead of working on the closet, we were finding glass. Then, the vacuum stopped working, so it needed to be unclogged. We never found the clog. It was somewhere in one of the $#%^&! tube elbows where we couldn’t get to, so I had run to the store to get a new vacuum. Anyway, we had way too much time cleaning and fixing things and not enough time focusing on the closet.
Once we were able to refocus, we cleaned out the closet, found several things to donate to Goodwill, and repainted.
OOOW! Off topic…. I want to introduce you to my new friend…okay “toy” since “friend” makes me sound like a tool-obsessed woman. I got my “toy” for Christmas. I LOVE my impact driver! I LOVE the light it has to light the way! I LOVE the extra POWER! LOVE, LOVE, LOVE! It reminds me of my obsessionappreciation for my Stanley ratchet screwdriver. I call him by his first name….”where’s my Stanley”, “Did someone borrow Stanley?”
Oh yeah, I know. Ignore the weird angle I’m holding the drill in this pic. The screw isn’t lined up correctly. I’m multitasked challenged when trying to drill with my right and holding the camera the camera in my left.
While taking a break, here I am documenting what a mess the bathroom has become. {Sh-h-h…..I so love wearing a tool belt while drinking wine. What does that mean?}
Here are some shots of the progress….
Left side, standing at the door
Left side, standing at the back of closet
Again, the final results….
“Ah, …that’s not it”….Lessons Learned
We made a few errors in the installation along the way. Other than breaking the light bulb and the vacuum,…
Lesson 1) We were the dorks who did not have the right tool for the job. We needed to cut out the baseboard to allow the long panels to fit against the wall. We tried using a jigsaw and a chisel to cut it out, but it was very difficult. My husband ended up finding a very cool tool that is made to do the job (I don’t remember what it is called, but it very cool, very straightforward to use, and I loved it!).
Lesson 2) One of the drawer stacks was not plumb, so we needed to cut out more baseboard and realign the stack (Sh-h-h, don’t tell hub, but I think I mis-measured.)
Duh! Lesson learned to read the directions more closely.
Lesson 3) We lamely missed a sentence in the instructions and we put the holes for the drawer glides too high. This caused a gap at the top of the top drawer. We re-read the instructions and found the missed statement, so we needed to re-drill the holes in the drawers. (I still need to patch those up.)
“Um, hon,…do we need this part?”
Lesson 4) We had the epiphany that our closet was not built plumb. My original design had filler shelves between each side and the shoe stack. This would allow the crown molding to flow continuously around the entire closet. But, the closet had other plans for us. The height of the sides and the shoe shelf differed by 5/8 inch. (The shoe stack weirdly was the highest point. Not sure why.) When I put the filler shelves on, it looked like a scene from Dr Seuss. (Hub….”Hon, do you really need crown molding? It’s looks so good just the way it is!” Me…”Of course, this is the Master Closet. I NEED the crown molding!”….Yes, I can be difficult. But the image was already in my head, so it was not going to go away.) So, the compromise was that the crown molding needed to be around each of the sections separately. As you may expect, part 2 of this challenge is… we didn’t have enough molding. I called the closet company and told them about the problem. They were great and sent an additional molding strip for no additional cost! What I also love about the final result is that you can’t tell we had an issue. It blends perfectly!
Lesson 5) Crown molding is difficult to cut and neither of us had experience with it, so it was an adventure.The cut was close, but…. The closet company sent a Fil-Stik to fill the gaps.
Before Fil-Stik
After Fil-Stik…a Beaut!
A few of my Fav Things …
1) The new power tools (DUH!)
Valet pole
2) The extras that were built into the design:
- The rounded corners on the half vertical panels, so when we bump our heads on the corner, we won’t scream as loud. (This was an upgrade.)
- The full extension drawers (standard is 3/4 extension, so this was also an upgrade)
- The raised panel drawers (also an upgrade)
- The valet pole to plan outfits (an add-on).
- The new ceiling light! Good-bye weird builder ball thing and Hello solid-Vintage-Style light with an Edison bulb!
Raised panel drawers
- The crown molding is the icing on the cake! Sweet! So worth the challenge!
3) How the closet was designed….
- We put the shoe stack to the back of the closet (I liked this so I can see my shoes straight on.)
- On the right side, we put a long section for dresses and my pants.
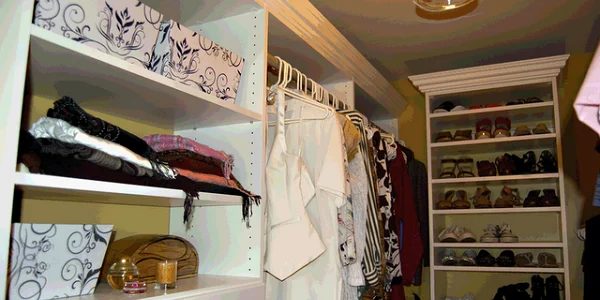
- Also on the right, is a drawer stack, shelves, and two sections of double hanging sections.
- On the left side, is another drawer stack, more shelves, and two more sections of double hanging sections.
- I still have room for my “lift spirits” inspriation board.
Final Reveal
We love the closet. It turned out solid! What a difference! We had some minor distractions and learning curves to over come, but it turned out well fitted!
Again….Master Closet Before…
Master Closet Redo – Before
Master Closet – After…
Master Closet Redo -After
This was our first project of the new year. What projects do you have planned for 2012?
List of sources
Paint in Closet ~ Behr Beachwalk
Paint in Master Bath (seen in my toolbelt / wine pic) ~ Benjamin Moore Ripe Riesling
Cabinets ~ straightforward Closets (easyclosets.com) (We found it on sale and with free shipping.)
Vintage-style light with Edison bulb ~ Lowes
Bench ~ Bed Bath and Beyond (about 5 years ago)
Baskets (black and white patterned and black and white hounds-tooth ) ~ Michaels at 50% off