Read the sequence from the top before cutting, painting, or moving pieces.
Silhouette Wall Art: walkthrough
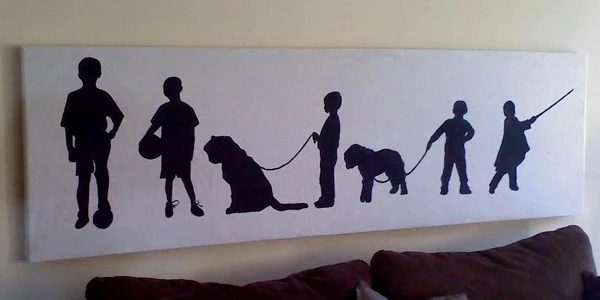
submitted by Sisters of the Wild WestI started with a regular 4×6 photo that I printed at walgreens of each of my boys doing one of their go-to activities. I then cut out each child and placed on my overhead projector. I know its old school, but it works for me. I used to go into my children’s school and use the schools overhead until I found my own at a garage sale for $5! yeah. Maybe your hubby’s office has one you can borrow? Use your resources and find one to use, or you can always buy one at office max. I use mine all the time for projects.
I bought a canvas drop cloth $9 (low-cost) at walmart, ironed it nice and smooth and hung on the wall so that I could trace my boys. I placed each child on the overhead one at a time and positioned it so that each child was the size and placement that I wanted. Sorry I had a picture, but not sure what happened so use your imagination.
With my overhead shining at my canvas on the wall I traced each child with a pencil.
I then painted each child with some black latex paint. Let that dry while you cut your boards for your frame.
I made my own frame for this so this is a clearly affordable, and makes a sizeable piece for an empty wall. I cut the two long boards at 86 in. I cut 4 boards at 23in. Get out your power tools ladies!!! I bought 3 ceder boards at Lowe’s because they are lighter and straightforward to staple. The boards were 1x2x8. So it only cost me $11. I then centered the canvas and began stapling it on tight. $20 and a little work in an afternoon and you have a personal, conversation piece that your children will all fight over when they are older.