Read the sequence from the top before cutting, painting, or moving pieces.
Have you ever wanted a nice wood shop table saw workbench and a router table all in one?
Today I want to show you a table saw workbench that I designed to help bring some order to my little workshop.
(Remember how we showed you the mess that we started with last week?)
To help organize this project of ours, we partnered up with Rockler Woodworking and Hardware. They have so many good options for keeping a shop in order and many great tools for building projects. We are excited to partner up with them for this very reason.
I will show you all the great tools that I have now because of them, and how it is making my garage shop experience so much better. You saw a sneak peek of this table last week, and I am so excited to show you how I built the workbench in today’s post.
Table Saw Workbench Woodworking Plans
Get the printable table saw workbench woodworking plans HEREOr click here to go right to the checkout.
I have always wanted to build a big table saw workbench.
It has been years in the making in my head and now finally coming true to life.
It is a large central table that I will use for almost everything.
The work table has the table saw and router table built in. It would also include a vice and many options for clamping for working on projects.
It’s going to organize and store tools as well. It is going to be solid POSSUM!!!
This post contains affiliate links. Learn more and read our full disclosure policy here.
UPDATE: See how we upgraded the table saw fence!
The Design of the Table Saw Workbench
I really wanted the table to be multi functional and have many useful features. I wanted it to be “pertty good looking” as well. (Thanks Pedro!)
Chances are we will be filming lots of projects from this workbench.
See how I used the table saw workbench to build a two-in-one Hoosier style bar stool step ladder to use while I’m working at the bench and around the garage and also our entry table with cubbies (that can also be a changing table).
The space where I wanted to keep it is big enough for a 4′ x 7′ workbench surface. That is pretty big for a work bench.
You can do a lot on a large surface like that, and you can store a lot underneath it as well. (And you can make yours a full 8 feet if you prefer.)
I did a bunch of research of what other people were doing and tried to create the best option for my needs. Listed below are all of the features that I wanted the table saw workbench to have.
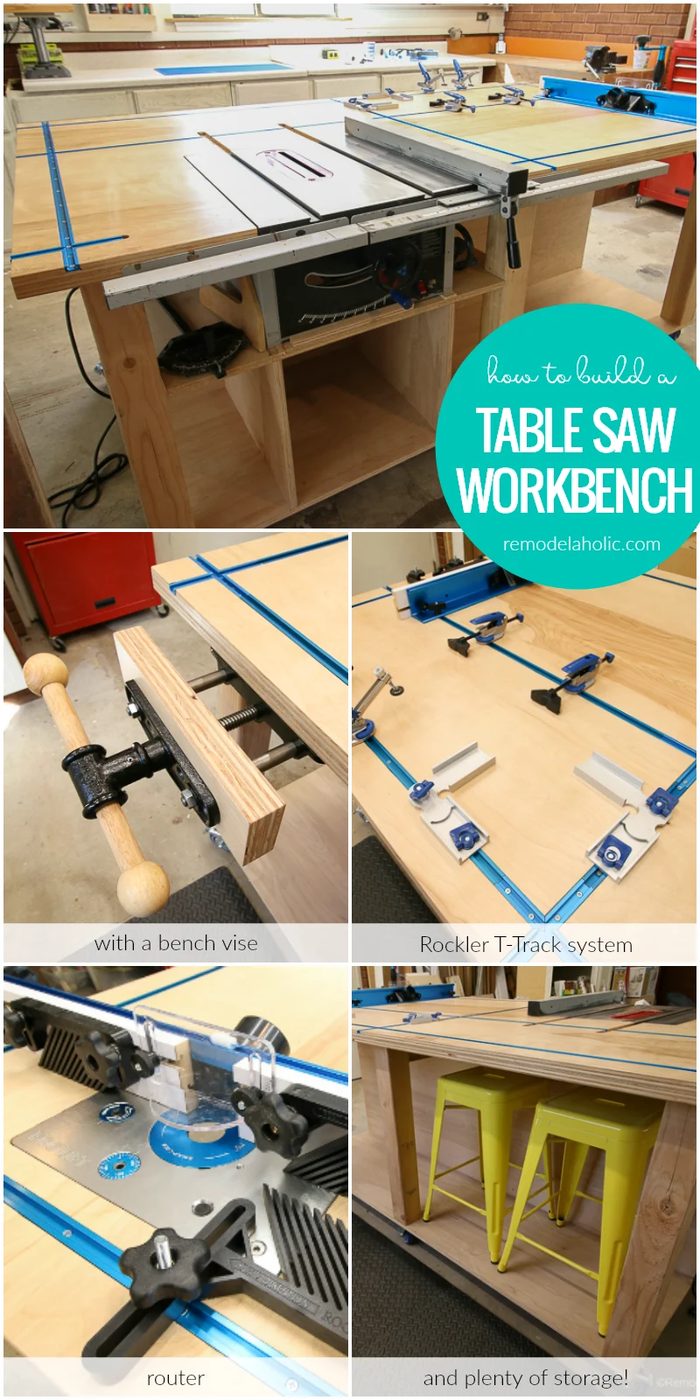
Features of the Table Saw Workbench
- Look memorable!!! That should be obvious right!
- Sturdy and strong with a 1 1/2″ thick table top.
- 3″ table top lip over hang for clamping to table
- Caster wheels to move it around the shop and locking in place.
- Built-in table saw with outfeed area.
- Built-in router lift and router fence.
- T-track system for clamping and building projects.
- Bench vise for more clamping of projects.
- Storage for tools with doors to keep the dust out.
- Leg room when working at the bench sitting on a stool.
- Place to store a bench or two when not in use.
- Dust collection area for under the table saw.
- Improved shop lighting when working on projects.
- Comfortable floor mats for standing areas around the table and table saw.
It took about a three full days to build and finish it. I am so pleased with how it turned out and how useful it has been so far. Here are some closeups of the table top features of the table saw workbench.
Want to know how the workbench is holding up? See our 3-year update post here for what we love and what we’d change.
Built-in Router Lift and Router Fence
This is the solid router table that I now have. It features a fence that slides back and forth in the T-Track and is easily removed for an entire table of flat surface to work on.
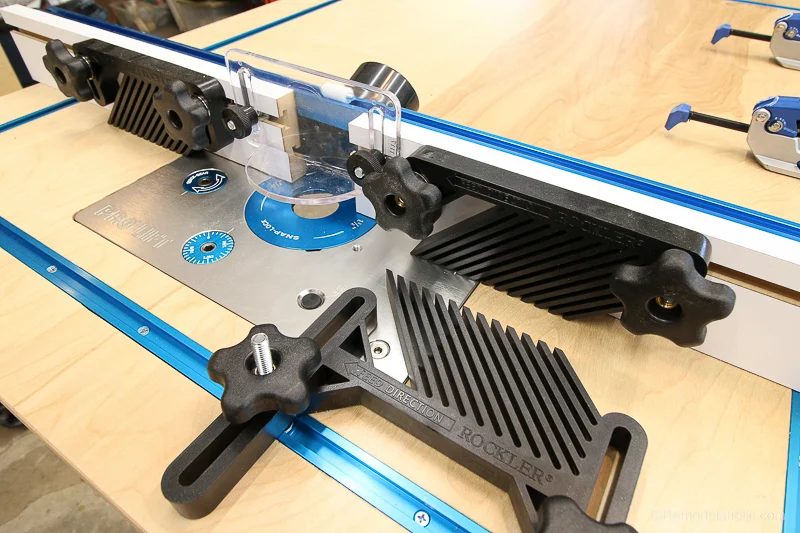
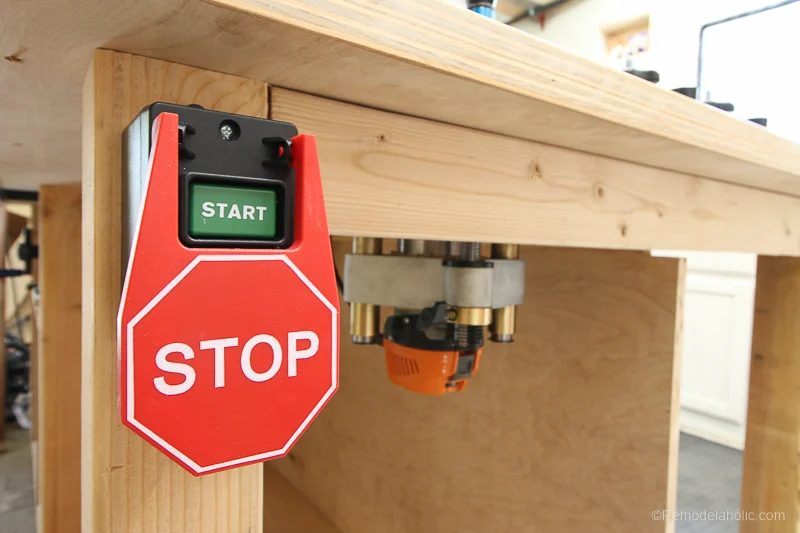
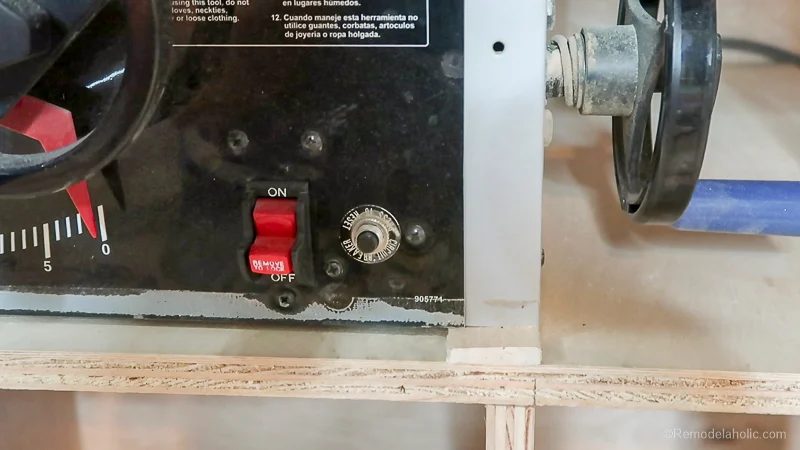
Safety Feature: Router Stop Switch
A really big stop switch attached to the router for better safety while routing.
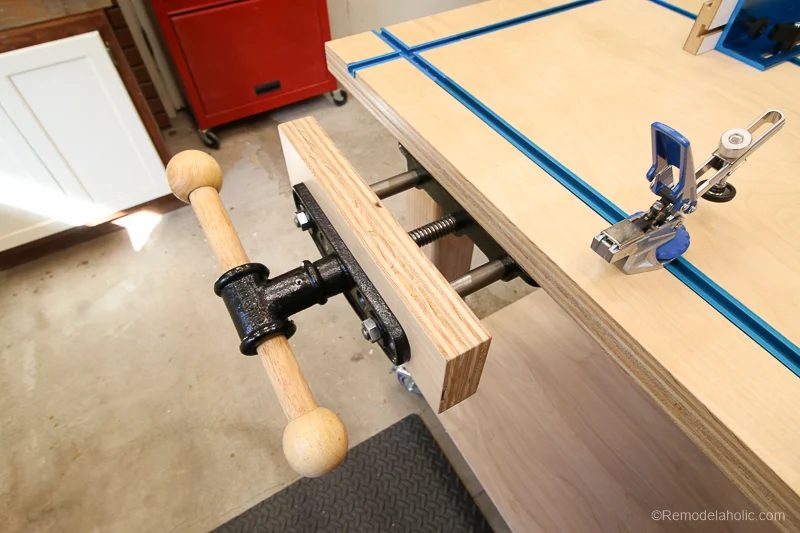
Workbench Bench Vise
A sweet bench vise with quick-release is always handy.
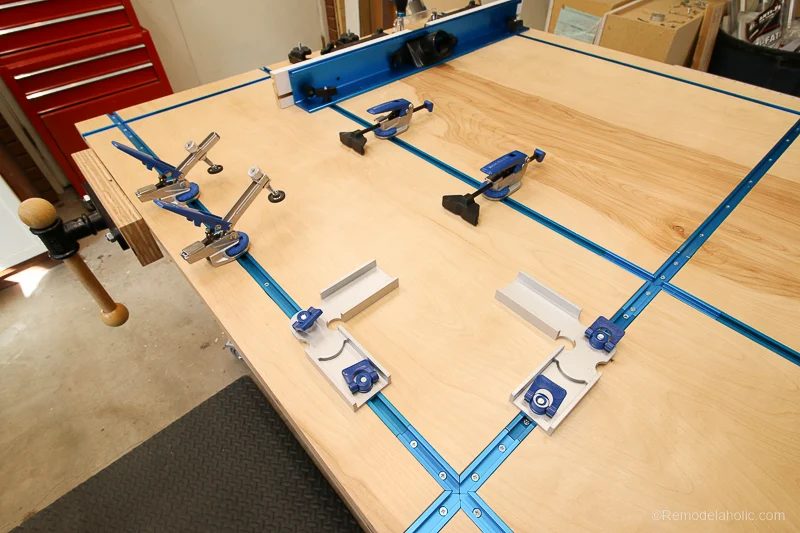
T-Track Clamping System
Tons of room for using the T-Track clamping system with all the different ways to clamp projects.
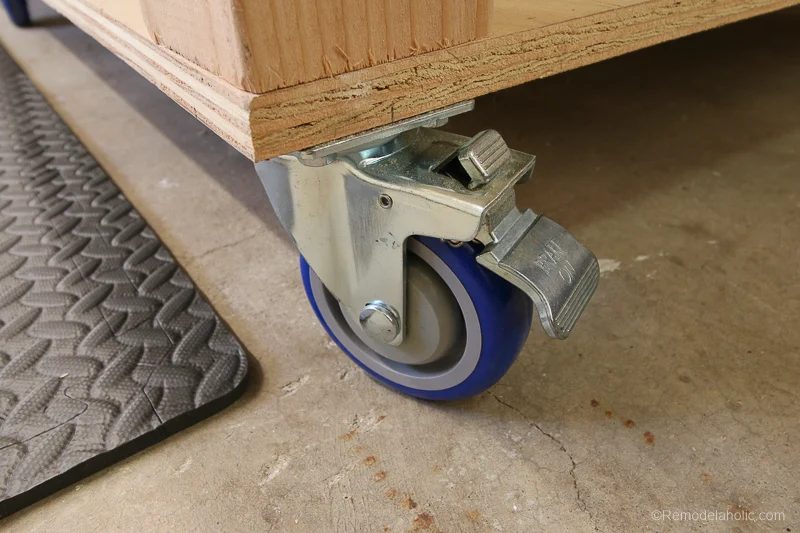
Movable with Heavy Duty Locking Casters
Lockable heavy duty casters let me move it when I need it, but hold it very secure when I’m working.
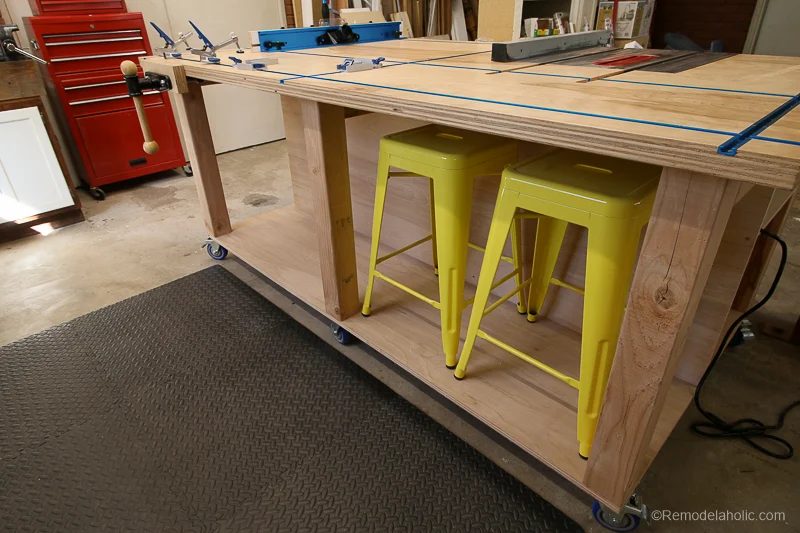
Workbench Storage Space
Bench storage (and see my new Hoosier step stool setup here) and comfy floor mats. Why not be comfortable in your work space right?
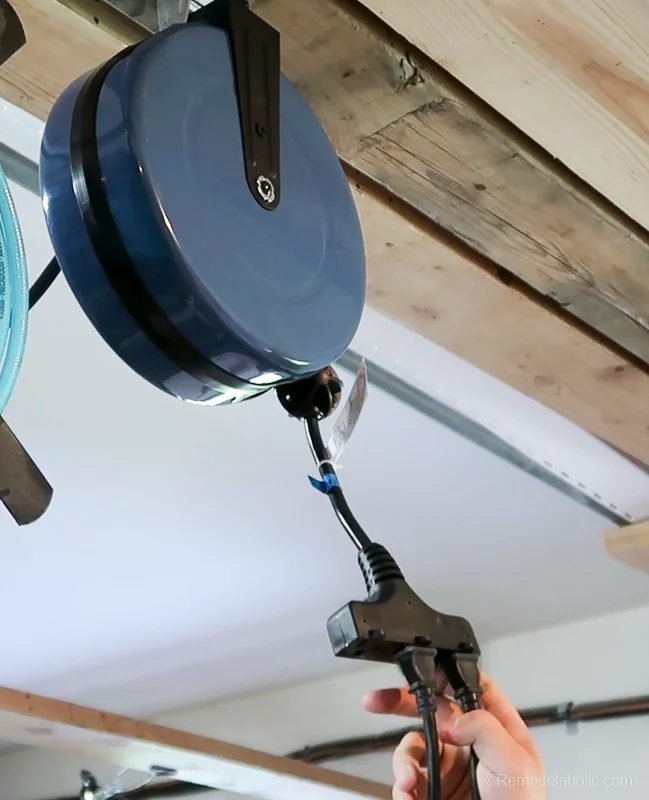
Workbench Cord Organization
Oh and this cord reel has been memorable to use. It’s heavy duty and 30′ long. It also locks in place if you only need ten feet. It really cleans up the shop being able to retract a power cord back up in a nice neat reel.
List of Products from Rockler.com Used in the Post
As we said, we love working with Rockler because of their memorable products!
FYI these are affiliate links, which means if you click and purchase through these links, we receive a small commission that helps us create new projects and videos like this — I really love these products, so I highly recommend them!
Workbench
List of Products from Rockler.com Used in the Post
As we said, we love working with Rockler because of their memorable products!
FYI these are affiliate links, which means if you click and purchase through these links, we receive a small commission that helps us create new projects and videos like this — I really love these products, so I highly recommend them!
Workbench
- (4) 4″ Polyurethane Casters, Total-Lock Swivel (Plate Mount)
- (2) 4″ Polyurethane Casters, Swivel (Plate Mount)
- (20′) Rockler Universal T-Track
- (9) Rockler T-Track Intersection Kit
- (1) Rockler Pro Lift Router Lift (8-1/4” x 11-3/4” plate)
- (1) Rockler Router Table Fence
- (1) Rockler 4-Piece Router Table Accessory Kit
- (1) Safety Power Tool Switch
Fence I upgraded to (details here):
- 50″ Vega Table Saw Fence
Clamps
- (2) Rockler T-Track Corner Stop
- (2) Rockler Auto-Lock T-Track Clamp
- (2) Rockler Auto-Lock T-Track Hold Down Clamp
- (1) Rockler Heavy Duty Quick Release Front Vise
- (2) Rockler Clamp-It® Corner Clamping Jigs
Lighting
- (6) Linkable 4000-Lumen 4′ LED Shop Light 2-Pack
- (2) 48″ Link Cords
Floors
- (1 pack) Interlocking Anti-Fatigue Mat
Power Cords
- (1) Rockler 12-Gauge Retractable Extension Cord Reel
Dust Collection Hoses
- (1) Dust Right® Universal Small Port Hose Kit
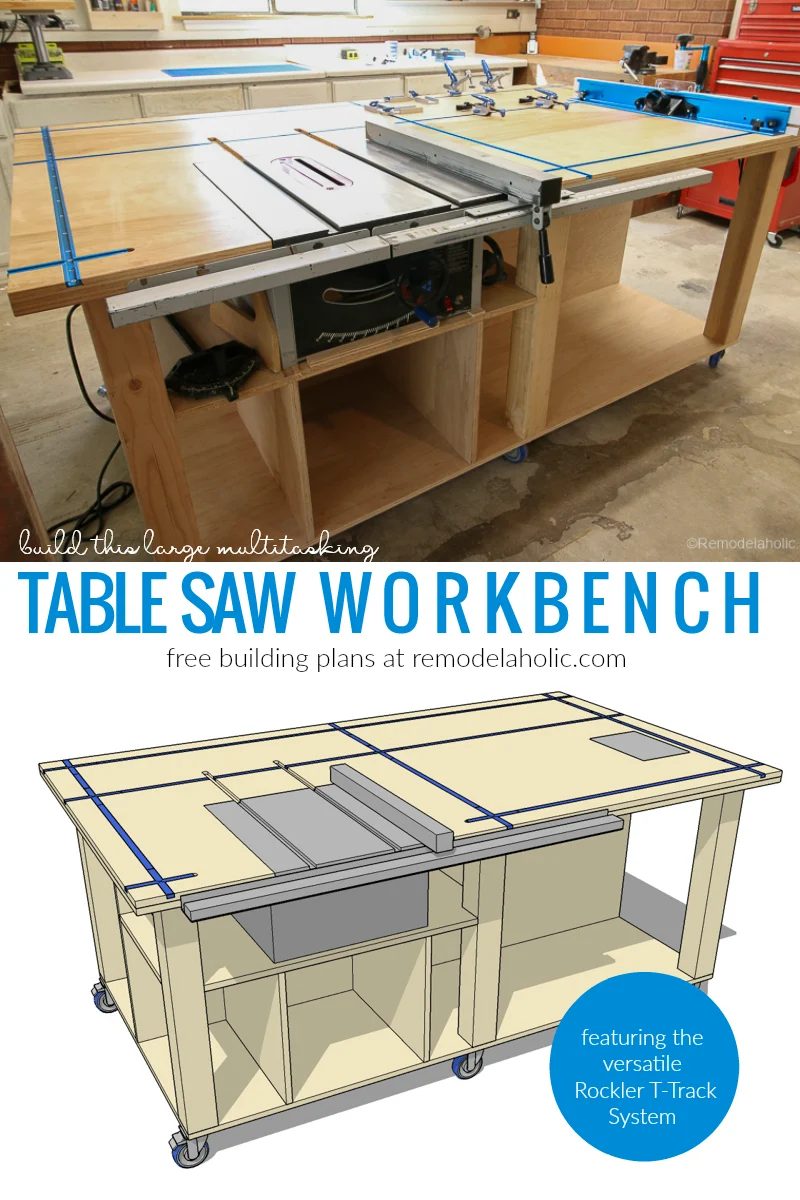
Build Your Own Table Saw Workbench
Now I will show you how to make your own table saw workbench, including the woodworking plans; tools, materials, and cut list; and step by step instructions of how to make your own table saw workbench.
The only thing that might be different in your plans would be the type of table saw that you would use to build it in. Mine was a fifteen-year-old Delta table saw.
You could even leave out the table saw and just build the table if you like. There are many options here.
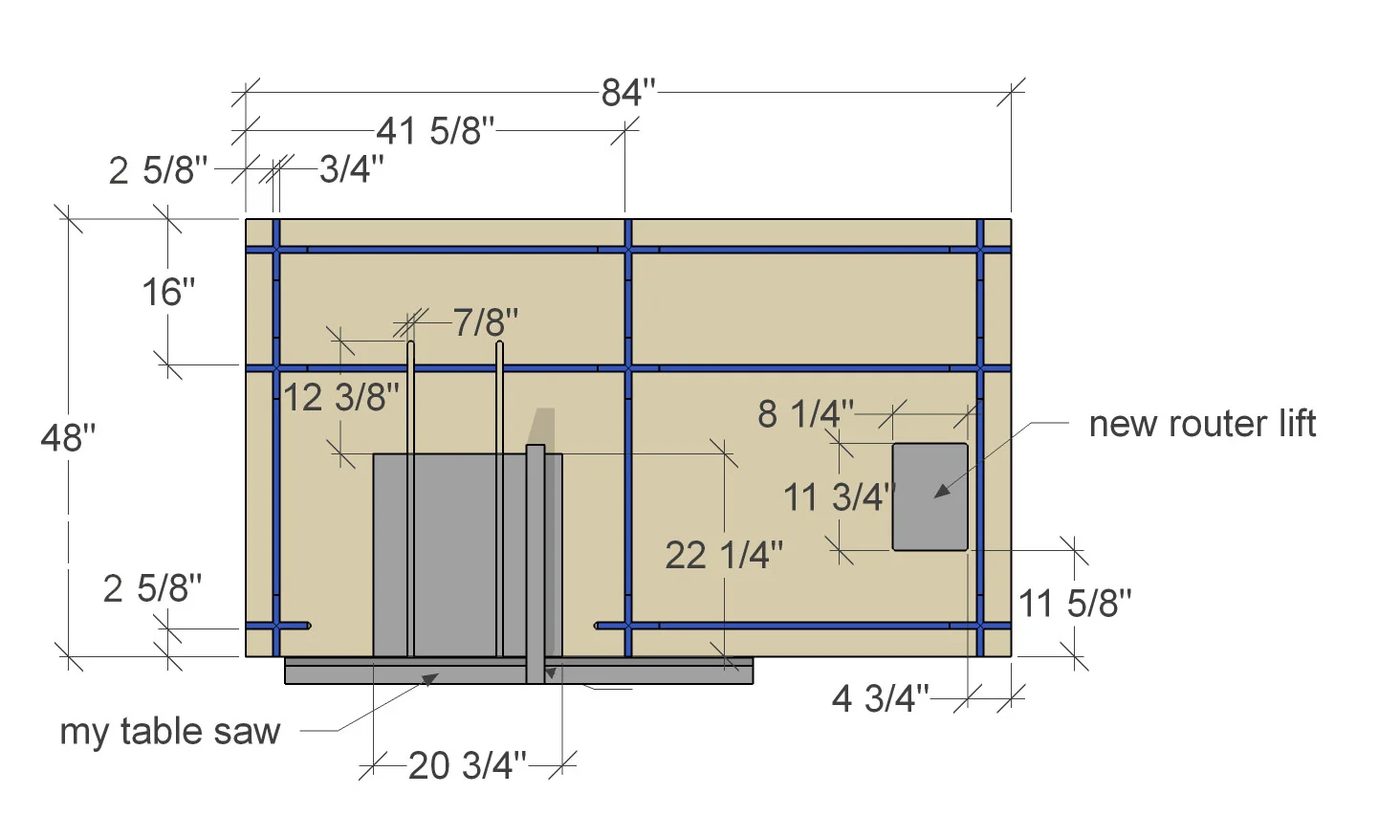
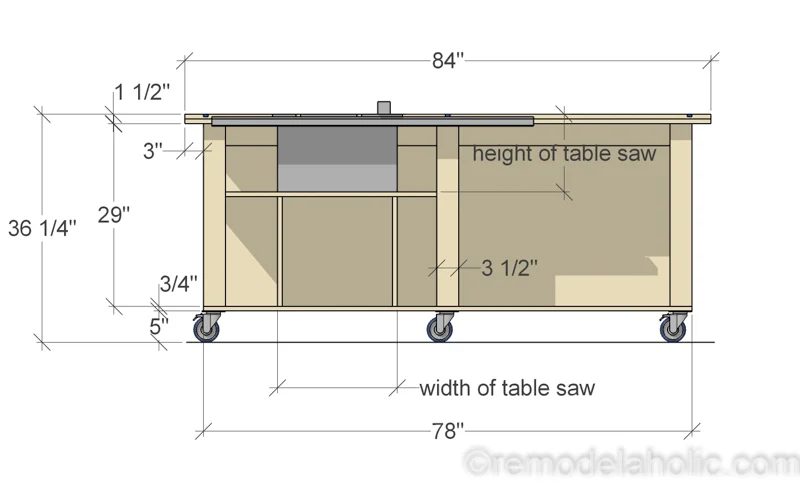
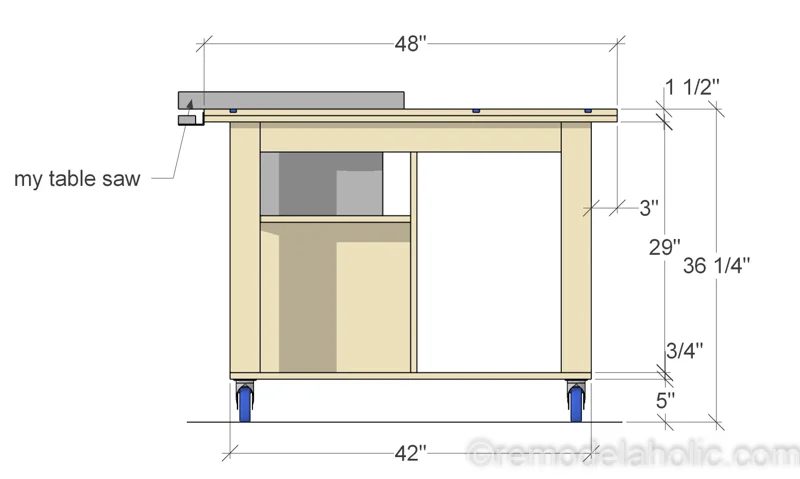
Or click here to go right to the checkout.Plan Dimensions
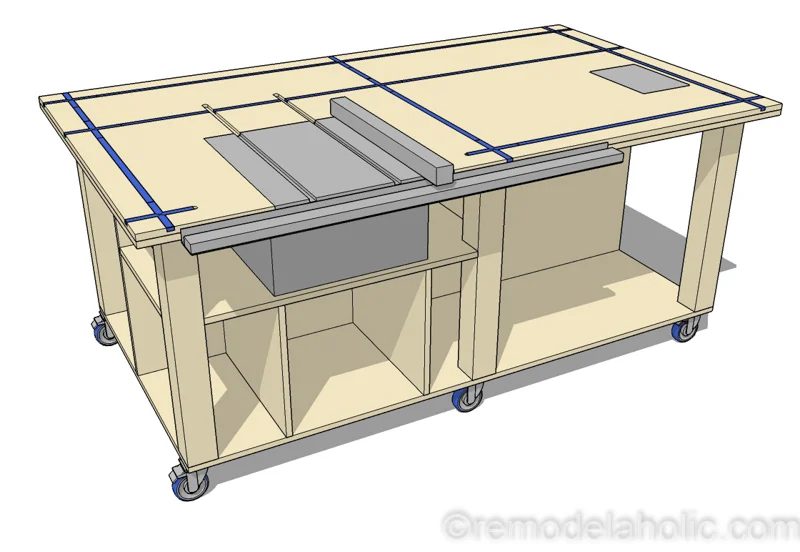
Top View
Front View
Side View
Tools List
Here are the tools that I used to build the table.
- Table saw
- Circular saw
- Plywood circular saw blade
- Jig saw
- Miter Saw
- Drill
- Router for T-Track tracks
- Power chord
- 3/4″ diameter router bit
- Sockets for lag bolts
- Sander
- Sand paper 120 and 150
- Brush for polyurethane
- Rags for dusting
- Pencil
- tape measure
Workbench Materials List
Be sure to use cabinet grade plywood or better quality for flatness and select all your wood that is as straight as possible.
- (4) Sheets of Plywood
- (2) 4x4x8′
- (3) 2x4x8′
- (40+) 1 1/4″ wood screws
- (24) 1/4″ x 2″ Lag Bolts
- (20) 2 1/2″ Pocket Hole Screws for soft wood
- (4) 4″ Polyurethane Casters, Total-Lock Swivel (Plate Mount)
- (2) 4″ Polyurethane Casters, Swivel (Plate Mount)
- (1) 4′ – Rockler 4 Ft. Universal T-Track
- (5) 3 – Rockler 3 Ft. Universal T-Track
- (9) Rockler T-Track Intersection Kit
- (1) Rockler Pro Lift Router Lift (8-1/4” x 11-3/4” plate)
- (1) Rockler Router Table Fence
- (1) Rockler 4-Piece Router Table Accessory Kit
- (1) Safety Power Tool Switch
- (1) 15′ Heavy Duty Power cord to connect router and table saw to power
- (8) 1 1/4″ x 1/4″ Wood Screws for the vise
- (2) Rockler Clamp-It® Corner Clamping Jigs
Cut List
- (1) 78″ x 42″ x 3/4″ – Plywood Base
- (6) 4×4 x 29″ – Legs
- (3) 2×4 x 35″ – Short Support Beams
- (2) 2×4 x 36 3/4″ – Long Support Beams
- (1) 78″ x 29″ x 3/4″ – Middle Plywood Partition
- (2) 84″ x 48″ x 3/4″ – Plywood Workbench Top
- (1) 40″ x 24 3/4″ x 3/4″ – Table Saw Shelf
- (2) Varies depending on height of your saw Table Saw Shelf Supports
- (2) 12″ x 4″ x 3/4″ Bench Vise Blocks
Instructions to Build the Table Saw Workbench
Get the full printable plans here.
Part 1: Build the Workbench Base
Cut the plywood base to length and width. (78″ x 42″)
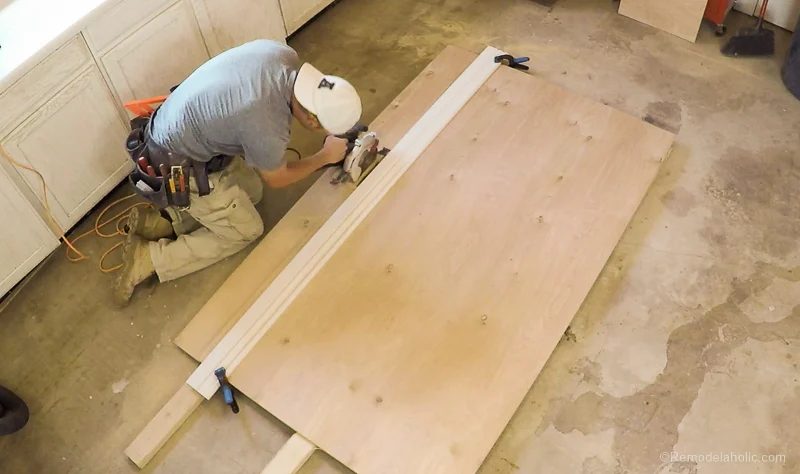
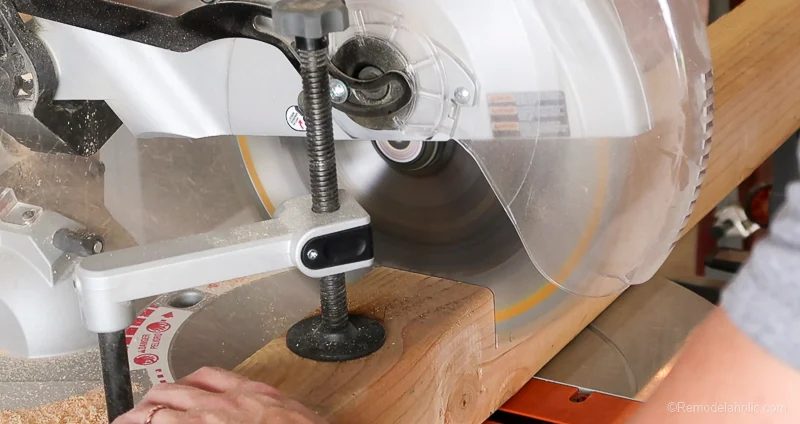
Cut six 4×4 legs to length (29″).
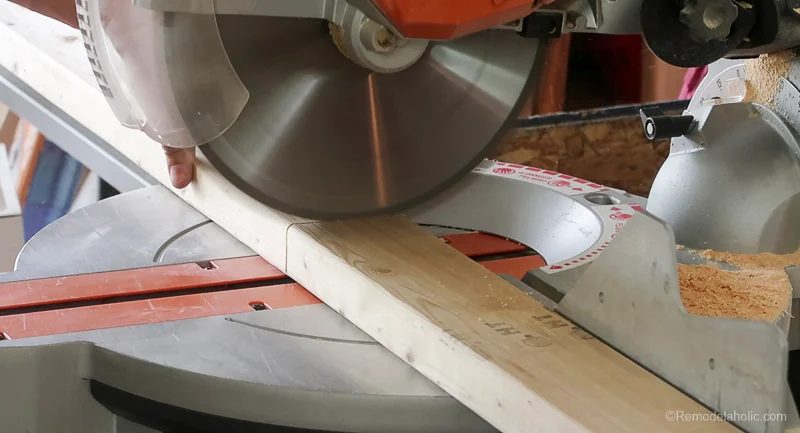
Cut two 2×4 short support beams to length and drill two pocket holes in ends (34″).
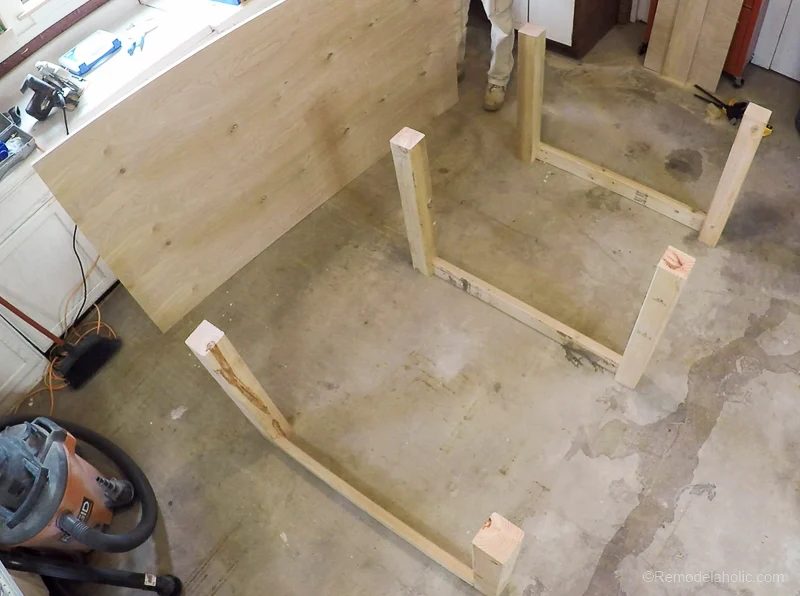
Assemble three leg assemblies of 4×4 and 2×4 support beams with 2 1/2″ pocket hole screws and set upside down.
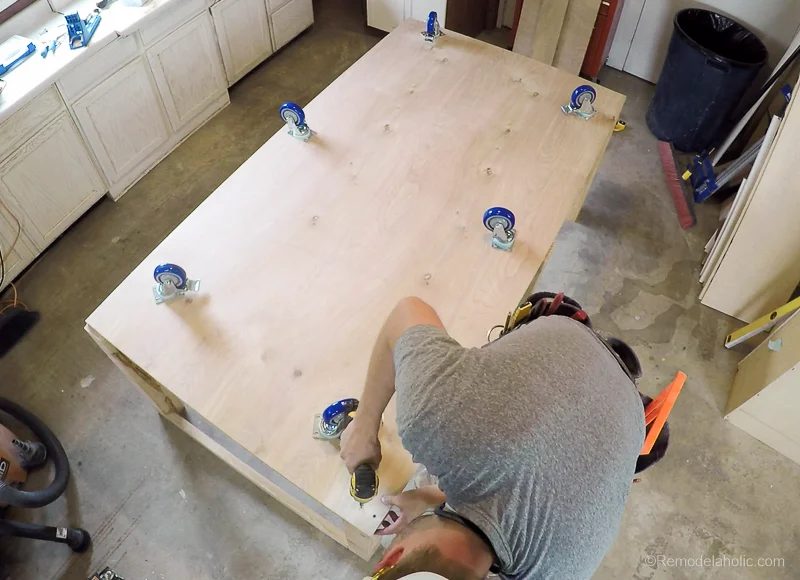
Attach the plywood base to leg assemblies with 1 1/4″ wood screws. Keeping the legs square to the outside corners and centering the middle leg assembly to the plywood base.
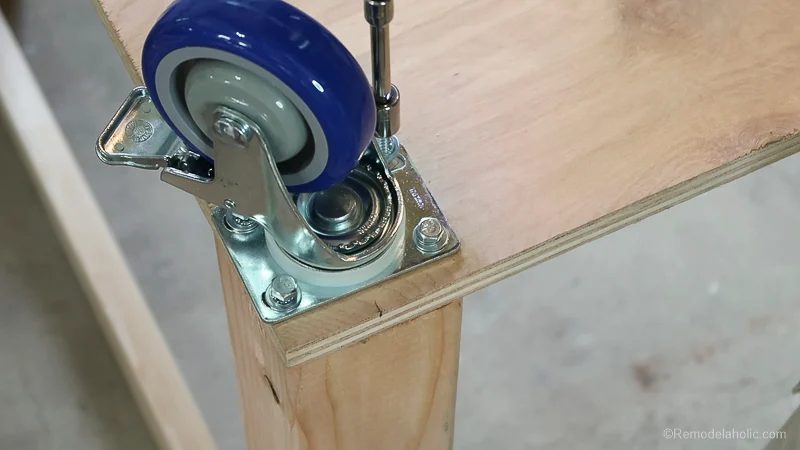
Attach four locking casters on the four corners through plywood base into 4×4 legs. Predrill the holes to avoid splitting. Attach two swivel casters in the middle. Use four lag bolts per caster and add a lock washer and a washer to each lag bolt.
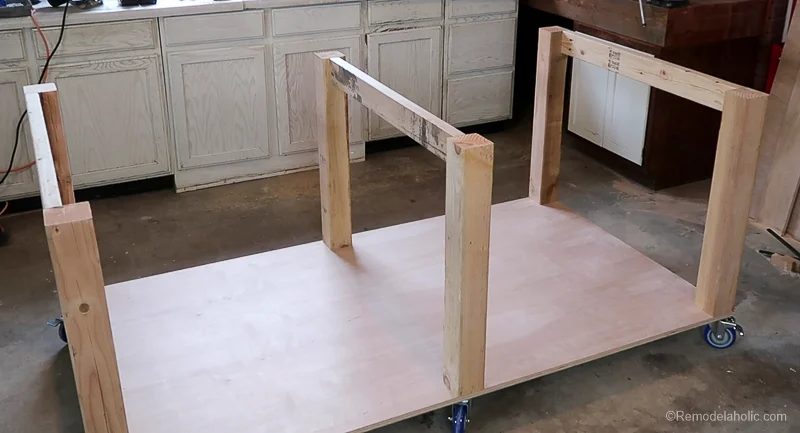
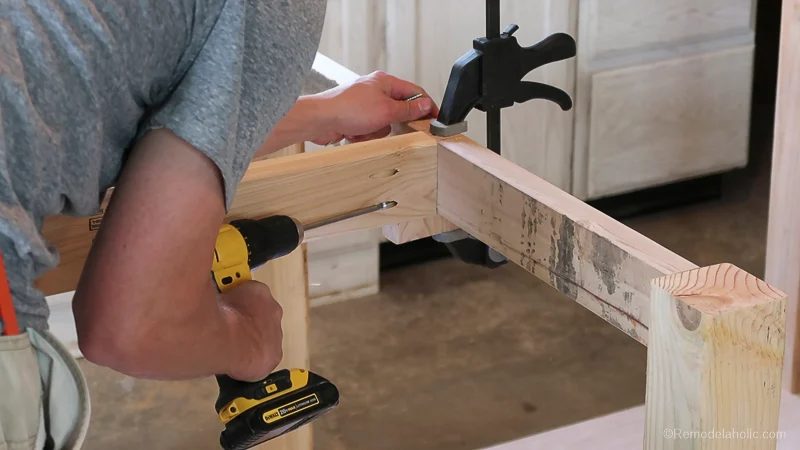
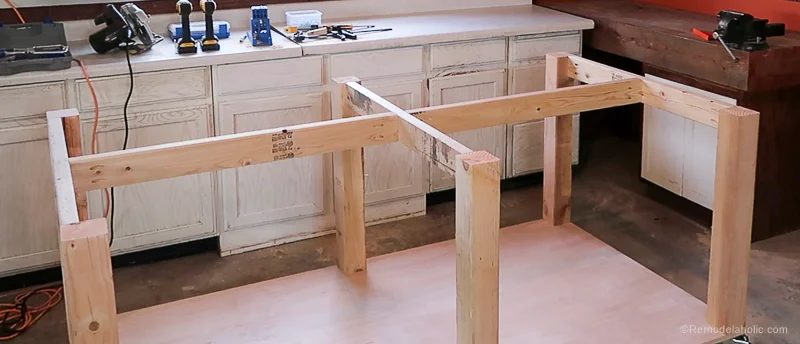
Flip table over and attach long beam supports between leg assemblies with pocket screws.I was able to clamp a block of wood under the long support to hold it flush with the top of the leg assemblies.Here is how the supports look finished.
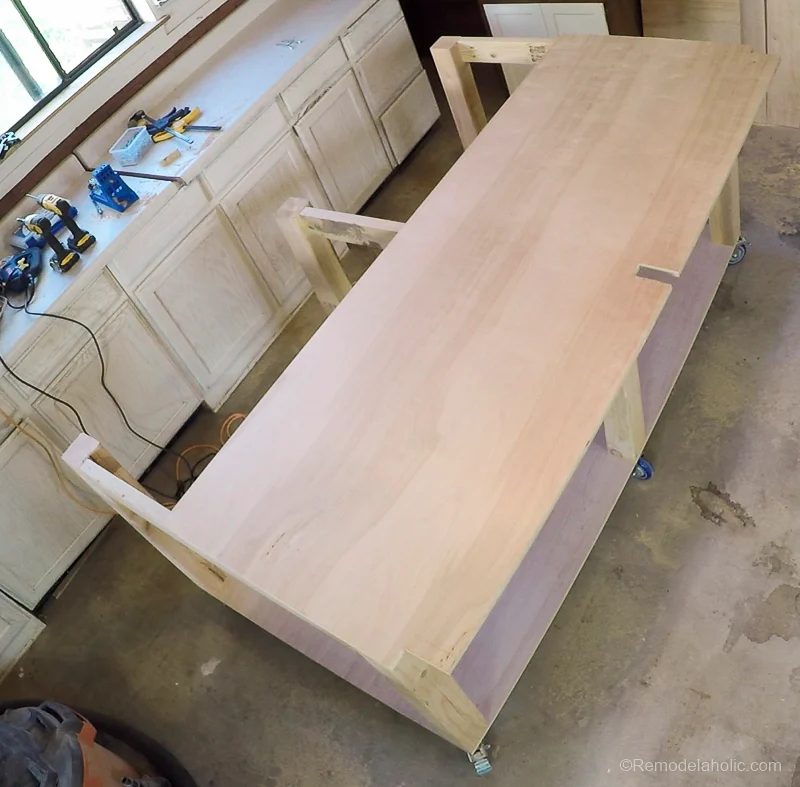
Cut out and install middle plywood partition (78″ x 29″).
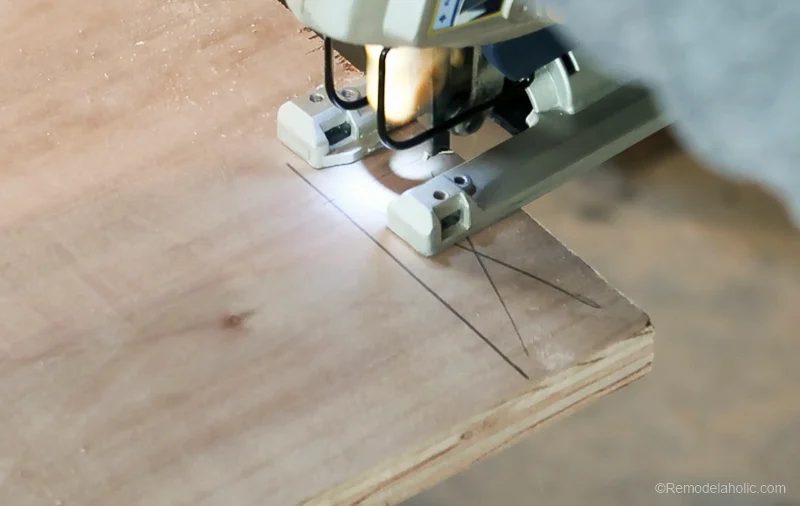
Cut out the top corners where the end beams and middle beams are with jig saw. I cut them 1/8″ bigger than the 2×4 so I had enough room to get the partition in easier.
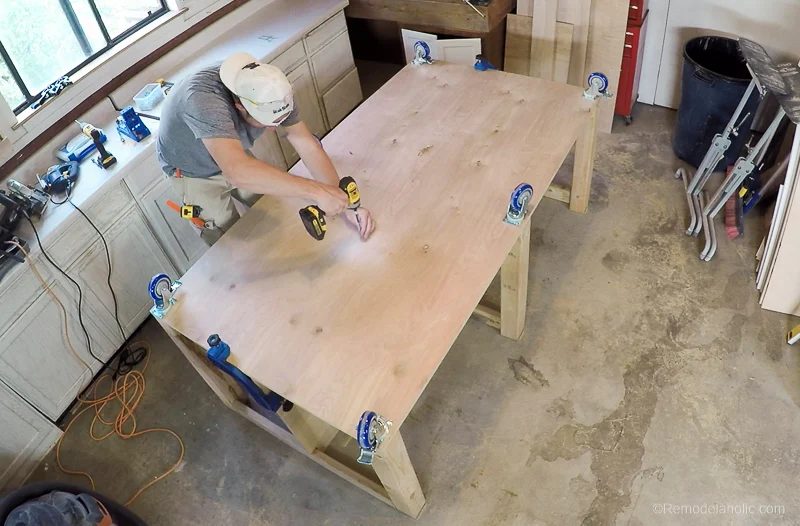
Install middle plywood partition to the long support beams on the table saw side with 1 1/4″ wood screws. Below I am screwing the partition in to the bottom of the table. You will also be able to screw into the top support beam as well.
Cut out plywood workbench top pieces and attach with screws (84″ x 48″).
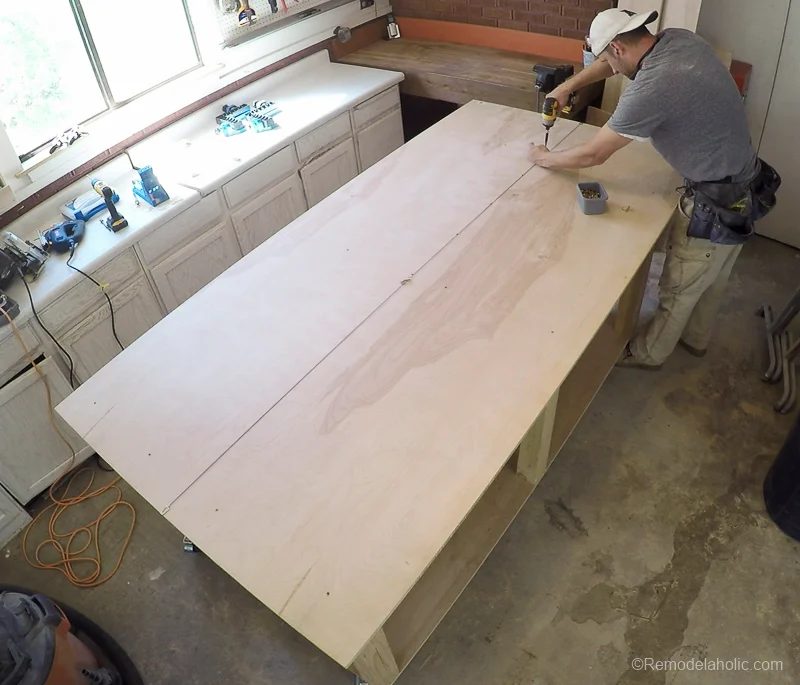
Attach the first layer of plywood workbench top to the top of the legs and beams and screw in place with 1 1/4″ wood screws. Be sure the center it with a 3″ overhang on all sides.
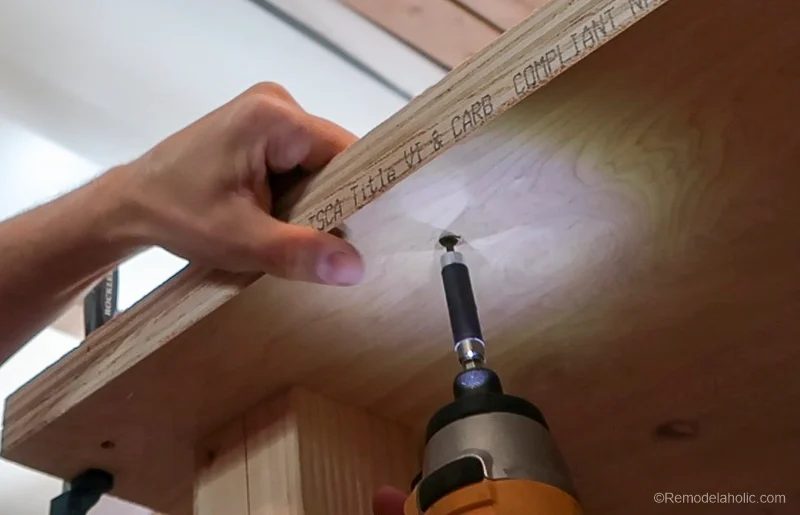
Attach the second plywood workbench top the the top of the first plywood workbench top with wood screws from underneath. (Be sure the keep screws out of the path of the router channels for the T-Track.)At this point the table is all built and ready to use. I am taking it further though to add all the other goodies to it.
Part 2: Table Saw Hole and Shelf Preparation, Miter Lift Preparation
Cut out table saw hole with circular saw and jig saw. Measure out the size of your table saw top and cut it to fit that size.
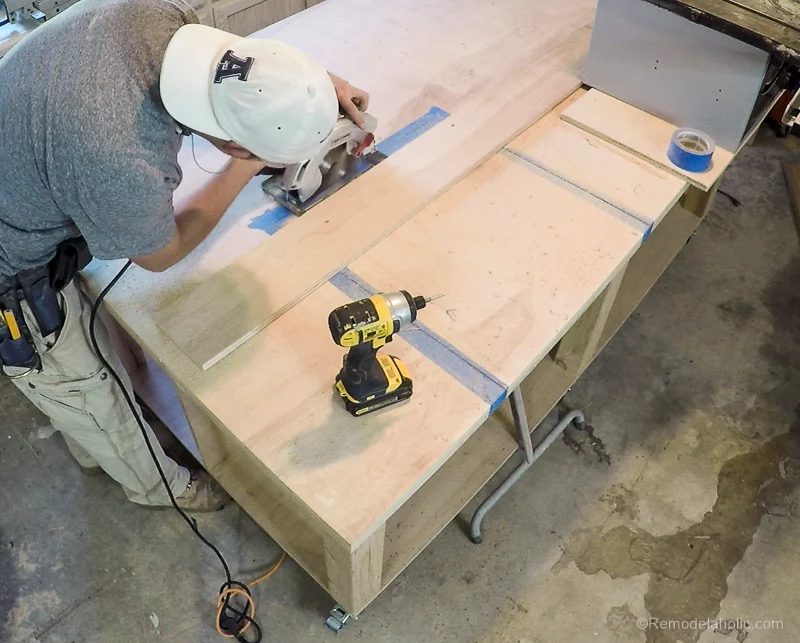
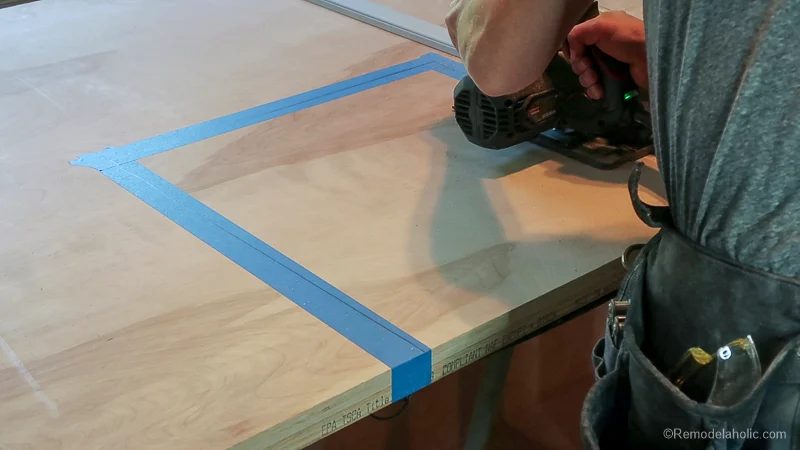
Use tape to protect the edge of the plywood.
Cut out and build table saw shelf
Cut table saw shelf to length and width (40″ x 24 3/4″).
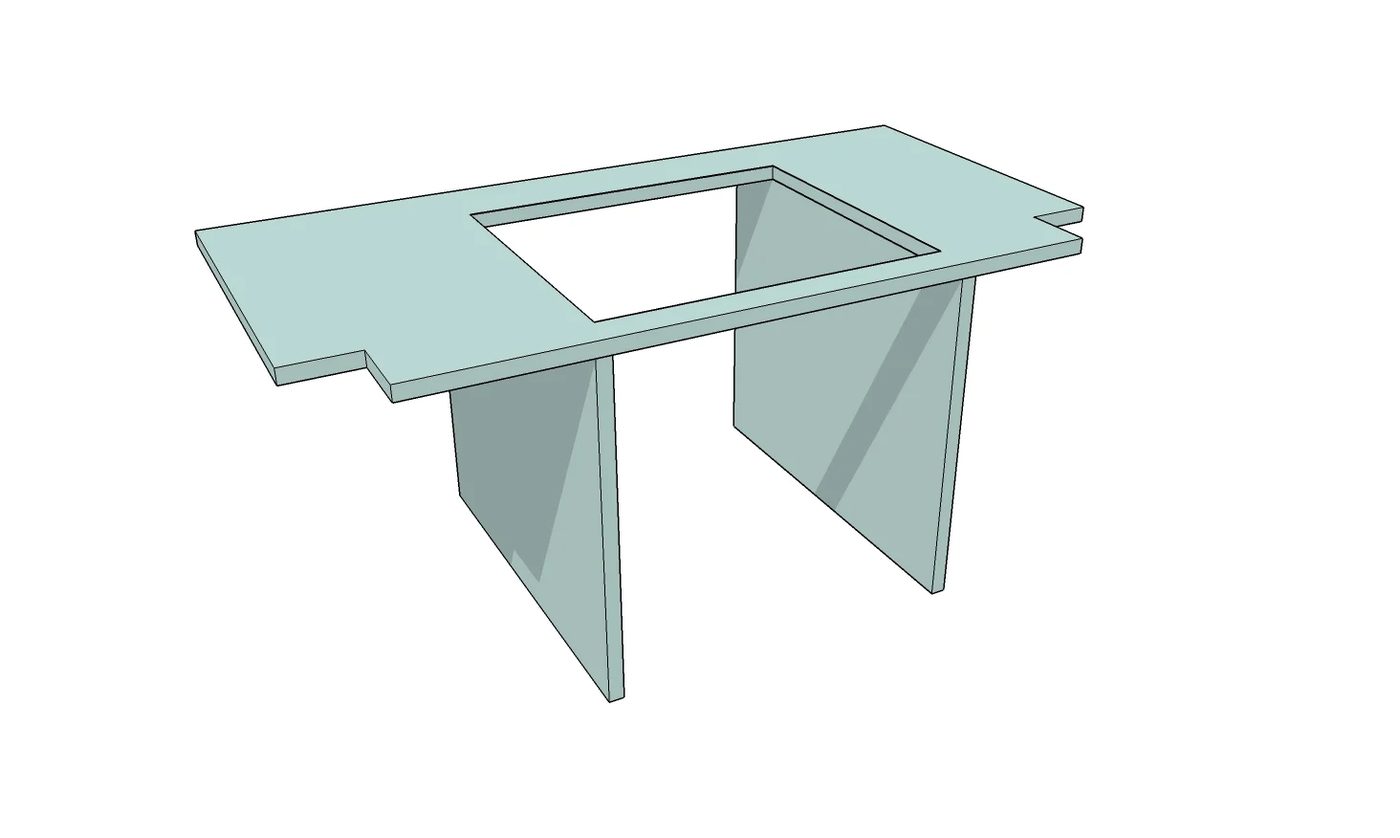
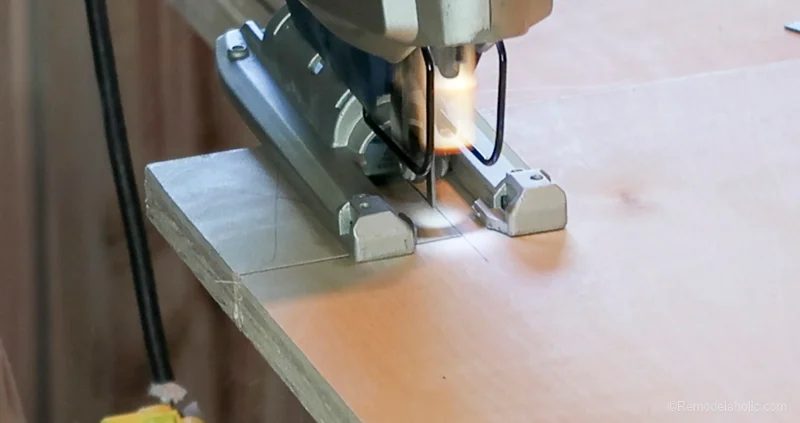
Cut out corners to wrap around the legs. Add 1/8″ to the leg thickness of 3 1/2″, to give room to install it without being too tight.
Cut out table saw shelf supports.
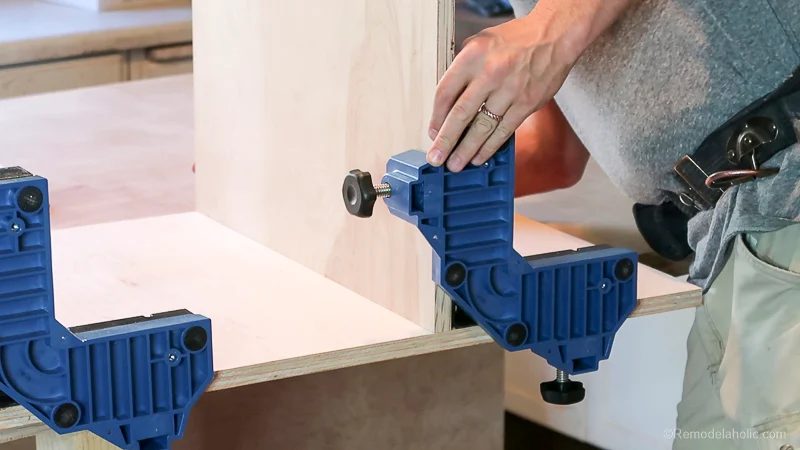
Assemble shelf and supports with screws. I used these solid corner clamping jigs for holding the supports in place while I screwed them together with 1 1/4″ wood screws.
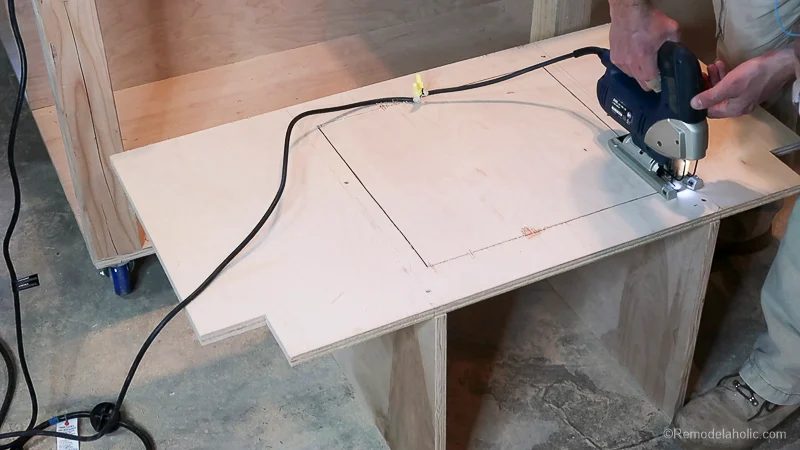
Cut out hole for table saw dust to fall into. This hole is 3/4″ smaller than the base of the table saw. That way the table saw still has something to sit on.
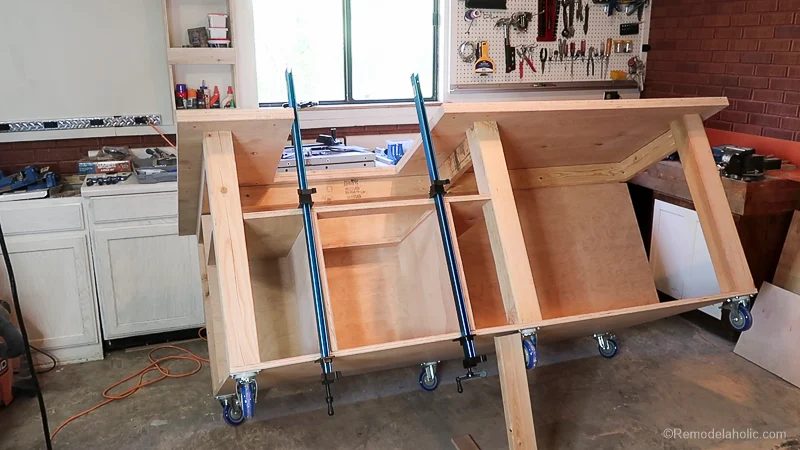
Attach shelf to table with 1 1/4″ wood screws. I jacked up the shelf and clamped it in place so I could screw it in underneath. I also squared it off and screwed it in through the partition.
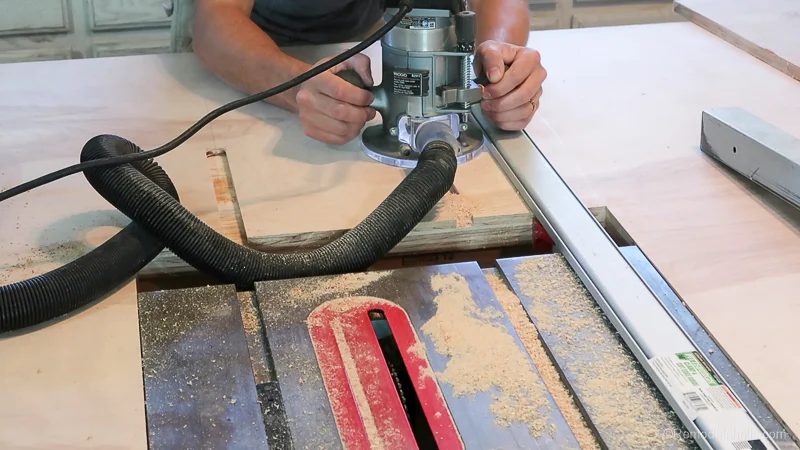
Rout out miter gauge outfeed channel in workbench top. Rout it long enough to get the miter past the blade of the table saw.
Part 3: T-Track Preparation and Installation
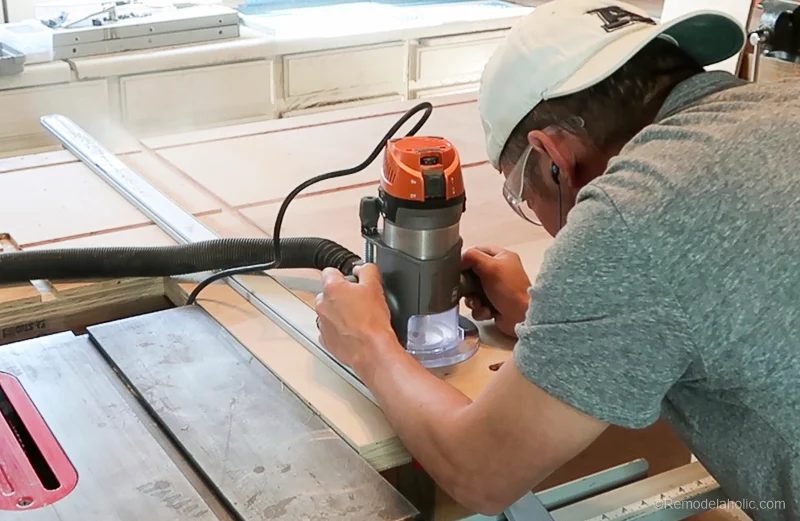
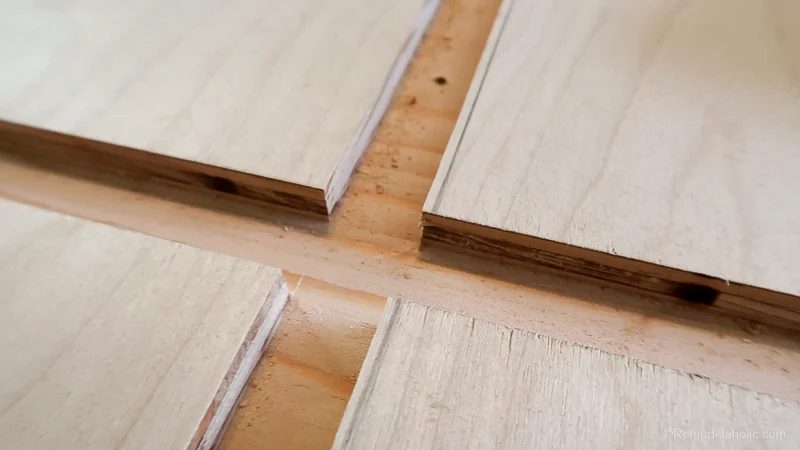
Route out T-Track channels over the entire table at 3/8″ deep. You want the channels to be deep enough to keep the top of the T-Track flush or just below the surface of the table top. See top view of table for layout of channels.This is where the T-Track intersections will go.
Router Lift Preparation
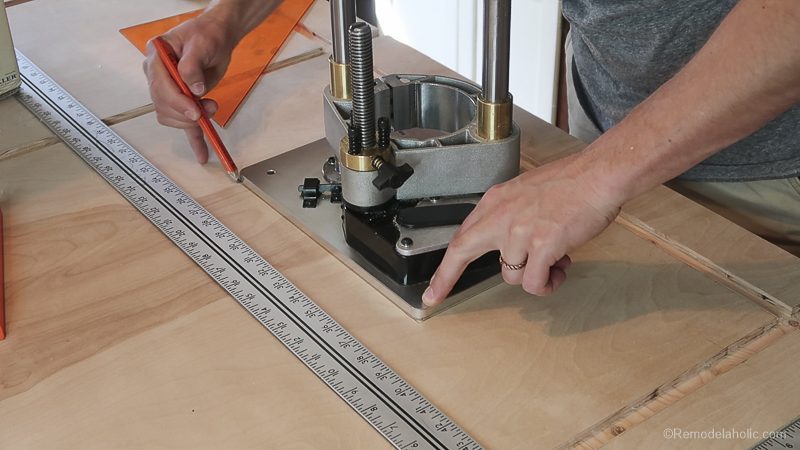
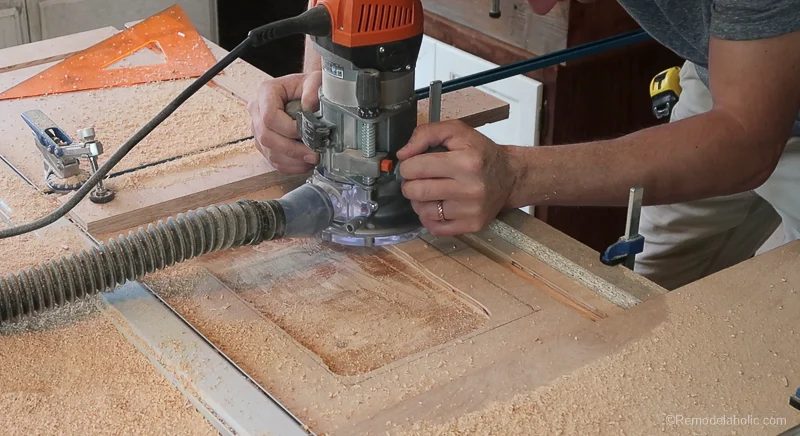
Cut out router lift hole with router at the depth of the lift plate. Just slightly bigger than 3/8″ deep. Start routing in the middle and work your way around in circles until you get to the edges. At the edges I clamped down wood as bumpers to keep my lines nice and square.
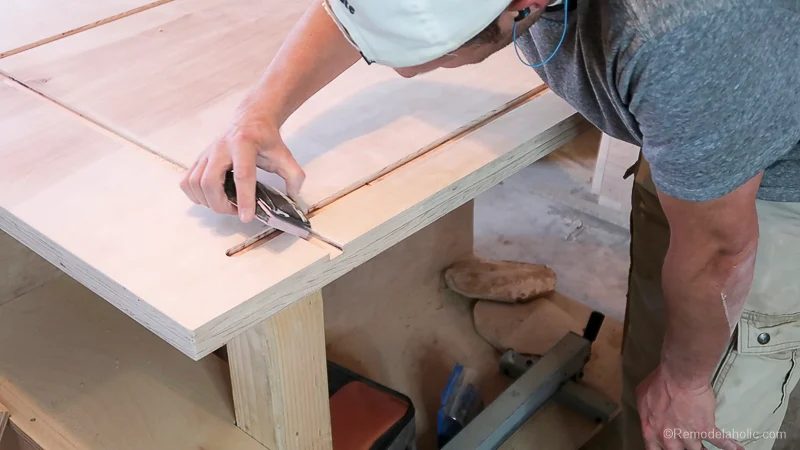
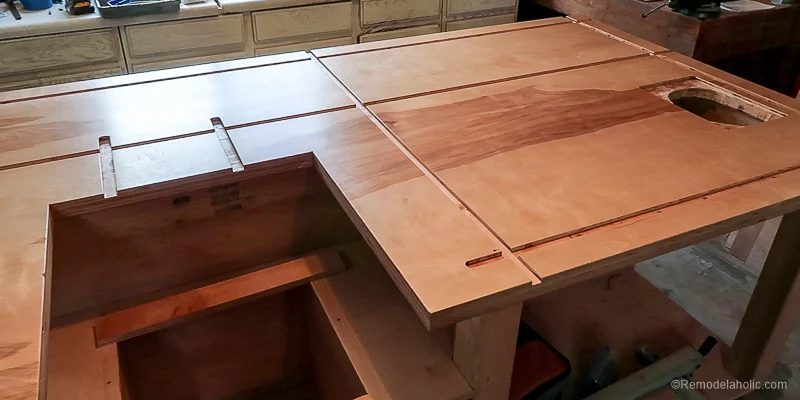
Sand and polyurethane table top. I sanded with 120 grit sand paper. I also rounded all the corners by hand so they wouldn’t be so sharp. On the outside edges I used an orbital sander to remove all the print on the boards and level the two top layers together. After I sanded I brushed in four layers of scratch resistant polyurethane. I also sanded with 150 grit sand paper between coats. I wanted it to be a really nice smooth surface.
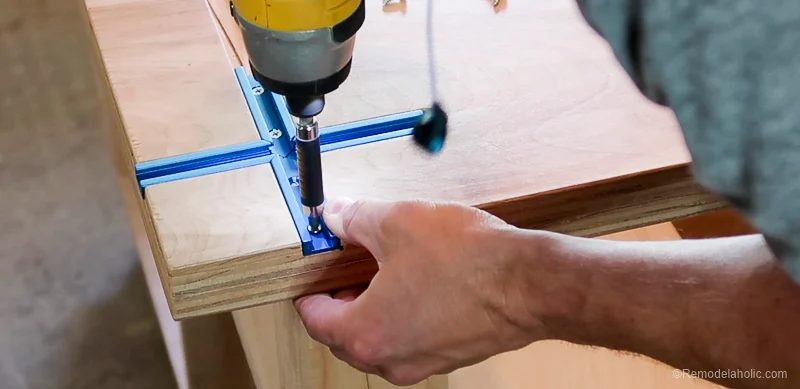
Now it’s time to install the T-Track. I started with the intersections then cut the T-Track to length with a metal blade on the jig saw. This part was fun because it was all coming together.
Part 4: Table Saw Installation
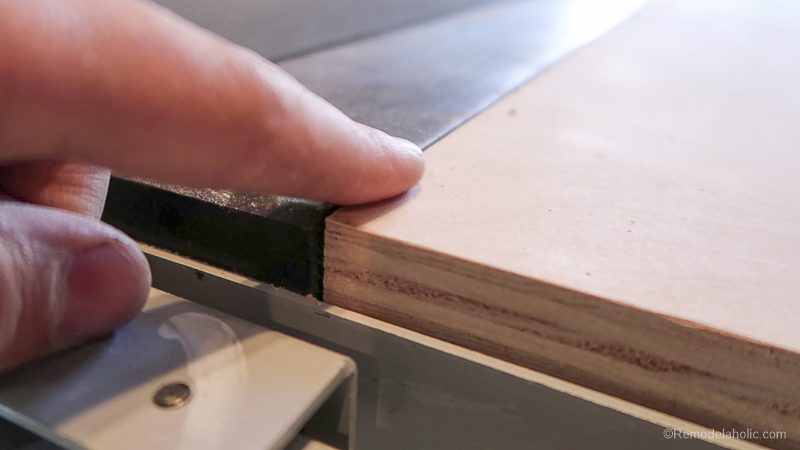
Level the table saw with shims. I gave myself some wiggle room to be able to shim it up to the right height of the table top. I got it nice and flush with the top.
Part 5: Router Lift Installation
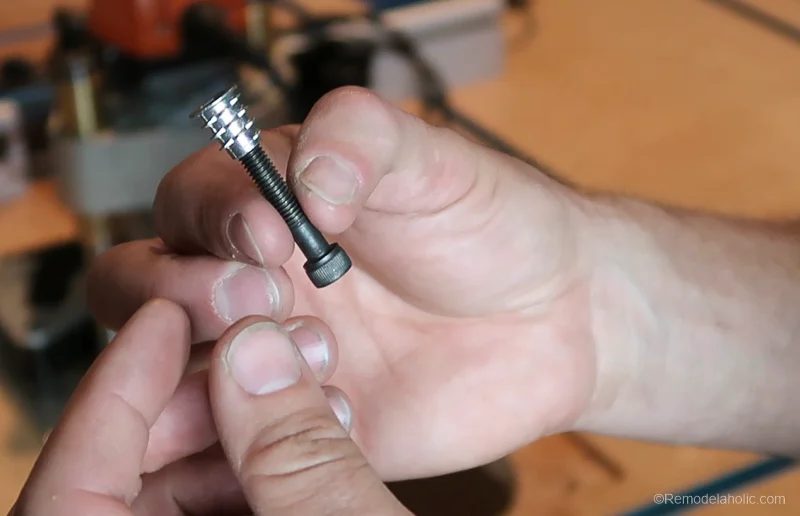
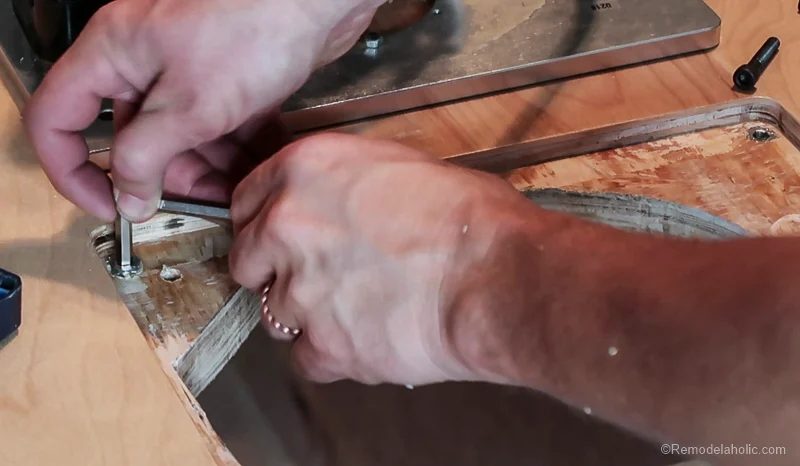
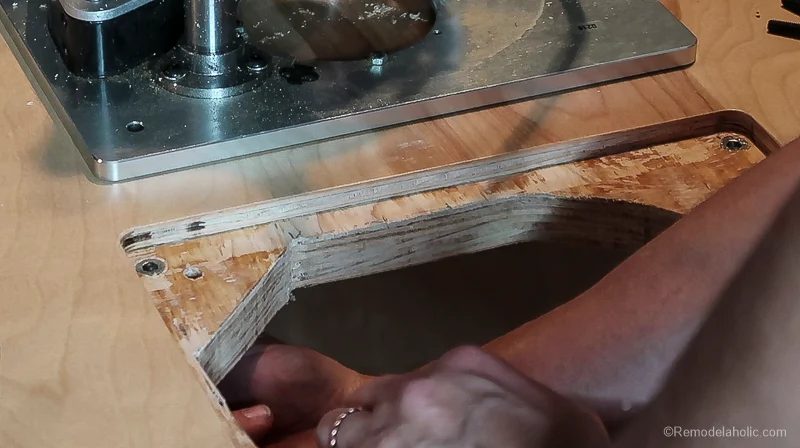
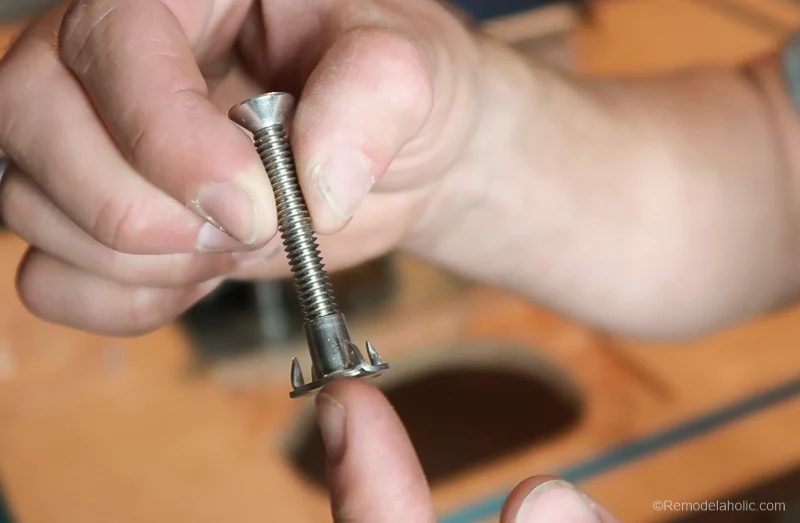

Install router lift adjustment screws. I installed four of these adjustable screws around each corner of the router lift for fine tuning the lift to the table. I had to go to the hardware store and pick these up. Once these are installed, all you need to do with this screw is reach under the table to level out the router lift flush with the top of the table. You should only have to do this once when you first install the lift.Here is a picture of the screws and how they are installed. Drill a hole for the nut and screw it in with an Allen wrench. Then reach under and make the fine tunes adjustments to the level of the lift.This is a longer version of the two screws that came with the lift. Because the table was 1 1/2″ thick, the screw that came with the lift was too short. I added the nut to a longer screw that matched. The nut gets hammered into the bottom of the table, so it would clamp the lift on really tight.This is how it ended up. Nice and flush.
Part 6: Bench Vise and Bench Vise Block Installation
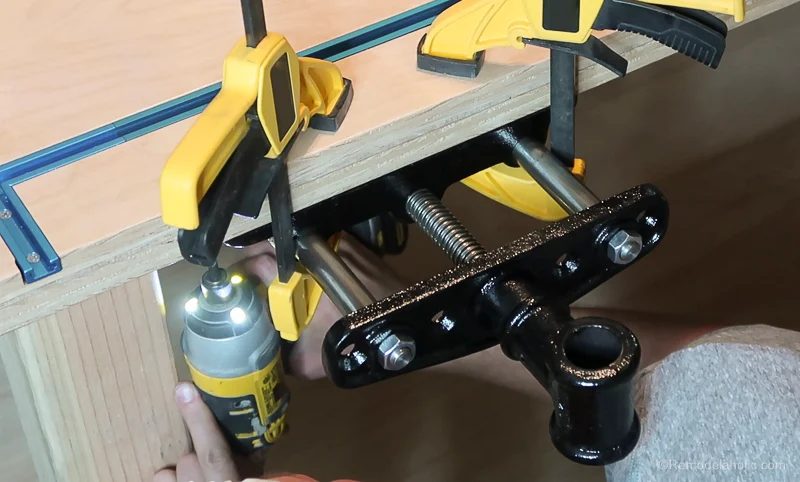
Install vice with 1 1/4″ wood screws to the base of the workbench table top. I clamped the vise in place and pre-drilled the holes to make it easier to screw in.
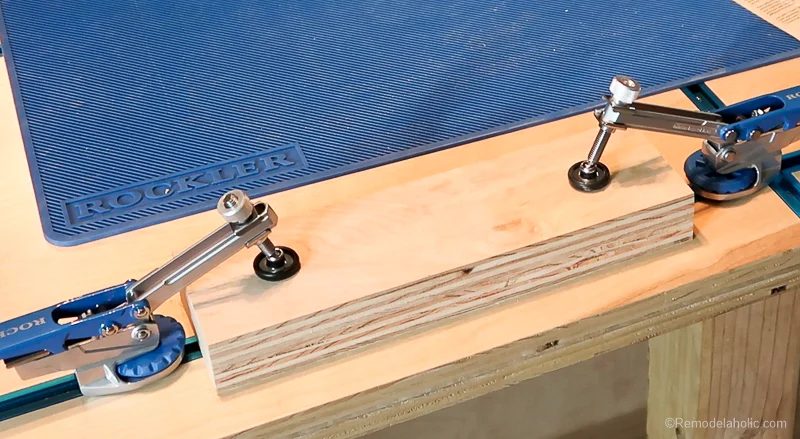
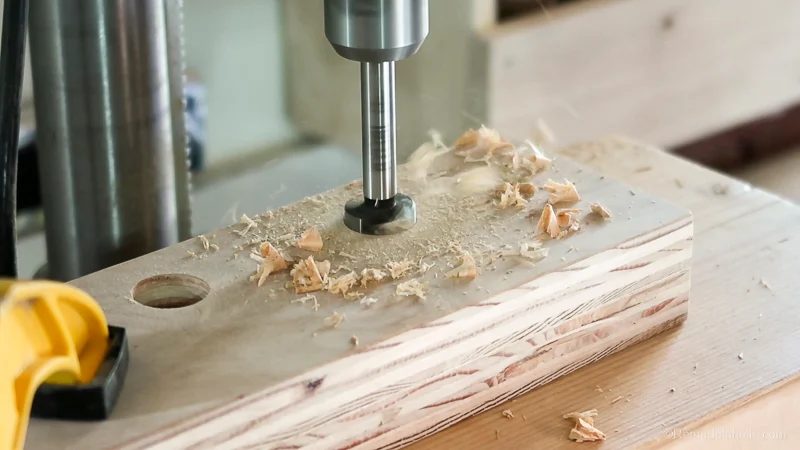
Build a block for the the vise. Cut out two blocks of wood at (12″ x 4″). Glue them together. Drill three holes for the three bars of the vise to slide through. Sand and polyurethane the block.
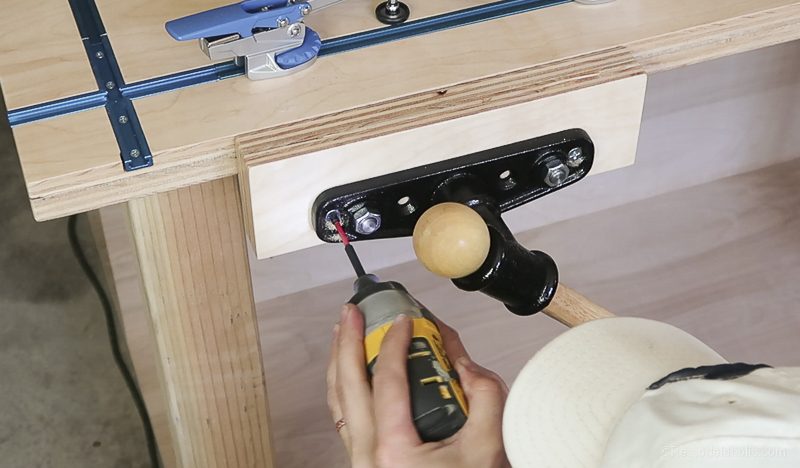
Remove the two big nuts at the end of the vise. Install the block of wood you just made over the three bars of the vise. Align the block with the top of the table then screw in four big 1 1/4″ wood screws through the black metal vise into the block of wood to hold it in place.
Whow! That was a lot of work… But the thing is, it’s done and ready to use. I plan on this table lasting FOREVER!
Now I need to take the time to find out what tools go where and customize the spaces under the table for them. I also have plans to build the doors like I mentioned in the design. I will have to let you know how that goes in the near future.
Thanks for reading this post and stay tuned for more shop updates.
Let me know if you have any good suggestions about how you organize your shop and what has been working well. I would love to hear your feedback!
More woodworking plans:
- Hoosier Step Stool/Barstool Step Ladder
- Portable Wood Wedding Arch/Arbor
- Handmade Barn Door Baby Gate and Dutch Door
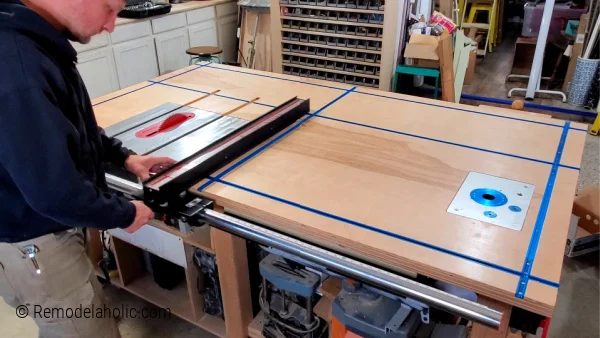
All About My Table Saw Workbench
- GET THE WORKBENCH PLANS
- Read more about the workbench build + features
- 50″ table saw fence upgrade
- 3-year review of the workbench
- Building a flip-over stepstool ladder (that fits inside the workbench)
- Plus see more of our garage workshop setup