
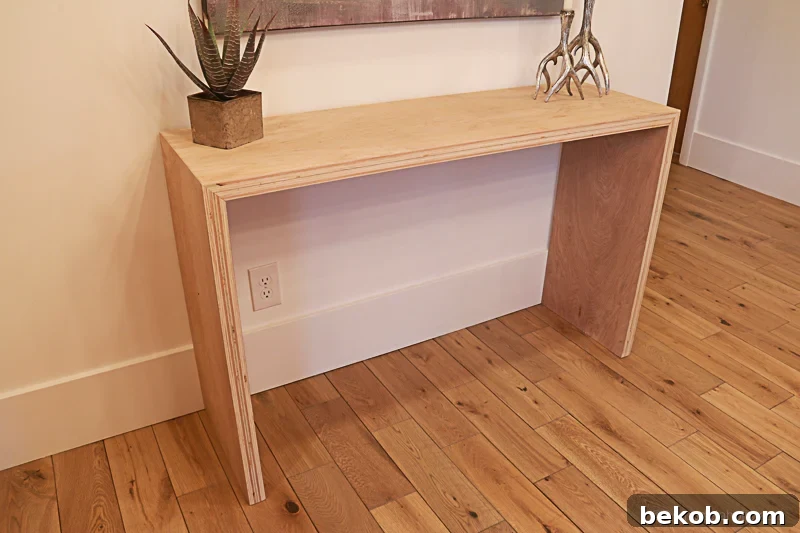
Welcome to the latest installment of our popular Plywood Pretty series! Today, we’re unveiling a project that masterfully showcases the inherent beauty and versatility of plywood: a sleek, modern waterfall console table. Crafted from a single sheet of plywood, this design celebrates the material’s unique character, from its distinctive grain patterns to its striking banded edges. This console table isn’t just a piece of furniture; it’s a statement, offering both elegance and functionality to any living space. The innovative construction, utilizing two precisely cut and stacked layers of plywood, results in a substantial 1.5-inch thick profile, lending an unexpected depth and richness that truly elevates its modern aesthetic.
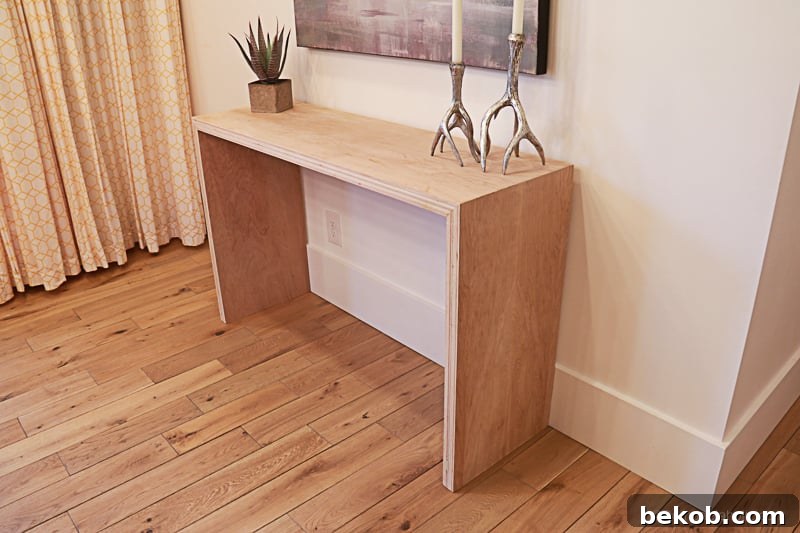
The beauty of plywood furniture lies in its blend of raw industrial charm and refined contemporary design. With this DIY project, you’ll learn how to transform a simple sheet of birch plywood into a sophisticated console table, perfect for entryways, hallways, or as an accent behind a sofa. The “waterfall” design, where the top surface visually flows down to form the legs, creates clean lines and a minimalist silhouette that is highly sought after in modern interior design. This project is a fantastic opportunity for DIY enthusiasts to hone their woodworking skills while creating a functional and stylish piece that rivals high-end retail options.
For this particular build, achieving that impeccably smooth and modern finish is crucial. Plywood, while beautiful, can sometimes reveal small voids within its layers when cut, which can detract from the pristine look we’re aiming for. To combat this, we’re excited to feature a fantastic partner for today’s project: Elmer’s ProBond Wood Filler. This product is indispensable for ensuring a flawless surface, making those exposed plywood edges look polished and professional.
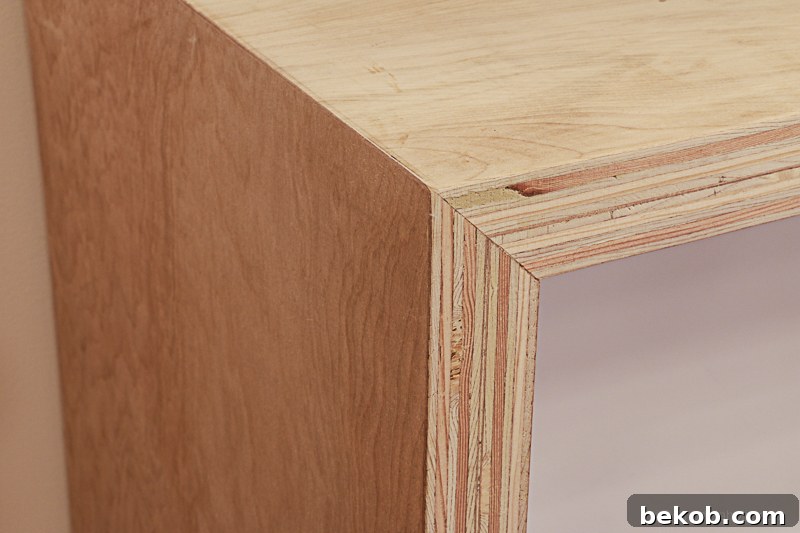
The elegance of this modern console table comes from the thoughtful combination of its banded plywood edges and the precisely mitered waterfall joints. These elements contribute to its sleek and interesting profile, making it a true focal point in any room. As mentioned, plywood’s layered construction can sometimes present small voids, especially along cut edges. Elmer’s ProBond Wood Filler comes to the rescue, allowing us to easily fill these imperfections, resulting in a seamlessly smooth and refined surface that perfectly complements the table’s contemporary design. This attention to detail ensures that your handmade piece looks professionally crafted and ready to impress.
For visual learners, we’ve prepared a comprehensive video tutorial that walks you through every step of this project. You can watch the full guide here. Don’t forget to give it a thumbs up and subscribe to our channel for more inspiring DIY woodworking projects and home improvement ideas!
Crafting Your Own Modern Waterfall Plywood Console Table
This post contains affiliate links, which means we may earn a small commission at no extra cost to you if you make a purchase through them. Learn more and read our full disclosure policy here.
Building your own furniture can be an incredibly rewarding experience, and this DIY waterfall plywood console table is no exception. It’s an accessible project that allows you to create a high-impact piece with a relatively low investment in materials. The key to success lies in careful planning, precise cuts, and patience during assembly and drying. Let’s gather everything you’ll need to embark on this exciting woodworking journey.
Materials Required for Your Plywood Console Table
- (1) 4′ x 8′ x 3/4″ Sheet of Birch Plywood: Opt for high-quality birch plywood for its attractive grain and smooth surface, which is ideal for exposed edges.
- (8) #10 25/32″ x 2-3/64″ Biscuits: Essential for strengthening mitered joints and ensuring perfect alignment.
- (1) Elmer’s Carpenter’s Wood Glue Max: A strong, reliable wood glue is critical for creating durable laminated pieces and robust joints.
- (1) Elmer’s ProBond Wood Filler (we used Natural): For filling any voids or imperfections in the plywood edges, ensuring a smooth, finished look.
- (6) 1 ½” screws for scrap wood (for clamping assistance while drying): These are temporary fasteners to hold alignment.
Having the right tools is paramount for precise cuts and a smooth assembly. Ensure all your saws are equipped with sharp blades for clean cuts, especially when working with plywood to minimize tear-out.
Tools Essential for This Project
- Table Saw: For ripping long, straight cuts and achieving consistent widths for your plywood pieces.
- Miter Saw: Ideal for cross-cutting and making accurate mitered joints for the waterfall effect.
- Circular Saw: Useful for making initial rough cuts on the large plywood sheet before moving to more precise tools.
- Biscuit Joiner: Creates slots for biscuits, providing excellent joint strength and alignment.
- Drill: For driving screws, particularly for the temporary bracing during glue-up.
- Spring Clamps (lots of them): Essential for applying even pressure during glue drying to ensure strong bonds.
- Tape Measure: For accurate measurements throughout the project.
- Pencil: For marking cuts and measurements.
- 80/120/220 Sandpaper and Sanding Block: For preparing surfaces, smoothing edges, and achieving a professional finish.
- (2) Saw Horses: To support the plywood sheet and workpieces safely during cutting and assembly.
Precision is key for a truly seamless waterfall effect. Take your time with measurements and cuts, referring back to these plans often.
Detailed Plans with Dimensions
Understanding the dimensions and layout is crucial before you start cutting. These plans provide a visual guide to help you conceptualize the table and ensure accuracy in your cuts.
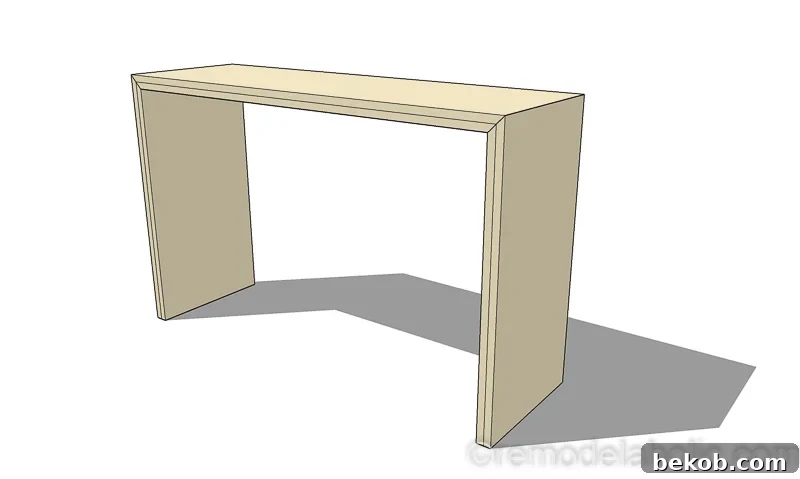
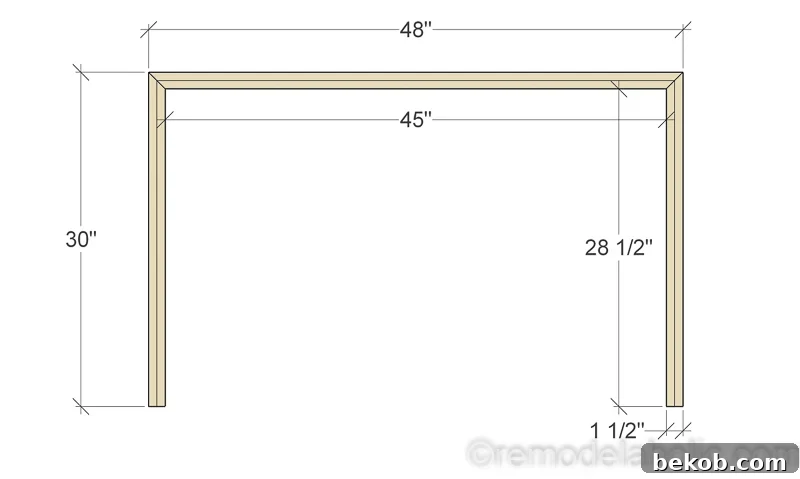
Front View: This perspective highlights the overall width and height of the console table, giving you an idea of its presence in a room.
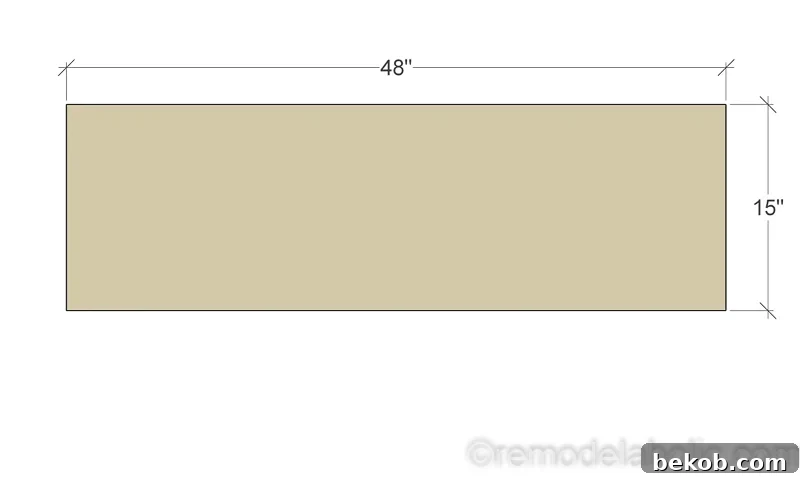
Top View: Essential for understanding the depth and layout of the tabletop.
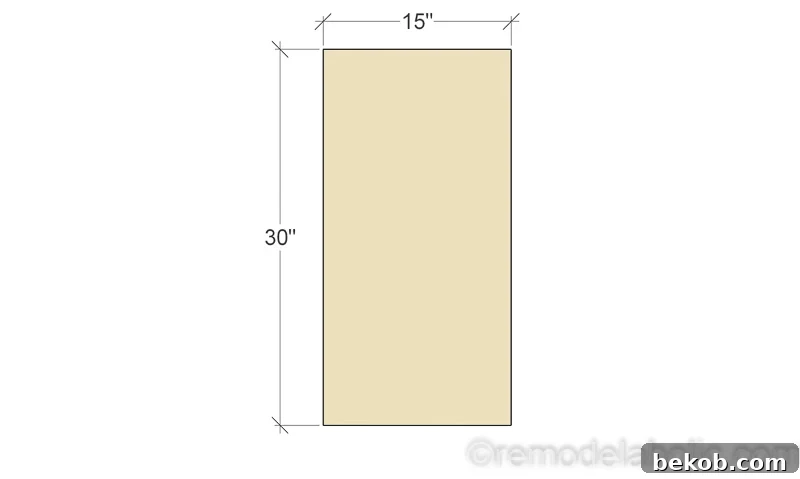
Side View: Illustrates the unique waterfall design and the double-thickness of the plywood elements, providing a clear reference for the overall structure.
By creating double-thickness components, we achieve a substantial and high-quality feel for this table. Remember to consider the grain direction when making your cuts, as this will affect the final aesthetic of your project.
Cut List (Length x Width x Thickness)
Begin by making rough cuts slightly larger than your final dimensions. This allows for precise final trimming after lamination, ensuring perfectly straight and square edges.
Rough Cuts from the 4’x8′ Plywood Sheet
- (2) Top Panels – 50” x 15 ¾” x ¾”
- (4) Leg Panels – 32” x 15 ¾” x ¾”
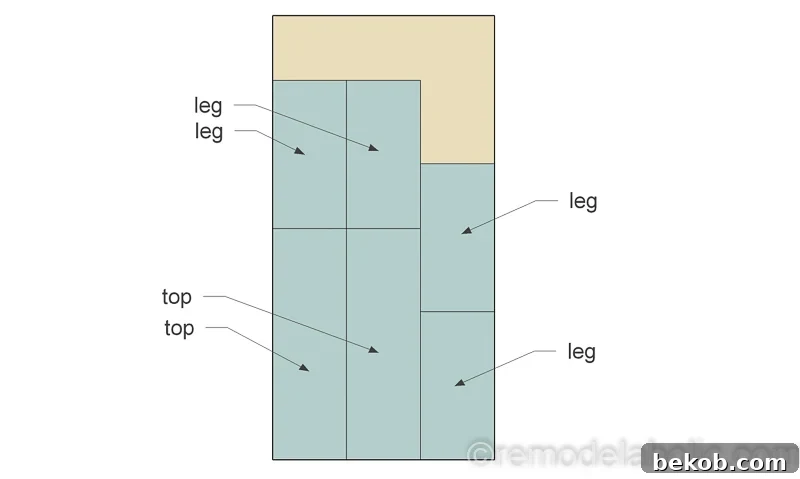
After the initial lamination and drying, these rough-cut pieces will be trimmed to their precise final dimensions. This two-stage cutting process guarantees exceptionally clean and accurate edges for your waterfall table.
Final Cuts (after pieces are glued together)
- (1) Top – 48” x 15” x 1 ½”
- (2) Legs – 30” x 15” x 1 ½”
This diagram illustrates the efficient layout for cutting all necessary components from a single standard 4×8 sheet of plywood. Planning your cuts carefully before you start is key to minimizing waste and ensuring you have all the pieces for your project.
Step-by-Step Construction Guide
Follow these detailed steps to construct your beautiful plywood waterfall console table. Take your time with each stage, ensuring accuracy for the best results.
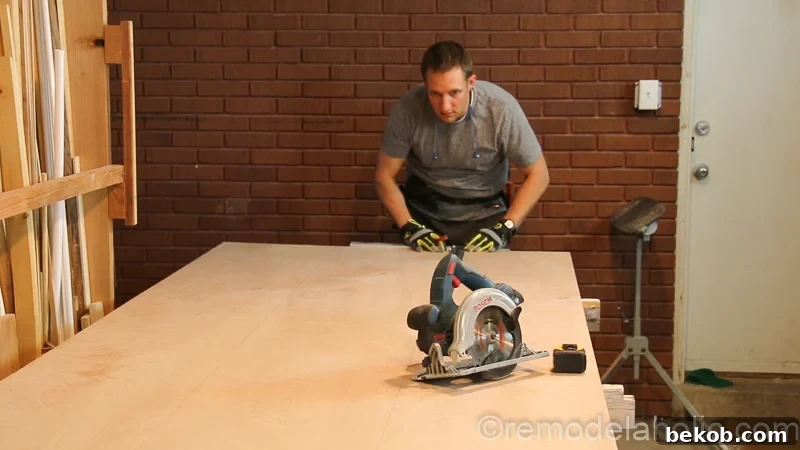
- Initial Rough Cuts: Begin by carefully rough cutting the six panels from your full sheet of birch plywood using a circular saw. You’ll need four boards for the legs and two for the tabletop, following the rough dimensions provided in the cut list. These initial cuts don’t need to be perfectly precise, as they will be trimmed down later, but aim to be slightly oversized to allow for clean final cuts.
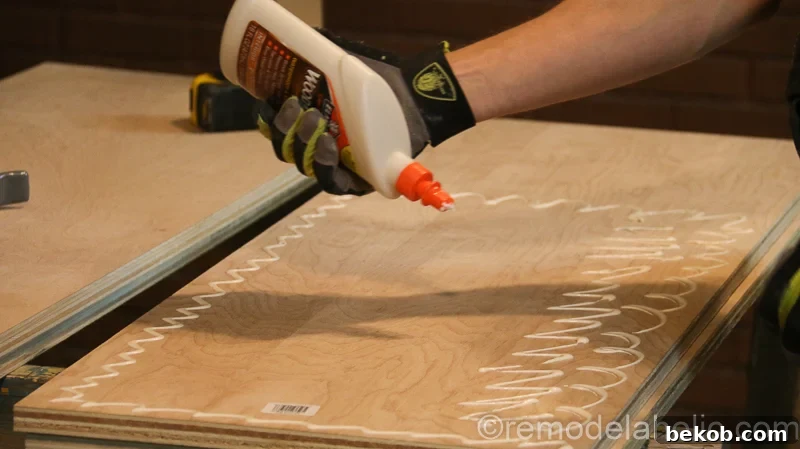
- Laminating the Plywood for Thickness: To achieve the desired 1 ½” thickness for both the legs and the tabletop, you will glue two ¾” plywood pieces together for each component. Apply a generous, even layer of Elmer’s Carpenter’s Wood Glue Max to the entire surface of one leg board. Carefully place a second leg board directly on top, aligning the edges as closely as possible.
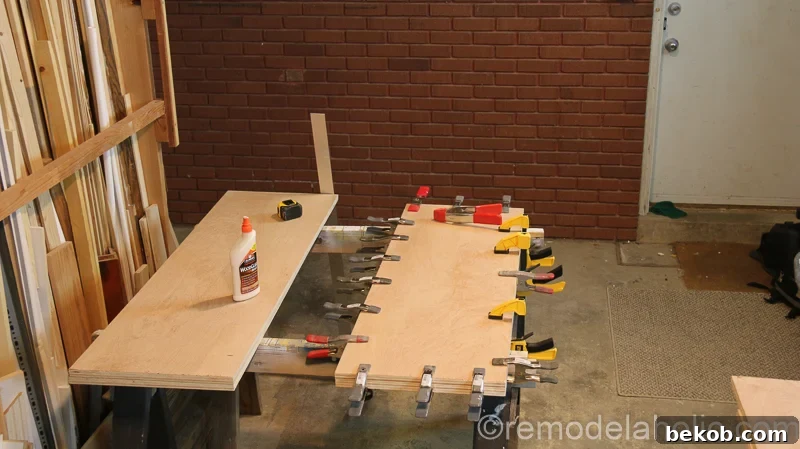
Once the two pieces are stacked, apply firm and even pressure across the entire surface using a multitude of spring clamps. This step is crucial for creating a strong, void-free bond. Use as many clamps as you can, ensuring pressure along all edges and across the middle. Repeat this process for the second leg and for the two tabletop pieces. Allow these laminated pieces to dry completely overnight, or for the duration recommended by your wood glue manufacturer, before proceeding to the next step. A strong bond here prevents future delamination and ensures structural integrity.
- Precision Trimming: After the glue has fully cured, take your laminated leg and tabletop pieces to the table saw. Carefully trim both long sides of each piece to their final width, ensuring they are perfectly straight and parallel. This step is critical for achieving clean, crisp exposed plywood edges that define the modern aesthetic of this table.
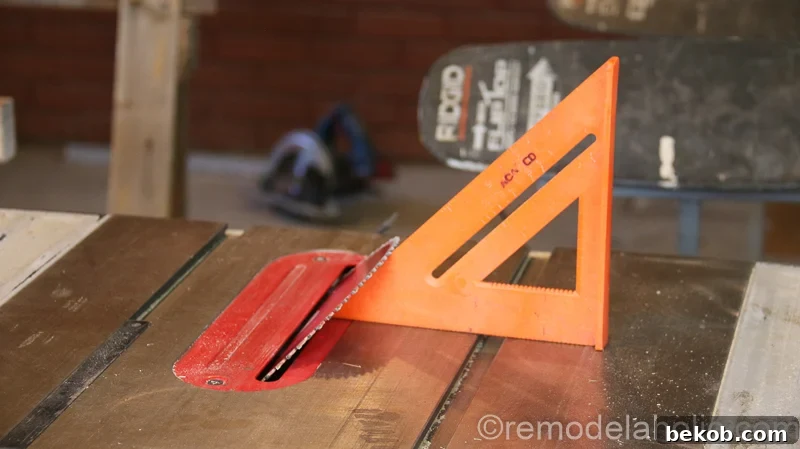
- Cutting the Mitered Waterfall Edge: The signature “waterfall” effect is achieved with precise mitered joints. On the table saw, set your blade to a 45-degree angle. First, cut the mitered edge on one end of your tabletop piece. Then, precisely cut the board to its final length (48 inches for the top, 30 inches for the legs), ensuring the miter is at the correct end for assembly. Repeat this for both leg pieces. Accuracy here is paramount for a seamless joint.
- Biscuit Joinery for Strength and Alignment: Using a biscuit joiner, cut slots for the #10 biscuits along the mitered edges of both the legs and the tabletop. These biscuits will serve a dual purpose: they add significant strength to the mitered joints, which can otherwise be fragile, and they provide excellent alignment during glue-up, ensuring your table pieces come together perfectly flush. Make sure the depth settings on your biscuit joiner are correct for the #10 biscuits.
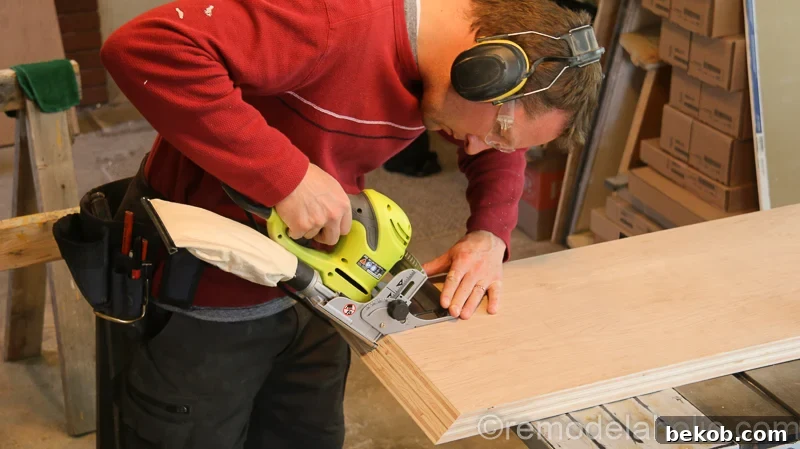
- Prepare for Leg Support: Cut several pieces of scrap wood to 48” long. These will act as temporary supports to maintain the precise 48-inch spacing between the legs during the critical gluing and drying phase, ensuring the table remains square. Having these ready before you apply glue is crucial for a smooth assembly.
-
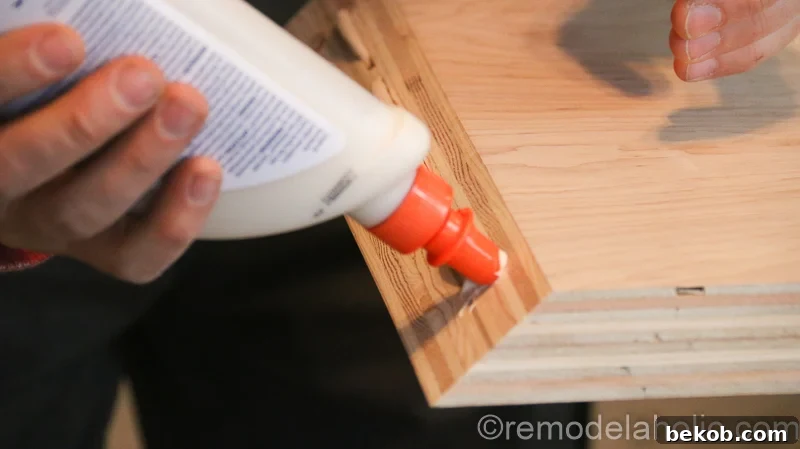
Gluing and Assembling the Waterfall Joints: Place the tabletop upside down on a flat, protected surface. Generously apply wood glue to the entire mitered area and within each biscuit hole. Insert the biscuits into the slots on the tabletop, ensuring they are fully seated, and then apply more glue over the biscuits. Carefully position one of the legs, ensuring its mitered edge perfectly aligns with the tabletop’s mitered edge. Gently press the leg into place, making sure the biscuits slide into their corresponding slots. Repeat for the other leg.

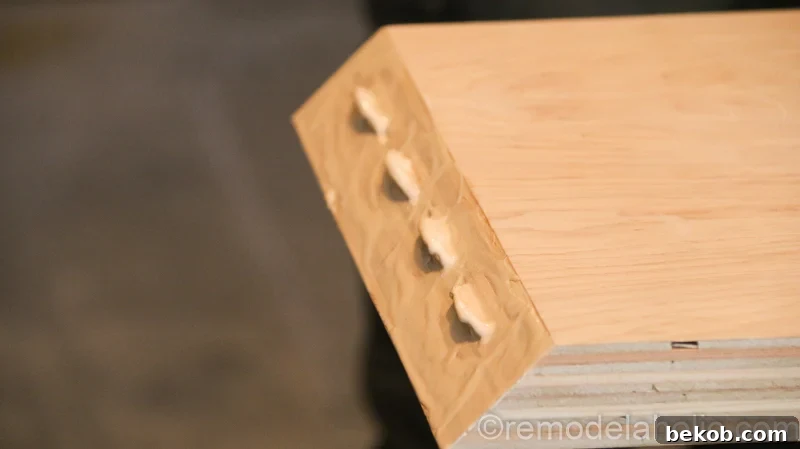
- Squaring and Securing During Drying: This is arguably the most critical step to ensure your console table is perfectly square and stable. Use your 48-inch scrap wood pieces to brace the legs, screwing them to the bottom of the table to keep the legs precisely 48 inches apart. Then, attach another piece of scrap wood diagonally across the table from one leg to the other.
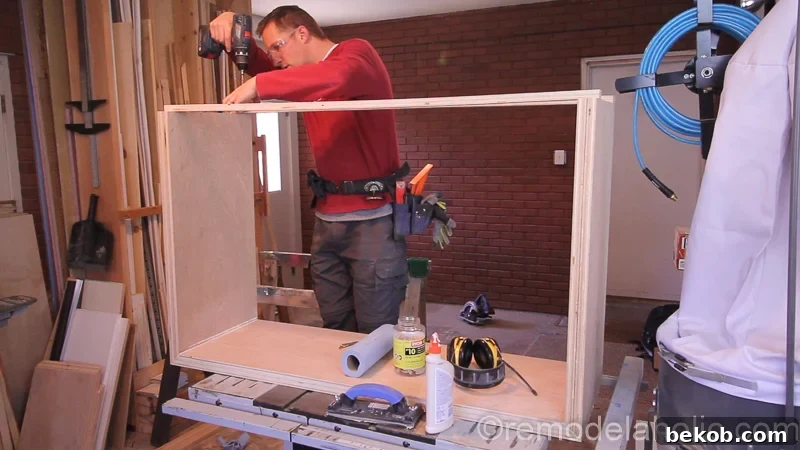
To check for squareness, measure the diagonal distance from corner to corner. When these two diagonal measurements are exactly the same, your piece is square. Adjust the diagonal bracing as needed until it is perfectly square.
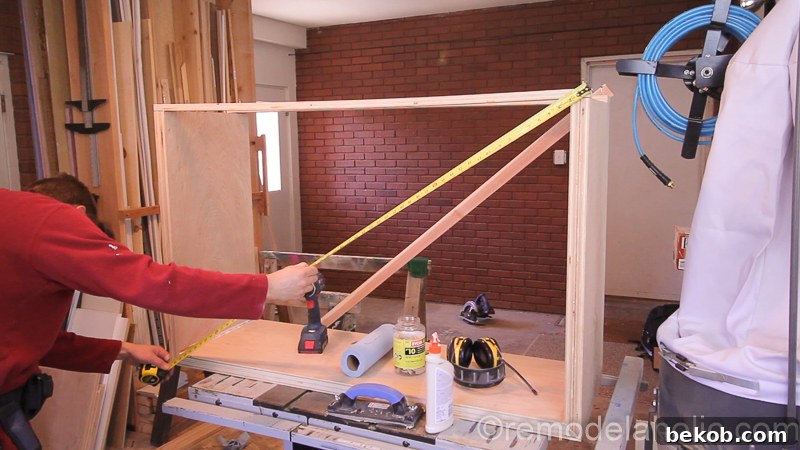
Secure the legs with an additional cross support to maintain this square position. Leave the table undisturbed to dry overnight, or even longer if humidity is high, ensuring the glue creates a rock-solid bond.
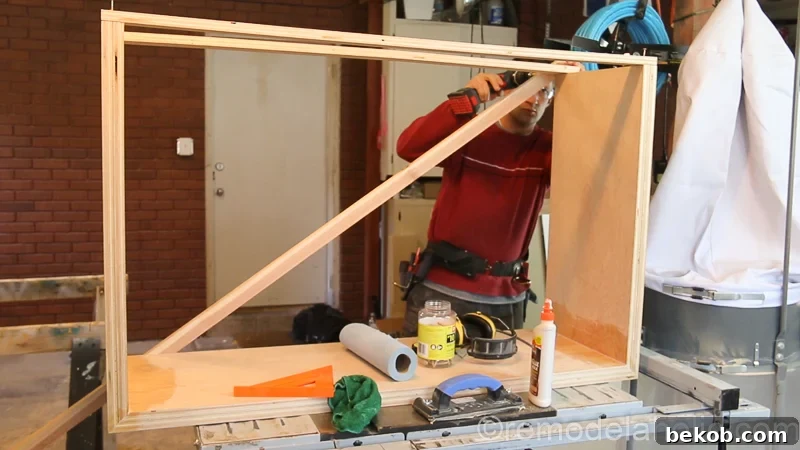
- Finishing and Void Filling: Once the glue is completely dry, carefully remove all the temporary scrap wood bracing. Stand the table upright. Now it’s time for the crucial clean-up and finishing phase. One common characteristic of plywood, especially when cut, is the occasional appearance of small void spaces where layers of veneer are missing. These imperfections can be noticeable on the exposed edges.
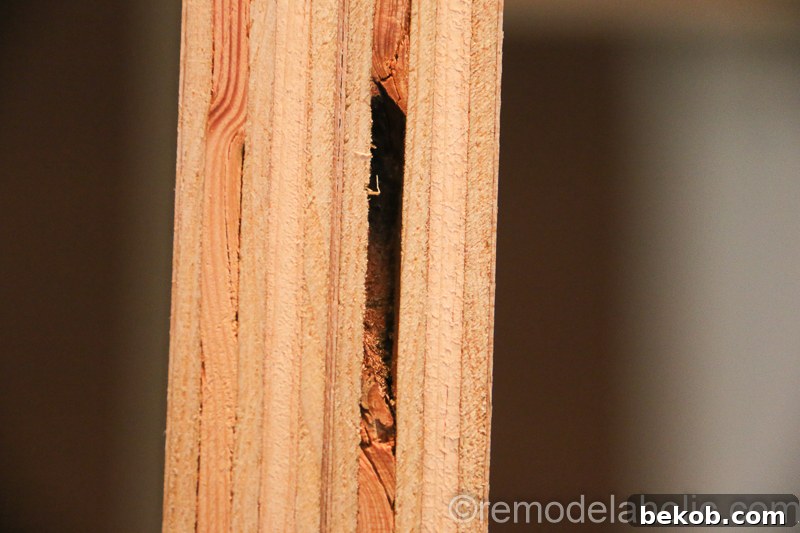
To achieve a perfectly smooth, professional-looking surface, we highly recommend using Elmer’s ProBond Wood Filler in Natural. This product is fantastic for seamlessly filling any voids, gaps, or small imperfections along the plywood edges. Simply apply the filler, smooth it out, and allow it to dry. If you plan to stain your wood to achieve a different color, Elmer’s also offers a stainable wood filler option that blends beautifully with various wood tones.
- Sanding for a Flawless Finish: Once the wood filler is dry, it’s time to sand. Start with 80-grit sandpaper to remove any excess filler and smooth out major imperfections. Gradually move to 120-grit, then 220-grit sandpaper, ensuring all edges and surfaces are incredibly smooth to the touch. Pay special attention to the exposed plywood edges to highlight their layered aesthetic. This meticulous sanding is crucial for a high-quality finish, whether you choose to seal, stain, or paint.
- Apply Your Chosen Finish: With the sanding complete, you have several options for finishing your console table. You can leave the birch plywood natural, highlighting its beautiful grain with a clear topcoat like polyurethane or lacquer. Alternatively, you could apply a wood stain to change its color, or even paint it to match your home’s decor. Always follow the manufacturer’s instructions for any finishing product you choose, applying thin, even coats and allowing adequate drying time between applications.
This sponsored conversation was written by us on behalf of Elmer’s. The opinions and text are entirely our own, reflecting our genuine positive experience with their products in achieving a professional finish for this project.
Explore More Creative Plywood Projects from Our Collection
Plywood’s versatility truly shines in DIY projects, and this console table is just one example of its potential. If you’re inspired by the “Plywood Pretty” concept, we invite you to check out these other fantastic plywood projects that demonstrate how a single sheet can be transformed into beautiful, functional furniture and decor:
Start with this clever leaning shelf, an excellent solution for stylish vertical storage without permanent installation.
Next, challenge yourself with this stacked plywood bench using half-lap construction, a brilliant technique that results in a sturdy and visually appealing piece.
For a functional and customizable storage solution, learn how to make this easy jumbo plywood pegboard, perfect for craft rooms, workshops, or even stylish kitchen storage.
And here’s a sneak peek of another stunning creation, an angled leg plywood bench, coming up on the blog very soon! 😉
Don’t miss out on any of our innovative and beautiful DIY projects! See all of our other plywood projects here, and be sure to subscribe by email or RSS. You can also follow along over on Facebook and Instagram using the hashtag #PlywoodPretty, so you’ll never miss out on new inspirations and tutorials!