
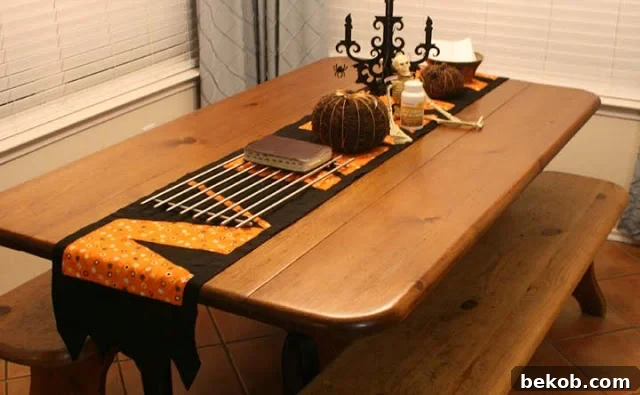
This year, Halloween has taken over my home! I’ve always collected decorations, but never really put them up. Now that my daughter, Etta, is here, I’m all in, transforming our place into a spooky, Halloween haven.
After decorating the front room, I realized my dining table needed some love. So, I decided to make a Halloween table runner. I pieced it together, and I have a newfound respect for quilters! Getting everything perfectly flat was a challenge, and I had to pick out more than a few seams.
DIY Halloween Table Runner Tutorial
Here’s a basic guide to creating your own festive table runner. Be warned, I often start a project with only a general idea, so my tutorials might be a little rough around the edges! I’ve included pictures to help clarify along the way.
Step 1: Planning Your Runner
First, decide on the desired width and length of your table runner. Consider your table size and the look you’re going for.
Step 2: Fabric Selection
Head to the fabric store and choose some fun, festive fabric! Look for Halloween-themed prints, colors, or textures that appeal to you. Don’t forget to check for sales and discounts!

Step 3: Fabric Cutting
Cut your fabric to the desired width. I believe I made mine 15 inches wide, but this is up to you. Remember to allow for seam allowances on all sides. It’s always a good idea to add a little extra to the width in case you need to trim the edges later to make sure lines are straight.
Step 4: Ironing is Key!
Ironing your fabric before you begin sewing is crucial for a professional-looking finished product. It makes a significant difference in how smoothly your seams lay and how neat your runner appears.
Step 5: Creating the Initial Shape
Begin by cutting a diagonal line several inches in from the edge of your fabric pieces, at one end of both fabric colors. This will create a four-sided shape with two parallel edges and two non-parallel edges. The specific shape is up to you, so feel free to experiment.
Step 6: Sewing the First Seam
Place the straight edges of your fabric pieces together, with the “good” sides (the sides you want to show) facing each other. Sew along the seam, connecting the two pieces. This will form the first part of your design.


Step 7: Pressing the Seams
After sewing the first seam, press the seam allowances down with an iron. I chose to sew over these seams for a little extra detail. This helps to set the seams and make them lie flat.


Step 8: Continuing the Pattern
To continue the pattern, lay the sewn piece face up on top of your cut fabric. Then, cut along the edge of the sewn piece, following its shape. Ensure the “good” sides of the fabric are facing up. This way they’ll be aligned the way you want them to look when the runner is laid out.
Step 9: Extending the Runner’s Length
Place the newly cut piece onto the runner, with the good sides together, and sew a seam to join them. Repeat steps 5-8 until your table runner reaches your desired length. Remember that all of my pieces are different sizes!


Step 10: Final Ironing and Trimming
Iron your entire runner again to ensure all seams are well-set. Carefully trim the edges to make them straight and even. This gives the runner a polished finish.

Step 11: Adding the Edging
Cut two long strips of fabric for the edging. These strips should be twice the finished width you desire for your edge, plus seam allowances. Place the good sides of the strips together and sew along the length of each side to form a tube.
Step 12: Folding and Ironing the Edging
Turn your edging so that the right side is on the outside. Fold the edge in half lengthwise, and press the fold with your iron. Next, fold the raw edge of the fabric under again, and iron again. This creates a neat, finished edge for your runner.
Step 13: Attaching the Backing
Use a single piece of fabric for the backing. It should be the same width and length as your quilted runner piece. Place it on the back of the runner and sew it in place. I have skipped a picture here. I placed it right under the edge I ironed under and sewed it together.


Step 14: (Sketchy!) Finishing Touches
This is where things got a bit more experimental for me, and I had to learn as I went! I made a few mistakes, but the trial and error process ultimately worked out. Because of the process, I didn’t take many photos. I am sorry, so I drew out the steps I took, since explaining it is just too difficult!


Enjoy Your Handmade Halloween Decoration!
You’re done! Place your festive table runner on your dining table and enjoy the spooky ambiance you’ve created.

