
Welcome, fellow home enthusiasts! Today, I’m thrilled to finally unveil the comprehensive journey of our master bedroom transformation – a project that, surprisingly, I’ve never fully documented here before. #BloggerFail, indeed! While I touched upon decorating the dresser some time ago, that only scratched the surface of the massive overhaul this space has undergone. Honestly, since we moved into our current home, the master bedroom was the very first room I set my sights on, a true passion project from day one. It desperately needed attention, and I was eager to dive in headfirst. Prepare yourselves for a truly dramatic “before and after” experience, starting with the really rough beginnings. Are you ready to see where it all began?
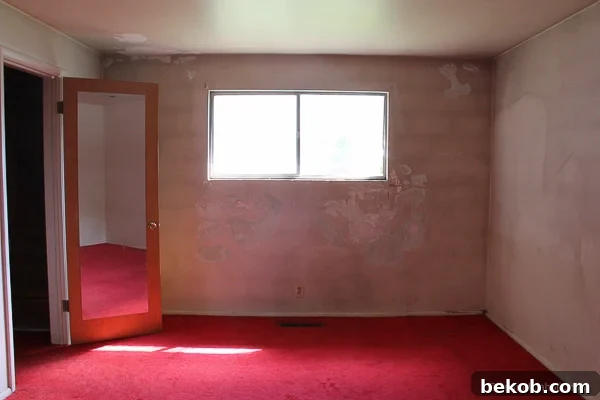
Brace yourselves for the ‘before’… Ta-da!
Before we delve into the gritty details, it’s important to understand the context. The lovely elderly couple who lived here before us were fiercely independent, refusing assistance from their children even during the last 12 years when the wife was blind. Consequently, the house had seen better days and was in a pretty rough state, especially our future master bedroom. Every corner told a story of neglect and a desperate need for a fresh start, and the carpet was arguably the loudest narrator of that tale.
The Great Carpet Rip-Out: A Renovation Tradition Begins
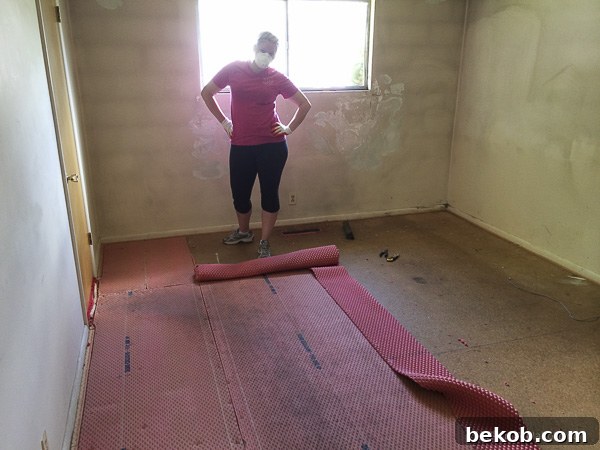
The “Elmo red” carpet, as we affectionately (or perhaps not-so-affectionately) dubbed it, was unequivocally the first thing in the house that had to go. No questions asked, no second thoughts. I vividly remember literally ripping it out on the very day our house closed. For me, it’s become somewhat of a personal tradition to tear out the carpet on closing day! There’s an incredibly cathartic satisfaction that comes with pulling up those old, worn fibers, symbolizing a fresh start and the shedding of the past. It just feels so wonderfully good to begin with a clean slate.
From Grimy to Gleaming: Temporary Fixes and Essential Upgrades
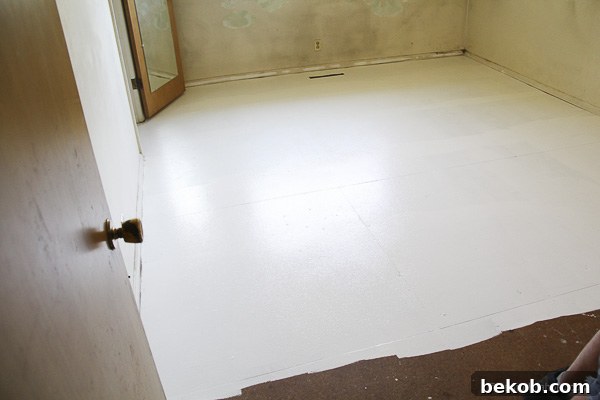
With the carpet gone, we were left with the bare subfloors, which, as you can imagine, weren’t exactly a vision of beauty. To make the space feel less… well, gross, and more habitable while we tackled other, more substantial projects, we decided to give the old subfloors a quick coat of paint. Who doesn’t have leftover paint lurking in their garage? (Being a remodelaholic certainly has its perks in this regard!). This temporary measure provided a much-needed psychological boost, making the room feel cleaner and more like a blank canvas, even if just for a little while.
Insulation and Framing: Building a Better Foundation
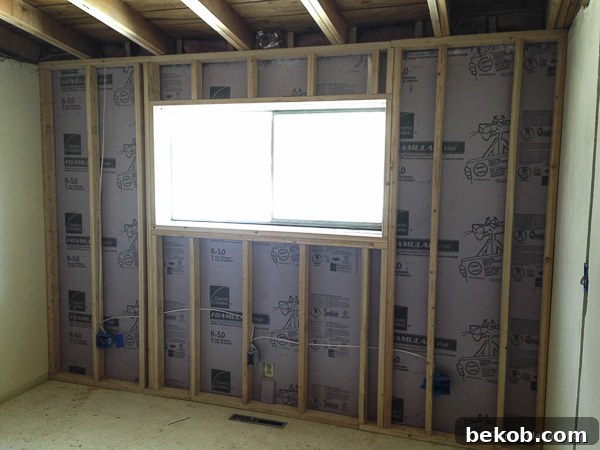
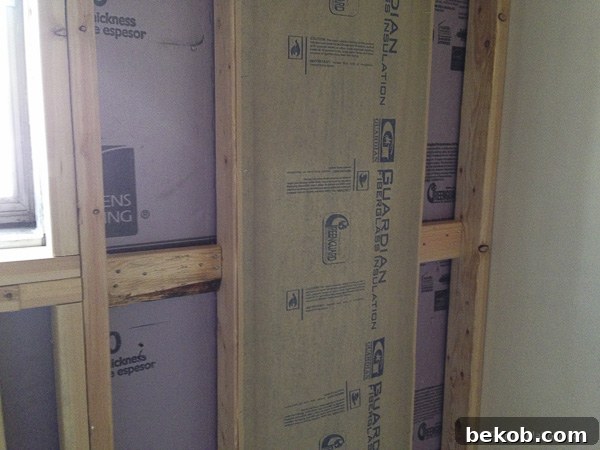
One of the most critical structural issues we encountered was the complete lack of insulation. If you look closely at the plaster in some of the “before” pictures, you can literally see the outlines of each cinderblock through the wall! This was a clear sign that our master bedroom was incredibly inefficient, leading to high energy bills and uncomfortable temperatures. Addressing this was a top priority for our overall home improvement strategy.
Our solution involved framing in a brand new wall, meticulously adding modern insulation. This wasn’t just about comfort; it was about creating a thermally efficient and soundproofed space. This phase also involved the significant task of ripping out the existing ceiling, which, in turn, exposed the old roof structure. It was a messy and extensive job, but absolutely essential for the long-term integrity and comfort of our master bedroom. These foundational changes, though often unseen, are paramount to a successful renovation.
The Savvy Pre-Drywall Secret: Drapery Blocking
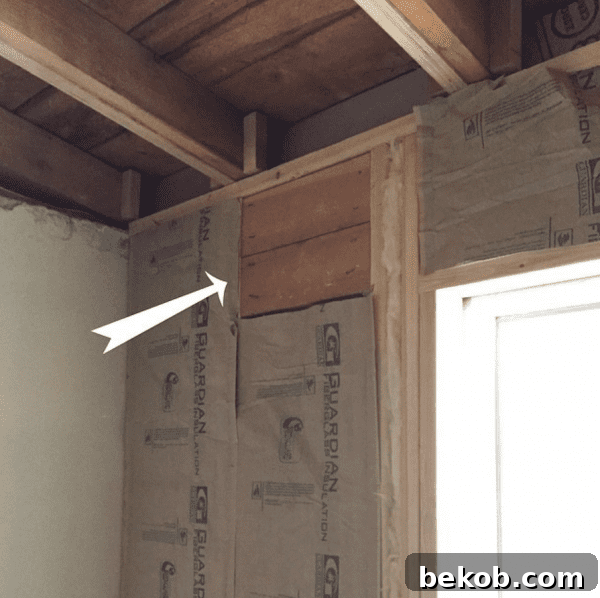
Among all the decisions we made during this remodel, one truly stands out as perhaps the best and most forward-thinking choice: installing blocking for future drapery rods. We implemented this around all our main windows, and it’s a tip I cannot recommend highly enough for anyone undertaking a renovation. By installing sturdy wood blocking behind the drywall, we eliminated the need to rely on flimsy drywall plugs or anchors to support our curtain rods. This means our drapes will hang securely and beautifully for years to come, without the worry of them pulling out or sagging. It’s a small detail during the framing phase that saves immense frustration and provides superior stability down the line – a true testament to planning ahead in home improvement.
The Drywall Dance: Walls Take Shape
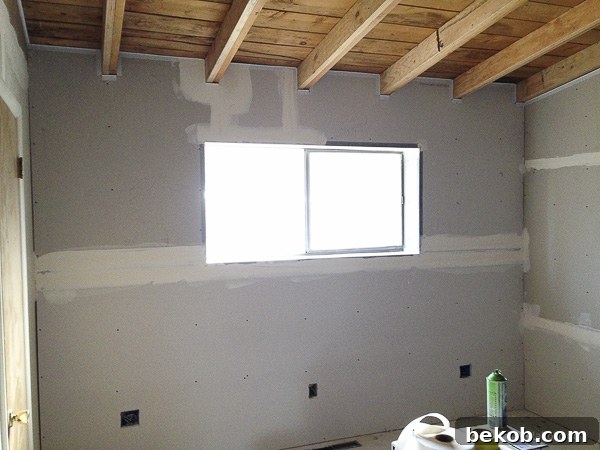
With the framing secure and the drapery blocking ingeniously in place, the next significant step was installing the drywall. This phase always brings a dramatic visual change; suddenly, the skeletal structure of studs transforms into recognizable walls and ceilings. It’s a messy job, but seeing the smooth, flat surfaces emerge ignites a fresh wave of excitement and helps visualize the finished space. The bedroom began to feel enclosed, private, and ready for its new identity.
A Splash of Color: The First Coats of Paint
Once the drywall was finished, taped, and mudded, it was finally time for some color! After what felt like countless hours of dusty, arduous work, the painting phase offered a welcome respite and an immediate sense of progress. A few dance parties later (because every DIY project needs a soundtrack and some spontaneous joy!), we had transformed the stark white walls with the initial coats of paint. Choosing the right color for a master bedroom is a crucial decision, as it sets the mood and tone for the entire space. Even these early coats brought a vibrant energy, pushing us closer to our vision for a serene and stylish retreat.
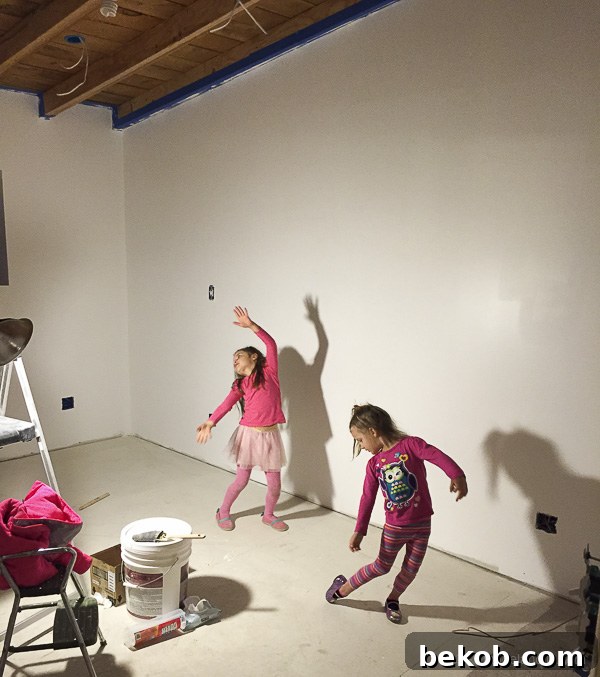
Creative Chaos: Kids, Paint, and the “Crime Scene” Floor
At this stage, our master bedroom remodel was just one piece of a much larger home renovation puzzle. With various spaces demanding our attention, we found ourselves needing to keep the kids occupied and engaged. What better way than to let them contribute to the house’s transformation? We decided to let them paint the floor of the master bedroom, transforming it into a temporary art project while we prepped the entire house for new flooring installation. It was a decision born out of necessity and a desire to involve them in the process, making it a memorable family affair.
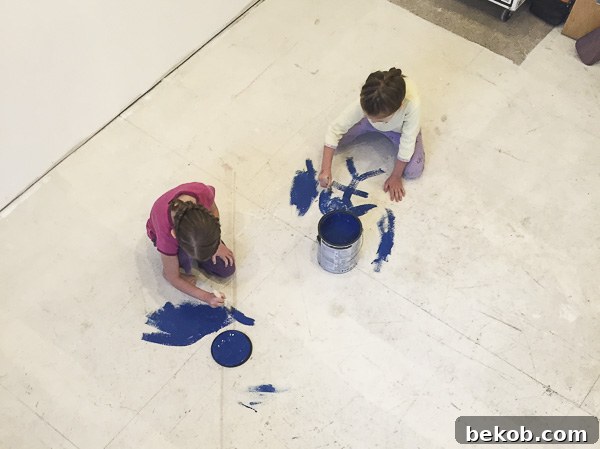
As you can imagine, a few enthusiastic little painters with buckets of paint led to quite the colorful explosion. Approximately 30 minutes later, the floor resembled what we jokingly called a “rather scary crime scene,” complete with splatters and abstract expressions of childish glee. It was a glorious mess, a testament to their creativity, and a fun, if chaotic, memory in our renovation journey. Once their masterpiece was complete, I went over the entire floor with some leftover blue paint, covering their artistic endeavors and providing a fresh, uniform base before the new flooring arrived.

Window Wisdom: DIY vs. Professional Installation Savings
Beyond the floors and walls, another critical component of our master bedroom refresh was replacing the window. At 55 years old, it was well past its prime, offering minimal insulation and often proving difficult to operate. Replacing it was not just an aesthetic upgrade but a practical one for energy efficiency and comfort.
Earlier in our renovation journey, we had two windows replaced professionally in my daughter’s room. The cost for those two windows? A whopping $1,200 buckaroos! While observing the installers, a lightbulb went off: “We could totally do that ourselves!” This realization sparked a new confidence. Armed with a bit of newfound knowledge and a desire to save, we decided to tackle the master bedroom window as a DIY project. The result? This new window cost us less than $200 bucks to install ourselves! This significant saving not only boosted our budget but also proved that with a little research and confidence, homeowners can achieve professional-looking results for a fraction of the cost. It’s a powerful lesson in empowering yourself through DIY.
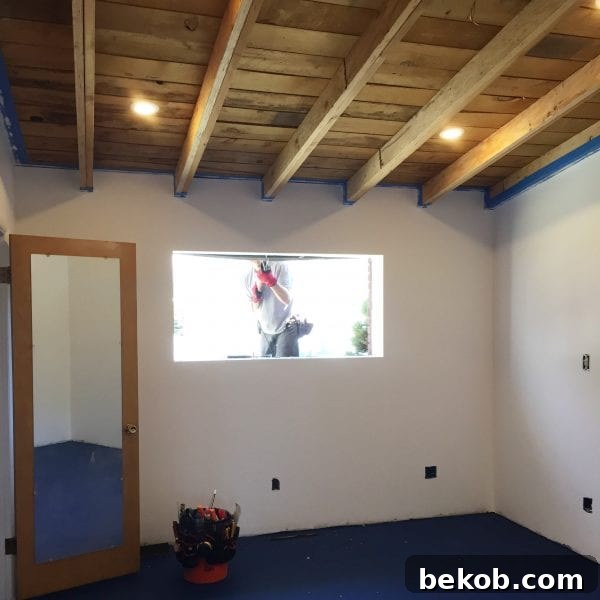
Life’s Interruptions: Navigating Delays and Finding Solace in Renovation
At this point, despite the master bedroom not being fully complete, we actually moved into the room. We were awaiting the installation of new flooring across several other spaces in the house, which meant a longer wait for our bedroom. Life, however, had other plans. I soon became pregnant, and as many expectant mothers know, the initial months can be incredibly challenging due to severe sickness. For about four months, our renovation efforts came to a complete halt; we simply couldn’t do anything. Unfortunately, after all those months of dreaming and waiting, we experienced a late-term miscarriage. This profoundly difficult period brought immense sadness and put everything into perspective.
After enduring the sickness and the heartache, we found ourselves throwing renewed energy into getting the house done. The renovation became a therapeutic outlet, a way to focus our minds and hands on something constructive amidst the grief. The act of creating and transforming our home became a powerful coping mechanism, helping us to slowly navigate through our emotions and find a sense of purpose again.
The Grand Finale: Flooring, Trim, and Finishing Touches
Finally, approximately one year later – yes, a full year! – we were ready for the flooring installation. This was a moment we had long anticipated, and it truly transformed the entire feel of the master bedroom. For this crucial step, we decided to invest in professional installation. While we love a good DIY, certain projects, like flooring, benefit immensely from expert precision and experience. It was worth every penny; the professional installer did such an amazing job, laying the foundation for a truly luxurious and comfortable space. You can read all about our flooring choices and the installation process here.
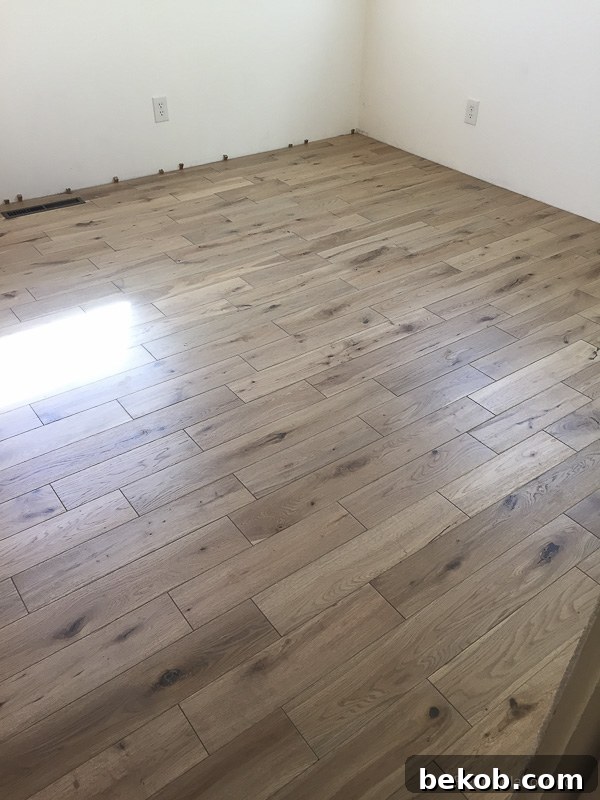
With the stunning new floors in place, the room truly began to take its final form. The last pieces of the puzzle included installing crisp new moldings around the floors and windows, which instantly elevated the room’s aesthetic, adding a refined, finished look. A brand new, stylish ceiling fan was also installed, providing both comfort and an additional layer of design. Unfortunately, I don’t have specific pictures of these final steps right now, but rest assured, they completed the transformation beautifully.
A Peek into the Present: Our Transformed Sanctuary
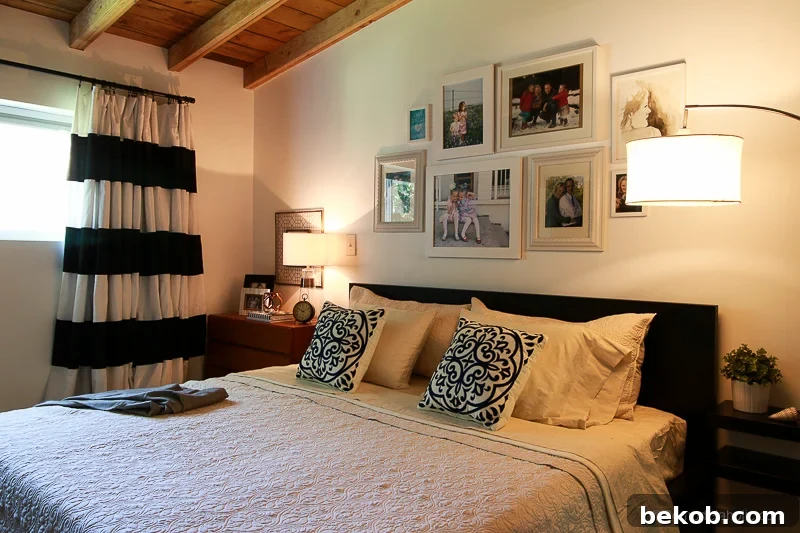
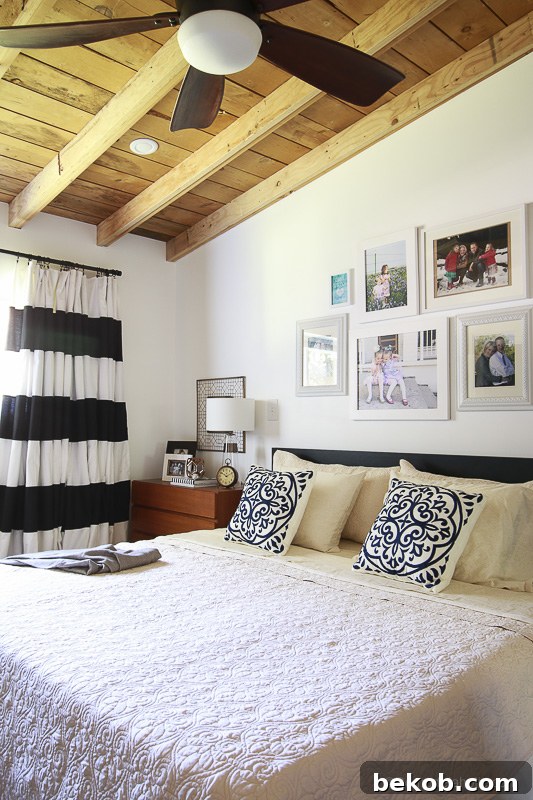
So, after all the demolition, framing, painting, delays, and careful finishing touches, are you curious to see what our master bedroom currently looks like? Well, here’s a little peek, a tantalizing glimpse of the serene and stylish retreat it has become. This image encapsulates the culmination of our efforts and the vision we had for this space. However, to truly appreciate the journey and discover how we brought all these elements together into a cohesive design, you’ll have to join me in the next post for the full reveal and all the decorating details!
Embracing the Pace: The “Slow Remodeler’s” Philosophy
I often joke that I might just be the slowest home remodeler in the entire blogosphere, but you know what? I don’t mind one bit. In fact, I’ve come to embrace this slower pace. I truly believe that taking our time allows us to make more personal, thoughtful, and ultimately, better decisions. Rushing through a renovation can lead to compromises, oversights, and sometimes, regret. By allowing ourselves the grace of time, we can live with a space, ponder different options, save up for the right materials, and ensure every choice truly reflects our style and needs. It’s also true that there are always so many things to do, and I might be a little A.D.D. when it comes to consistently finishing one actual project before starting another! But this “slow and steady” approach has allowed our master bedroom, and indeed our entire home, to evolve authentically and meaningfully. It’s not just about finishing; it’s about savoring the journey.
Your Dream Bedroom Awaits!
Our master bedroom remodel has been a labor of love, a journey filled with challenges, unexpected turns, and immense satisfaction. From the “Elmo red” carpet to the serene sanctuary you glimpsed above, every step has brought us closer to our dream home. We’ve tackled structural issues, embraced DIY savings, and learned invaluable lessons along the way. I hope this detailed account of our transformation inspires you in your own home improvement endeavors.
Now that you’ve seen the monumental effort and vision behind creating this space, you’re undoubtedly eager for the grand tour and the “how-to” secrets. Don’t miss out on the full reveal and all the decorating tips! See how we meticulously created this beautiful look in the next post (it publishes at noon)!!