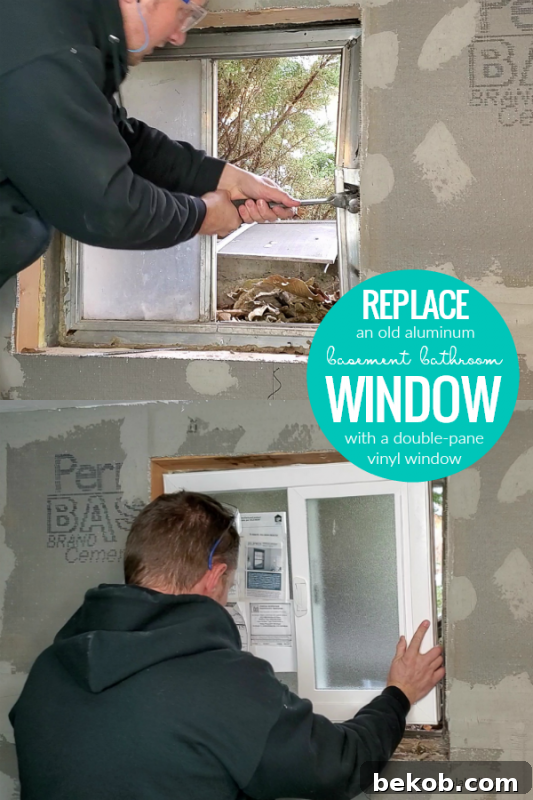
Is an old, inefficient window diminishing the comfort and energy efficiency of your home? If you’re tackling home improvements, replacing outdated windows is a fantastic way to upgrade both the aesthetics and functionality of your space. Today, we’re diving deep into a practical DIY project: updating an old aluminum window and installing a new, energy-efficient double-pane vinyl window in our basement bathroom. This comprehensive guide will walk you through every step, ensuring a weather-tight and professional finish.
This project is proudly sponsored by DAP, whose quality products were essential for achieving a durable and weather-resistant installation. All opinions expressed are genuinely our own. For more details, please refer to our full disclosure policy here.
Our home, affectionately known as The Birch House, is an older property, rich in character but also in need of modern upgrades. We’ve been dedicated to transforming it into a contemporary and comfortable living space, project by project. From revamping the mantel and fireplace to installing new flooring throughout the main areas, and even undertaking significant renovations like a complete kitchen overhaul with a dedicated pantry organization system, we’ve come a long way. Memorable milestones include saying goodbye to the infamous pink bathtub! While these projects have spanned several years, the vision for our home is steadily coming to life. And it’s not just indoors; we’ve also invested considerable effort into transforming the yard into a beautiful extension of our home.
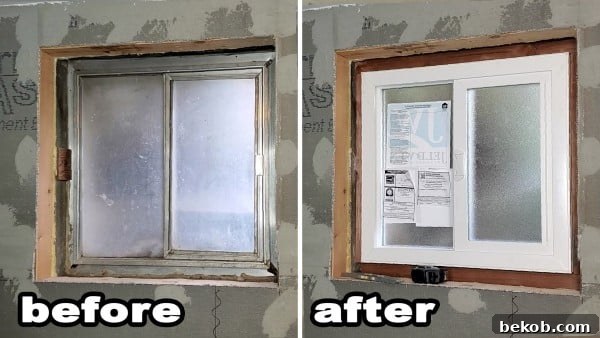
The focus of today’s project is our basement bathroom, an area we’ve been diligently working on for some time. Our most recent update on this space involved installing cement board around the perimeter, preparing the walls for new tile. As we progress with the bathroom remodel, it became clear that before moving much further, replacing the outdated window was a critical step. The existing aluminum window, likely installed when the house was built in the 1950s, offered virtually no energy efficiency, leading to significant heat loss and drafts. Upgrading to a modern double-pane vinyl window is a key component in creating a truly comfortable and energy-efficient basement bathroom.
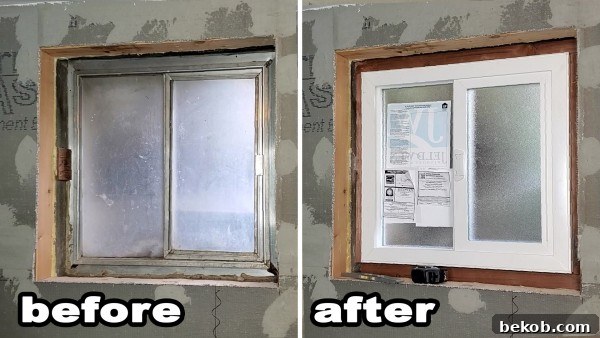
Fortunately, our window isn’t directly above the vanity or sink, a common challenge in many bathroom layouts. If it were, an ingenious solution like this sliding mirror over a window would have been a clever way to integrate functionality and style!
Installing a New Window in a Basement Bathroom: A Step-by-Step Guide
Replacing an old window in a basement can dramatically improve energy efficiency, reduce drafts, and enhance the overall comfort and aesthetic of the space. This DIY guide is designed to help you tackle this project with confidence.
What is the typical cost to replace an old window with a new one?
For this particular project, the total material cost was approximately $120. This included the new Jeldwen vinyl window, which was a custom order to fit our specific opening, and all the necessary DAP materials required to ensure a robust and weather-tight seal. Keep in mind that costs can vary based on window size, type, features, and local material prices.
How much time does a window replacement project like this take?
From start to finish, the entire process took us roughly 3 hours. This efficient timeline covered several key stages:
- Safely removing the old aluminum window from its frame.
- Thoroughly cleaning and preparing the window opening.
- Carefully installing the new vinyl window.
- Applying caulk and foam sealants to create a completely weather-tight barrier against the elements.
How to accurately measure for your new window replacement
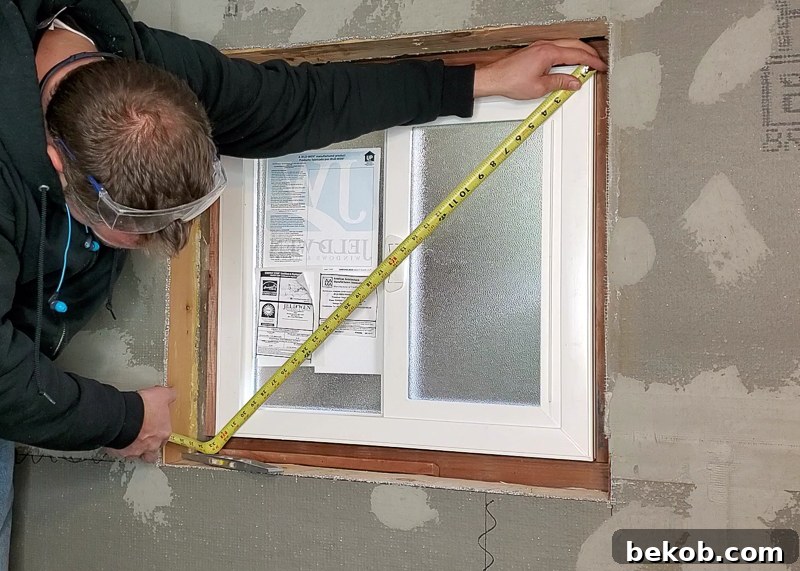
Accurate measurements are paramount for a successful window replacement. Begin by measuring the width and height of the existing window opening from the outside of your home. To ensure a proper fit and allow for expansion, contraction, and proper sealing, it’s crucial to subtract a small amount from these dimensions – typically between 1/4″ to 1/2″ from both the width and the height. This slight reduction will give you the final dimensions to provide when ordering your new window. For this particular basement bathroom window, I opted for a vinyl window specifically designed without fins on the sides. This choice was deliberate because I planned to add custom wood trim around the interior of the window, offering a cleaner finish and easier installation in the concrete basement wall. Due to it being a custom order, it took approximately a week or more from placing the order to picking up the window, so planning ahead is essential.
For more in-depth advice and considerations when selecting windows for your home, be sure to check out our comprehensive tips for picking new windows here.
Essential Materials and Tools for Replacing an Old Window in a Basement Bathroom
Having the right supplies on hand before you begin will streamline your project and ensure a smooth installation process.
Materials List
Please note that this post may contain affiliate links. By clicking and making a purchase, we may receive a small commission at no extra cost to you. This helps support our content creation. Learn more and read our full disclosure policy here.
- Jeldwen Vinyl Window (Ensure it’s sized correctly for your opening, preferably without mounting fins for this specific application)
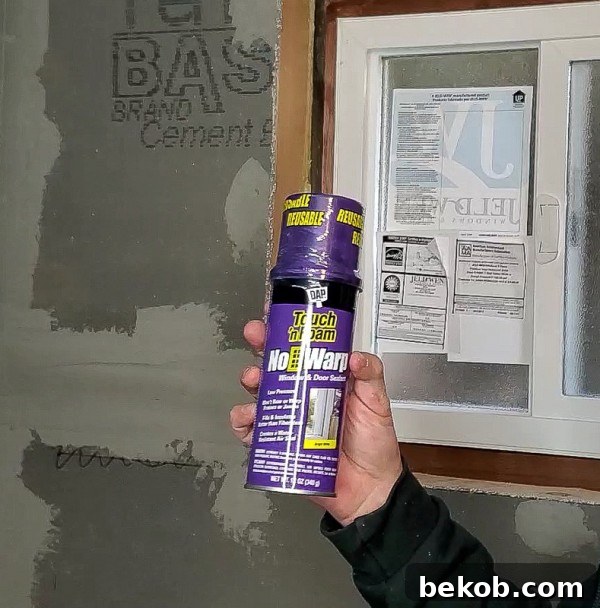
- DAP Touch ‘n Foam Window & Door Sealant (Specifically formulated not to bow window frames)
- DAP DynaGrip All Purpose Construction Adhesive (For securing wood trim to concrete)
- 1 1/2″ Flat Head Screws (For securing the new window frame)
- Cedar Shims (Essential for leveling, even if not explicitly used in every scenario, they are good to have)
- Redwood lumber (For creating a secure interior frame, if installing into concrete or masonry)
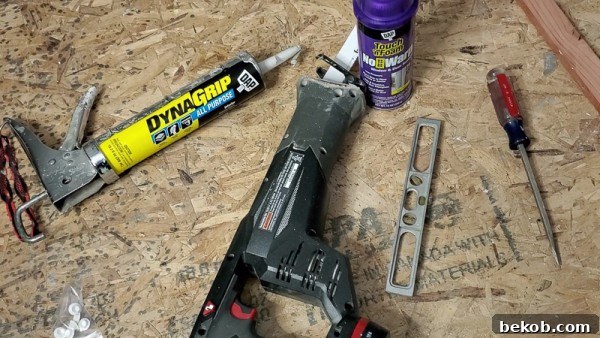
Tools Required
- Hammer (For prying and general use)
- Reciprocating Saw (With metal-cutting blades for aluminum frames, or wood-cutting blades for wood frames)
- Tape Measure (For precise measurements)
- Caulking Gun (For applying sealants)
- Screw Driver or Drill with appropriate bits (For securing screws)
- Chisel (For removing old caulk and debris)
- Small Level (Crucial for ensuring a perfectly plumb and level window)
- Utility Knife (For cutting caulk, foam, and other materials)
- Drill (For pilot holes and driving screws)
- Vacuum (To thoroughly clean the opening)
- Safety Glasses and Gloves (Always prioritize safety!)
How to Remove an Old Window and Install a New, Energy-Efficient Replacement
Follow these detailed steps to successfully replace your old, inefficient window with a brand new one.
1. Carefully Remove the Old Existing Window.
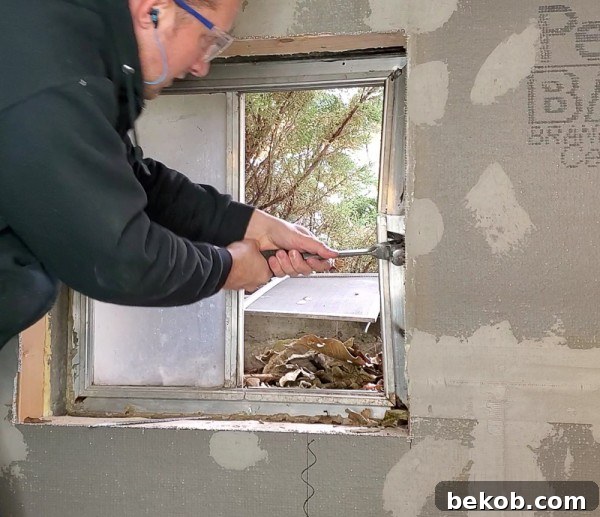
The first step is to safely extract the old window. In our case, the old aluminum frame was securely embedded, requiring a robust approach. I used a reciprocating saw fitted with a metal-cutting blade to carefully cut through the various sections of the old aluminum frame. Once the frame was cut into manageable pieces, I used a hammer and pry bar to meticulously pry out each section, ensuring the opening remained as intact as possible. Always wear appropriate safety gear, including gloves and eye protection, during this demolition phase, as sharp edges and flying debris can be a hazard.
If your home features old wooden windows that can be removed in one piece, don’t just throw them away! Here are some creative and inspiring ideas for what to do with salvaged old windows.
2. Clean and Thoroughly Prepare the Window Area.
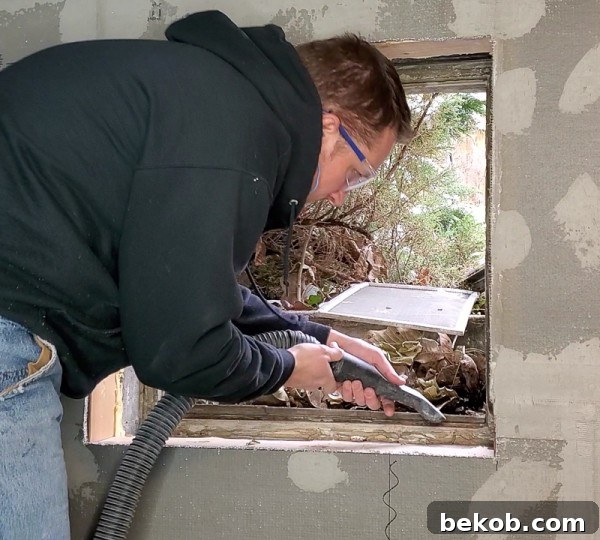
Once the old window is out, the next critical step is to prepare the opening. This involves removing any lingering dirt, dust, loose debris, and especially any old caulk or sealant residues. A utility knife and a chisel can be effective for scraping away stubborn materials. Use a shop vacuum to thoroughly clean the entire window cavity, ensuring a pristine surface. A clean, smooth, and debris-free opening is essential for proper adhesion of new materials and a tight seal, which directly impacts the energy efficiency and longevity of your new window.
3. Perform a Dry Fit of the New Window.
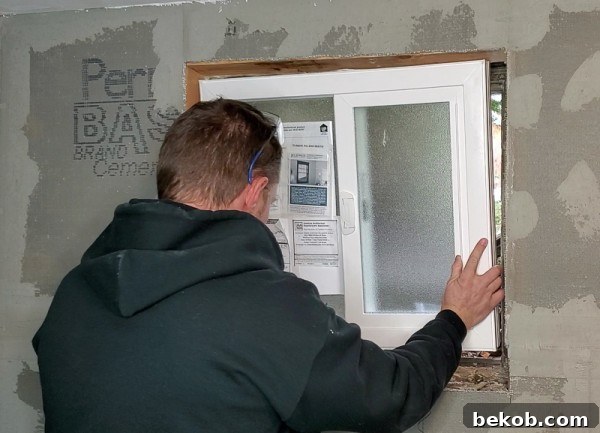
Before applying any adhesives or sealants, it’s absolutely vital to perform a “dry fit.” Carefully place your new vinyl window into the prepared opening. This step allows you to confirm that the window fits snugly but not too tightly, ensuring that your measurements were accurate. Check for any obstructions or areas where the fit might be off. This is your last chance to make minor adjustments to the opening before the permanent installation. Remember the old adage: “Measure twice, cut once,” or in this case, “Measure twice, order once, and dry-fit to be sure!”
4. Install the Wood Trim Frame.
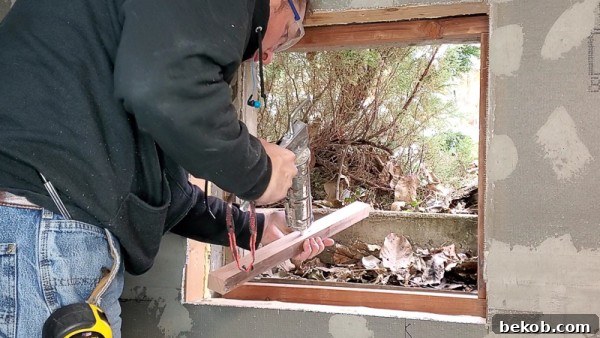
For windows installed in concrete or masonry walls, such as in a basement, creating a secure sub-frame is often necessary. I opted to add a redwood trim frame around the perimeter of the opening. Redwood is an excellent choice for this application because it’s a durable wood with natural resistance to rot, decay, and insects, making it ideal for environments where moisture might be a concern. We frequently use redwood in our outdoor projects for its longevity, from our refreshed wood deck to our new raised garden beds. You can also see it featured in our modern redwood and concrete bench, the garden arbor, and our DIY pergola plans.
I glued the redwood frame directly into the concrete opening using DAP DynaGrip Construction Adhesive. This adhesive provides an incredibly strong bond, crucial for securing the wood to the concrete. This custom wood frame serves a dual purpose: it provides a stable and consistent surface for mounting the new vinyl window, and it creates a material into which I can easily drill screws to hold the window firmly in place.
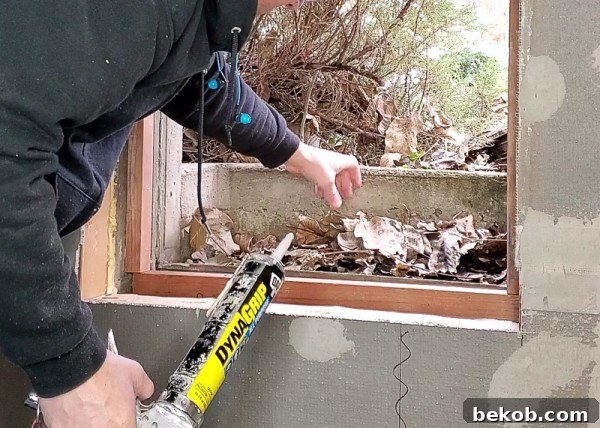
5. Level the New Window Within the Opening.
With the wood frame in place, it’s time to set the new window. Carefully position the window in the opening, ensuring it is centered. Now, using a small level, meticulously check that the window is perfectly level and plumb (vertically straight) on all sides. This step is non-negotiable for proper window operation and aesthetic appeal. I was fortunate that the redwood frame I built created an opening that was already perfectly level, so I didn’t need to use cedar shims for adjustment. However, it’s always wise to have a supply of cedar shims on hand. If your window isn’t level, strategically place shims between the window frame and the wood opening, tapping them gently until the window is perfectly aligned. Once level, you can snap off any excess shim material.
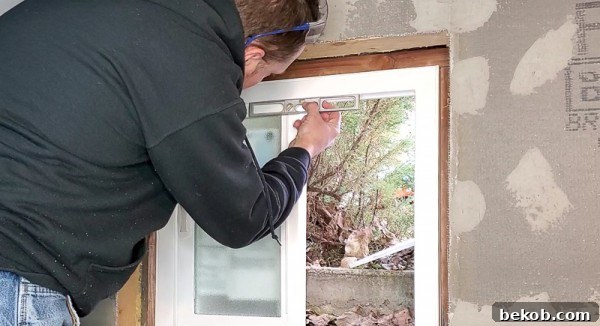
6. Test Window Operation Before Final Securing.
Before permanently screwing the window into place, give it a thorough test run. Slide the window open and closed multiple times to confirm that it operates smoothly and effortlessly. Check that there’s no binding, sticking, or excessive play. This step is crucial because once the window is fully secured, leveling and operational adjustments become much more difficult. If you encounter any issues, re-evaluate the leveling in step 5.
7. Secure the New Window to the Wood Frame.
Once you’re satisfied with the window’s levelness and operation, it’s time to secure it permanently. I used 1 1/2″ flat head screws to attach the vinyl window frame to the redwood sub-frame. It’s important to use flat head screws so that the screw head sits flush with the window frame, preventing it from interfering with the window’s future opening and closing mechanism. Drill pilot holes slightly smaller than your screws to prevent cracking the vinyl frame and ensure a clean drive. Distribute the screws evenly around the perimeter of the window for maximum stability.
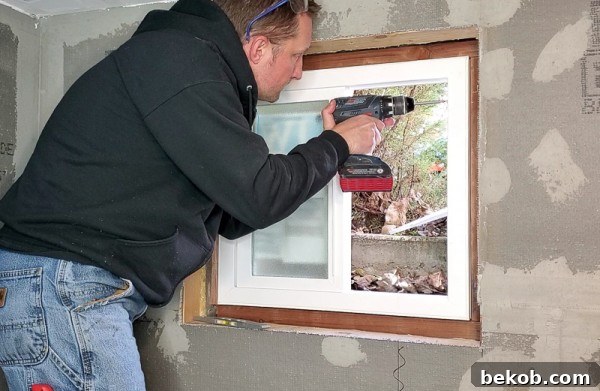
After driving the screws, I covered the screw heads with the decorative caps that came supplied with the Jeldwen window. These caps not only provide a neat and finished appearance but also create a smoother surface, making the window tracks easier to clean and maintain over time.
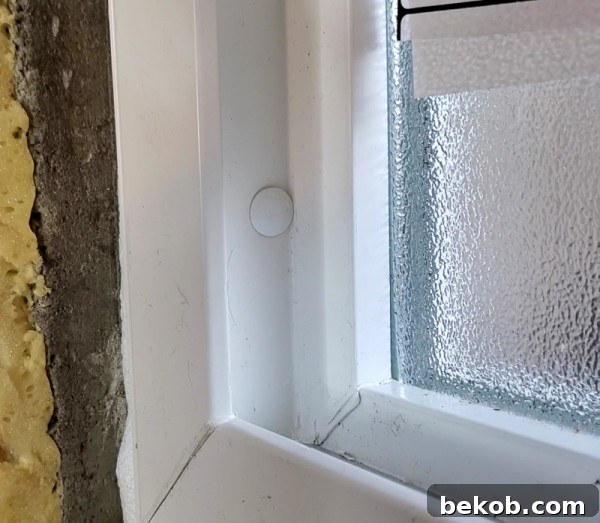
8. Seal Gaps with Insulating Foam.
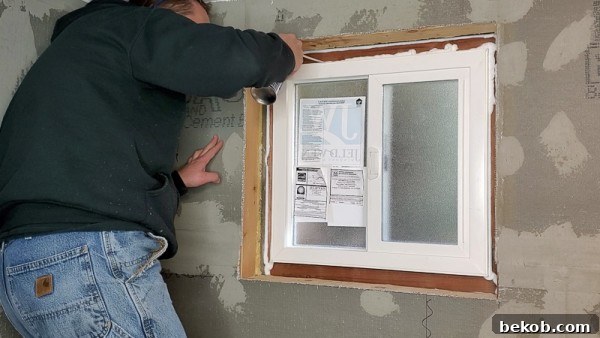
Achieving a weather-tight and energy-efficient seal is paramount for any window installation. I used DAP Touch ‘N Foam Window & Door Sealant to fill all the gaps and voids between the new window frame and the rough opening, both on the inside and outside of the window. This specialized foam is designed not to warp or bow window frames, making it safe for vinyl windows. Apply the foam carefully and judiciously; it expands considerably as it cures. Filling these voids is crucial for preventing air infiltration, reducing drafts, and significantly improving the insulation value of your window, ultimately contributing to lower energy bills and a more comfortable living space.
9. Apply Final Seal with Caulk.
Once the insulating foam has fully cured (refer to product instructions for curing times), the final step to a truly weather-tight installation is applying an exterior caulk. I used a high-quality DAP Window Trim Caulk to create a continuous, waterproof seal around the outside perimeter of the window frame where it meets the house siding or masonry. This outer layer of caulk acts as a barrier, preventing water intrusion and protecting the foam insulation and the interior of your wall from moisture damage. Apply the caulk smoothly and evenly using a caulking gun, then use a wet finger or a specialized caulk tool to create a clean, professional-looking bead. A well-applied caulk seal is essential for long-term performance and durability.
Related Reading: Once your window is installed, you might consider enhancing its interior appeal. Learn How to Install Craftsman Window Trim for a polished finish.
With the new window now securely installed and thoroughly sealed, our basement bathroom remodel is moving forward beautifully! The next phase involves tackling the tiling, which will bring a whole new level of style and function to the space. We’re still deliberating on the perfect finishes for this bathroom, weighing various design options. We could opt for something visually striking, like Moroccan-style fish scale tile in the shower, or perhaps a more contemporary look with modern hexagon tile for the floor. The possibilities are exciting, and we’re eager to finalize our choices!
Stay tuned for more updates on our basement bathroom transformation! If you’re curious to see the complete journey, you can revisit where this bathroom project began and catch up on how we installed the cement board as part of the initial stages.
More DIY Window Inspiration and Updates:
Looking for more ways to enhance your windows? Check out these related DIY tutorials:
- How to Install DIY Window Mullions or Muntins (Window Grids) – Add character and style to plain windows.
- DIY Faux Leaded Glass Windows – Achieve the elegance of leaded glass without the high cost.
- Lace DIY Privacy Window Covering – A charming and simple solution for added privacy.