Read the sequence from the top before cutting, painting, or moving pieces.
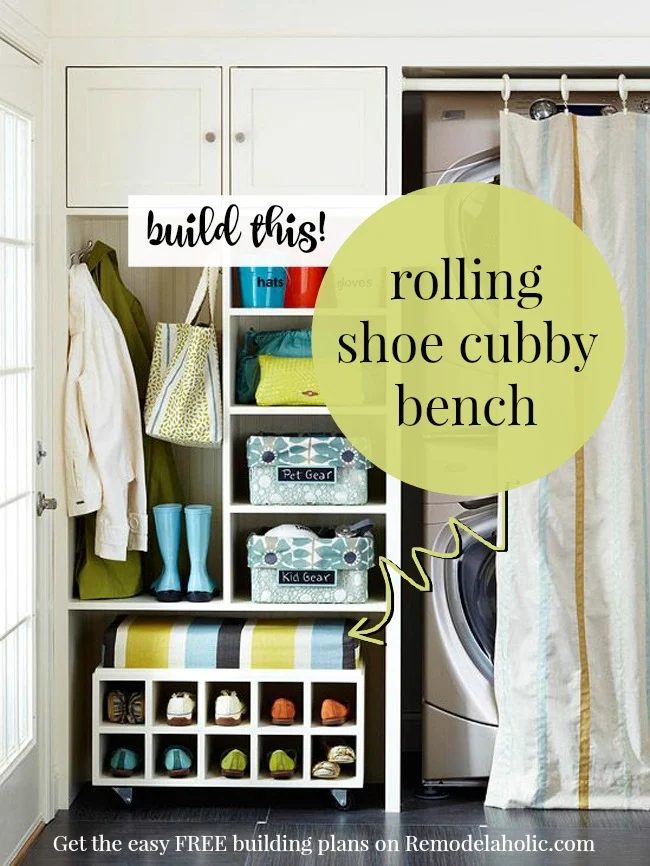
Happy 2016 to all the fabulous readers at Bekob! It’s Ananda from A Piece of Rainbow. Today’s fun project is well fitted for New Year’s de-cluttering and organizing – we are building a clearly cute and straightforward rolling shoe cubby bench!
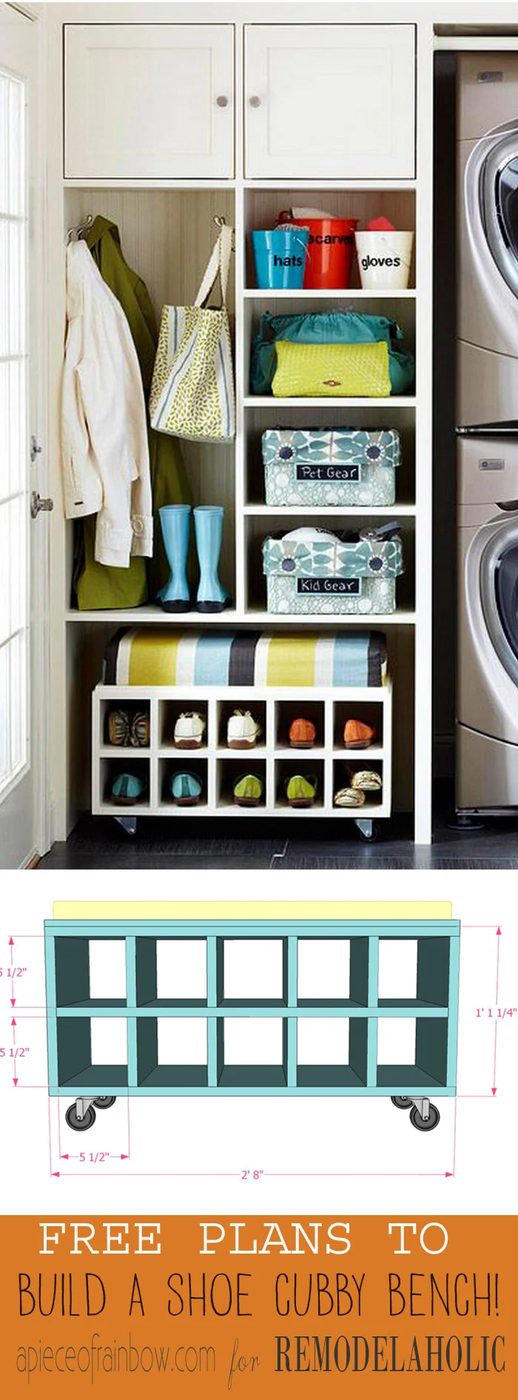
How to Build a Rolling Shoe Cubby Bench
Materials and Tools:
- 1 – 1×12 @ 10 feet long
1 – 1×6 @ 8 feet long - (4) 2” to 3” swivel casters
- Optional trim pieces to hold the top cushion – 1×1 or ½ trim
- 1 1/4 inch finish nails or 1-1/4″ Pocket Hole Screws (see Step 1 for which option to choose)
- Optional Elmer’s Wood Glue
- 120 grit sandpaper
- measuring tape, square (Check for square after each step! ), and pencil
- safety glasses, always!
- Drill: always predrill holes before attaching with screws.
- Circular Saw: Clamp each piece properly onto a sturdy surface before cutting.
- Random Orbital Sander or hand held sanding pad
Cut List:
(2) – 1×12 @ 2’8″ (top & bottom)
(2) – 1×12 @ 11 3/4″ (sides, vertical)
(1) – 1×12 @ 2’6 1/2″ (middle, horizontal)
(8) – 1×6 @ 11 3/4″ (dividers)
option: trim pieces to hold top cushion – 1×1 or ½ trim, (2) @2’8″ , (2) @ 11 3/4″
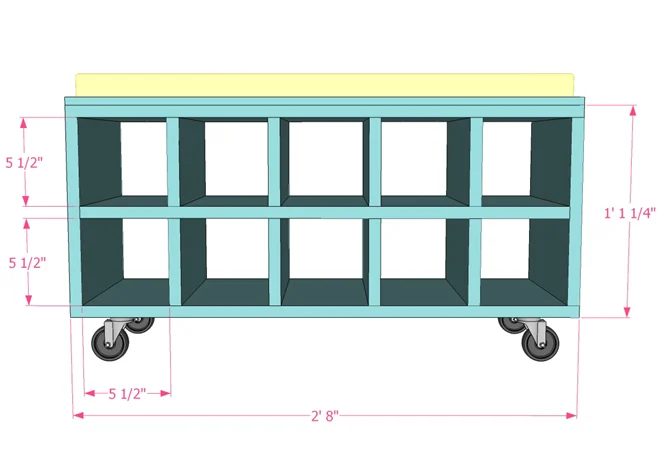
Of course there are many ways to build a piece of furniture. My goal is to figure out the most direct ways. Please always feel free to share options of improvements with us here!
Step 1: Build two identical components like shown below – Attach (4) pieces of 1×6 dividers onto the bottom 1×12 board with screws, and do the same with the top 1×12 board.
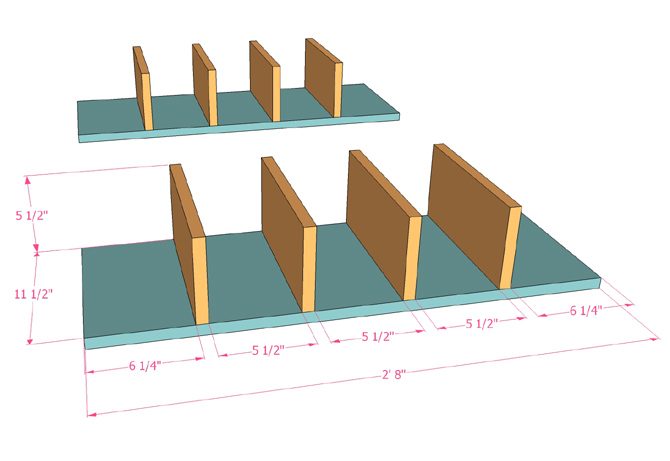
Because the screw heads will not be visible on the bottom, or under the cushion, this offers a clearly straightforward and sturdy way to build this piece. If you are omitting the top cushion, then consider using pocket hole screws.
Step 2:
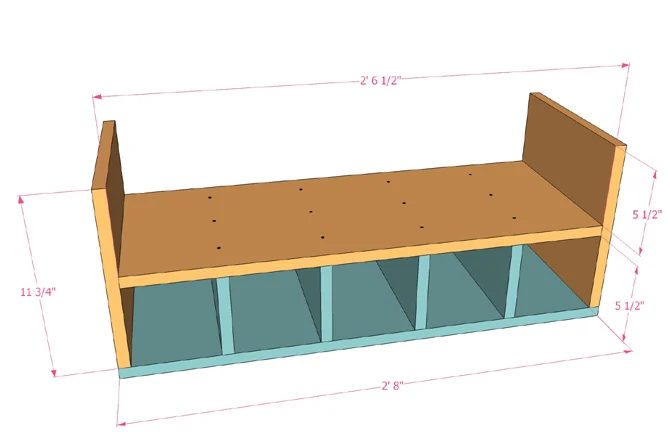
Attach the middle shelf and two side panels to the bottom unit (from Step 1) with screws.
Step 3:
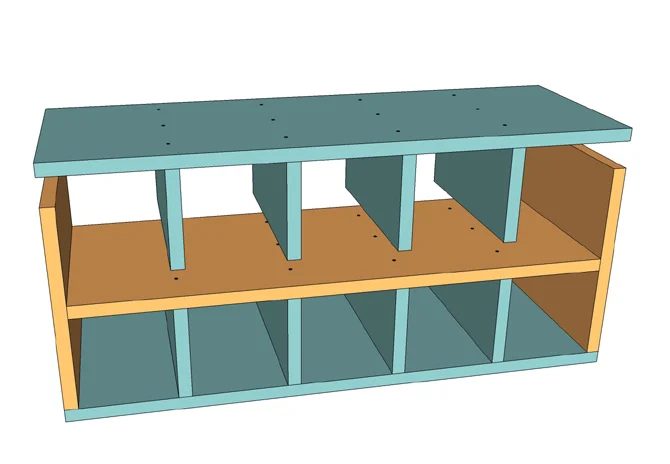
Attach the top unit (from Step 1) to the rest of the shelf by screwing the two ends to the side panels. The 1×6 dividers will sit on the middle shelf without the need for screws.
Step 4: Finishing touches.
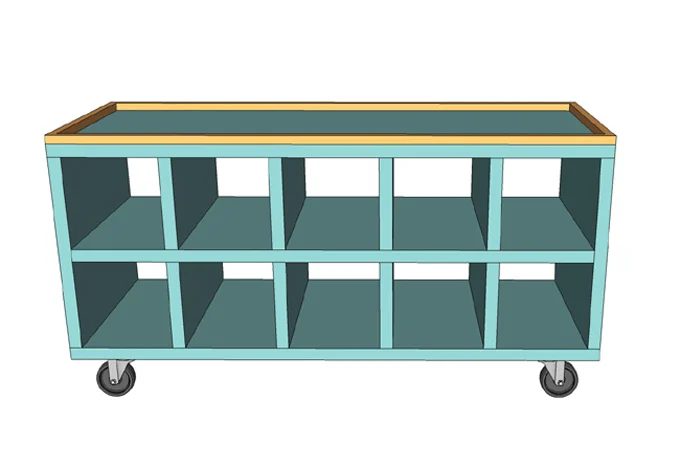
Attach (4) 2” to 3” swivel casters to the bottom, and 1×1 or 1/2″x1/2″ trim pieces to hold the seat cushion at the top, using glue or nails.
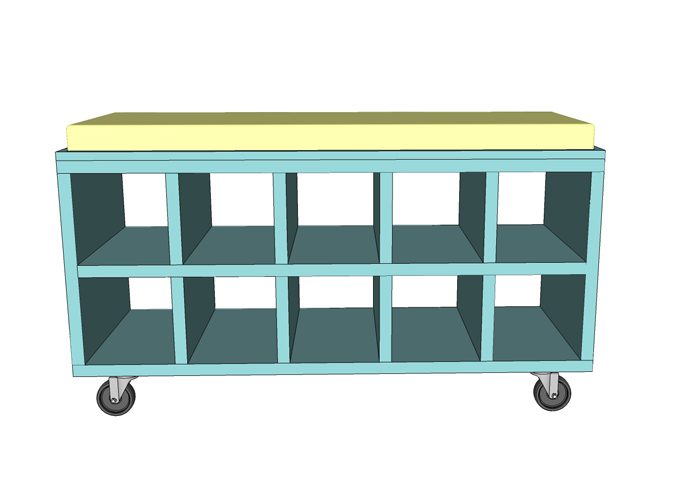
The seat cushion can be made from 3″ or thicker foam cut to size, with a fabric cover. I love everything no-sew, and I would consider using fabric glue to complete the seat cover!
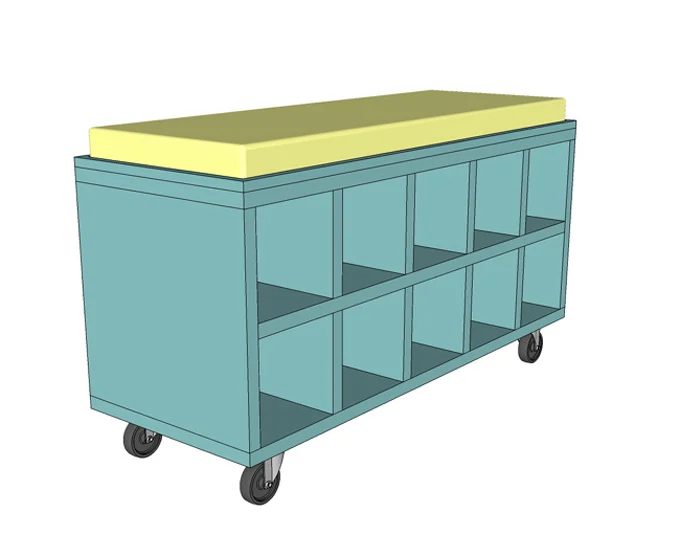

Doesn’t this small piece of furniture make a big difference?
Below are some fun projects for the new year if you would like to stop by and visit!
1) A Dollar Store method that will change your wreath making life! 2) 7 ways to make effective all natural wood stains. 3) Make a strawberry tower this spring with recycled materials!

———————————