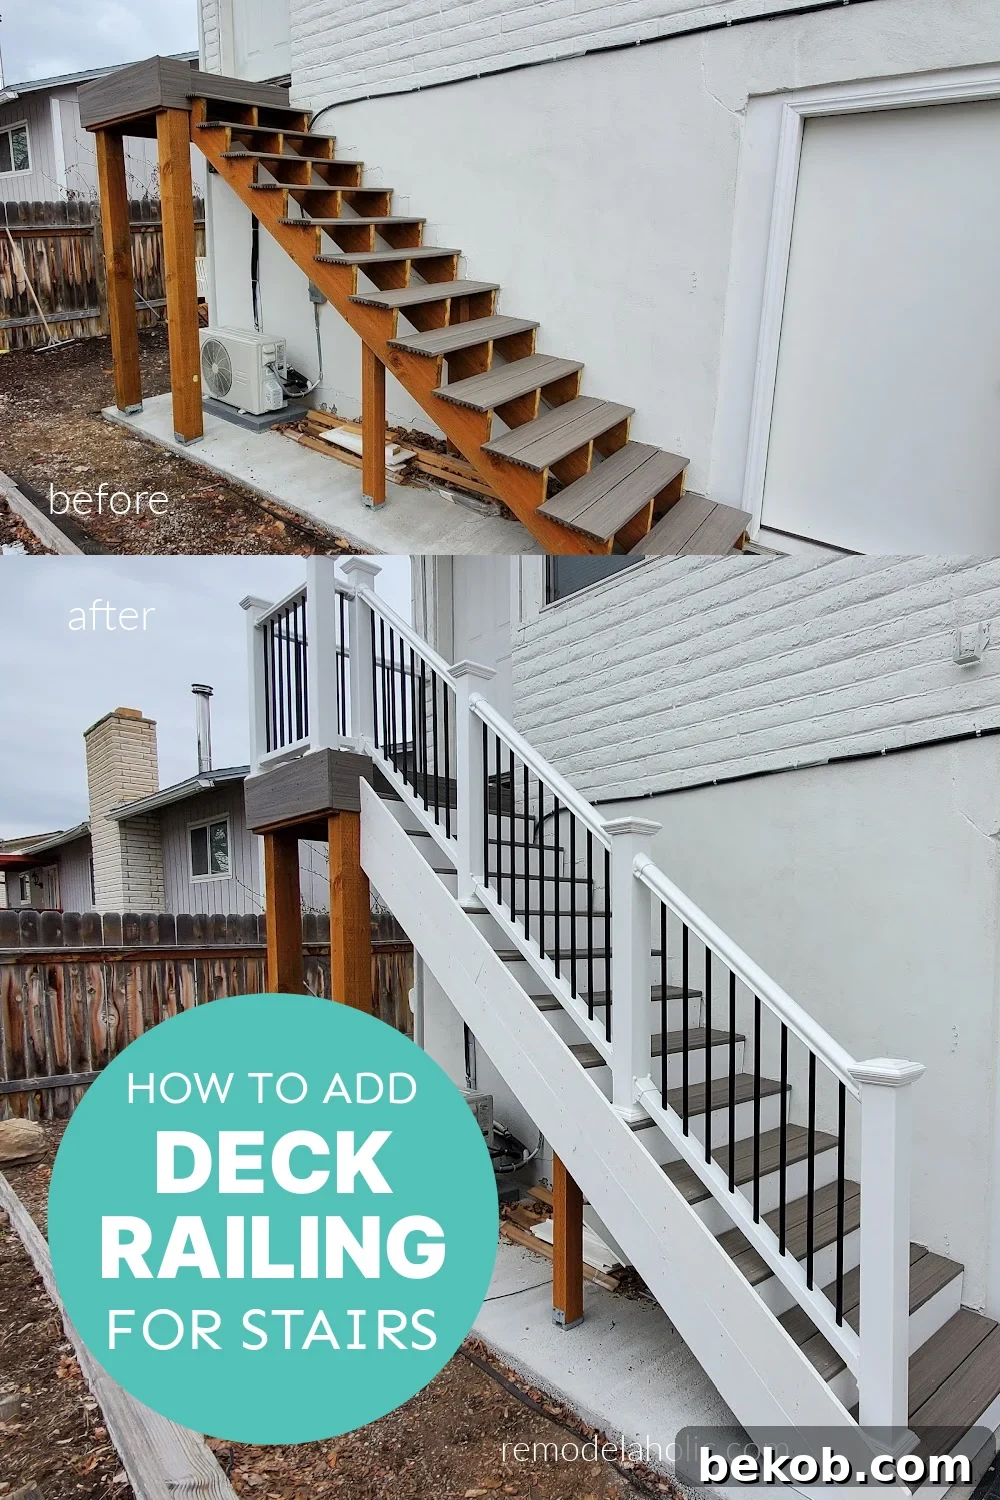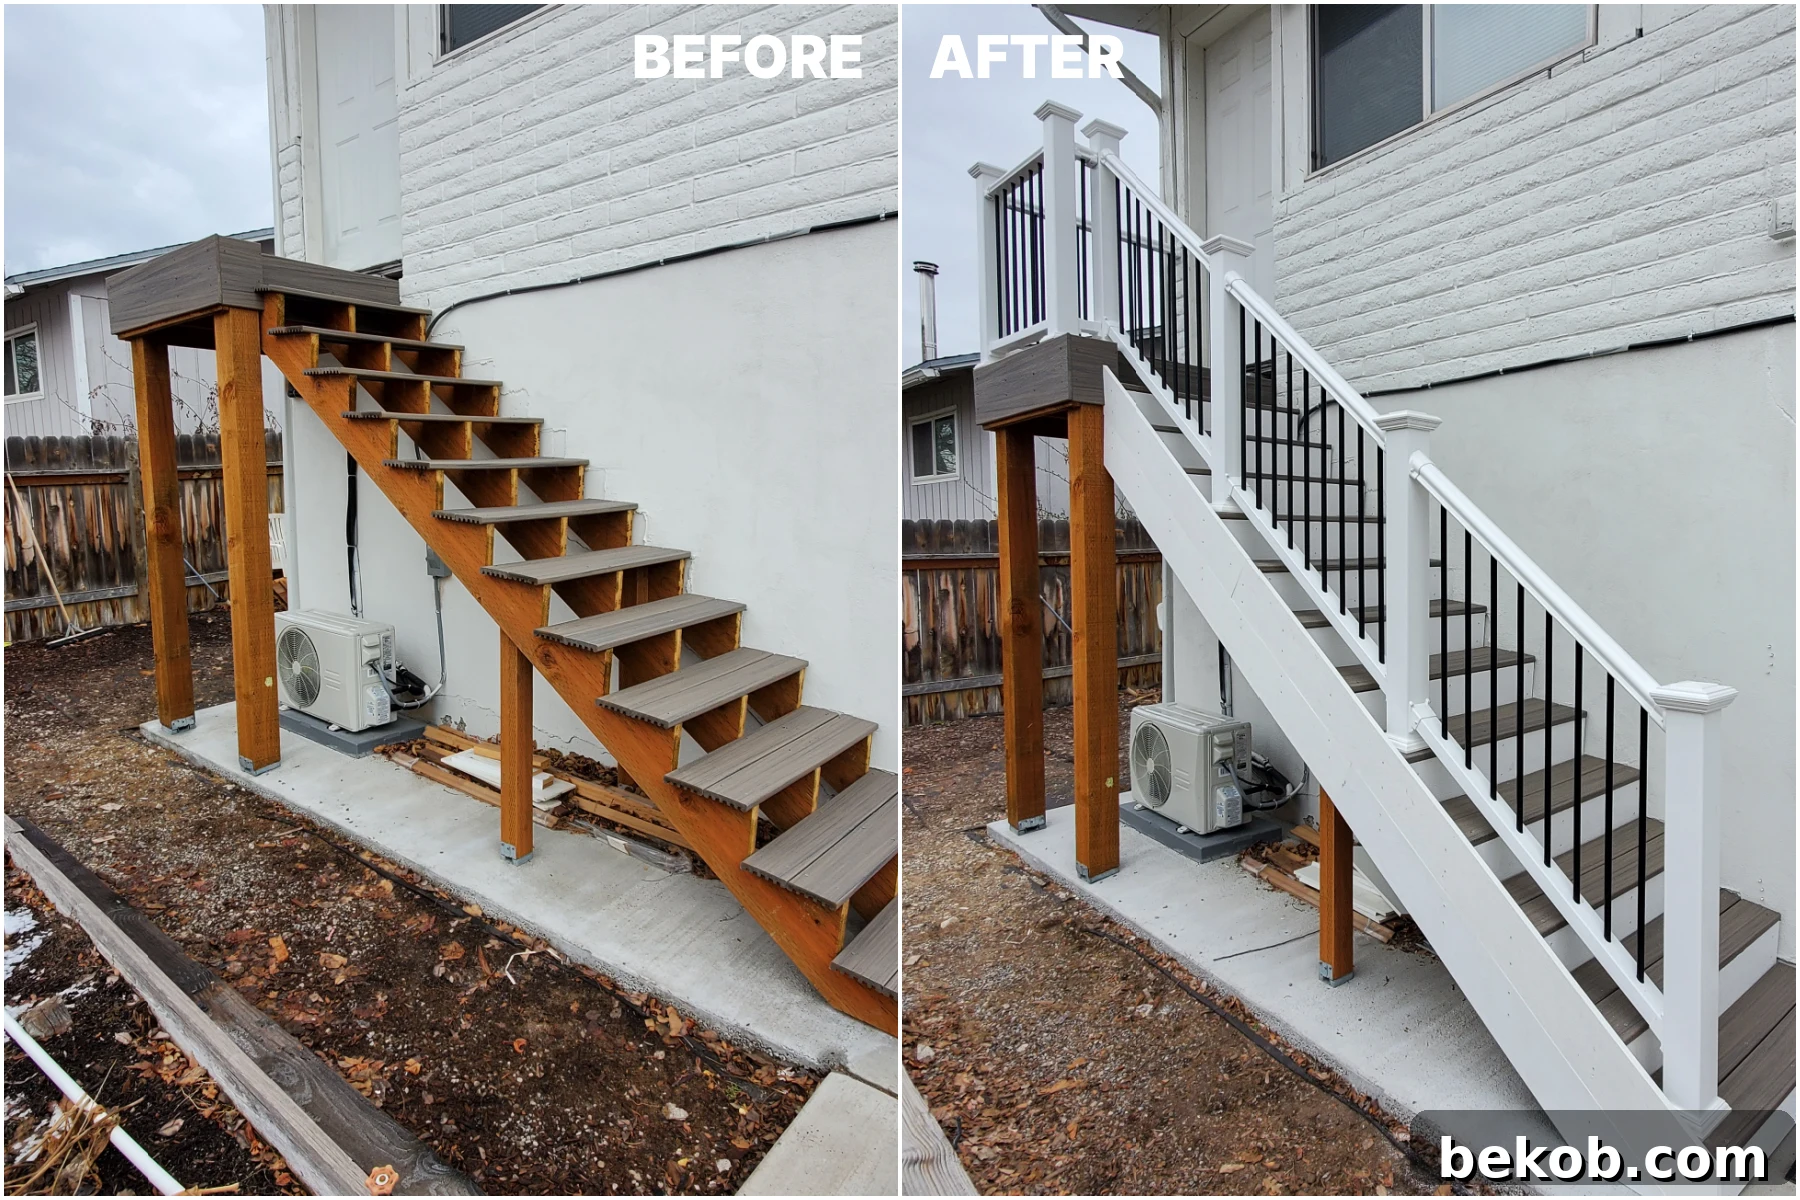
DIY Deck Railing Installation: A Comprehensive Guide to Safety and Style
Elevate the safety and beauty of your outdoor space by installing a DIY deck railing. This step-by-step guide provides a clear and concise approach to installing deck railing that not only enhances the aesthetic appeal of your deck or porch but also ensures the safety of your loved ones.
Building a deck or porch is a significant investment in your home, providing a space for relaxation, entertainment, and enjoying the outdoors. A crucial aspect of this construction is the installation of outdoor stair railings. A well-installed railing is not only a safety feature but also an integral part of the deck’s overall design. This guide will take you through each step, ensuring your DIY deck railing installation is both beautiful and safe. Remember to consider local building codes and regulations before starting your project.
While you’re improving your outdoor space, consider adding an outdoor baby gate to the stairs for enhanced safety, especially if you have children or pets. You can also upgrade your deck style by refinishing a wooden deck and adding space-saving built-in deck benches.
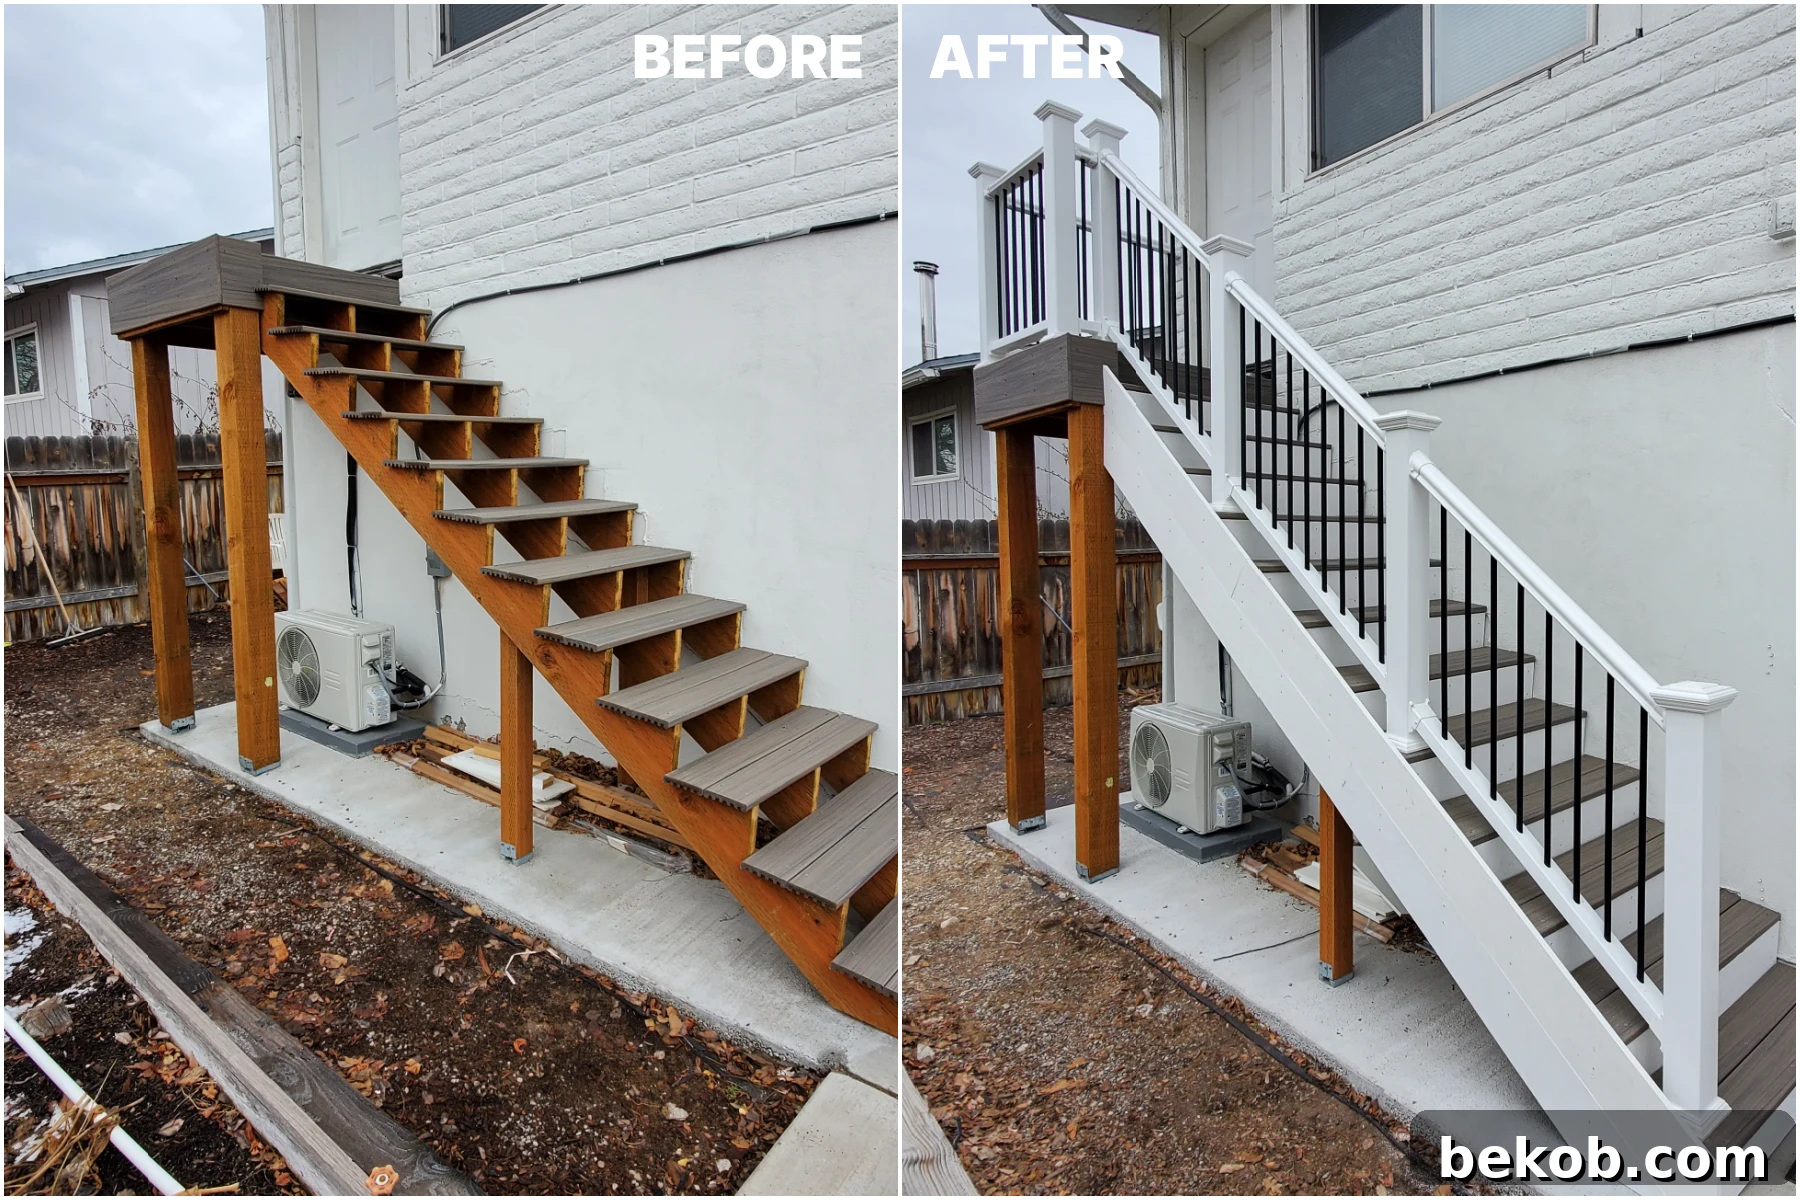
This comprehensive guide will walk you through the process of installing a DIY deck railing, covering everything from initial planning and measurements to the final touches. We’ll focus on using vinyl deck railing, known for its durability and low maintenance, but the principles can be adapted for other materials like wood or metal.
This post may contain affiliate links. Please read our full disclosure policy here.
Before diving into the specifics, let’s understand the importance of a well-installed deck railing. Besides preventing accidental falls, a railing provides support, acts as a visual barrier, and contributes to the overall style of your deck. Choosing the right materials and ensuring proper installation are critical for long-term safety and satisfaction.
Whether you’re a seasoned DIY enthusiast or a beginner looking to improve your home, this guide will provide you with the knowledge and confidence to tackle your deck railing installation project successfully. Let’s get started!
DIY Deck & Stair Railing Video
Watch this video to see a step-by-step demonstration of how to add deck railing, stair railing, and side trim to transform basic deck stairs into an aesthetically pleasing and secure feature. Below the video, you’ll find detailed written instructions to guide you further.
How to Install DIY Deck Railing for Stairs: A Detailed Guide
This tutorial outlines the installation of a standard deck and stair railing, focusing on a 36″ handrail height and a 39” post height, utilizing vinyl deck railing. While we’re installing on a composite deck, the installation process remains largely the same for wood decking. Always refer to the manufacturer’s instructions for your specific railing system.
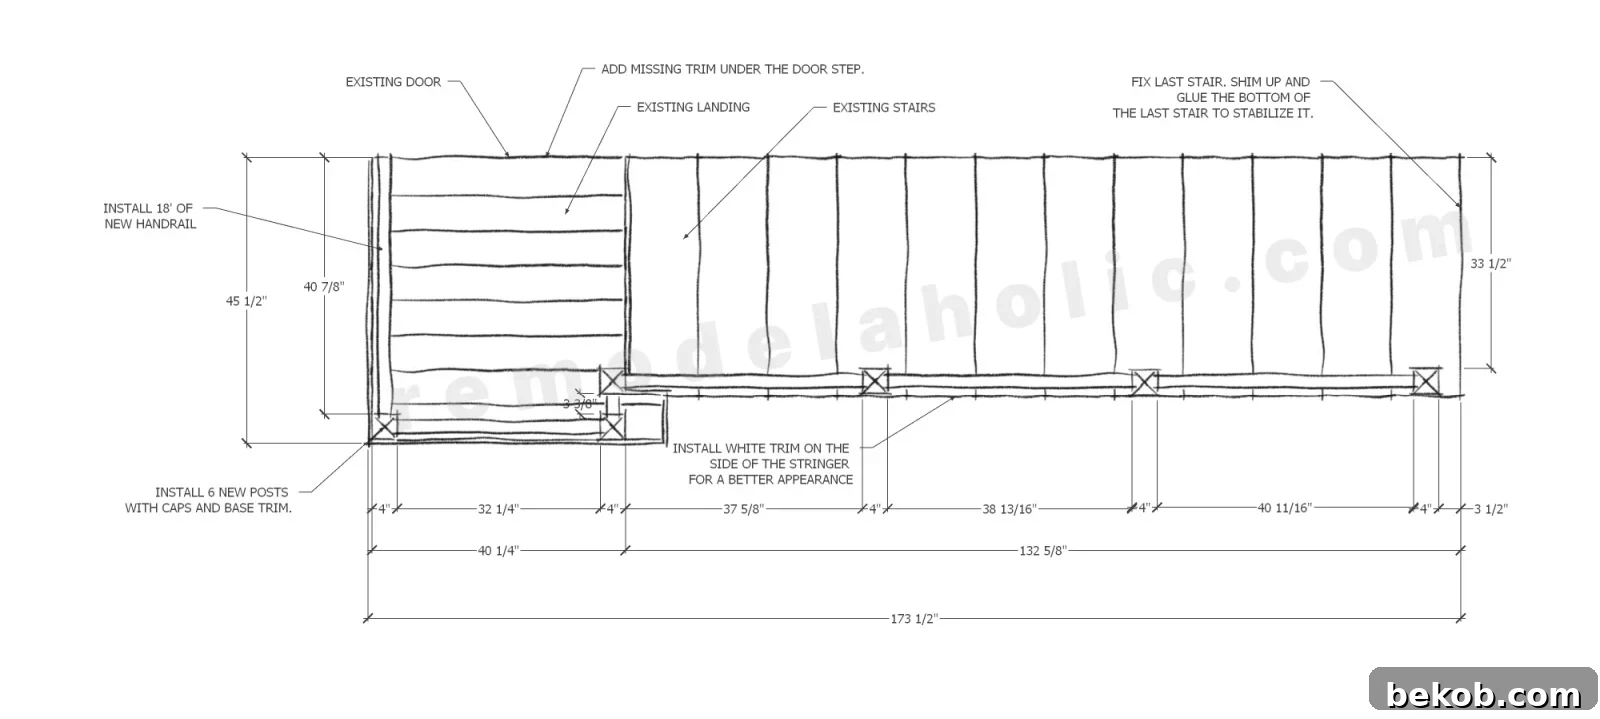
For our sample project – a 45″ x 40″ deck landing and 13 steps – we required approximately 21 linear feet of handrail. Calculating your material needs is crucial for a successful project. Let’s delve into how to calculate the materials required for your own deck and stair railing installation.
Calculating Deck & Stair Railing Length: Measure Twice, Cut Once
Accurate measurements are the cornerstone of any successful DIY project. Take your time, measure carefully, and double-check your figures. A few extra minutes spent measuring can save you time, money, and frustration later on.
Step 1: Measure and Draw Out Your Landing Area
- Start by creating a detailed sketch of your deck landing area. Note the dimensions of each side, including any bump-outs or irregular shapes.
- In our example, the porch landing is 45″ x 40″, with a small bump out near the stairs, requiring about 92″ of straight railing for the two sides plus the bump out.
Step 2: Determine the Number of Posts Needed
- Posts provide the necessary support and stability for your railing system.
- For our porch landing, which extended beyond the stairs, we required three posts for the straight railing.
- While we anchored the railing directly to the house, omitting a post next to the house, you can include one for added support if desired.
- For the stairs, we placed one post at the bottom and two posts spaced evenly along the length of the stairs.
- As a general rule, ensure stair rail posts are no more than 6 feet apart.
Step 3: Measure the Length of the Stair Railing
- Measure from the front edge of the bottom stair to the front edge of the top stair to determine the required length of your stair railing.
- In our example, the stairs measured 12 1/2 feet.
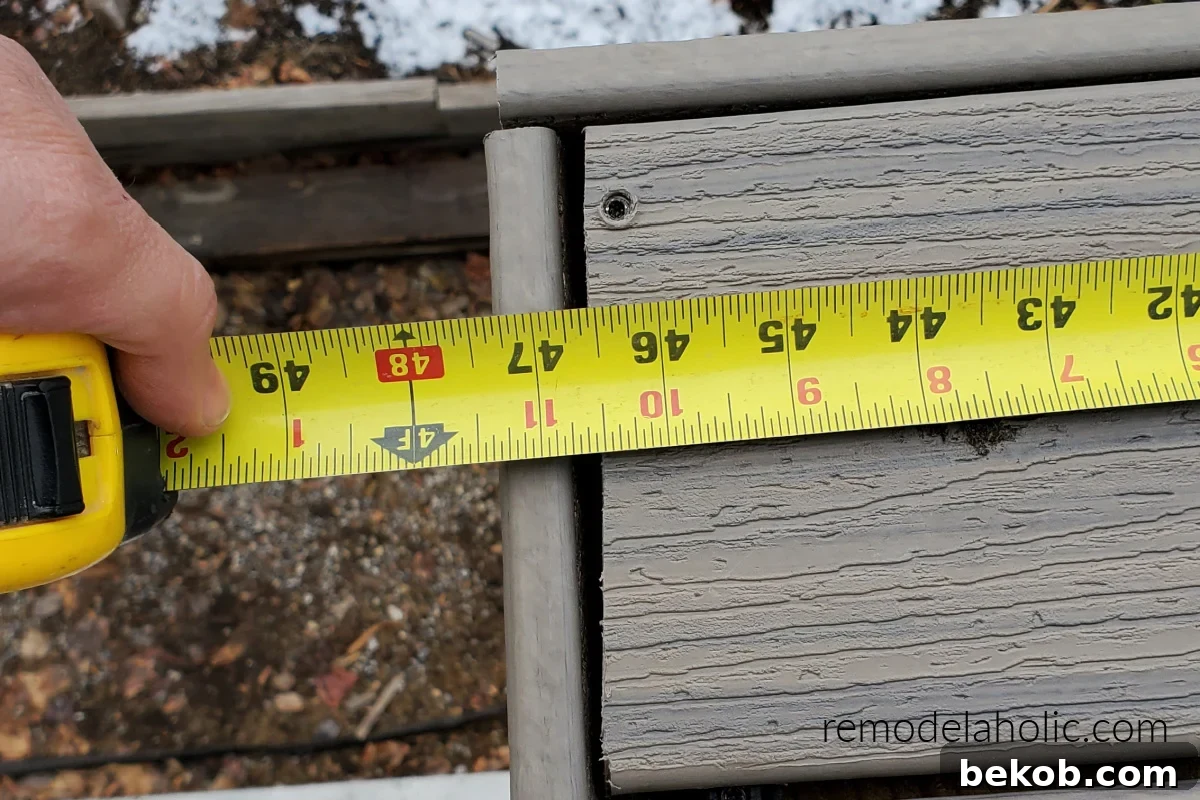
Remember, accuracy is paramount. Precise measurements ensure you purchase the correct amount of deck railing system materials, avoiding costly mistakes and delays. Measure at least twice!
*These measurement principles apply similarly to wood posts and railing installations, but the specific installation techniques for wood decking may differ.
Deck and Porch Railing Materials: Understanding Nominal vs. Actual Measurements
Before you head to the store, it’s important to understand that deck railing is typically labeled with its NOMINAL measurement. The actual measurement will correspond to the nominal measurement when installed with posts. Here’s an illustration:
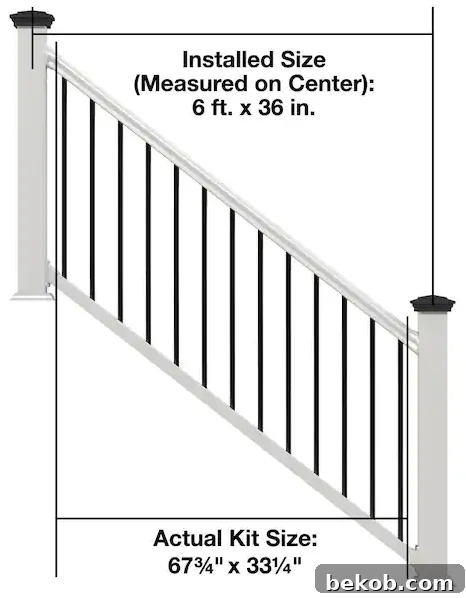
For our project, we opted for the Veranda traditional white metal rail kit with black metal balusters, appreciating its aesthetic appeal and durability, along with the matching stair rail sections. In this particular railing system, straight handrail sections are available in *nominal* 8’ lengths (actually 92″), and stair handrails come in 6’ sections (actually 67 3/4″).
Consequently, for our porch and stair railing project, we required the following materials:
- Materials for 6 Posts
- (6) Install kits for vinyl posts (powder-coated steel)
- (6) Deck post jackets (white vinyl)
- (6) Post base trim (white vinyl, New England style)
- (6) Post caps with glue (white vinyl, New England style)
- (24) ⅜” x 3” lag bolts (4 per post base)
- (1) 8-foot straight handrail kit (actually 92″)
- Includes handrail, bottom rail, balusters, and one bottom rail support bracket
- (3) 6-foot stair handrail kits (actually 67 ¾”)
- Includes handrail, bottom rail, balusters, and one bottom rail support bracket
Additionally, we enhanced the appearance of the stairs by incorporating white PVC trim stair risers and 1×8 Trex trim along the side of the stair stringer.
Total Cost
The deck railing components amounted to approximately $850. The additional composite boards for the stair risers and side trim/closed stringer added a couple of hundred dollars to the total cost.
Prepping the Stairs: Ensuring a Solid Foundation
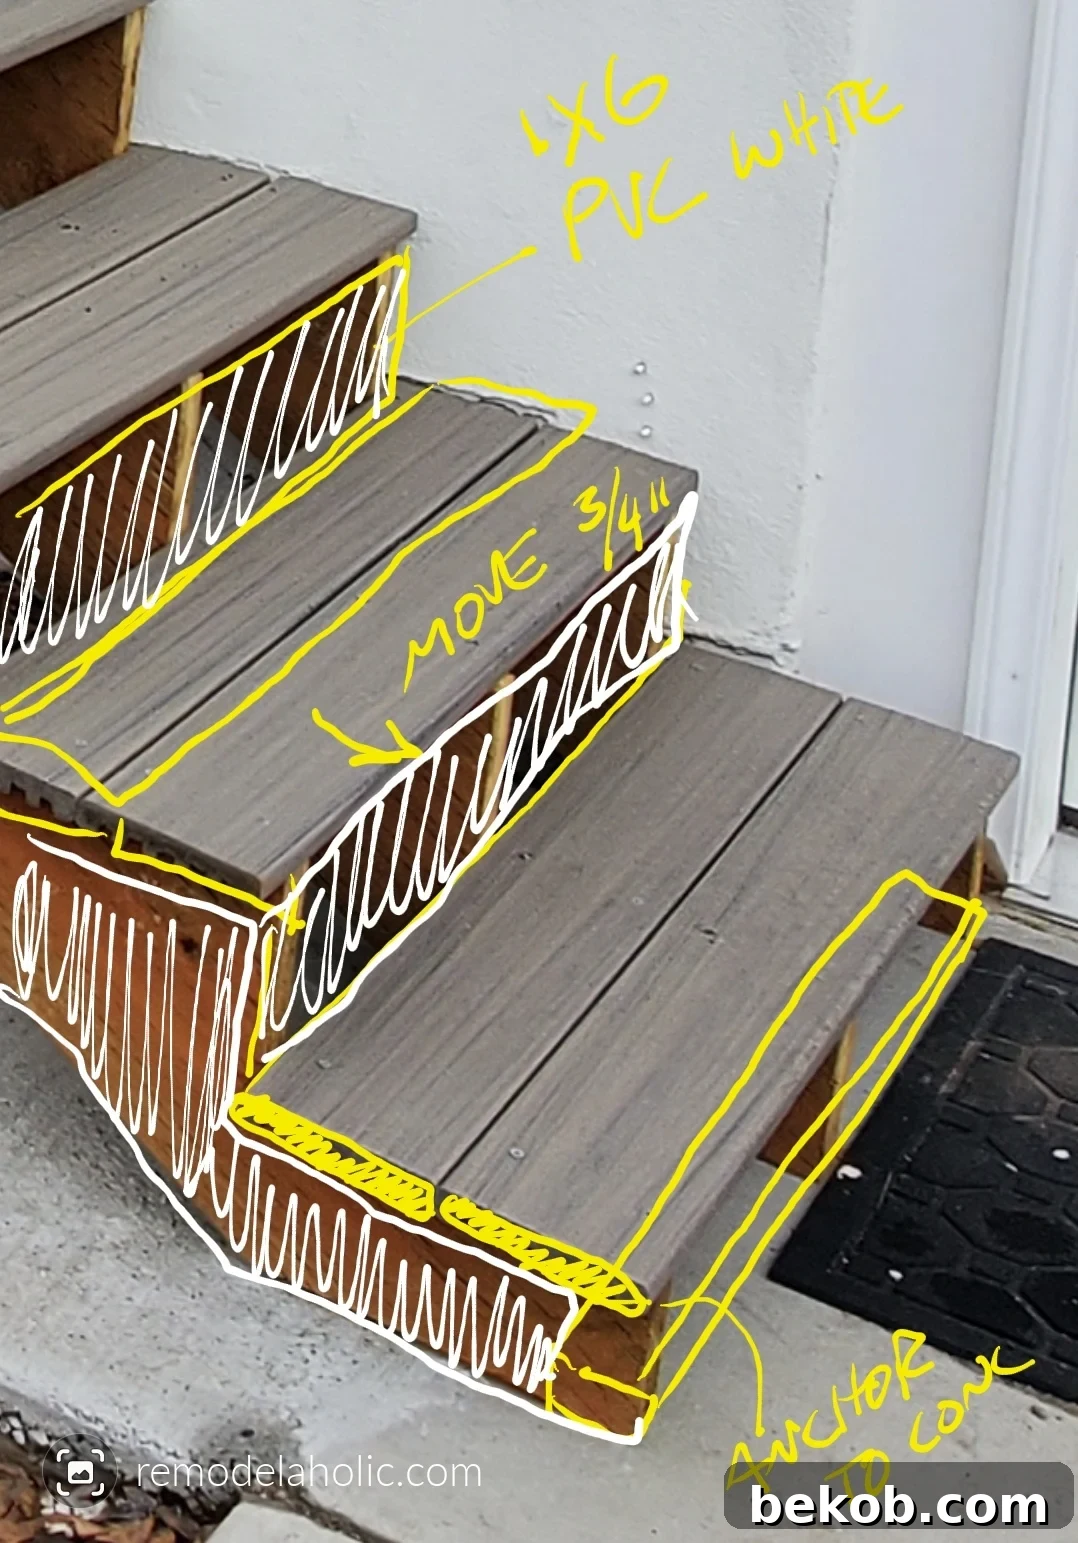
Prior to installing the deck railing, we addressed some imperfections left by the contractor who installed the deck stairs. We…
- Added a bracket on the concrete patio foundation to secure the bottom stair.
- Incorporated additional blocking to the frame of the stringer where the post base would be anchored.
- Added new riser trim and adjusted the stair tread placement.
With these enhancements, the deck was now ready for the DIY deck railing installation!
DIY Deck Railing Installation: A Step-by-Step Guide
Installing a vinyl DIY deck railing is an attainable project for homeowners with some prior experience. While the deck railing itself is relatively straightforward, the stair railing demands more meticulous planning and experience to ensure a perfect fit (or to make necessary adjustments).
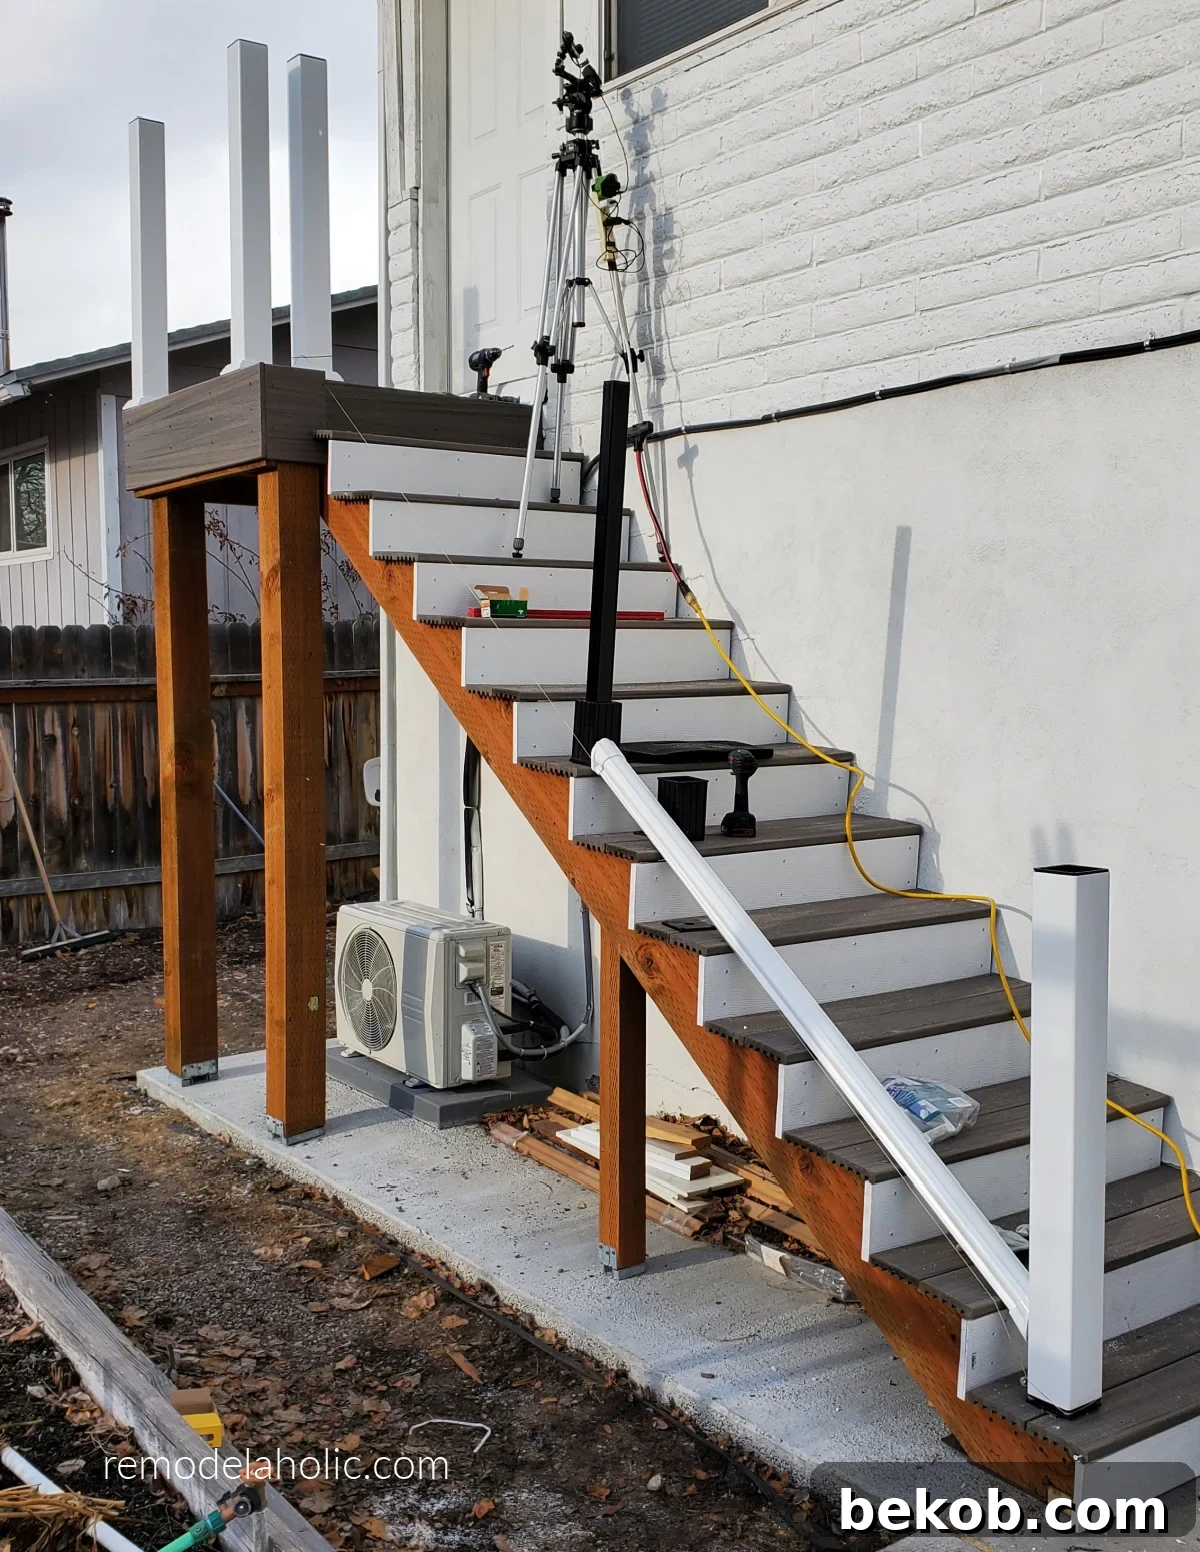
Measure with precision and adhere to the manufacturer’s instructions. By doing so, you’ll ensure that your front porch, back porch, or deck boasts a stunning upgrade upon completion!
Step 1: Installing Post Bases and Sleeves
Begin by anchoring the post bases to the top of the tread on the first stair at the bottom, then at the top of the stairs, and at all other predetermined post locations.
Depending on the deck/stair design, you may need to incorporate blocking between joists or along stairs to provide a solid anchoring point for the post bases. We added two layers of blocking to the side of the stringer to accommodate some of the post bases. Conversely, we were able to anchor directly into the deck post for a couple of the post bases.
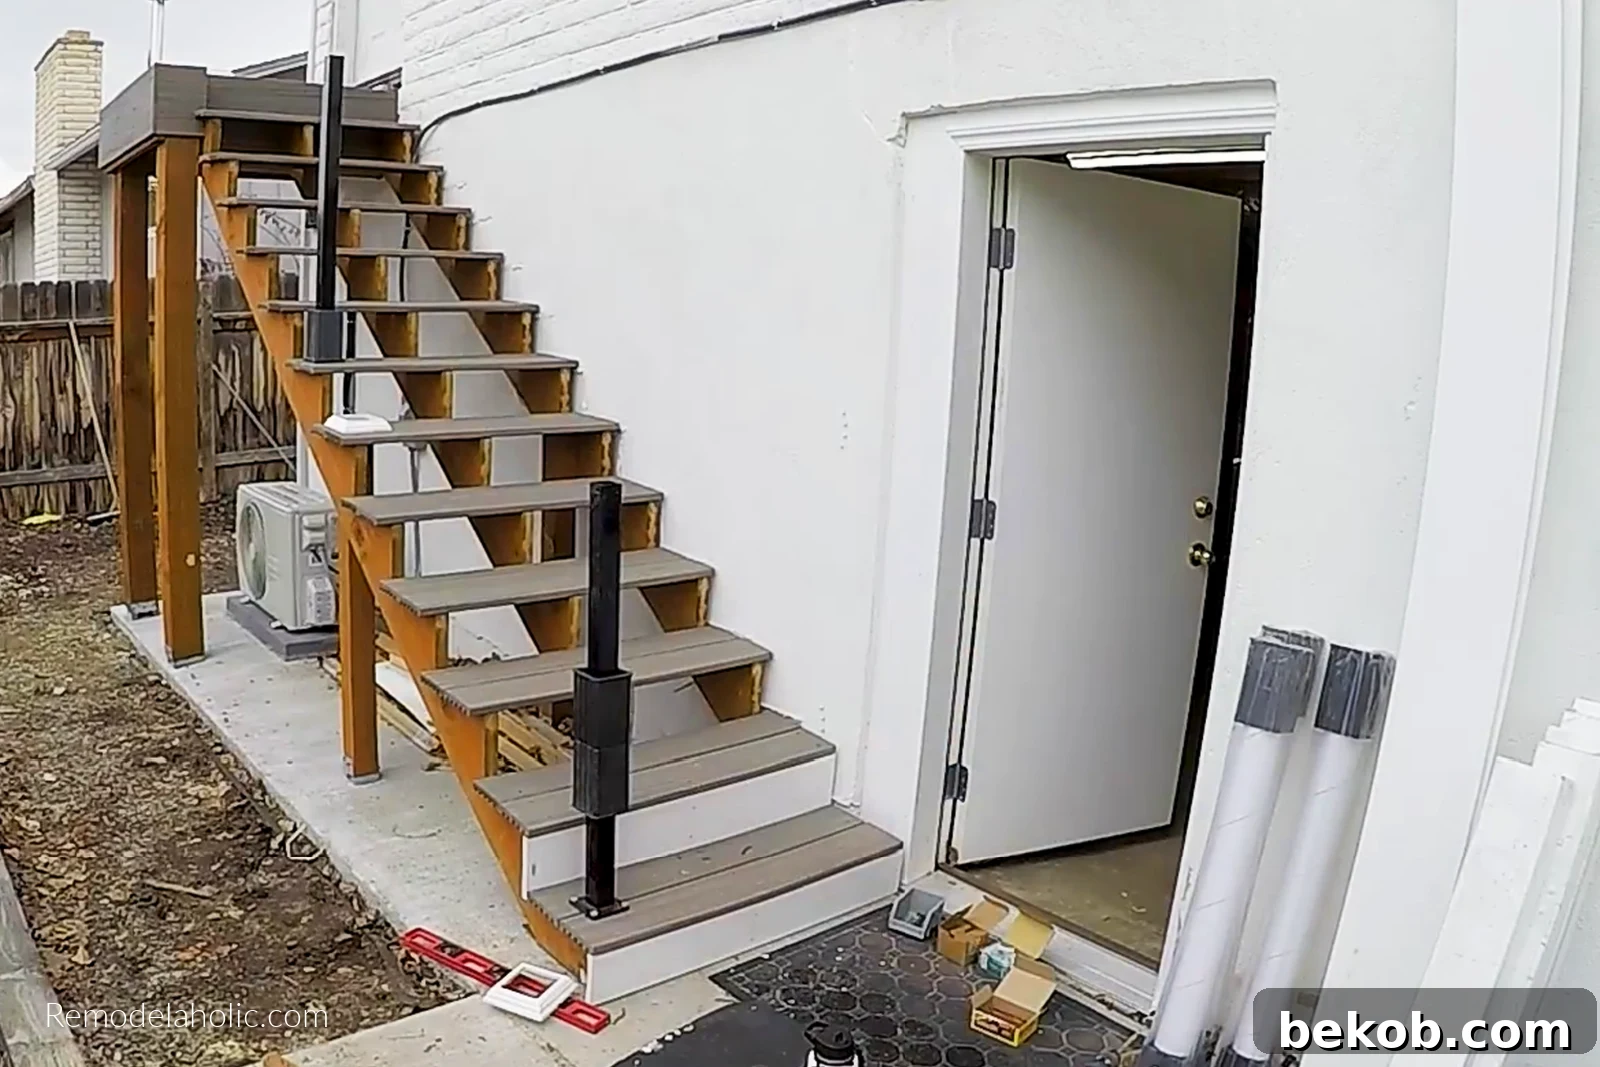
To anchor and install the post bases and sleeves:
- Mark and predrill four ⅜” holes for ⅜” x 3” lag bolts.
- Install the separate bottom plate beneath the deck and the post on top using the lag bolts and nuts.
- Drive in the lag bolts using an impact driver and employ the shims (included with the post) to level the post.
- Position the bottom post insert, followed by the top post insert.
- Slide the post sleeve over the post base and inserts.
- Slide the post base trim section over the post sleeve.
To ensure a level stair railing along the stairs, the stair posts aren’t positioned in precisely the same location on each stair. Refer to the video to understand how we used a string line to align them for an aesthetically pleasing result.
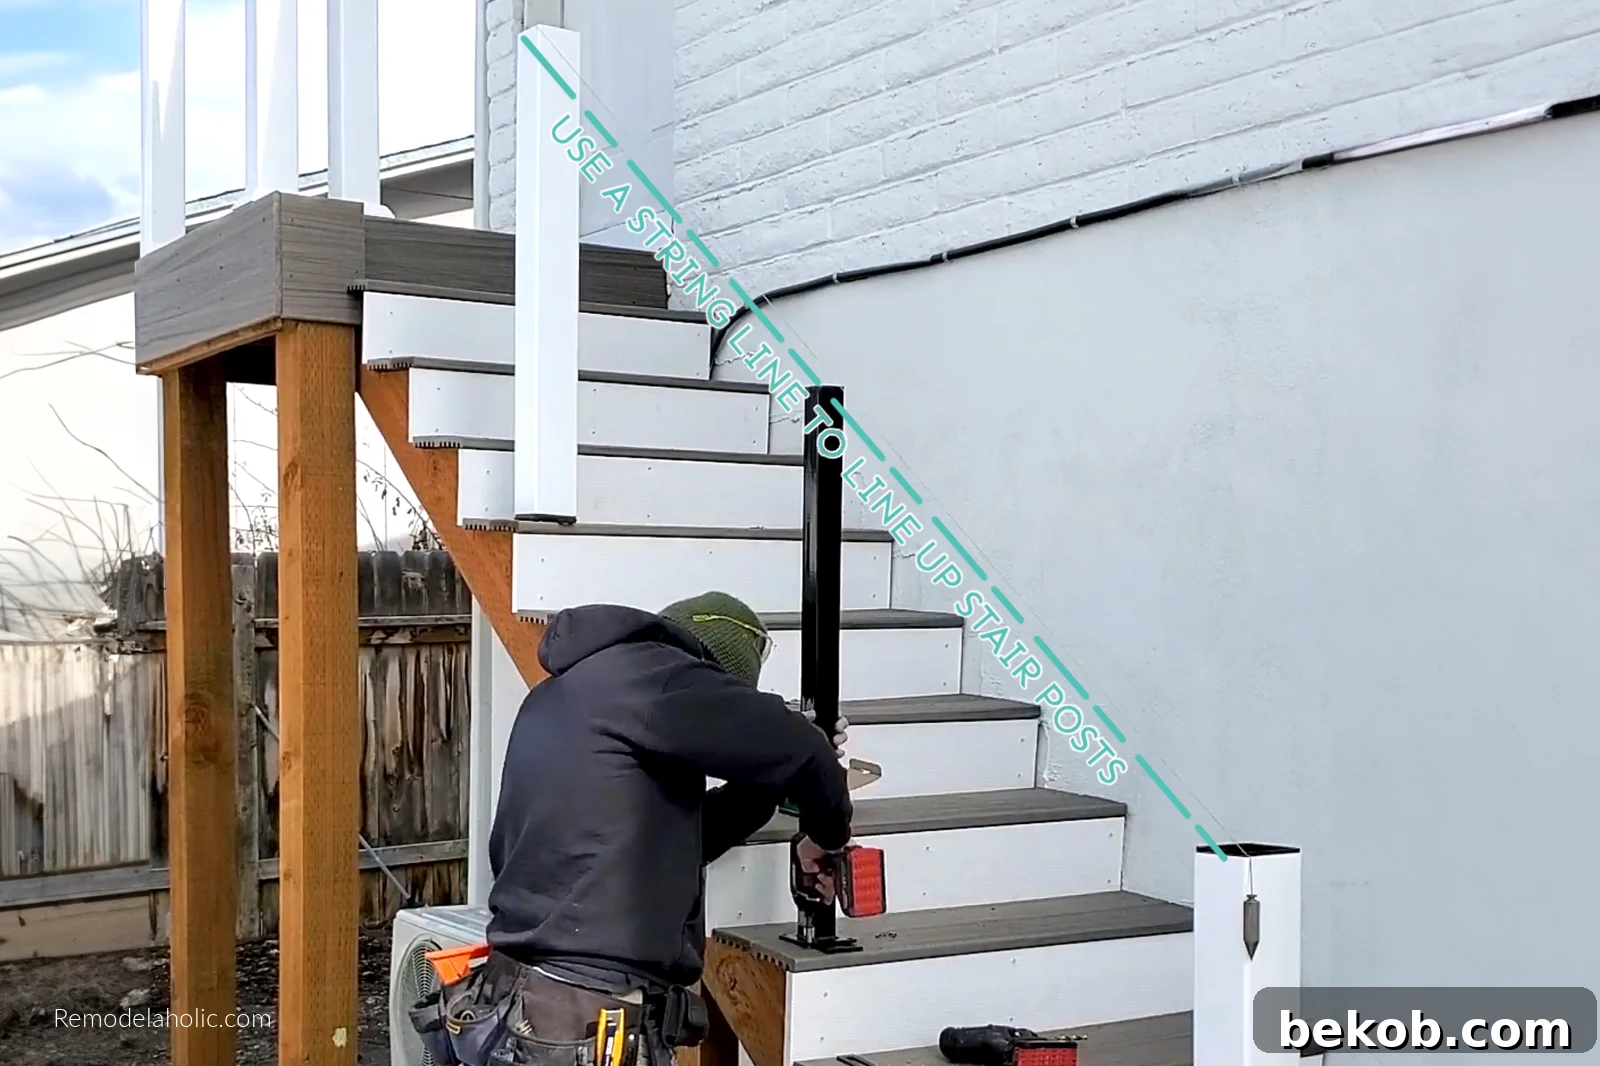
Step 2: Installing Railings on the Landing
To install straight deck railings on the landing, adhere to the following steps, which align with the manufacturer’s instructions:
- Cut the rails to the appropriate length.
- Install bottom rail support braces (if necessary – for our short spans, they weren’t required).
- Assemble the railing sections by inserting the balusters into the pre-cut holes in the bottom rail and then the top rail.
- Position the assembled rail in place (supported by scrap wood spacers or the support braces) for a dry fit.
- Attach the top rail metal brackets to the rail using screws.
- Position the bottom rail bracket over the bottom rail.
- Reposition the assembled rail in place (carefully!) with support from the spacers.
- Attach the top rail metal brackets to the post, centered, using screws.
- Attach the bottom rail brackets to the post, centered, using screws.
- Install the top rail bracket covers using screws and slide on the bottom rail bracket covers.
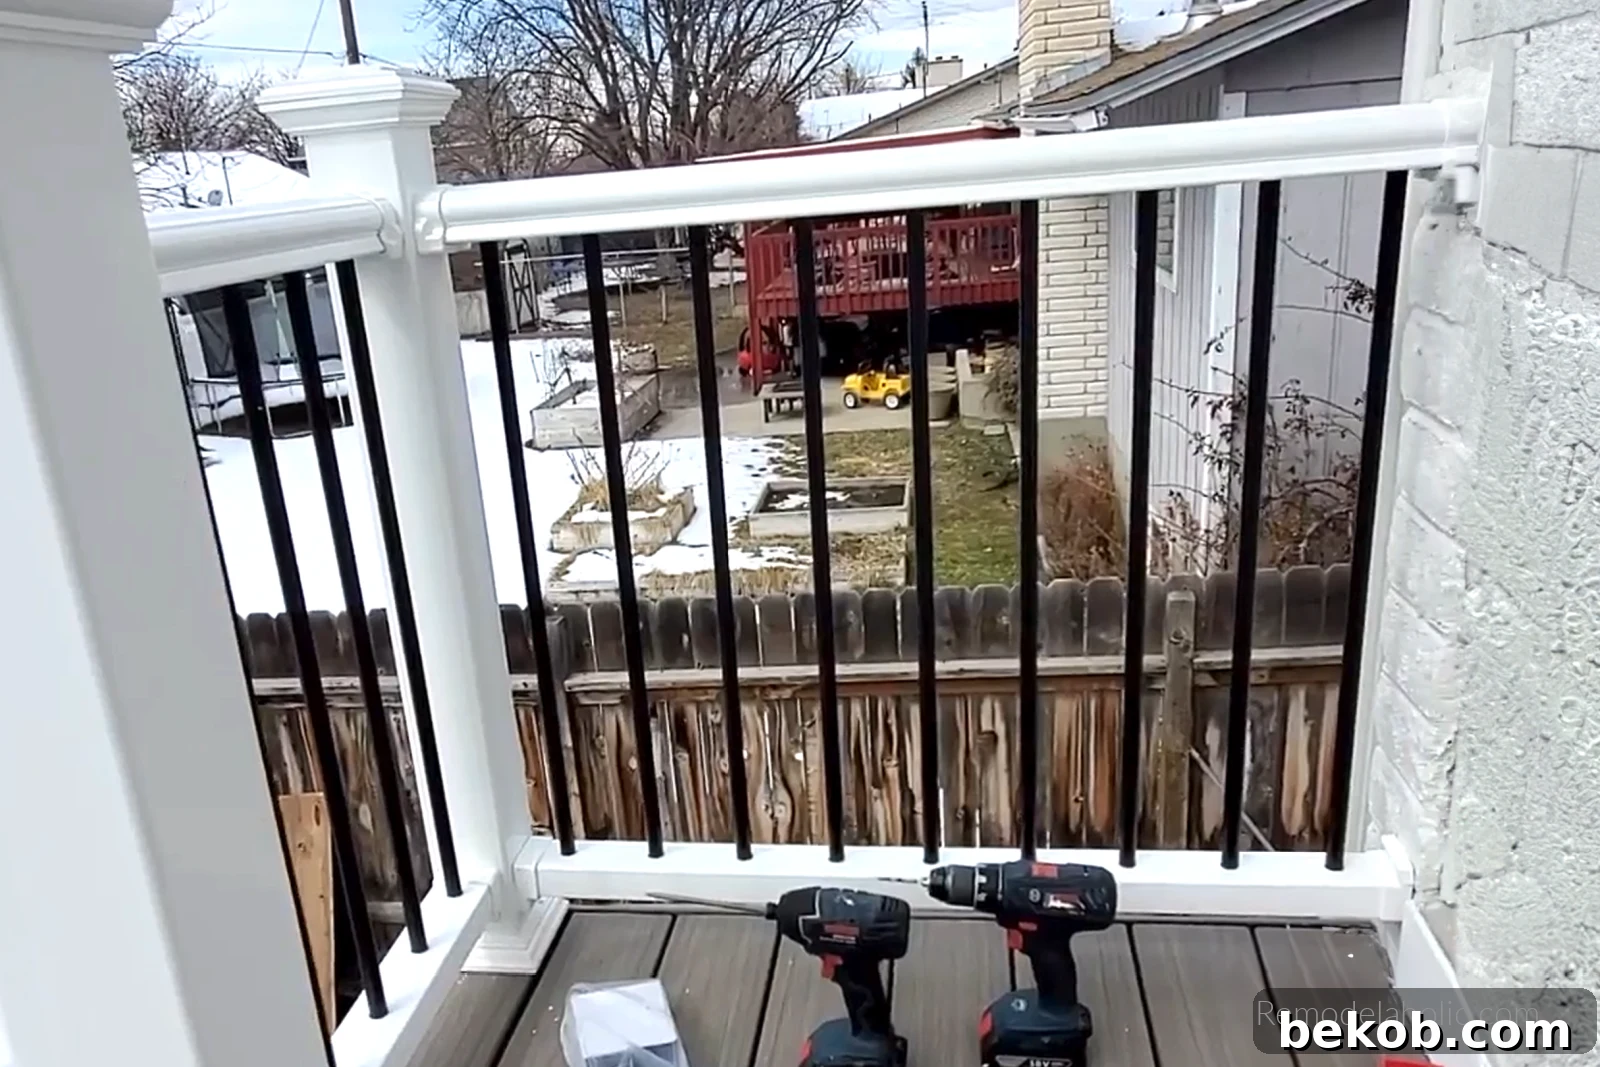
Attaching Railing Directly to the House
We chose to forgo a post next to the house for aesthetic reasons, though you can certainly add one if stability is a concern. We anchored the rail brackets directly into the brick or wood using brick anchor screws.
To attach the deck railing directly to the house, we used a bracket kit. This approach saves on the cost of an additional post if you’re comfortable drilling directly into the exterior. In our case, the brick exterior presented no issues.
Adding Railing to a Tight Corner Section
Due to a bump-out overhang on the porch area, we encountered a tight railing section measuring just over 4”. To accommodate this, we opted to add a handrail. To make this work, we had to remove the post sleeves and install the handrail with the post sleeves off the post base.
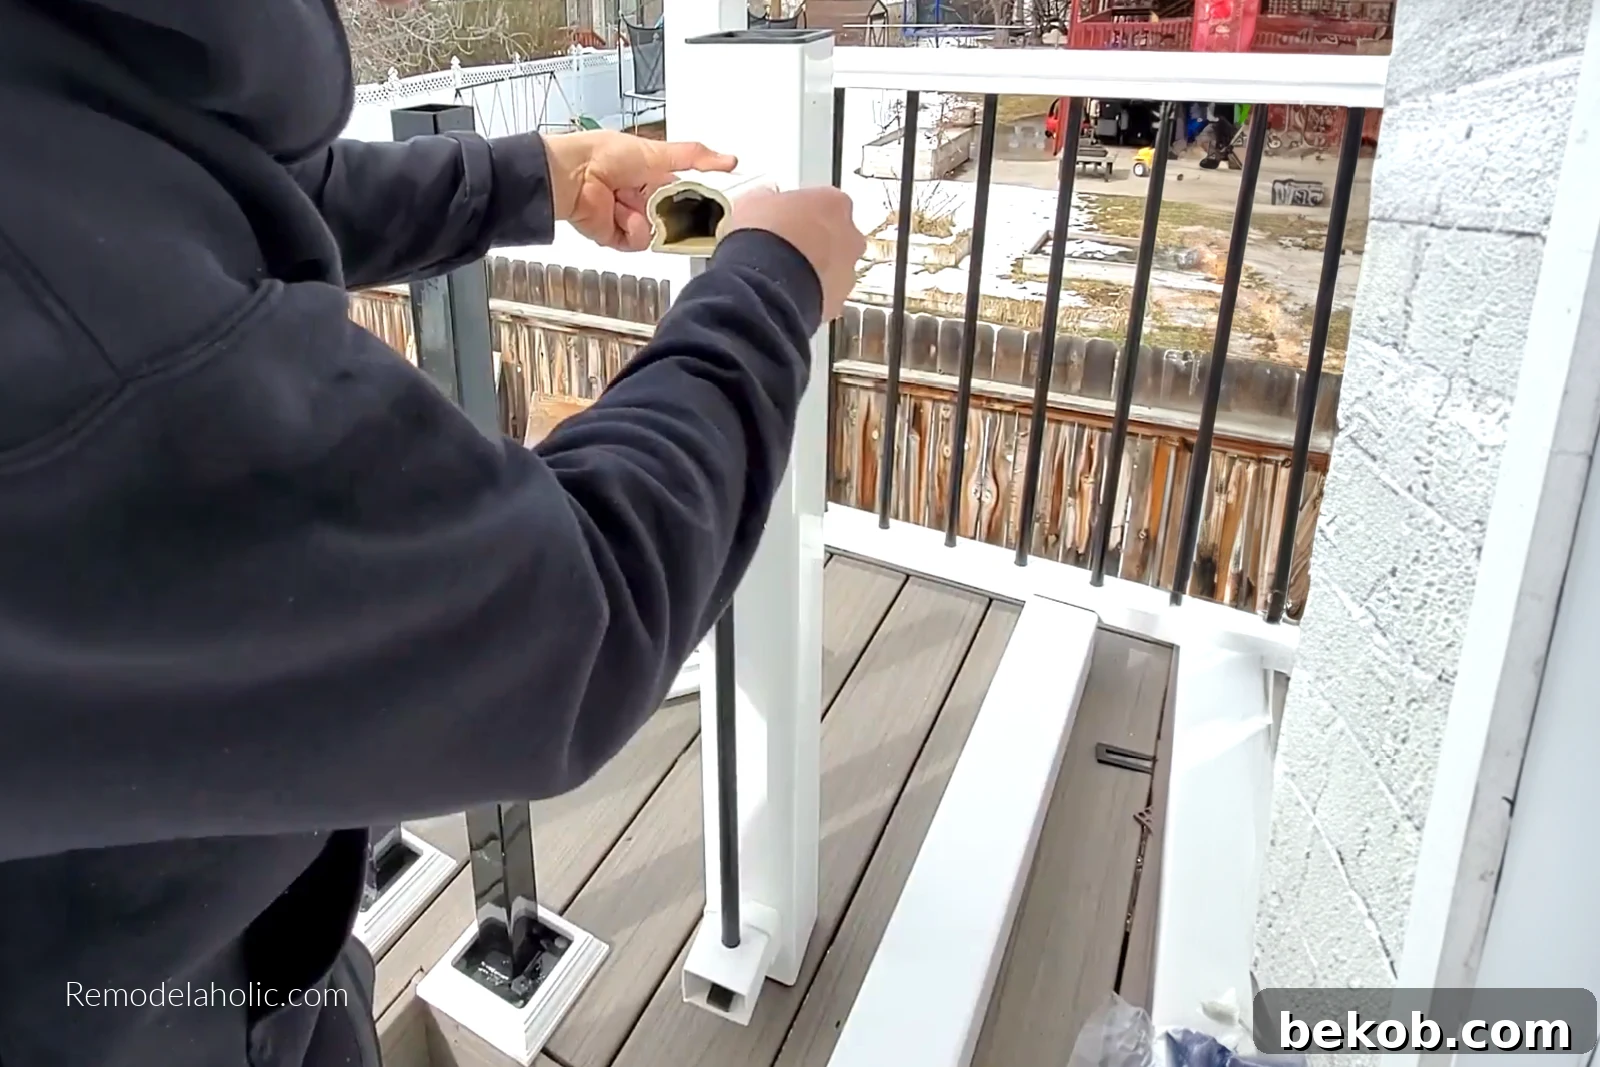
This proved to be a bit challenging, but ultimately successful. Here’s how we accomplished it:
- We marked the location of the handrail and installed the straight rail line bracket to the post sleeve for both the bottom rail support and top handrail.
- We then cut the handrail and bottom rail to length, ensuring that we left one hole in the center for a single black baluster in that section.
- Next, we attached the bottom rail to one post sleeve, added the baluster, and secured the top rail to the post sleeve.
- We then attached the bottom rail and top handrail to the other post sleeve.
- With this section assembled, we carefully slid the two post sleeves over the post bases and inserts, fitting them into the post base trim that had already been slid over the post bases.
Step 3: Installing Railings and Balusters on the Stairs
This step required careful attention. The key was to determine how low the bottom railing needed to be while maintaining a consistent line along the top of the stair. Here’s where we share our insights to help you avoid potential pitfalls.
Be sure to watch the video to see how we used a string line to properly align the stair railings!
In our initial attempt, we installed the top of the railing about 1″ too high, which necessitated notching out the post caps in the subsequent step. Keep this 1″ discrepancy in mind when calculating this part!
We recommend dry-fitting the stair railing *and* placing the post cap during the dry fit to prevent the extra work we incurred.
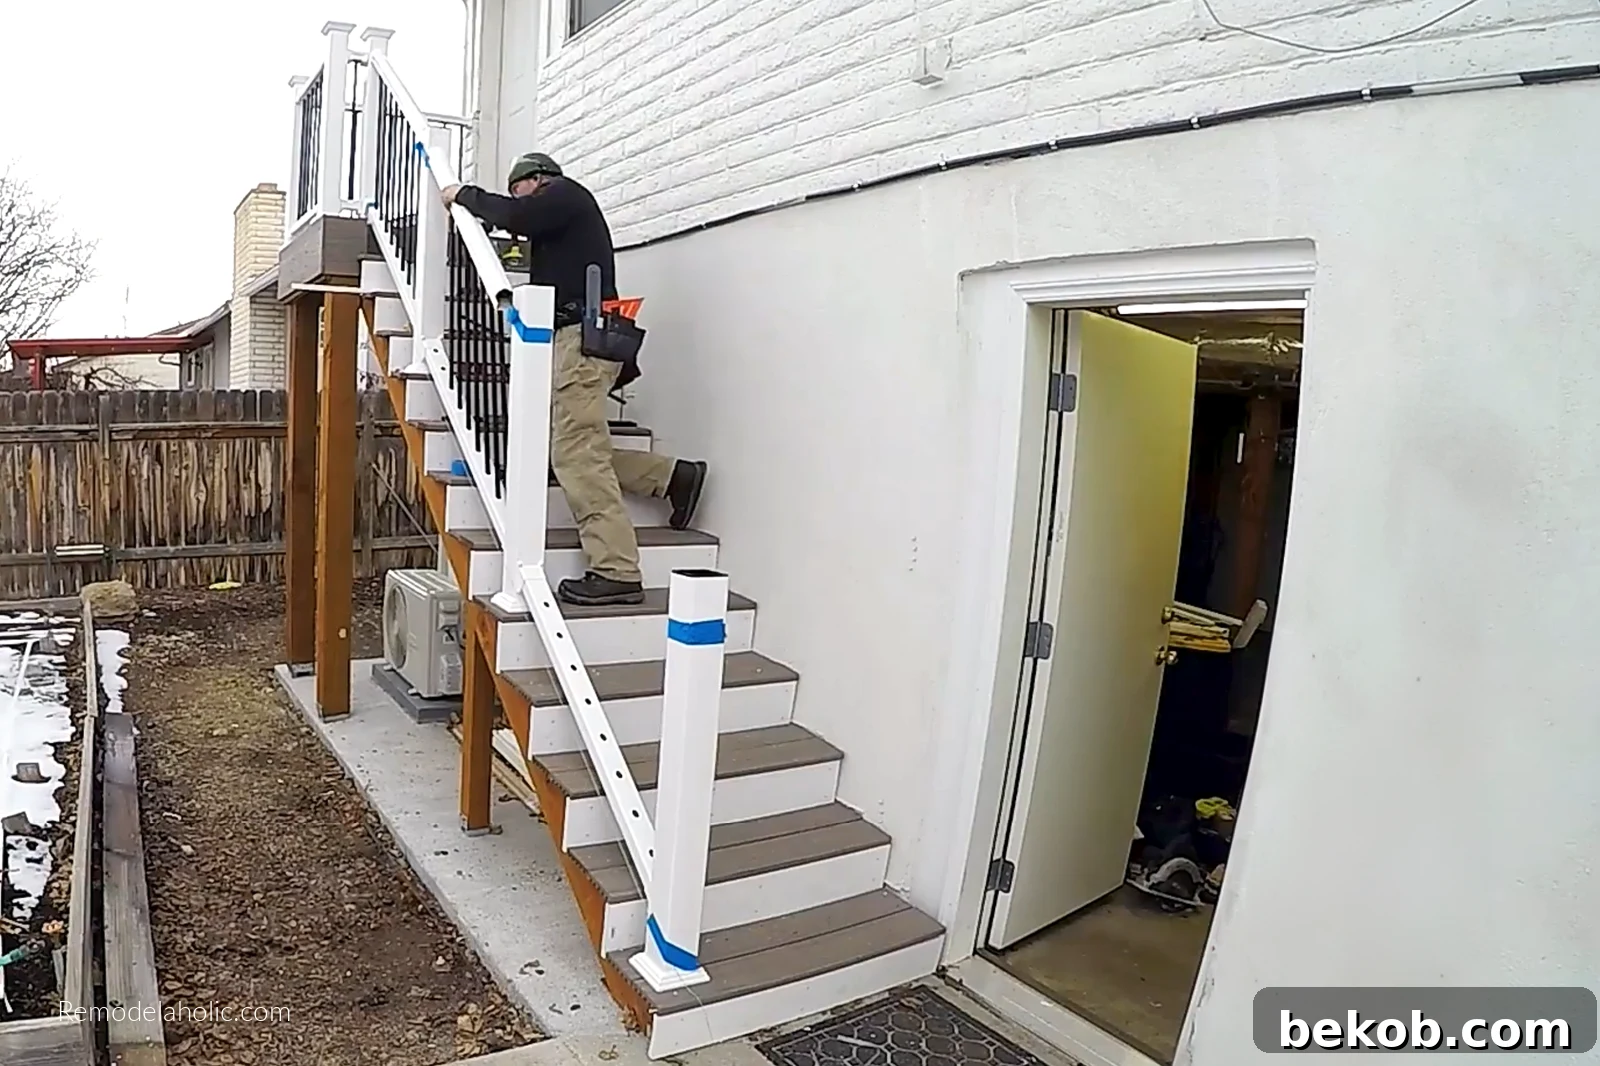
To assemble and install outdoor stair railings:
- Assemble the stair railing section by inserting the balusters into the pre-drilled holes in the bottom and top railings.
- Position the assembled railing section adjacent to the posts, utilizing spacers below the bottom rail and clamps to attach the railing section to the posts for this dry fit.
- Adjust the placement of the railing section until the distance between the post and the first baluster, as well as the other post and the last baluster, is consistent.
- Mark the posts on each rail, both top and bottom.
- Unclamp the railing and cut the ends at the marked locations, ensuring the correct angle.
- Slide the angled stair railing brackets onto the rails.
- Position the rail and mark the bracket hole locations, then predrill the holes.
- Attach the brackets to the posts using screws, then secure the bracket to the rail with another screw.
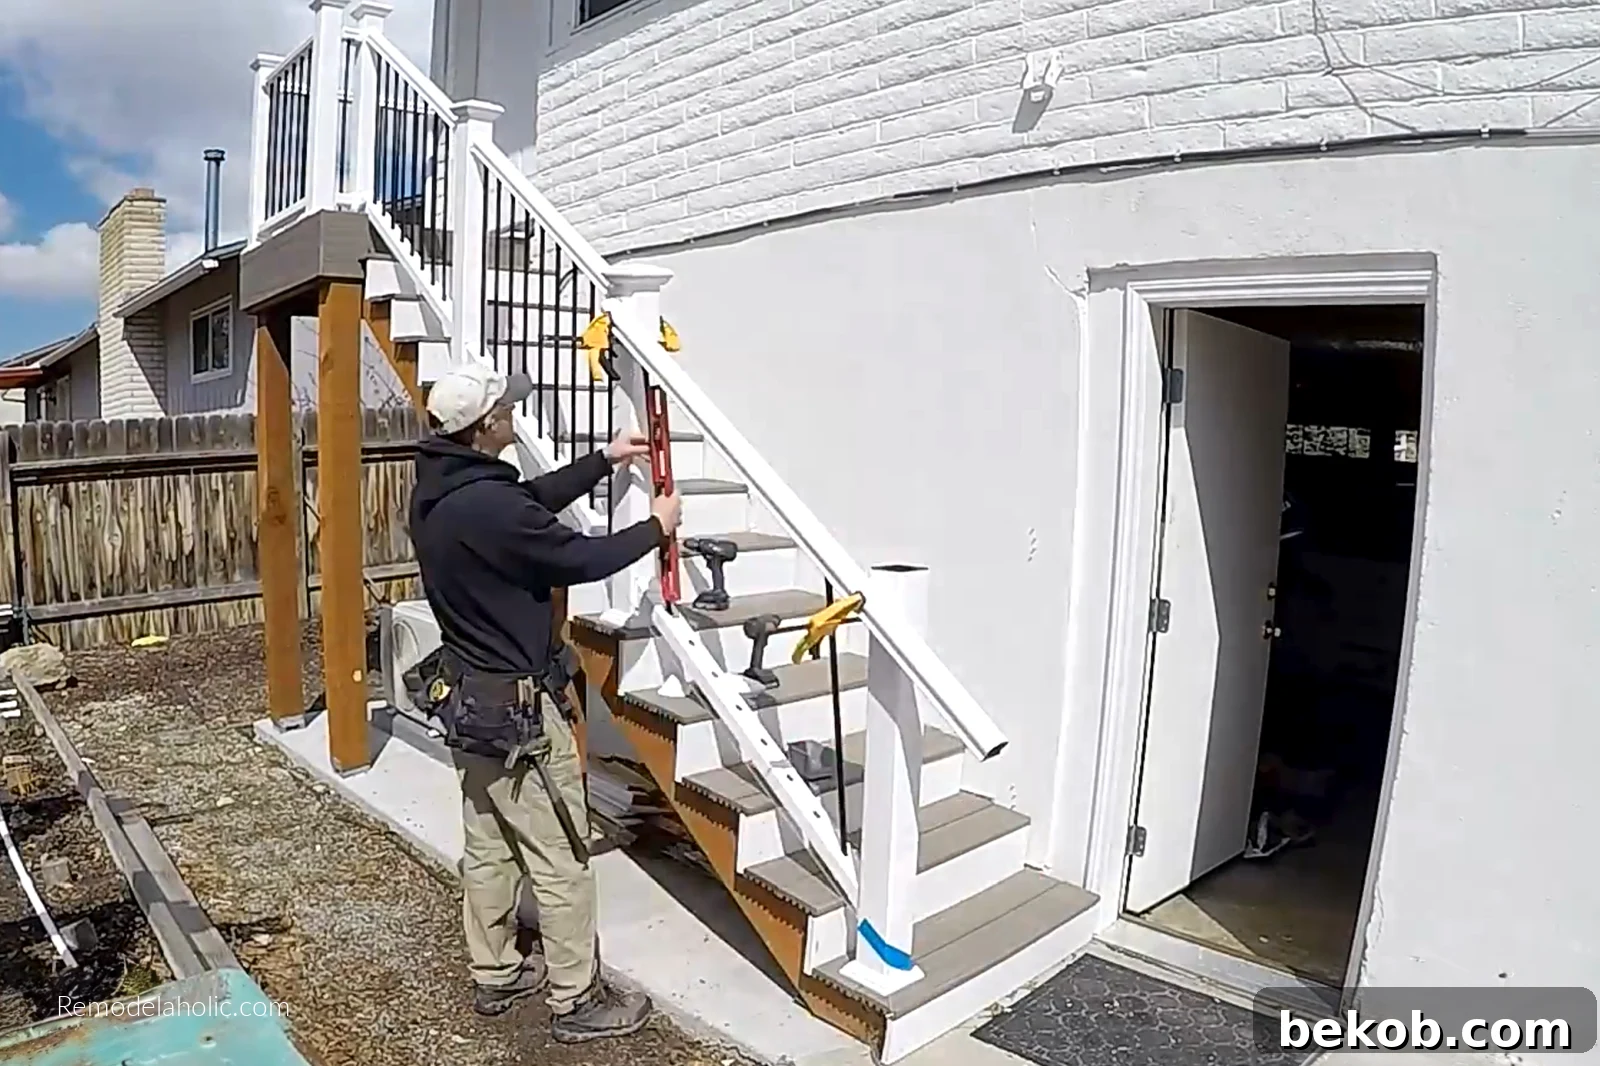
Step 4: Installing Post Caps
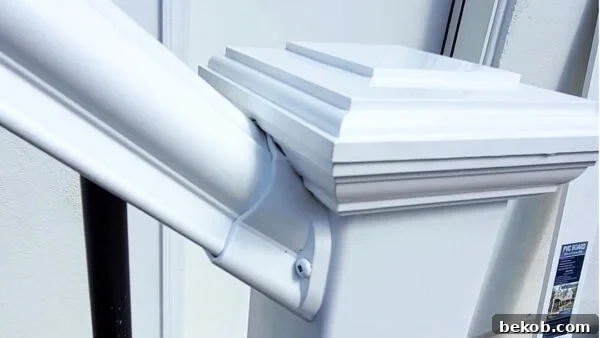
With the railing height correctly installed, installing post caps is a straightforward process! These pre-glued post caps simply slide over the top of the post sleeve. You can use the included rubber cement adhesive; however, we opted for Liquid Nails adhesive instead.
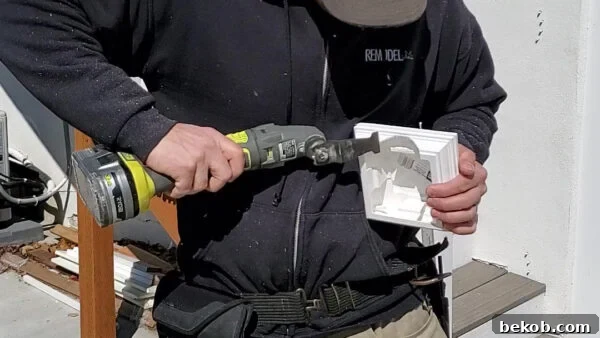
Given that the height of our railing was slightly too high during installation, we had to cut a small notch on the uphill side to accommodate the handrail profile. While manageable, it was more complex than necessary.
Step 5: The Finishing Touch – Installing Stair Side Trim
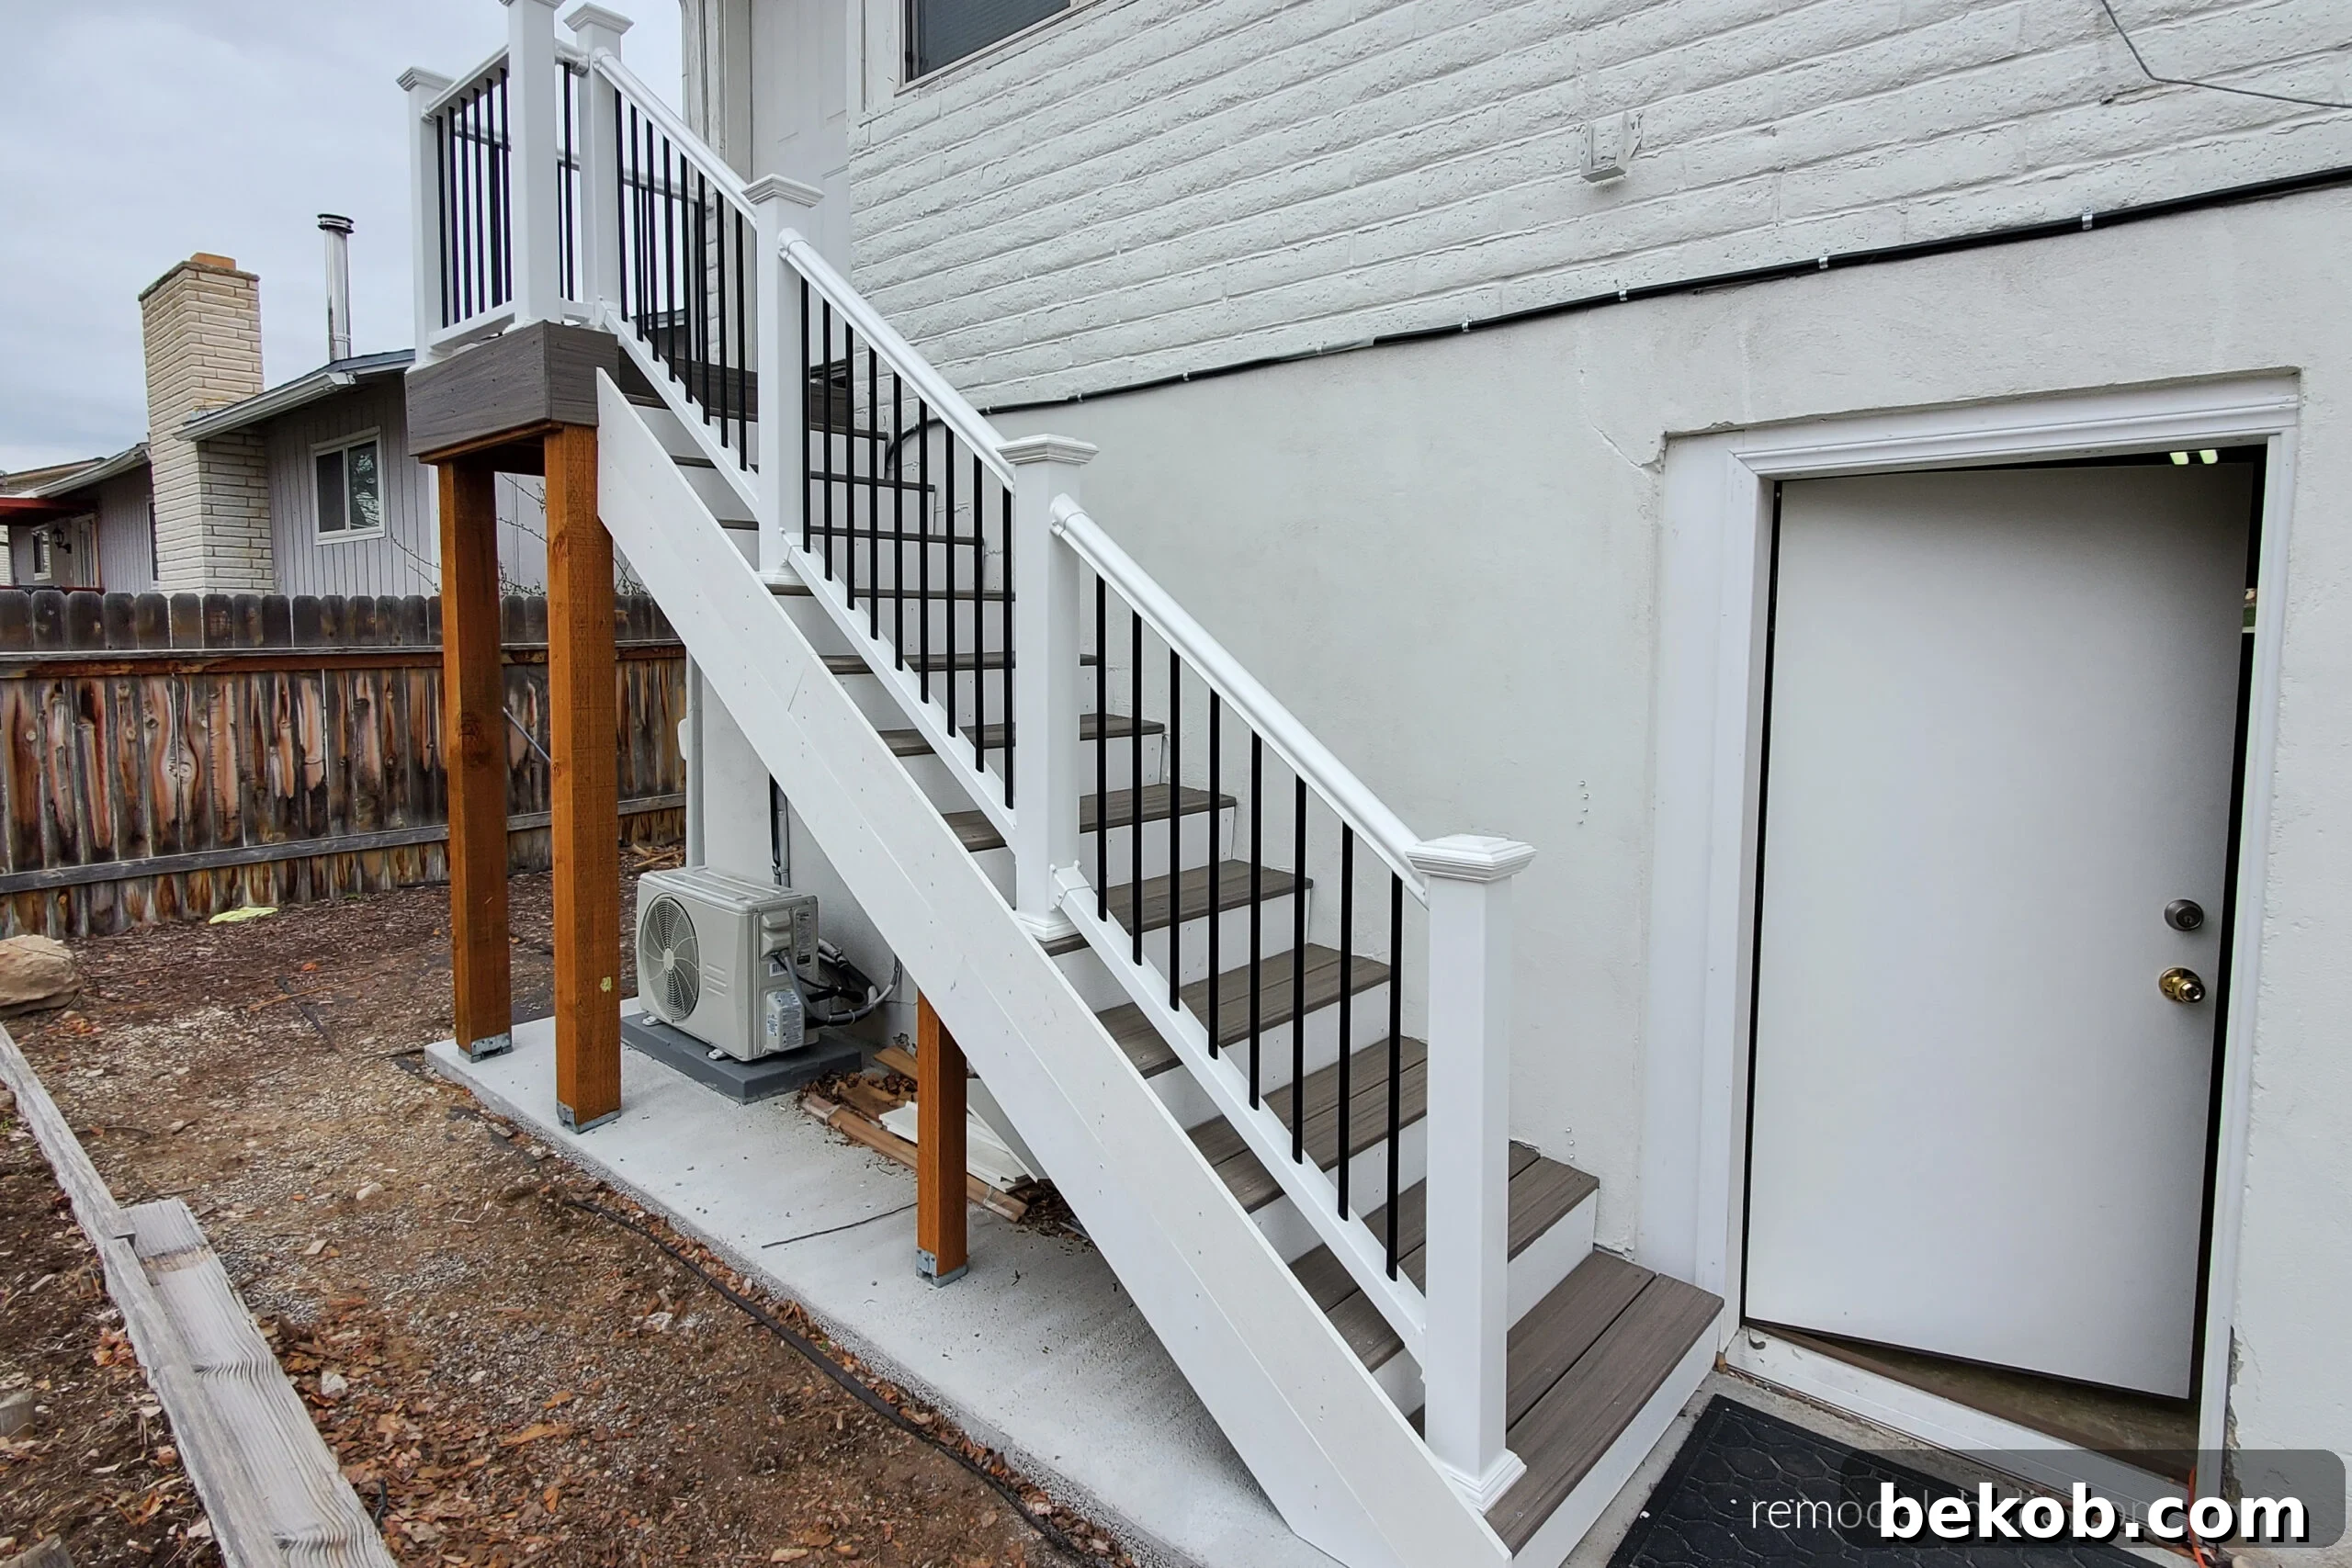
Given that the existing tread lengths were already established, we installed the risers to match, enabling us to install the side trim over the top, creating a closed stringer effect on the deck stair skirt. The side trim comprised two layers of 1×8 PVC boards. In total, we used approximately four boards for the entire skirt on these 12.5-foot stairs.
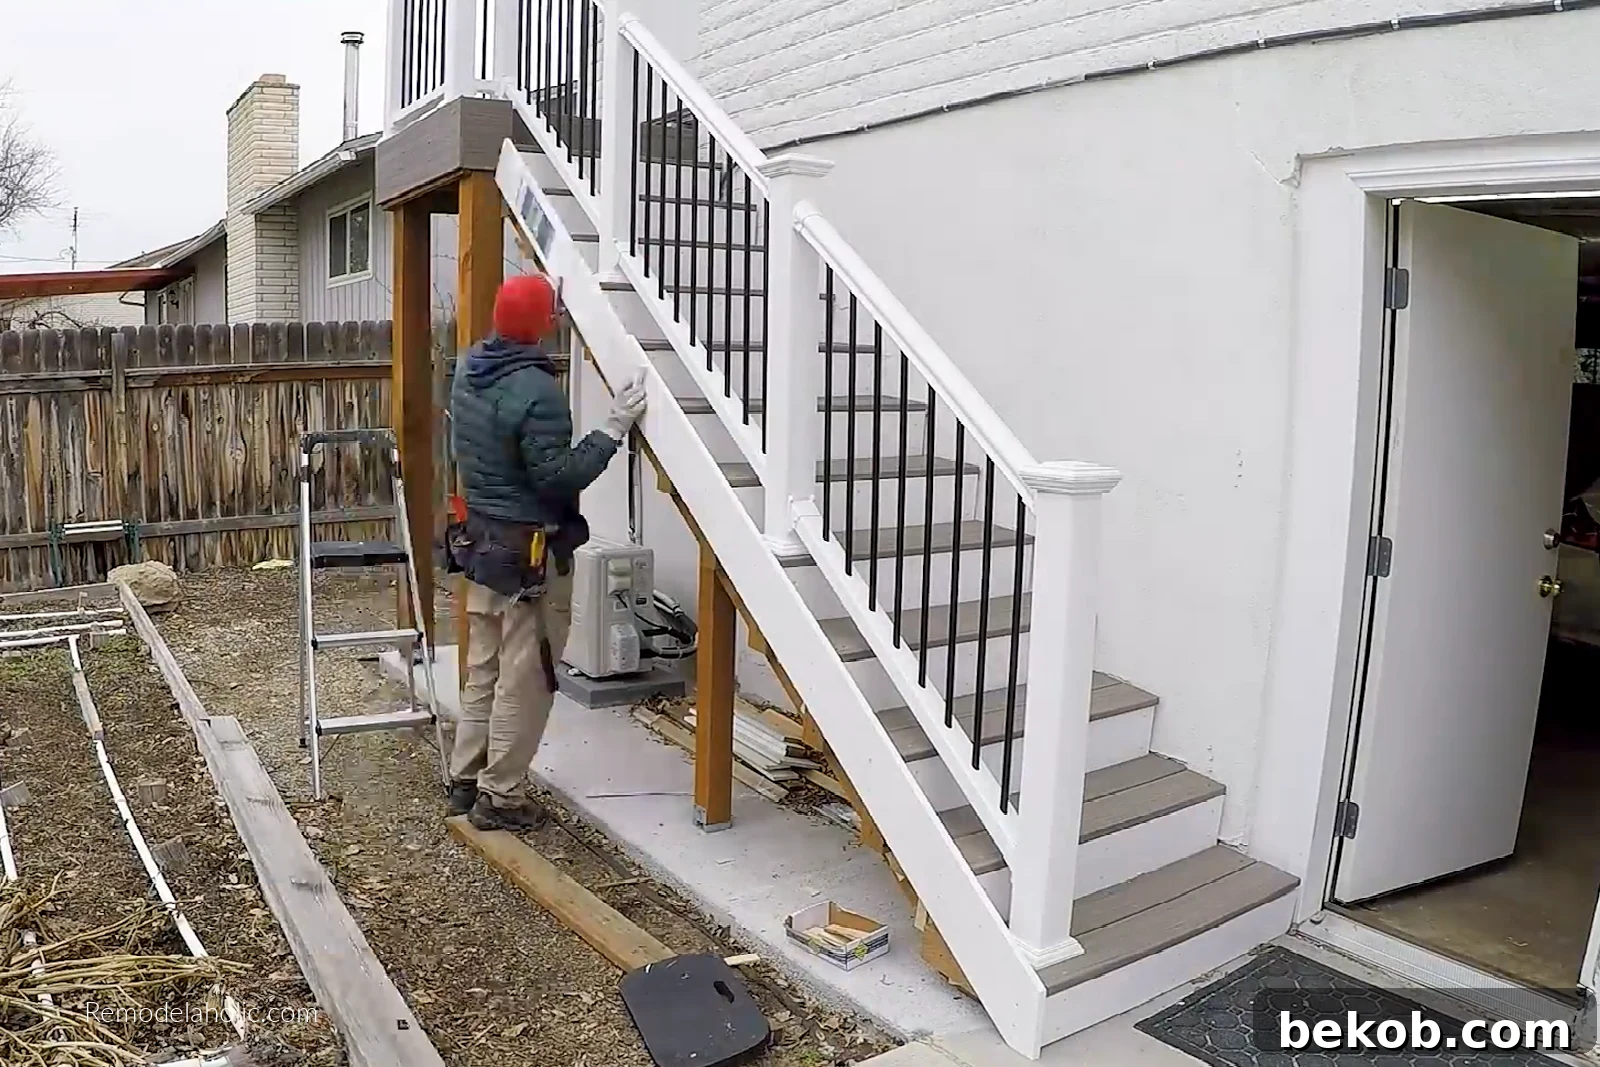
Due to the construction of the stairs, we needed to add spacers to align the wood surface with the level of the end of the treads and risers. We utilized pieces of 2×4 pressure-treated lumber, approximately 9” long. In hindsight, they should have been slightly longer, around 12”, to better support the second board. Additionally, we added spacers to the back of some boards to ensure they were all at the same level.
Given that the boards were slightly warped, we had to ensure they were straight to stack another layer evenly. We used screws and shims to straighten them before securing them in place.
Deck & Stair Railing FAQ
What is the Best Type of Outdoor Railing?
We opted for vinyl deck railing! While it may be slightly more expensive than wood, we appreciate its ease of installation, durability, and minimal maintenance requirements. Wood deck railing is a viable option and boasts an attractive appearance, but it necessitates the same annual maintenance (or semi-annual, depending on your climate) as a wood deck.
See how we finally found a wood deck stain we love!
For a low-maintenance deck and outdoor railing solution for Mom, we chose to use PVC deck boards and vinyl railing with aluminum metal balusters. These composite railings will maintain their appearance for years to come, free from splinters or weathering.
Can You Have a Porch Without Railings?
Consult your local building codes for definitive guidance. Many low porches, decks, or short staircases can be constructed without railings.
Can Vinyl Deck Railing Be Cut?
Yes! All vinyl deck railing kits are designed to be cut to length to accommodate your specific requirements. Review the manufacturer’s instructions for specific guidelines, and be sure to use the appropriate saw blade (typically a fine-tooth blade) on a circular saw or miter saw for a clean cut.
How Can I Make Deck Railing Sturdy?
When installing new deck railing, ensure its sturdiness by providing sufficient blocking between joists to secure the posts. Cut the railings as precisely as possible and fasten them to the posts using the correct fasteners to guarantee a strong and secure railing.
What is the Difference Between PVC and Vinyl Railing?
In the context of fencing materials, PVC and vinyl are used interchangeably. Vinyl fencing is composed of PVC, making all vinyl fence materials accurately referred to as PVC fence materials.
Pin this to share and save for later!