Dreaming of sleek, modern walls? This comprehensive DIY guide will teach you how to effectively skim coat textured walls, transforming them into a beautifully smooth finish and eradicating those outdated, bumpy textures. Achieve a professional look without the professional cost!
Watch our detailed video tutorial below, then follow our step-by-step guide and invaluable tips to achieve the smooth, flawless wall surface you’ve always desired, rivaling the finish of professional work.
You might also be interested in our Ultimate Guide to Wainscoting, our picks for 40 Gorgeous Wall Panels, and 50 Stunning Wallpapers.
How to Skim Coat Walls for a Beautifully Smooth Finish
Wall texture is a defining characteristic of any room, often going unnoticed until it becomes glaringly outdated. If your home still boasts textures from decades past—like the ubiquitous 1970s swirls, popcorn ceilings, or textured drywall finishes such as orange peel and knockdown—you know the feeling. These textures can make a space feel dated, collect dust, and hinder modern design aspirations.
For those who prefer a clean, contemporary aesthetic, achieving a smooth wall texture is a transformative home improvement project. We’ve tackled this renovation in several of our homes, mastering a technique known as skim coating. This DIY process effectively removes old wall textures and smooths out imperfections, leaving you with a sleek, paint-ready surface.
Achieve smooth wall texture with no drips!
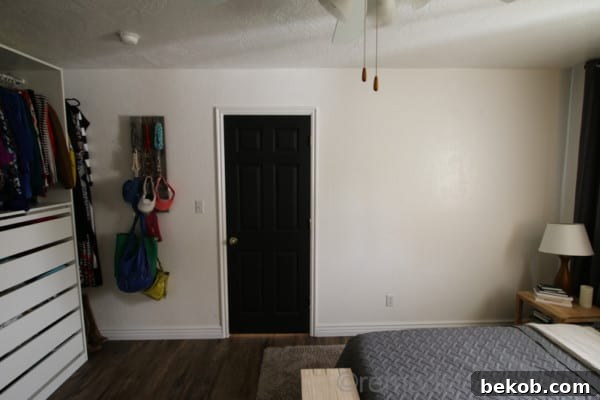
While it requires patience, practice, and a bit of labor, skim coating is a highly rewarding DIY endeavor. We’ve successfully used this method to create beautiful smooth wall textures when we built our bathroom built-ins and when we added a layer of soundproofing drywall to our master bedroom, demonstrating its versatility and effectiveness.
This comprehensive guide will walk you through every detail, from preparation to the final sanding, ensuring your existing textured walls transform into a flawless, smooth surface.
What Exactly is Skim Coating?
Skim coating is a specialized process used to re-texture a wall, giving it a smooth, uniform finish. Essentially, it involves applying one or more very thin layers of drywall mud (also known as joint compound) over an existing surface. This technique is designed to cover imperfections, hide drywall tape, and, most importantly for this project, smooth out unwanted textures. The goal is to build up a new, flat surface that can then be sanded to perfection.
This post and its accompanying video tutorial will provide all the necessary information and visual guidance on how to smooth textured walls, resulting in a beautiful, flat-looking wall that enhances any room.
Are There Other Ways to Remove Wall Texture?
While skim coating is our preferred method for its excellent results and relative simplicity, other options exist for removing or concealing wall texture:
Wet and Scrape: For certain textures, especially older ones, wetting the wall and then scraping the texture off can be effective. However, this method is often very labor-intensive, messy, and can damage the underlying drywall.
Remove and Replace Drywall: This is the most drastic approach. It involves tearing out all existing drywall and installing new sheets, which are then taped and mudded to your preferred smooth finish. This is ideal if the drywall is severely damaged or you’re undertaking a major structural renovation, but it’s costly and creates significant construction waste.
Cover It Up: Instead of removing the texture, you can disguise it with decorative elements such as wainscoting (like board and batten), wallpaper, or modern textured wall panels. While these options offer aesthetic appeal, they don’t truly “remove” the texture; they simply hide it.
We advocate for our skim-coating technique because it consistently delivers superior results, even on walls that are over 50 years old, providing a truly smooth and lasting finish.
Can I Smooth the Texture on an Existing Wall?
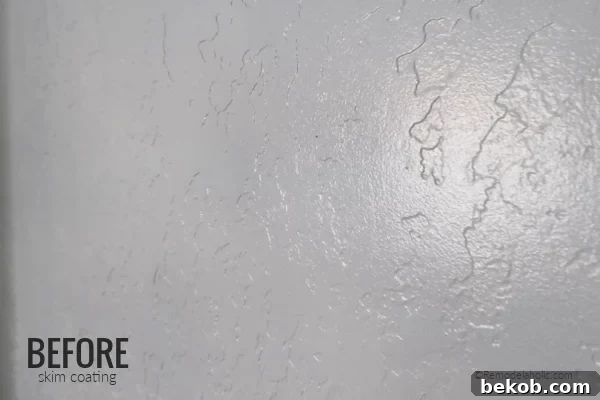
Absolutely! Skim coating is specifically designed for existing textured walls. Whether your walls have a knockdown texture (like the one shown below), orange peel texture, or even more aggressive different textures (including old popcorn walls), this technique can transform them. It can also be applied to new drywall once the initial taping and mudding along the seams have been completed.
Can I Skim Coat Over Damaged Drywall?
Yes, in most cases, you can use skim coating to repair and smooth damaged drywall. If you’ve removed wallpaper or a backsplash and caused some minor surface damage, skim coating is an excellent solution. For instances where the drywall paper is ripped, it’s highly recommended to apply a peel stop primer/sealer first. This creates a stable base for the joint compound, preventing further peeling and ensuring optimal adhesion.
See how we installed drywall in our basement bathroom, providing a fresh surface for finishing.
How Do I Get a Smooth Texture on New Drywall?
Creating a smooth wall texture on brand new drywall involves a similar process. After the drywall sheets are installed, tape and mud all drywall seams as you normally would. Once these initial layers are dry and sanded, you’ll pick up the skim coating process from the “Prep” step described below. This method worked exceptionally well when we retrofitted with soundproofing drywall, yielding a perfectly smooth surface.
Before we dive into the details, let’s clarify an important question:
What’s the difference between joint compound and drywall mud?
Answer: These are simply two different terms for the exact same product! “Joint compound” is the official name you’ll typically find printed on product buckets. “Drywall mud” is the informal, colloquial term for the same material, which some people might also refer to as “plaster” or “drywall compound.” Throughout this guide and video, we use these terms interchangeably.
This post contains affiliate links. Learn more and read our full disclosure policy here.
Your Step-by-Step Guide to Skim Coating and Removing Wall Texture
The skim coating process, while straightforward in concept, is a labor of love that requires time, patience, and a willingness to get a little messy. The good news is that with each wall you smooth, your technique will improve, and the process will become easier. Here’s a detailed breakdown of how to achieve that coveted smooth wall finish.
Below is a full video tutorial demonstrating the entire process of creating a smooth wall finish. (Don’t forget to subscribe to the Remodelaholic channel for more DIY projects and tips!)
To transform your textured walls into smooth surfaces, you’ll follow these key steps:
Thoroughly prep and clean your walls.
Apply a first, “rough” coat of all-purpose joint compound.
Apply a second, refining coat of all-purpose joint compound.
Apply a third and final “topping” compound for ultimate smoothness.
Sand the entire wall texture to a flawlessly smooth finish.
Prime and paint your newly smoothed walls.
Materials & Tools Needed to Skim Coat for Smooth Wall Texture
Gathering the right materials and tools is crucial for a successful skim coating project. For an average-sized room (e.g., 15′ x 12′ walls at 8′ tall, approximately 1395 sq ft of wall surface excluding doors and windows), you’ll typically need:
Joint Compound (Drywall Mud)
(2) – 4.5 gallon buckets of All-Purpose Joint Compound: This compound is your workhorse for the initial layers, providing excellent coverage and adhesion to existing textures.
(2) – 4.5 gallon buckets of Topping Joint Compound (often identifiable by its light blue lid): This compound is lighter, finer, and easier to sand, making it perfect for the final, smoothing layers.
Professional Product Tip for Faster Drying:
For those with some drywall experience, consider using a powder bagged mix compound, available at most home improvement stores. These products come in bags marked with numbers like 5, 20, 45, or 90, which indicate their approximate working time (e.g., “20-minute mud”). Unlike traditional pre-mixed joint compound, these dry chemically, significantly speeding up the drying process.
If you opt for a powdered mix, it’s essential to work quickly. Mix small batches to a peanut butter-like consistency using a drill with a mixing paddle attachment. Apply the compound immediately, and only mix a new batch once the previous one is used up. Mixing too much at once will result in it hardening before you can apply it. For beginners, a 45 or 90-minute mix provides more working time, while more experienced DIYers might prefer a 20-minute mix for quicker project completion.
Essential Tools
Wash Rags and Towels: For cleaning, wiping, and drying surfaces.
Drop Cloths and/or Sheet Plastic: Absolutely essential for protecting your floors and furniture from the messy joint compound and sanding dust.
Empty 5-gallon buckets: For mixing compound, holding water for thinning, and washing tools.
Drill and Mixing Paddle Attachment: Vital for thoroughly stirring and thinning joint compound to a consistent, workable consistency.
Drywall Mud Pan: A specialized pan for holding small amounts of mud for easier application.
8” Drywall Joint Knife: Useful for smaller areas, patch-ups, and loading mud onto larger knives.
10” Drywall Joint Knife: A good all-around size for applying medium coats and smoothing.
12” Drywall Joint Knife (also known as a taping knife): Your primary tool for applying broad, thin, and smooth layers over large wall sections.
Drywall Sandpaper Block (hand drywall sander): For detailed hand sanding and smoothing out smaller imperfections.
Shop Vacuum and Vacuum Sander Attachment: Highly recommended for minimizing dust during the sanding phases, keeping your workspace cleaner.
Shop light or box light (optional but extremely helpful): Casts a grazing light across the wall, highlighting subtle imperfections you might otherwise miss.
Particulate dust mask and safety glasses: Non-negotiable safety gear for protecting your lungs and eyes from fine drywall dust.
Ladder (optional but can be helpful): Especially for working on taller walls or ceilings.
An important note about your drywall joint knife: The blade of a drywall knife (also called a plaster knife or taping knife) is typically designed with a slight curve. This subtle curve is intentional, helping you to apply plaster or mud evenly across the surface without leaving noticeable lines or ridges along the edges of the blade. As you apply the mud with the knife, always remember to keep this curved edge firmly against the wall, allowing it to feather out the compound smoothly.
Before the Skim Coat: Preparing Walls for Smooth Texture
As with any home improvement project, proper preparation is the foundation for a successful and lasting finish. Skim coating generates a fair amount of dust and can be messy, so taking the time to prepare your workspace properly will save you significant cleanup time later.
Protect Your Space: Begin by covering all your flooring with drop cloths or sheet plastic. Extend this protection to any furniture that cannot be removed from the room. Mask off baseboards, trim, and ceilings with painter’s tape for clean lines.
Address Major Damage First: While skim coating can conceal minor flaws, any significant dents, holes, or cracks deeper than approximately 1/4 inch should be repaired prior to starting. Use spackle or joint compound, along with drywall tape if necessary, to fix these larger imperfections. Allow these repairs to dry completely according to manufacturer instructions.
Remove Obstructions: Carefully take off all switch and outlet covers. Remove any hardware for curtains, blinds, or wall decor. This ensures you have a clear, unobstructed surface to work on.
Clean the Walls Thoroughly: Mix a small amount of mild detergent (like dish soap) into a bucket of warm water. Using a clean sponge or soft cloth, wash the entire wall surface. This removes grease, grime, dust, and any other contaminants that could interfere with the adhesion of the joint compound.
Dry Completely: After washing, dry the walls thoroughly with clean, old towels or rags. It’s important that these rags are as lint-free as possible to avoid leaving fibers embedded in your freshly cleaned surface. Ensure the walls are completely dry before proceeding; moisture can affect the setting time and adhesion of the joint compound.
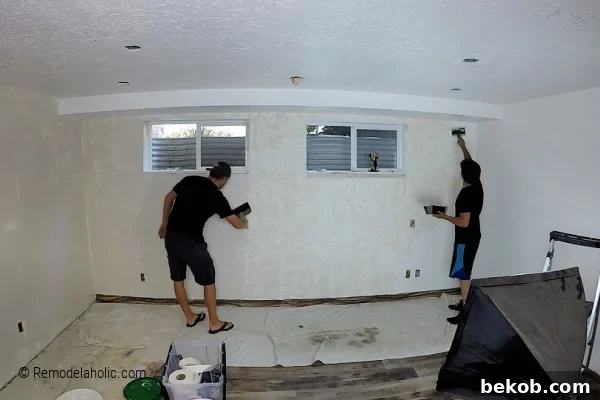
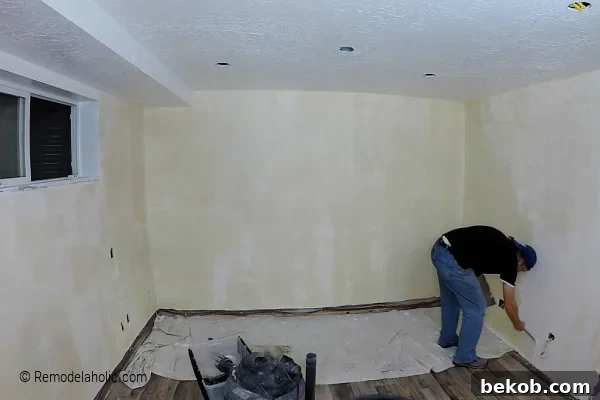
Applying the first thin coat of joint compound.
Layer 1: The Initial Rough Skim Coat
This first thin layer of joint compound is crucial. Its primary purpose is to fill in the “pockets” and depressions of the existing wall texture, effectively laying the groundwork for a smooth surface. Don’t worry about achieving perfect smoothness at this stage; focus on thorough coverage.
Pro Tip: Prepare Your Compound Well! Before you begin, stir your all-purpose joint compound thoroughly. The consistency should be uniform and lump-free, similar to thick peanut butter. Using a mixing paddle attachment for a drill is highly recommended for achieving this consistency efficiently and preventing large bumps in your application.
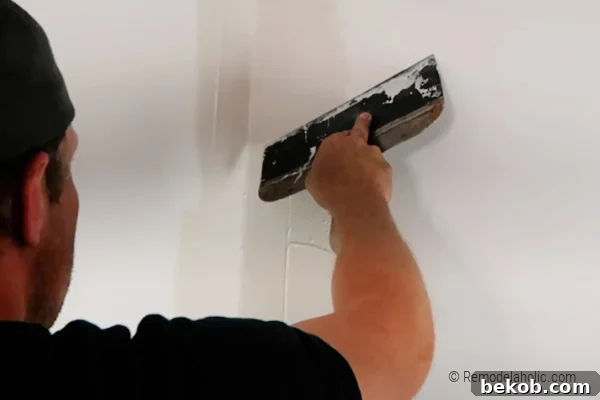
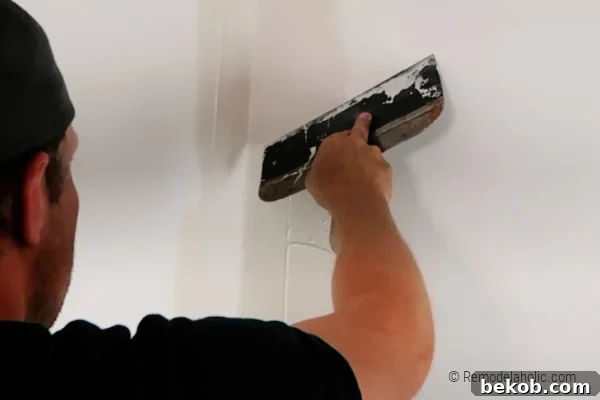
Load your wide drywall knife (a 10-inch or 12-inch knife is ideal for large areas) with a manageable amount of joint compound from your mud pan. Begin applying a thin, even coat to the entire wall. You can start at the top of the wall and work your way down, or work in small, overlapping sections. The key is to apply just enough mud to fill the existing texture, then immediately use the knife at a slight angle (around 15-30 degrees) to feather it out and scrape off any excess, leaving only the material needed to fill the texture.
Avoid applying excessively thick layers, as this will lead to longer drying times and more sanding later. Focus on consistent coverage. You can address corners after this layer has dried, as detailed below. Once you’ve covered the entire wall, allow the mud to dry completely. This typically takes 8-10 hours, but always follow the manufacturer’s specific instructions, as drying times can vary based on humidity and compound thickness.
Note: Some prefer to apply drywall compound using a paint roller with a thick nap, then immediately smooth it with a knife. While this can cover large areas quickly, I find that direct application with a drywall knife offers greater control and accuracy, especially for beginners.
The Trick to Flawless Corners
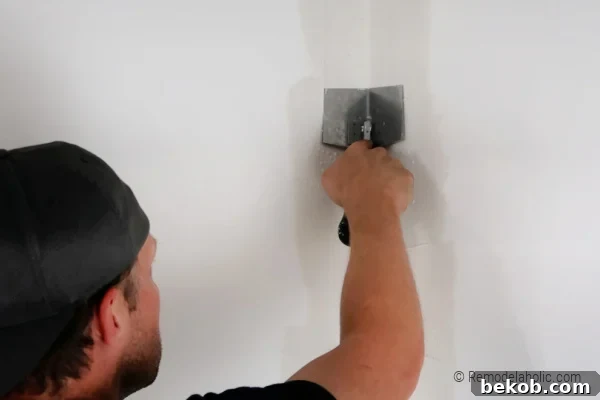
After your first layer of joint compound has fully dried, your corners will likely need some attention, as demonstrated in our video tutorial. They often accumulate excess mud or retain some original texture.
Apply Mud to Corners: Carefully apply a thin, even layer of joint compound directly into the corner using your smaller drywall knife (8-inch).
Shape with a Corner Tool: Immediately follow up with a drywall inside corner tool. This specialized tool is designed to perfectly shape the 90-degree angle, ensuring a crisp, clean line. Run the tool firmly along the entire length of the corner to remove excess mud and create a smooth, defined edge.
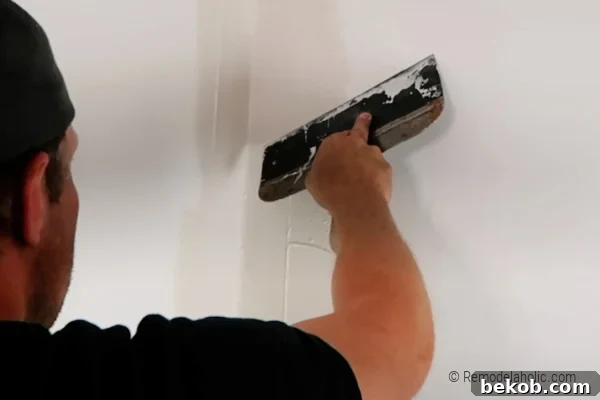
Feather the Edges: Once the corner itself is smooth, use a wide drywall knife to “feather out” the edges of the fresh mud where it meets the main wall surface. To do this, apply slight pressure to the side of the knife blade that is *away* from the fresh corner mud. This technique helps to seamlessly blend the new mud into the existing wall, preventing noticeable lines or ridges from forming.
Layer 2: Filling and Refining with All-Purpose Joint Compound
This second layer continues the smoothing process, focusing on filling any remaining minor depressions, subtle texture, and addressing any imperfections from the first coat. You’ll continue using the all-purpose joint compound for this layer.
Before applying this coat, it’s beneficial to lightly prepare the surface. You can either very lightly sand the wall using a hand sanding block, or, as I prefer to do, wipe the entire wall with a damp sponge. This helps knock down any raised bits or rough spots from the first coat without creating excessive dust. Ensure the wall is dry before proceeding.
Apply another thin, even layer of all-purpose joint compound across the entire wall. This time, be more deliberate in your application, aiming for a smoother finish than the first coat. Pay special attention to covering any small holes, divots, or remaining texture from the previous layer. Revisit and touch up corners as needed, using the corner tool and feathering technique as described above. Allow this second layer to dry completely, which again typically takes 8-10 hours or longer, depending on thickness and environmental conditions.
Layer 3: The Final Smooth Skim Coat with Topping Compound
This is where your walls truly begin to transform! The final skim coat is applied with a lighter, finer compound designed for a superior smooth finish and easier sanding. Before reaching this stage, assess your walls. Depending on the severity of your original texture and the quality of your previous layers, you might need to apply additional layers of all-purpose joint compound until you’re satisfied with the base smoothness.
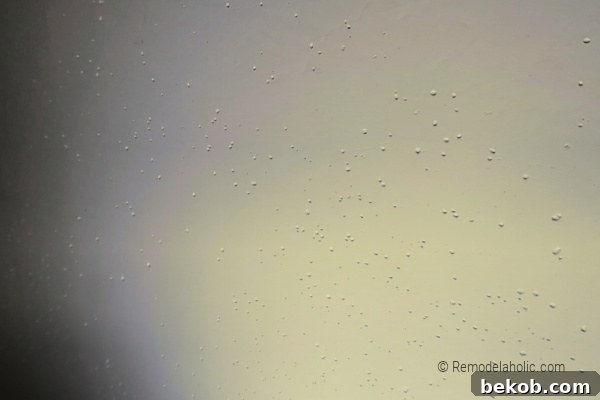
Troubleshooting Tip: Don’t Despair Over Bubbles!
It’s common for bubbles or small holes to appear, especially on older walls that have been painted many times over the years. This can happen when air gets trapped under existing paint layers, or when the joint compound doesn’t adhere perfectly. If you encounter bubbles or holes like these, don’t worry! Simply allow the existing layer to dry, then apply an additional thin layer (or two) of all-purpose drywall mud over the affected areas. The extra layers will fill and cover these imperfections, providing a solid base for your final smooth coat.
Once your underlying layers of joint compound are thoroughly dry and free of bubbles or significant imperfections, you’re ready for the final smooth coat. Lightly sand the walls again. For a quick, efficient job, I recommend using a vacuum sander attachment to minimize dust.
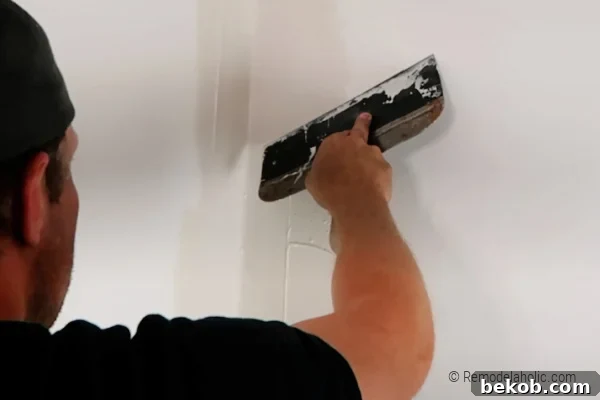
Now, apply a thin, smooth layer of topping joint compound using your largest plaster knife (10-inch or 12-inch). To achieve the best workability and a silky-smooth finish, you may want to add a small amount of water to the topping compound in your mud pan and mix it thoroughly until it reaches a consistency you’re comfortable working with – slightly thinner than the all-purpose compound. This final layer requires careful attention to detail; strive for an incredibly smooth application, removing excess compound as you go. Work systematically across the wall, overlapping your strokes to ensure seamless coverage. Once applied, allow this final layer to dry completely.
Applying the final topping skim coat layer.
The Grand Finale: Finish Sanding for a Perfect Smooth Wall Texture
This is often the messiest but undoubtedly the most satisfying step in achieving truly smooth walls. This is where all your hard work comes together, transforming rough layers into a pristine surface.
Safety First! Essential Gear for Sanding:
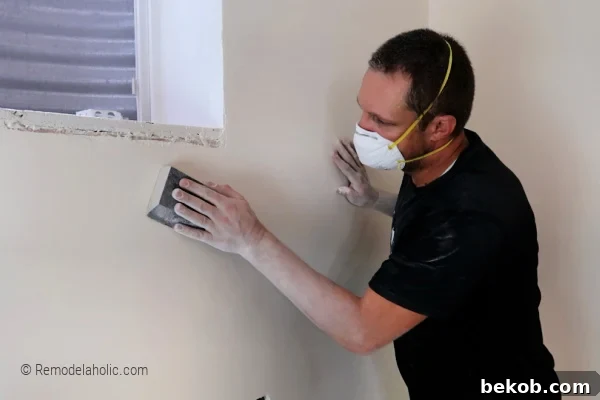
Sanding drywall mud generates a significant amount of fine dust, which can be harmful to your lungs and irritating to your eyes. It is absolutely crucial to wear proper safety gear. At a minimum, always use a particulate respirator dust mask. Safety glasses are also highly recommended to protect your eyes. To contain the dust to the working area, consider hanging plastic sheeting over doorways.
Having done an excellent job applying smooth layers, your final sanding should be relatively light. The goal is to eliminate any minor ridges, faint lines, or subtle imperfections, leaving behind a perfectly flat surface.
Initial Dust Control Sanding: I highly recommend starting with a vacuum sander attachment connected to your shop vacuum. This tool significantly reduces airborne dust, making the process cleaner and more comfortable for the initial pass. Work in circular motions or long, even strokes, applying light to moderate pressure.
Hand Sanding for Perfection: Follow up with a spongy sanding block or a finer grit sandpaper on a hand sander. This allows for more tactile feedback and control, enabling you to meticulously smooth out the last remnants of texture, address any lingering imperfections, or feather out subtle scratches.
The Shop Light Test: To ensure a truly professional finish, use a shop box light or a powerful work light. Position it at the bottom of the wall, shining upwards, and then from various angles across the wall. The grazing light will cast shadows, revealing any uneven spots, dips, or high points that need further sanding. This step is critical for a truly flawless surface.
Final Cleanup: Once sanding is complete, use your shop vacuum to thoroughly clean the walls and surrounding areas of all dust. For an even cleaner surface, you can wipe the walls down with a slightly damp cloth (ensure it’s lint-free) to remove any lingering fine dust particles before priming.
What Next: How to Prime and Paint Your Smooth Walls
Congratulations, you’ve achieved beautifully smooth walls! The next crucial step is priming and painting to protect your work and showcase the flawless finish.
We highly recommend painting your newly skim-coated walls with a layer of drywall priming paint. This specialized primer serves several vital functions: it seals the porous joint compound, preventing the regular wall paint from soaking in unevenly. This ensures that your topcoat paint adheres better, achieves a more uniform color, and results in a smoother, more professional-looking finish. Without priming, your paint color can appear patchy, and you’ll likely need more coats of expensive finish paint.
What About the Ceiling?
Just like walls, ceilings can also benefit from skim coating. If your ceiling features an outdated popcorn texture or other undesirable finishes, you can apply the same skim coating process described above to achieve a smooth, modern ceiling surface.
However, for this particular room, we opted for a different aesthetic. We decided to install a whitewashed pine plank ceiling, and we absolutely adore the warmth and character it adds to the space, providing a charming contrast to the smooth walls.
You’ll also find these related guides helpful for your home renovation projects:
How to Install Board and Batten (with Perfect Board and Batten Spacing!)
50+ Interior Wall Painting Ideas
Choosing the Right Whole Home Paint Color For Your House
How to Skim Coat Smooth Wall Texture Over Textured Walls
Want modern smooth wall texture in your home? Follow this DIY tutorial to learn how to skim coat a textured wall to get a beautiful smooth finish and get rid of that ugly bumpy wall texture! Step by step instructions from Remodelaholic.com
Print Recipe
Equipment
Wash rags and Towels
Drop cloths and/or sheet plastic
Empty 5-gallon buckets for water to thin compound and wash tools
Drill and mixing paddle attachment for drill
Drywall Mud Pan
8” Drywall Joint Knife
10” Drywall Joint Knife
12” Drywall Joint Knife
Drywall Inside Corner Tool
Drywall Sandpaper Block
Shop Vacuum and Vacuum Sander Attachment
Shop light or box light (optional)
Particulate dust mask and safety glasses
Ingredients
24.5 gallon bucketsAll Purpose Joint Compound
24.5 gallon bucketsTopping Joint Compound (with the light blue lid)
Video
Notes
Always wear proper safety gear when sanding drywall mud! A particulate respirator dust mask at a minimum, and safety glasses are essential. I also recommend using plastic sheeting to block off the doorway to contain dust to your work area.
*The estimated joint compound quantities are based on walls measuring 15′ by 12′ at 8′ tall, totaling approximately 1395 sqft of wall surface, excluding door and window openings.
Application Note: Some individuals prefer to apply drywall compound with a thick-nap paint roller and then smooth it with a knife. While an option, I generally prefer and recommend applying directly with a drywall knife for better control and a smoother initial finish.
Key Tip for Drywall Joint Knives: The blade of a drywall knife (also known as a plaster or taping knife) features a slight curve. This design helps in applying mud evenly and prevents unsightly lines along the blade’s edges. Ensure you maintain this curved edge against the wall during application to achieve the best results.