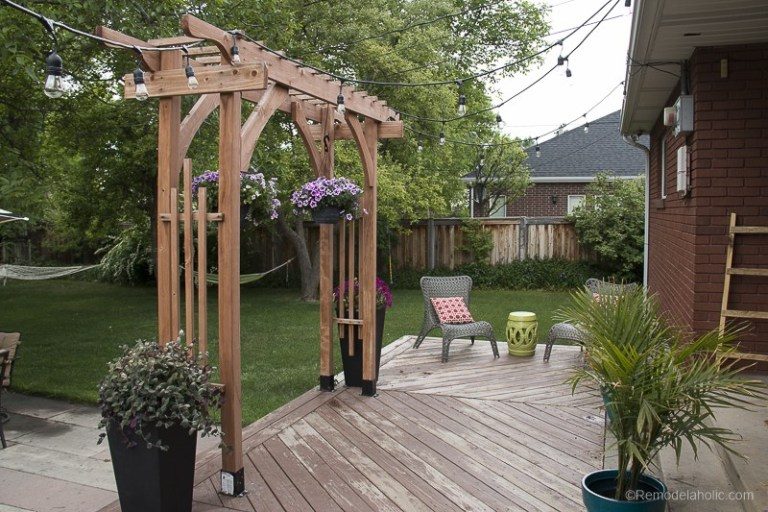
Materials and the sequence of the job sit together on this page.
Build a modest-cost-friendly garden arbor from 2x4s and other inexpensive structural lumber following our straightforward building plan. This classic wood arbor is striking for a backyard wedding arch or just everyday backyard decor!
A few years back, my sister asked me to build a garden arbor for her backyard wedding. So I got to work designing a classic wood arbor that is easily portable and built with 2x4s and other affordable redwood lumber.
You can see more great 2×4 projects here in our 2x4andMore building plan series — plus this gothic arch arbor and vegetable trellis and outdoor coffee table with built-in drink coolers are favorites of mine.
How to Build a Garden Arbor from 2x4s and Structural Lumber
Get the woodworking plan and templates here, then watch how I built this wood arbor for my sister’s wedding and reception – and be sure to subscribe to our channel for more Handmade videos!
Backyard Wedding Arch Design
My sister gave me this wedding arch inspiration photo to work from: 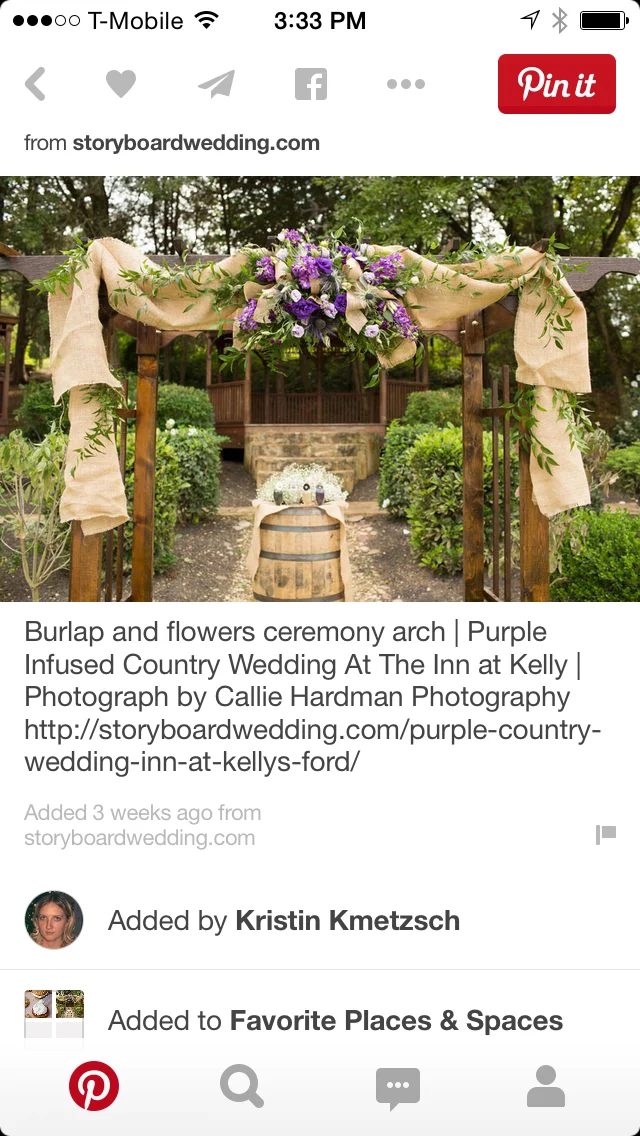
She trusted me and knew that I would be able to come up with something great. (Because that’s what #Bekob brothers do!)
So I started to look at the inspiration design to see how I could build it. Based on that style, I also knew I wanted a few other features in this wooden wedding arch:
- portable, to be built in sections and easily assembled at the outdoor wedding site
- tall enough to stand under for the ceremony, reception, and photos
- affordable, using inexpensive 2x4s and other structural lumber
- durable redwood lumber, so we could continue using it after the wedding
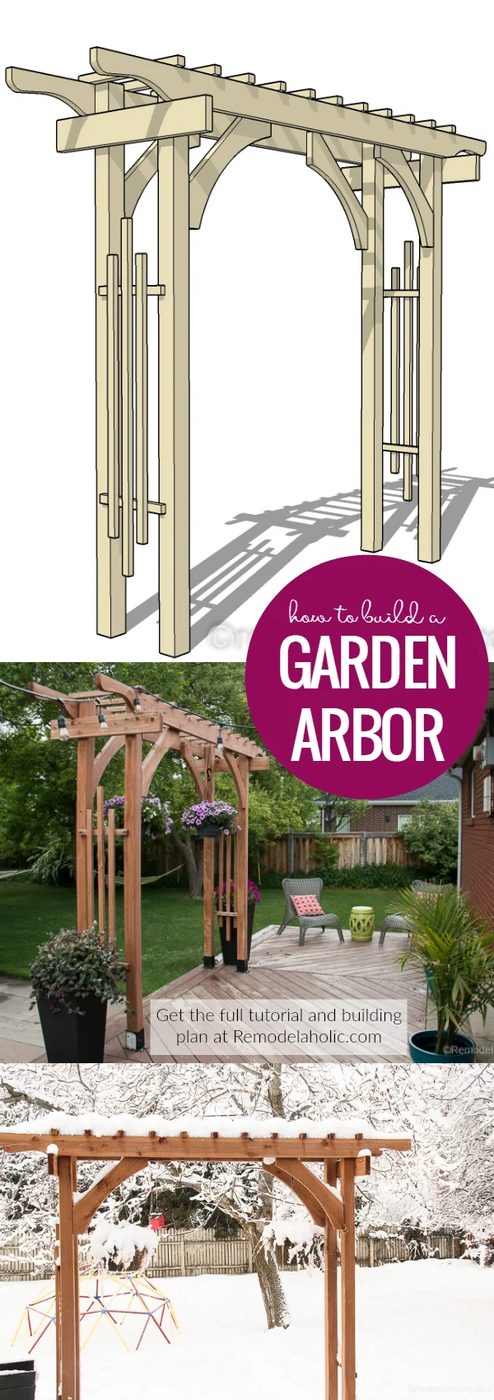
I had built a gothic arch vegetable arbor before, so I had some options of how I wanted to build this mini pergola style arbor. I started sketching my version and this is what I came up with.
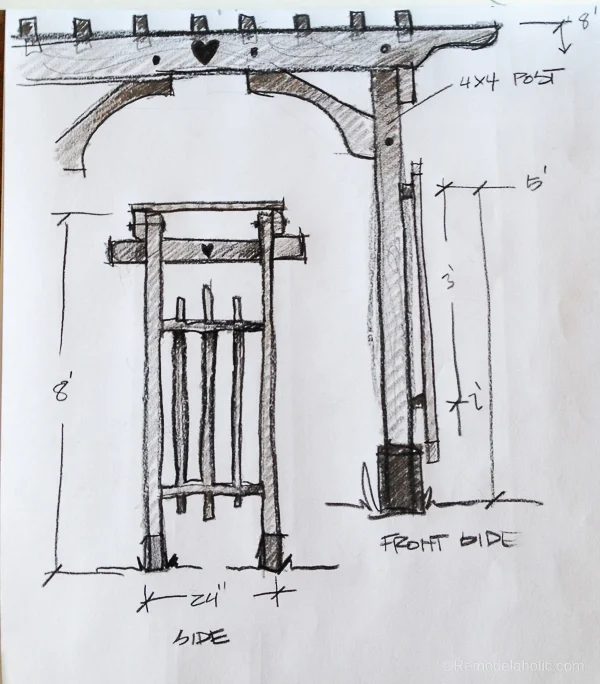
As soon as I had a good option of the design, I built a model in 3d to figure out how I was going to build it. Given my list of requirements above, I found that having a top and two side sections was to best option and corbels would end up holding it all together.
If you need benches or other outdoor wedding decor, be sure to look at these options!
How to Build a Wood Garden Arbor for a Wedding
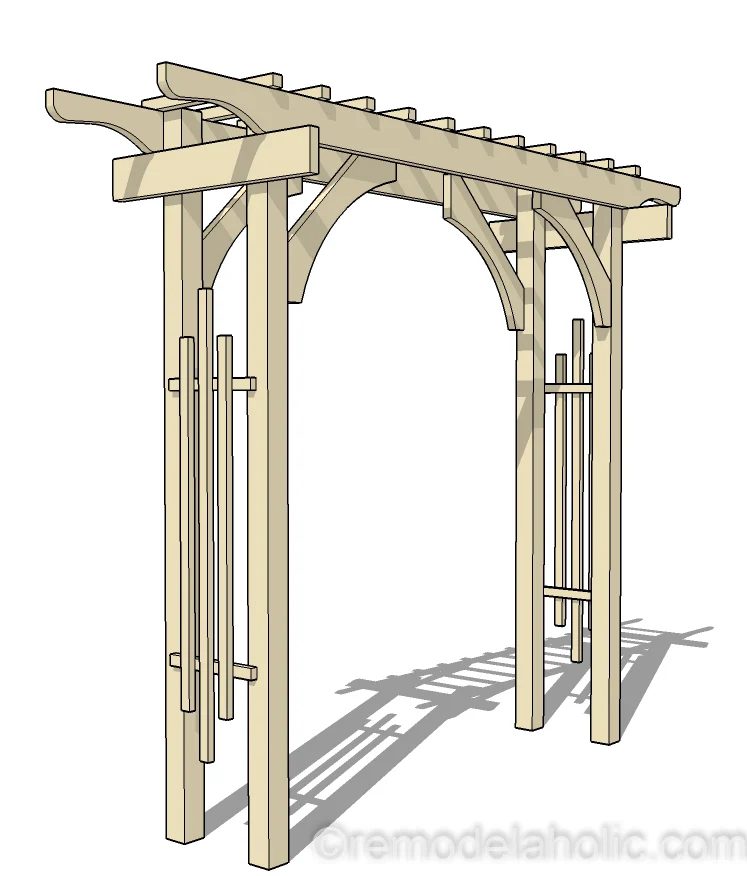
Wedding Arch Garden Arbor Dimensions
- 120″ wide at the top
- 85″ between outer edges of posts
- 96″ tall
- 19″ deep at the bottom, 24″ at the top
Materials
All pieces were made of redwood lumber purchased at our local hardware store. This post contains affiliate links. Learn more and read our full disclosure policy here.
- (3) 2x4x8 – Redwood (ripped down for the trellis pieces)
- (4) 4x4x8 – Redwood Posts
- (2) 2x8x8 – Redwood (for the corbels)
- (1) 2x6x6 – Redwood (side bracket/beam support)
- (2) 2x6x10 – Redwood (beams)
- (4) Post Brackets (This is what we used to attach to deck. You will have to find out what would work best for your situation.)
- (50+) 2 1/2″ – Deck Screws
- (20+) 1 1/4″ – Deck Screws
- (1) Gal. – Stain ( I stained the pieces first then assembled it. Pick the color that works best for you.)
- Wood Glue (I used wood glue to hold the side trellis pieces together.
Tools
- Table Saw (for ripping trellis pieces)
- Circular Saw
- Jig Saw
- Orbital Sander
- Drill/Driver and Bits
- Tape Measure
- Pencil
- Saw horses (recommended)
*If you don’t have a table saw, you could alternately use 2x2s, 1x2s, or even smaller square dowels. Those aren’t as readily available in the redwood lumber, though, so ripping the material down was my preferred option.
Steps to Build a Wood Wedding Arch Garden Arbor
Purchase the woodworking plan with cut list and dimensions here in the shop.
1: Cut Out All The Pieces
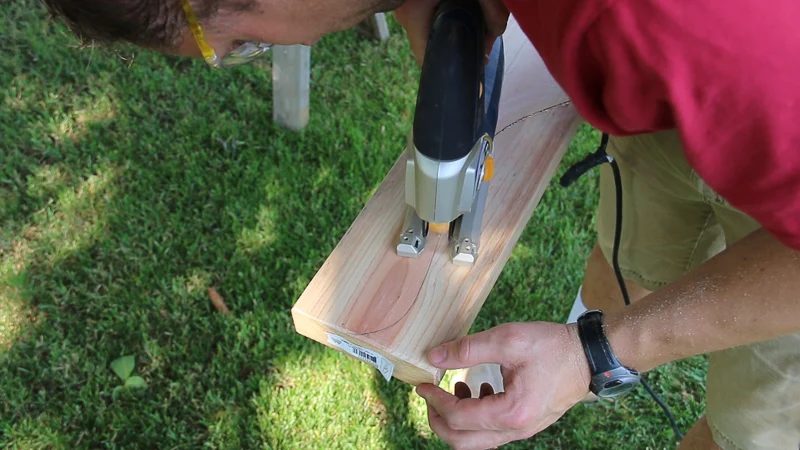
Start by cutting out all the pieces as listed in the woodworking plan and shaping any ends. Print the included template or sketch out the pattern on some card stock, cut out the pattern and transfer it on the ends of the top trellis board. Then cut it out using a jigsaw.
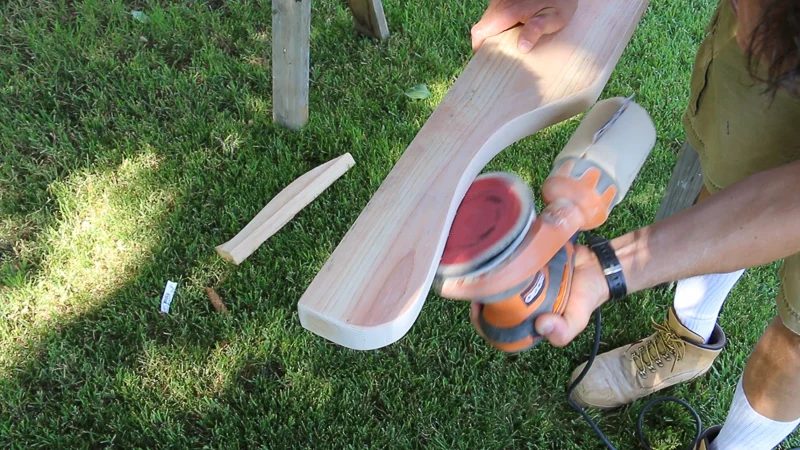
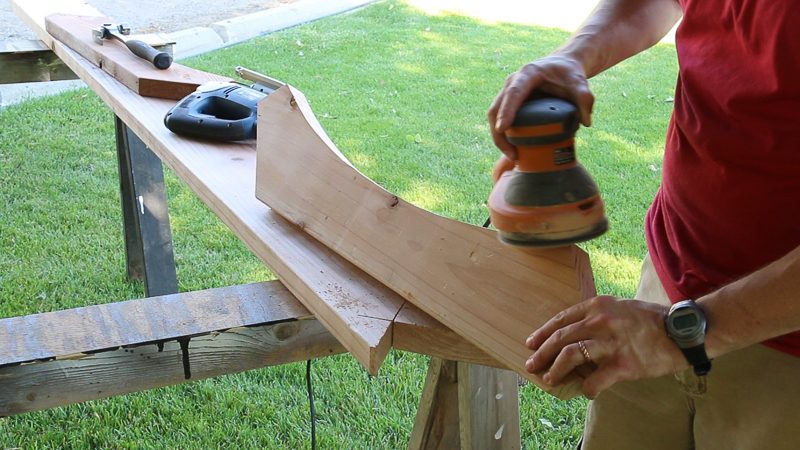
 After it is cut to shape, sand it with an orbital sander. (I prefer to also sand the edges round for a softer look.)
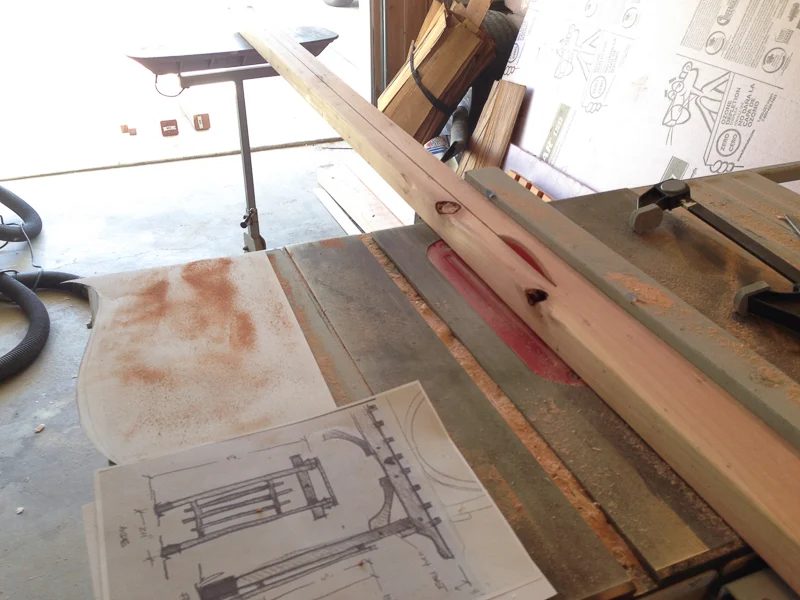
 After shaping all four ends of the top trellis beams, rip the trellis pieces to size (listed in the building plan) using a table saw. (I highly recommend my new table saw workbench for making cuts like this!)
After ripping to the two different widths, cut all the pieces to length according the the sizes listed in the building plan.
After shaping all four ends of the top trellis beams, rip the trellis pieces to size (listed in the building plan) using a table saw. (I highly recommend my new table saw workbench for making cuts like this!)
After ripping to the two different widths, cut all the pieces to length according the the sizes listed in the building plan.
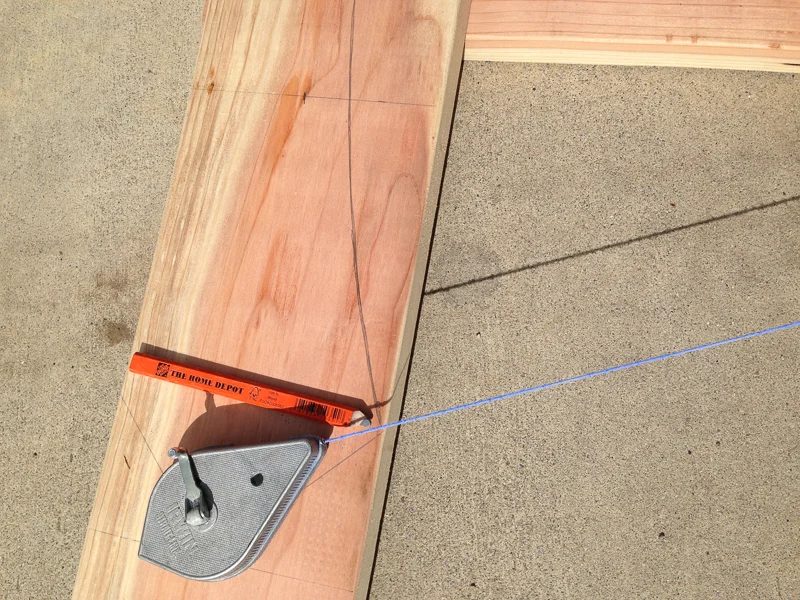
 Next, cut out the four corbels. Draw out all the edges on the 2×8 board as shown in the woodworking plan (or use the corbel template from the plans.) To draw the arch, screw the corbel board to another longer board, centered.
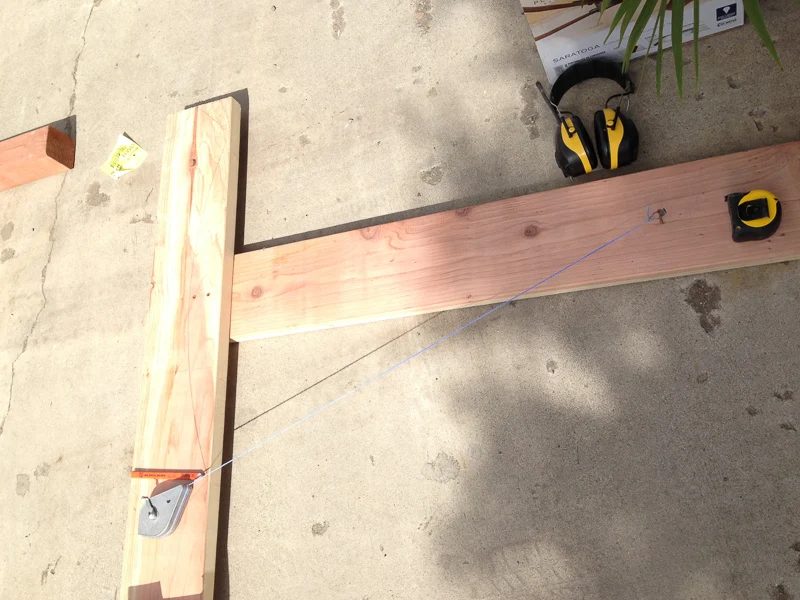 Then use a chalk line (or string) connected to a center screw (as shown) and a pencil to draw a nice smooth arch from each end point on the pattern.
 Then cut out the pattern with a jig saw and circular saw.
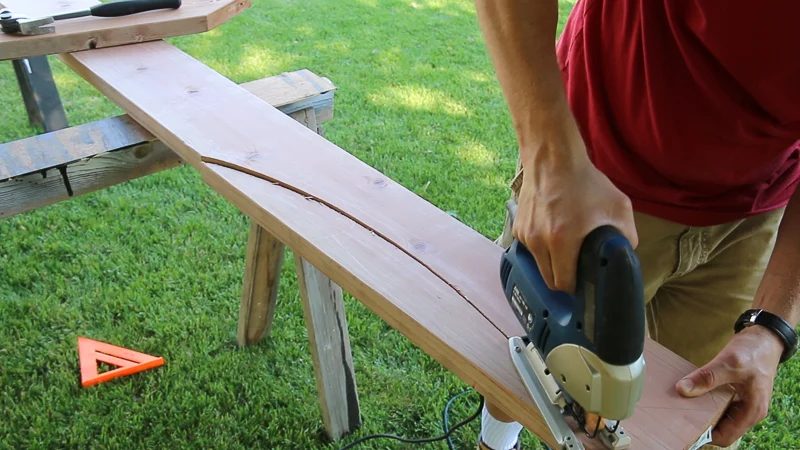
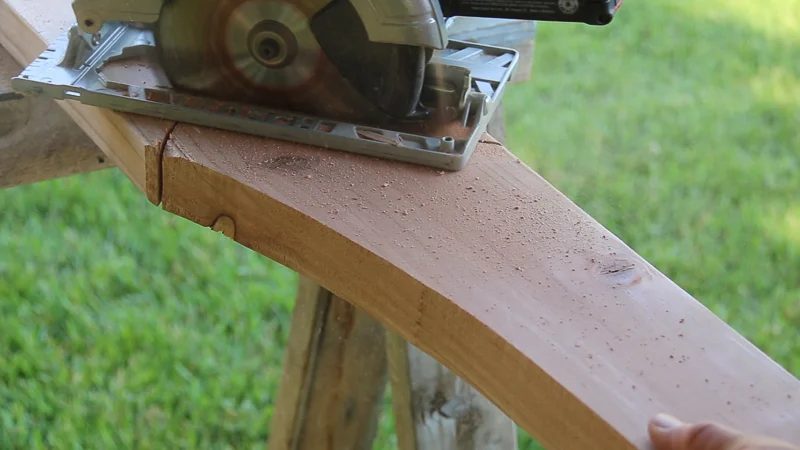 Finish up your cuts by sanding all the edges smooth.
2: Stain
Now is the easiest time to stain all the pieces, before assembling.
3: Assemble the Arbor Side Sections
Build the side trellis group for each side. I used a combination of wood glue and screws for a secure hold.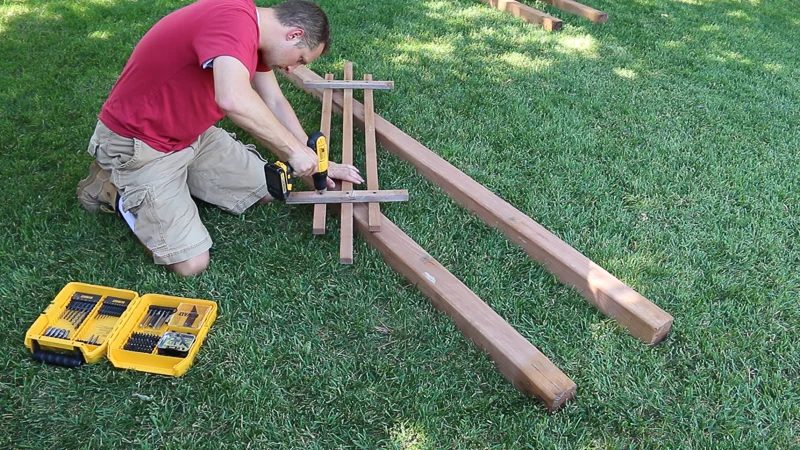 Next, attach the top side bracket — spacing and measurements listed in the building plan.
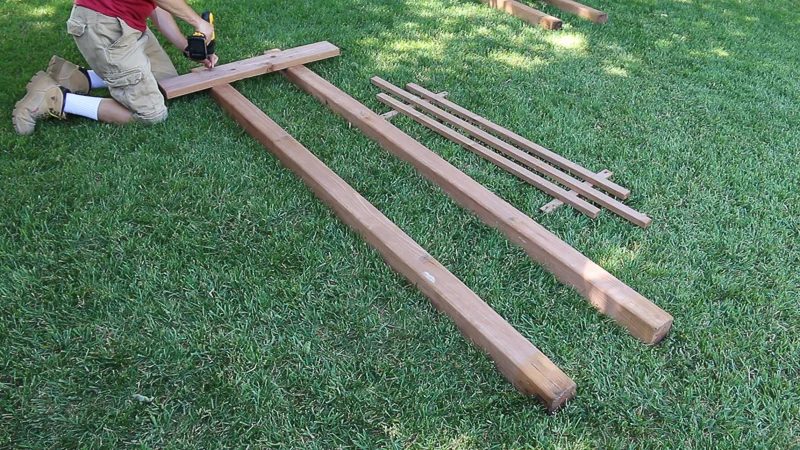 Then attach the side trellis to the side posts. Repeat for the opposite side of the arbor.
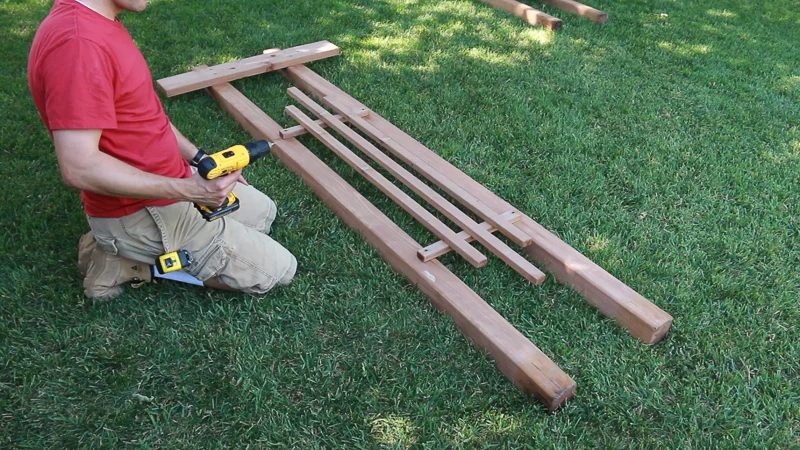
4: Assemble the Top Trellis Section
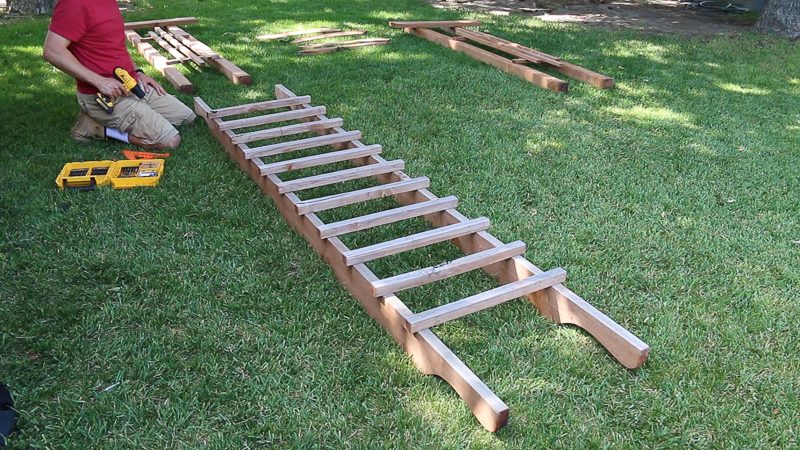
Now it’s time to build the third section of the garden arbor: the top trellis. Lay out the shaped beams on their ends. Pre-drill holes on the trellis boards, to avoid splitting at the ends. Mark out the spacing of the trellis boards and screw them to the top of the beams with 2 1/2″ deck screws.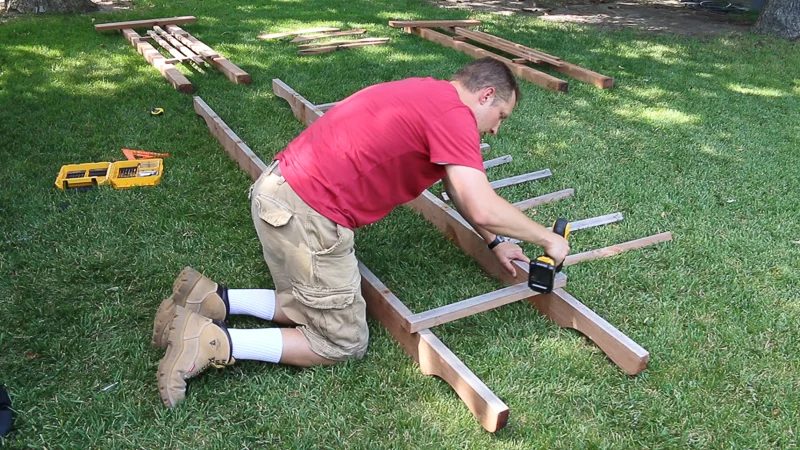 Repeat until all the trellis pieces are attached, to look like this:
5: Assemble the Garden Arbor
Now it’s time to put the whole garden arbor together! Assembling the pieces separately and using the corbels to hold the arch together makes it really straightforward to move to a new location and assemble on-site at a wedding. First, lean the top and side sections on their sides.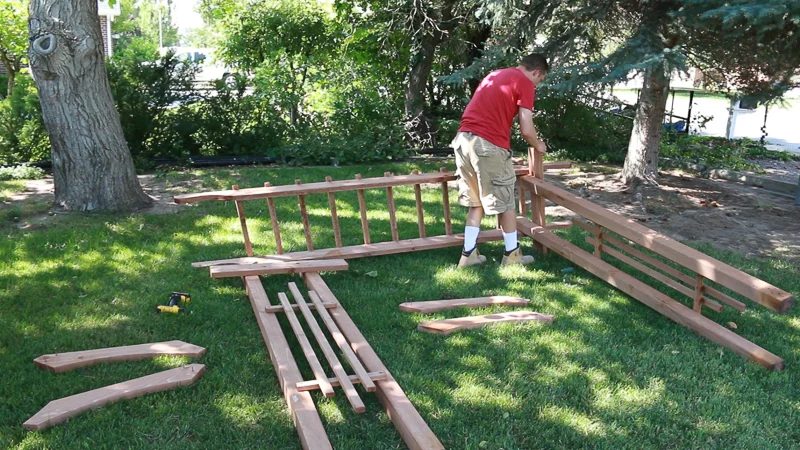
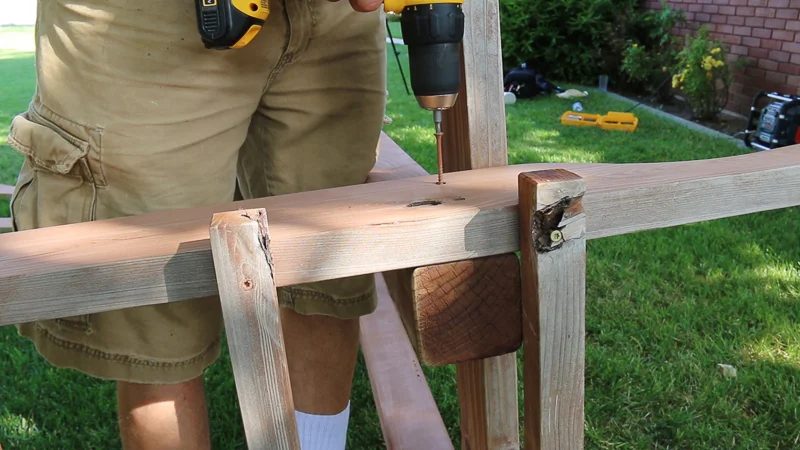 Screw both sides together at the top on one side. Have a buddy help stand up the arch, then screw the other side together.
Before attaching the corbels, make sure everything is square. Measure the distance at the top of the posts, the bottom of the posts, and the two diagonals.
Screw both sides together at the top on one side. Have a buddy help stand up the arch, then screw the other side together.
Before attaching the corbels, make sure everything is square. Measure the distance at the top of the posts, the bottom of the posts, and the two diagonals.
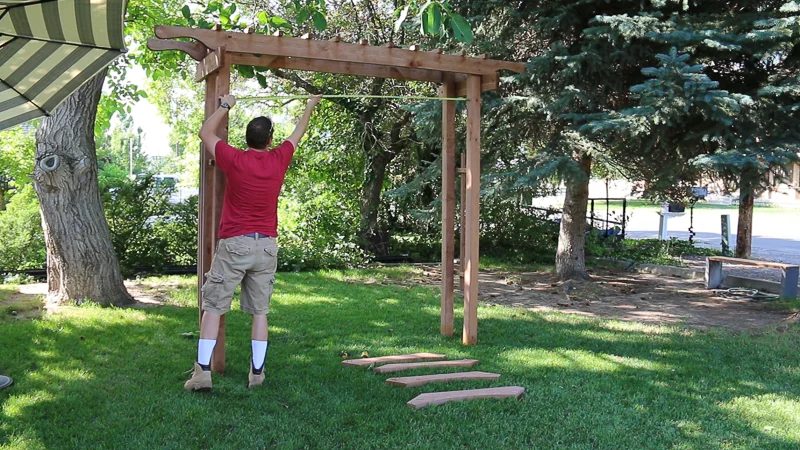
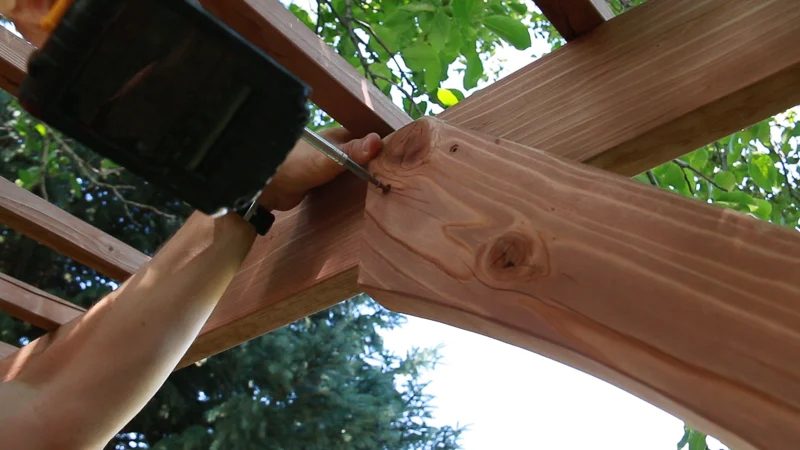 Then screw the corbel into the post. Pre-drill a hole through the bottom, at an angle, and attach it to the post with a deck screw.
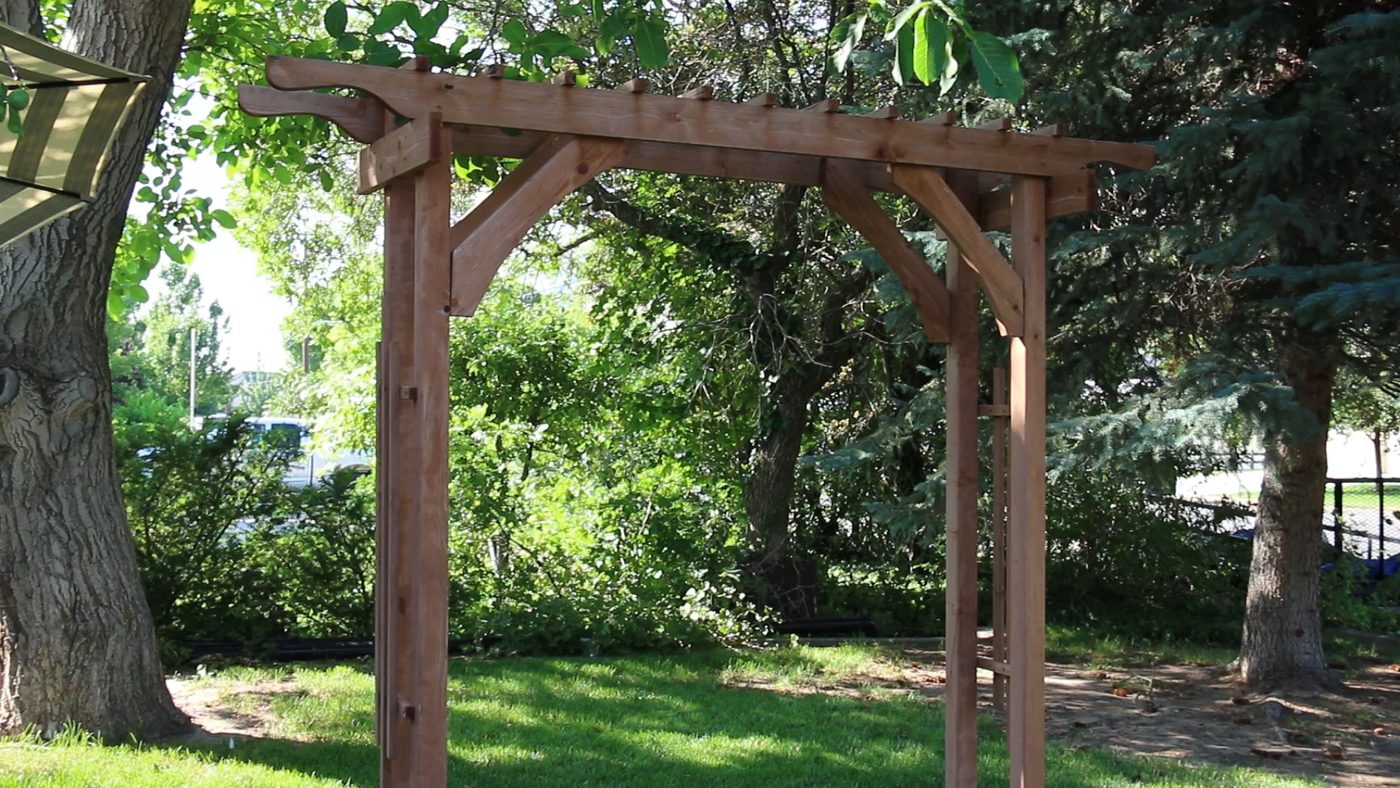
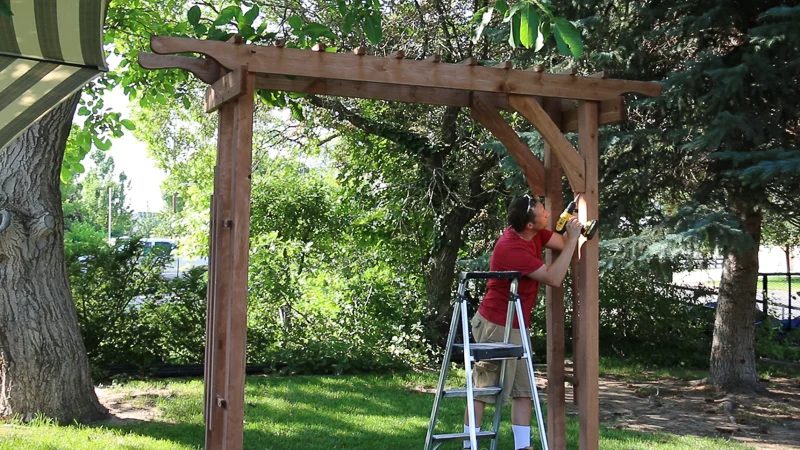 There you have it. This is what it looks like all built together.
Installing a Garden Arbor on a Deck
My sister didn’t have a place for it after the wedding, so the garden arbor came to live on our deck: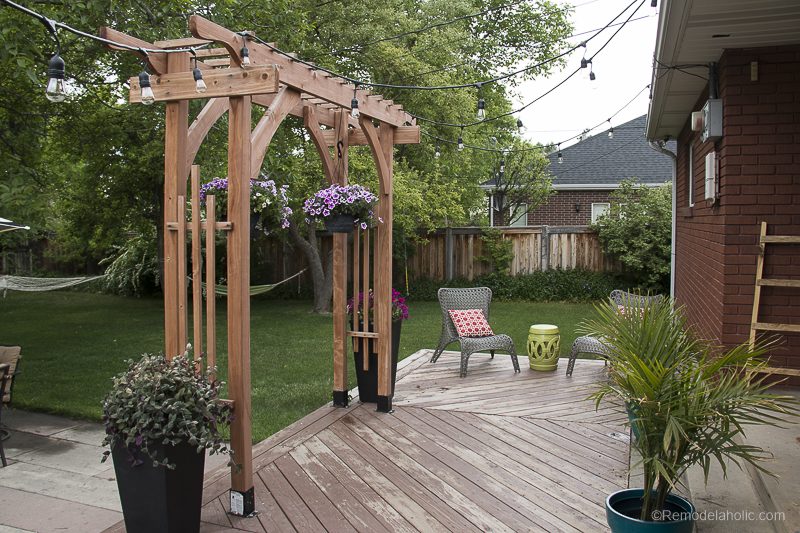 We attached it using brackets like this:
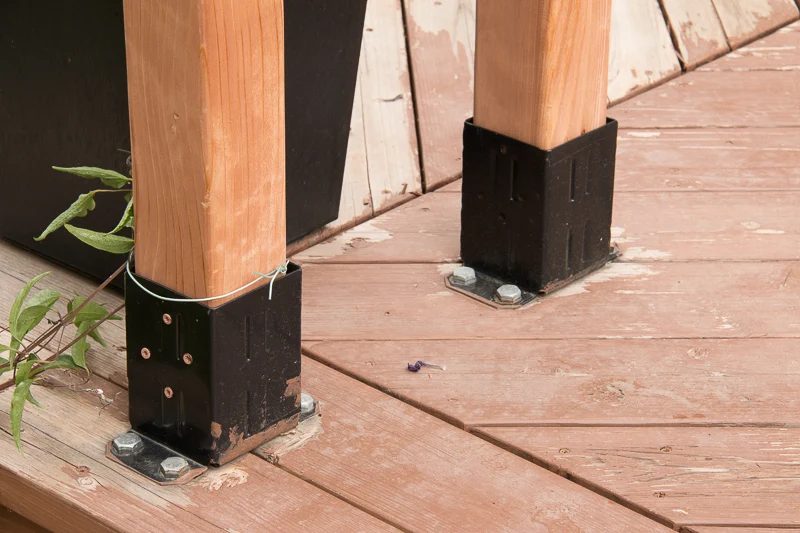 This is where it stayed until recently when we changed things up and added a different style of deck structure. You can see that post here, if you haven’t seen that yet.
It even looks memorable in the snow.
This is where it stayed until recently when we changed things up and added a different style of deck structure. You can see that post here, if you haven’t seen that yet.
It even looks memorable in the snow.
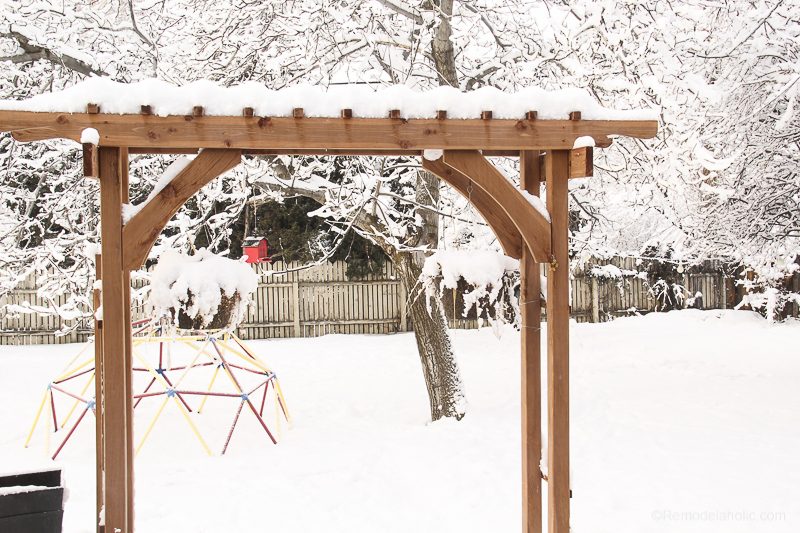
So what do you think of our garden arbor? Will you be building one for a wedding? Where will you be putting yours?
open this to purchase the garden arbor wedding arch woodworking plans.
October 2019: Reader Daniel B. sent us this photo of the arch he built for his sister’s wedding ceremony at the picturesque Castle in the Clouds in Multonburough, NH. Such a dreamy setting for a striking location wedding!
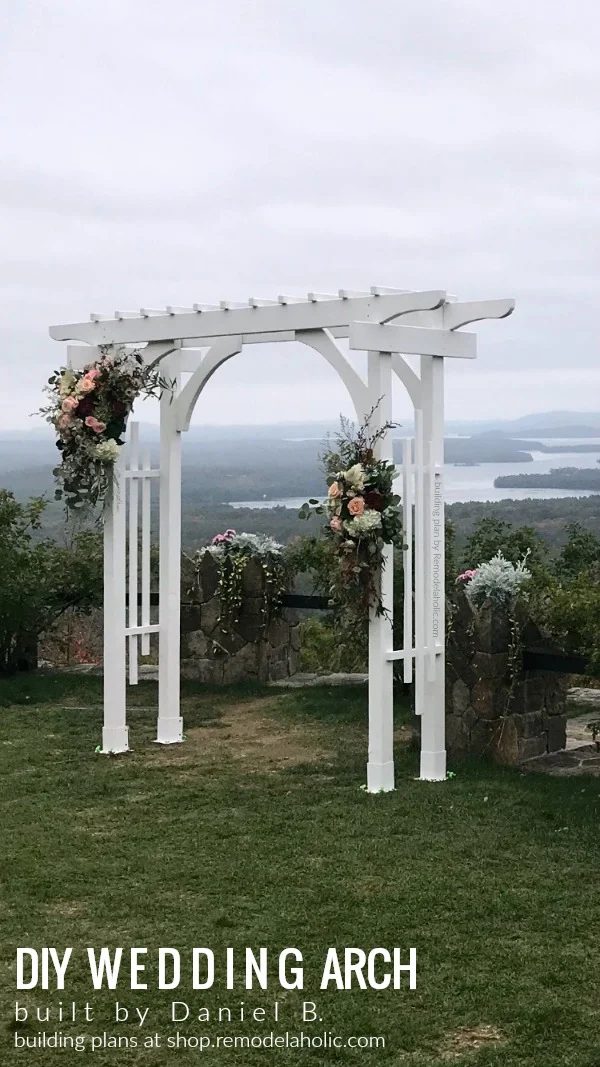
If you’ve built something using one of our plans, we’d love to see photos! Email us at [email protected] or tag #imaBekob on Instagram.
See more 2×4 and More projects using inexpensive 2x4s and other structural lumber — we love showing off the versatility of readily available lumber. We even hosted a #2x4andMore Challenge with fellow bloggers to show the variety of projects you can build with basic boards — see all of the projects (and share yours) here.
look at all of the other 2×4 and More Challenge posts here:
- garden arbor Bekob
- 15 minute coffee table The Ugly Duckling House
- tiered corner plant stand Charleston Crafted
- single-board rolling bar cart Woodshop Diaries
- outdoor bench w/rope detail At Charlotte’s House
- wall planter and herb garden Making Joy and Pretty Things
- upholstered x-base bench Frazzled Joy
- jumbo tic tac toe Ginger Snap Crafts
- porch bench Everyday Party Magazine
- console table Hertoolbelt
- farmhouse patio table North Country Nest
- straightforward flower planters Our House Now a Home
- treadmill incline Practical and Pretty
- patio side table Girl Just Handmade