The steps below follow the order of the work for this project plans project.
Hello friends at Bekob! It’s Ananda from A Piece Of Rainbow, where I blog about home and garden inspirations, and creative Handmade projects!
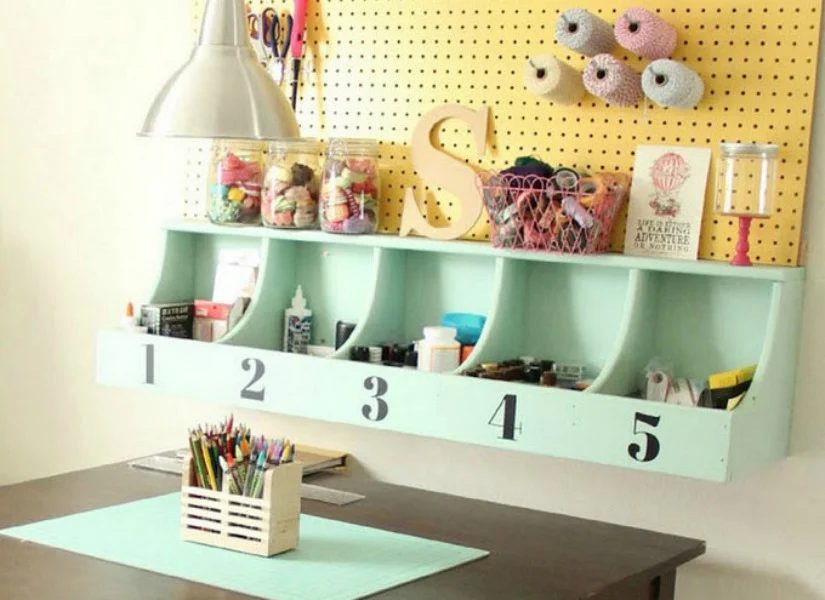
We all love a striking and well organized room, such as this vivid craft room at Just Between Friends blog.
Are you noticing that wall shelf?
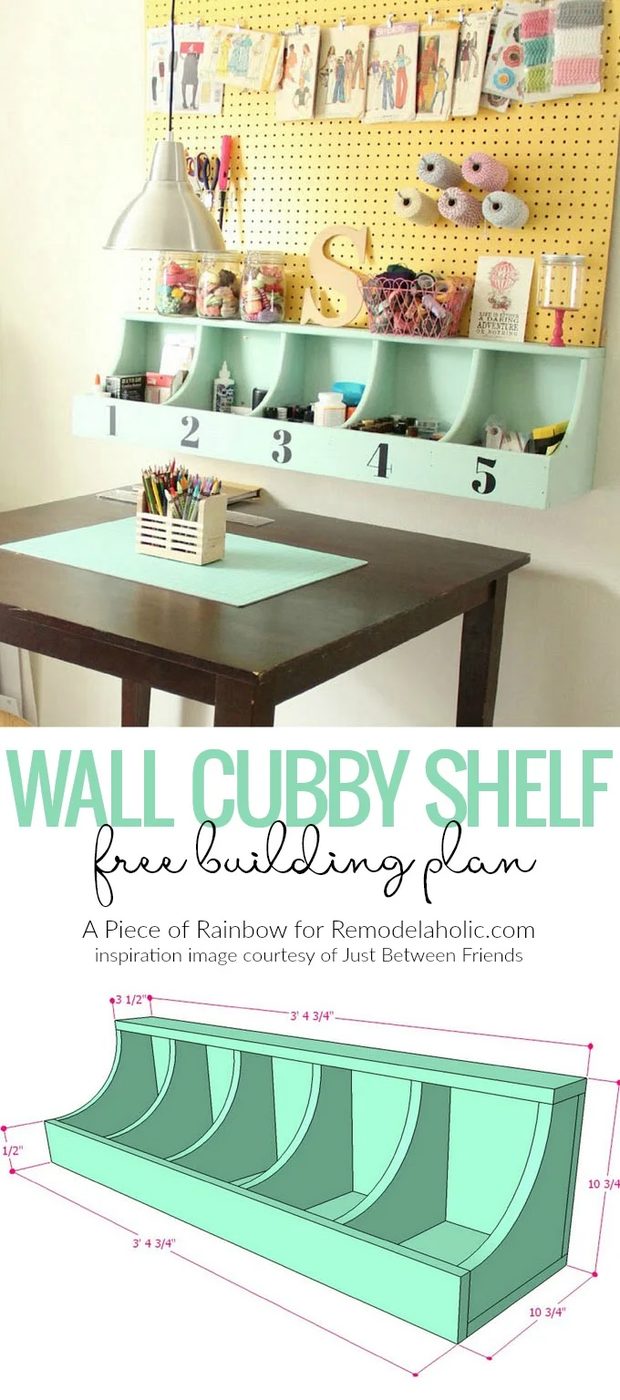
Jonie found this beauty at a local store which has closed. She graciously gave us permission to create a building plan for everyone who wants it. Thank you Jonie!
This unique and versatile wall shelf would look great in so many spaces in a house: kitchen, kid’s room, office, craft room, or even laundry room.
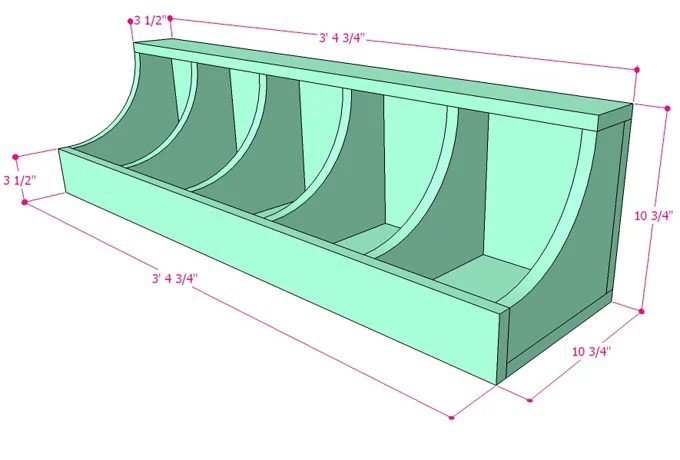
How to Build a Wall Cubby Shelf
This post contains affiliate links for your convenience; learn more and read our full disclosure policy here.
open this to get a free printable version of this building plan
*All Bekob building plans and tutorials are for personal, non-commercial use only. Use this printable plan as you build, but don’t sell the PDF plan or otherwise distribute the file. (Items built following this walkthrough may be sold, but the instructions and PDF file may not.) Thanks!
Before we start building, remember safety first! Please follow good practices to build safely and smartly. Always wear eye and hearing protection. Work on a clean level surface, free of clutter or debris.
Let’s start with the cut list:
This post contains affiliate links with no additional cost to you. Read our full disclosure here.
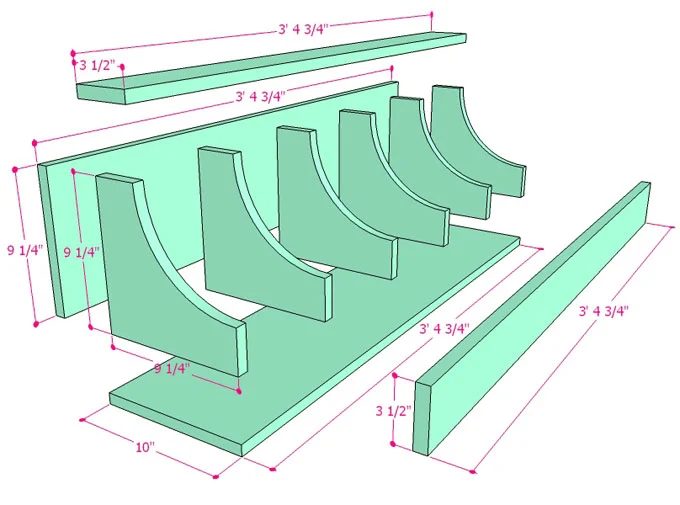
All parts are cut from a sheet of ¾” thick plywood.
- (1) 9.25” x 40.75” : back side of shelf
- (1) 10” x 40.75” : bottom of shelf
- (2) 3.5” x 40.75” : top and front trim
- (6) 9.25” x 9.25” : shelf dividers
- Optional: (2) 3” x 36”, these two pieces are for hanging ( see Step 5 ) and do not need to be very accurate.
- Optional: ¾” edge banding if you want to give the plywood cut edges a more finished look.
Other Materials and Tools:
- paint and / or stain for finishing
- jig saw, circular saw, sand paper or sanding pad, drill, 1 ½” wood screws
- measuring tape, square, pencil, safety glasses!!
- Kreg jig ( optional: a 90 degree clamp ) and 1 ½” pocket hole screws
Step 1:
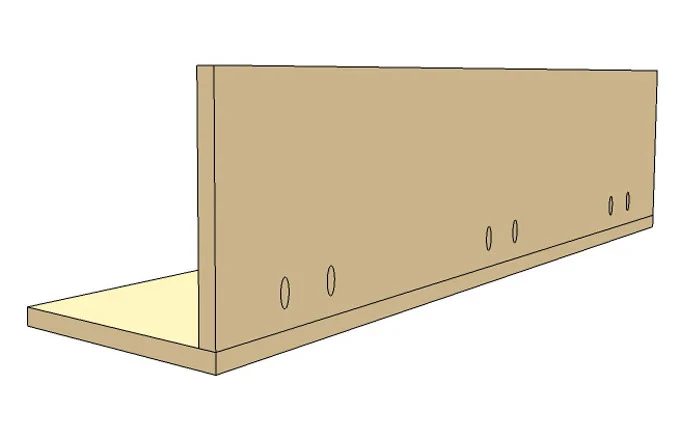
Drill pocket holes on the back board. Join the back and bottom of shelf together at 90 degrees using 1 ½” pocket hole screws.
A good way to do this is to use Kreg jig and the right angle clamp.
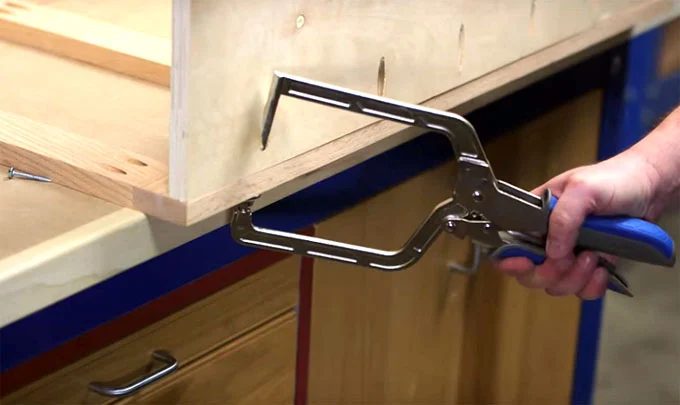
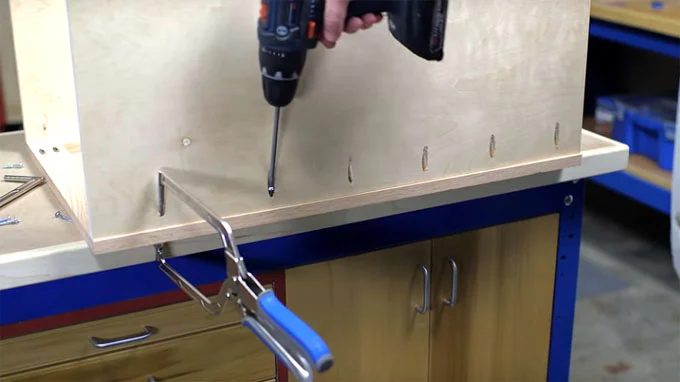
Image Credit: Kreg Jig
Step 2:
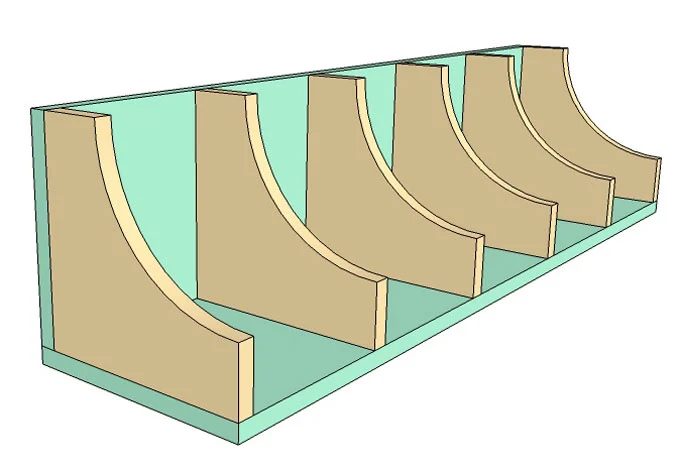
Cut each divider using the measurements below. Cut the curves slowly and carefully with a jigsaw.
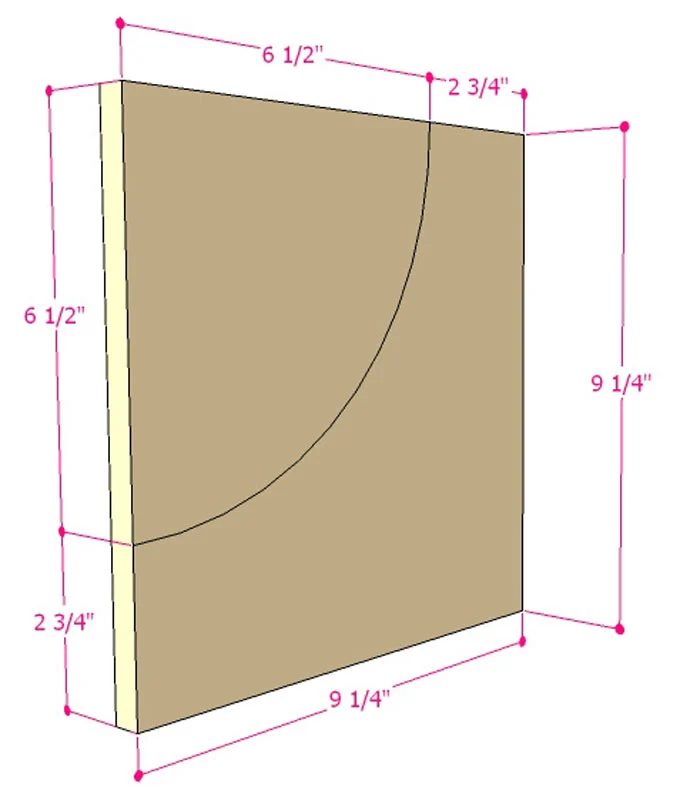
Attach each divider to the back and bottom of shelf using 1 ½” wood screws.
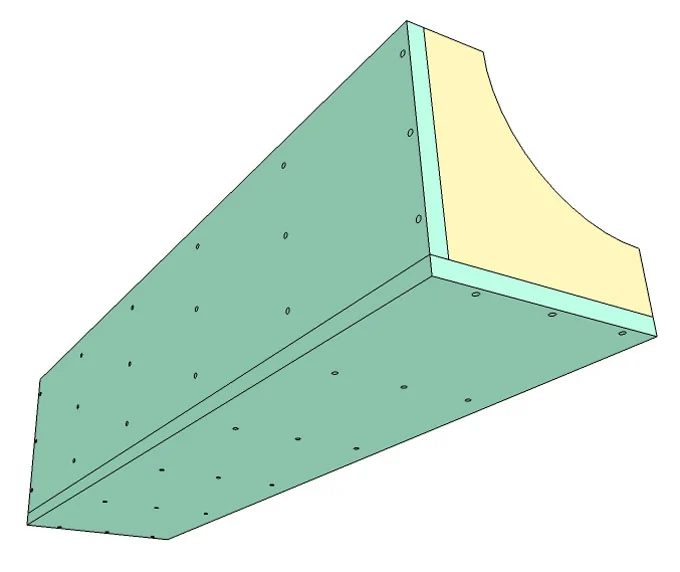
Step 3:
Add top and front trim pieces to the shelf.
Because these two pieces are not structural, you can screw them at just a couple of end points.
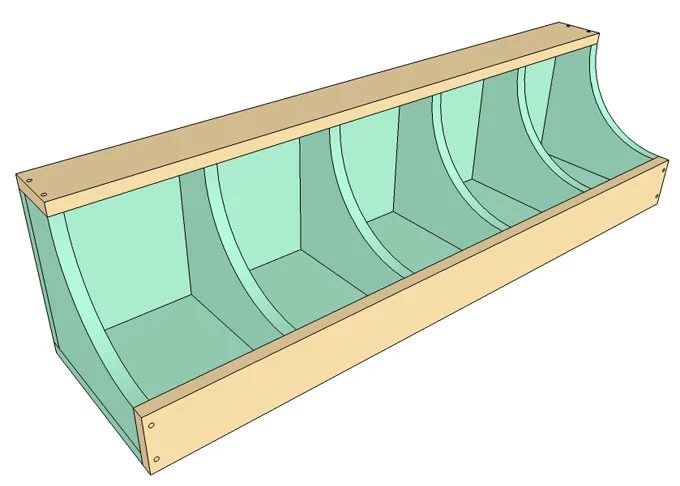
Step 4: Options for hanging.
One option is to screw the shelf directly to the wall studs.
Another great option is to use French Cleat, which comes with a cleat mounted to the wall and a matching edge cut into the object to be hung.
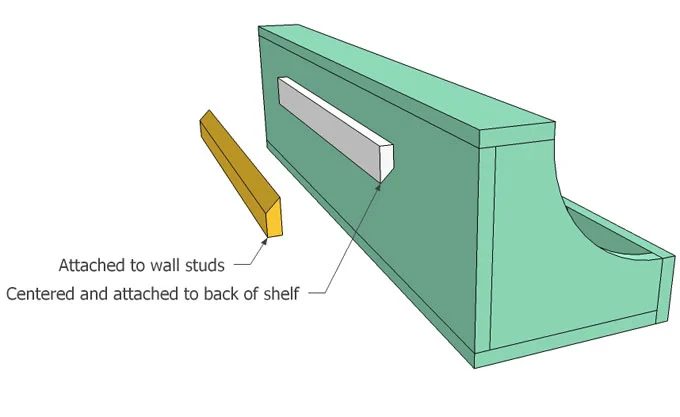
You can either buy or make your own French Cleats by cutting a 45 degree slope into two piece of ¾” plywood. The cleat can be the full length of the cabinet, or slightly shorter.
Once the cleat is secured to the wall, the cabinet can be simply lifted onto it. Even a heavy cabinet can be hung easily this way.
Step 5: Finishing touches.
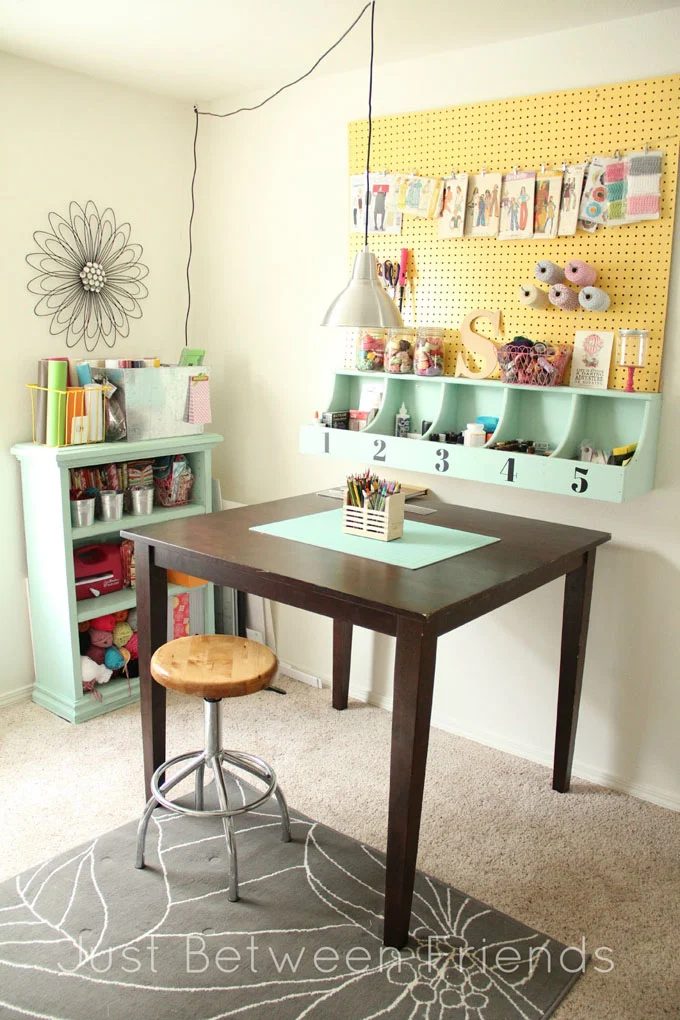
Image Credit: Just Between Friends
If you want to hide the cut edge of the plywood, use edge banding before painting.
Iron-on edge banding is a strip of wood veneer with hot-melt adhesive on one side to make plywood edge look like real wood.
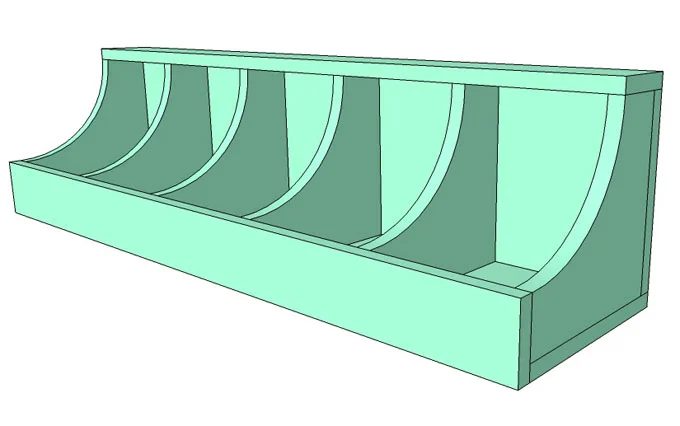
If you love a farmhouse whitewashed look, here’s a detailed walkthrough on how to whitewash wood using 3 straightforward and fun techniques. And this ultimate guide to create distressed wood paint finish will be well fitted for those who want a rustic chippy paint finish!
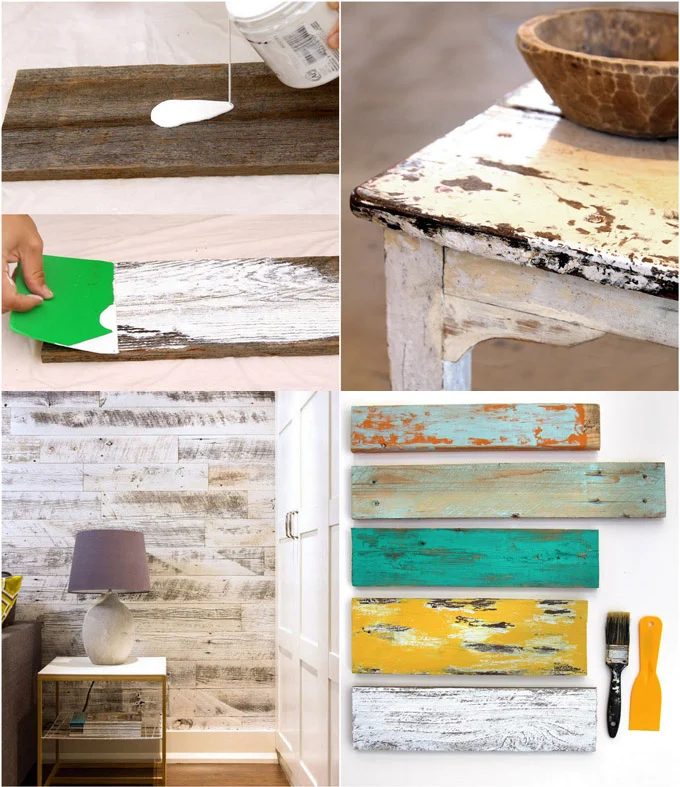
What would you use this shelf for? What color would you paint it with? Let us know in the comments!
Can’t get enough shelving options? You will love these 16 Handmade floating shelf projects!
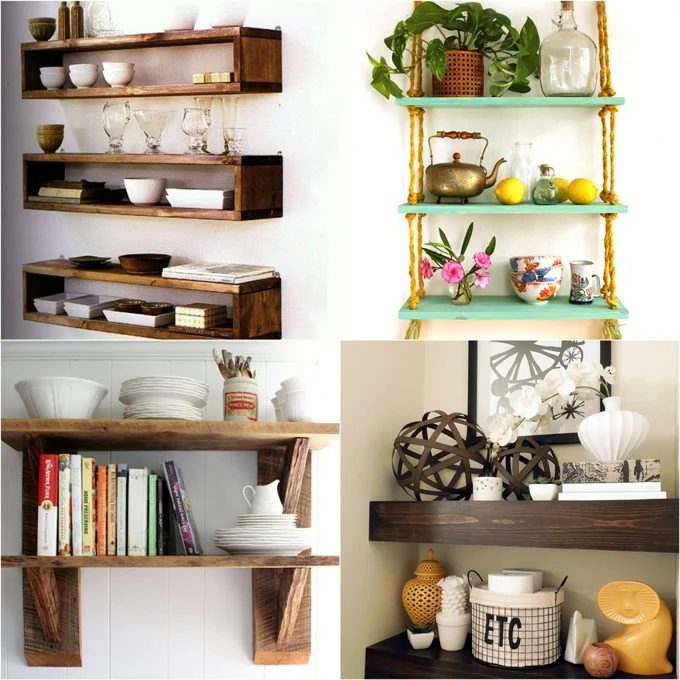
Have a great summer and happy building!
Be sure to look at these posts as well:
How to Build Rustic Wall Storage Bin Cubbies
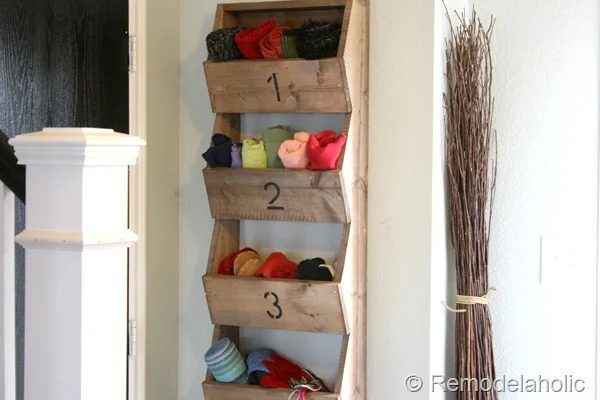
How to Build a Chalkboard Wall Organizer
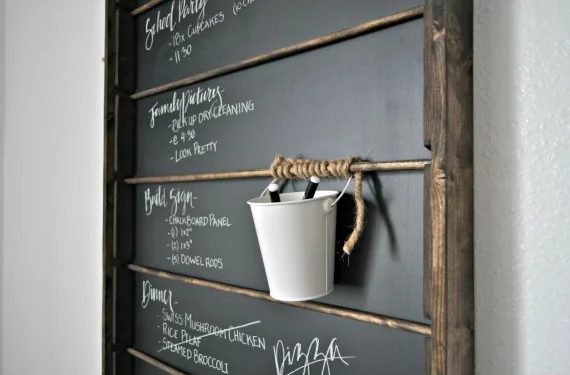
straightforward Handmade Farmhouse Wall Baskets