This project plans walkthrough stays in the order the work happens.
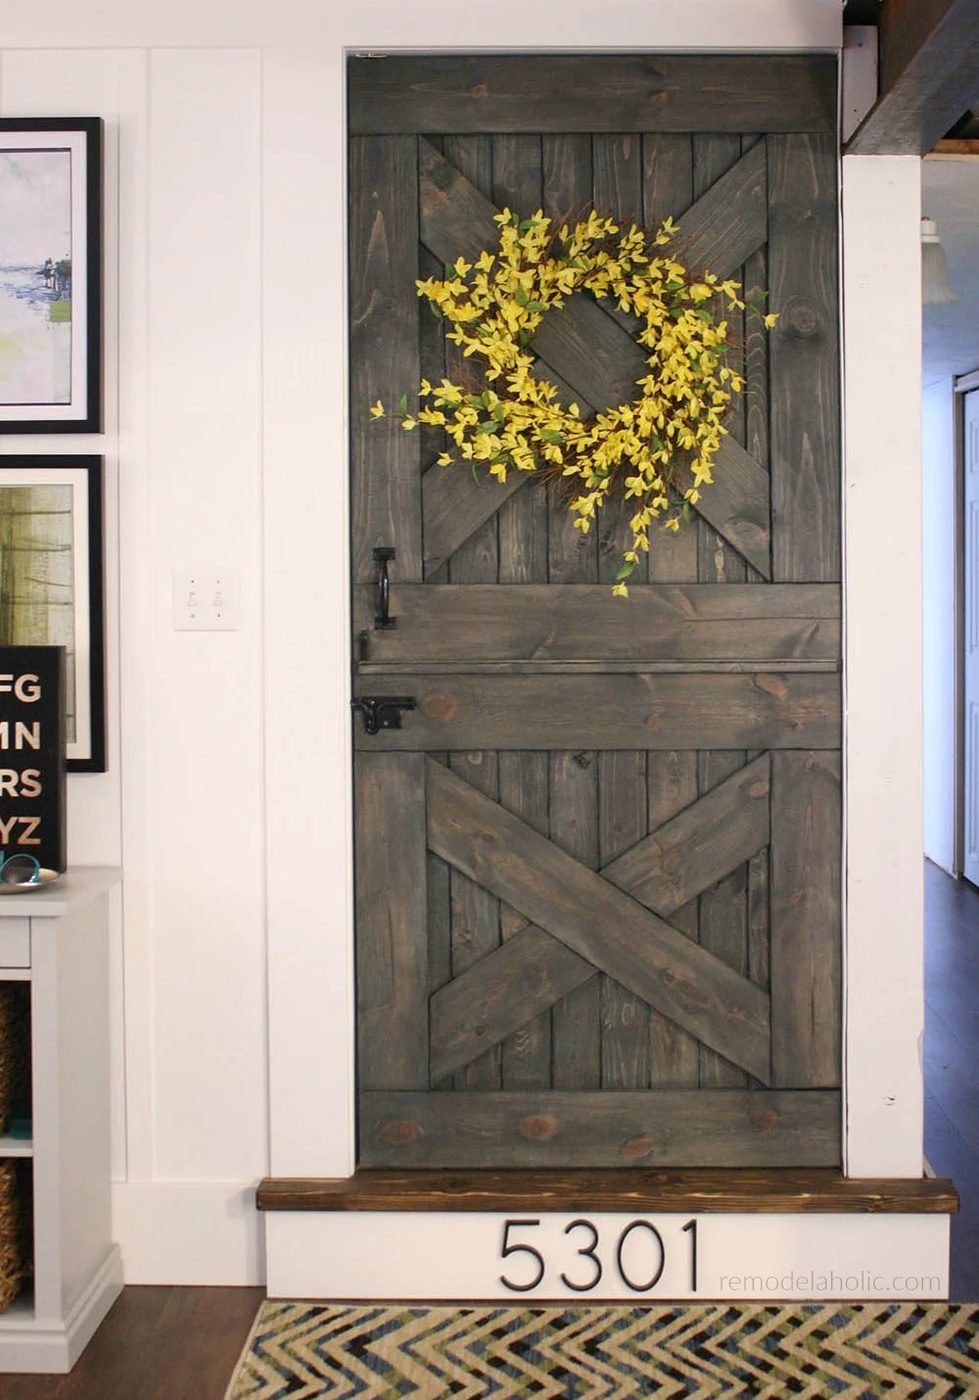
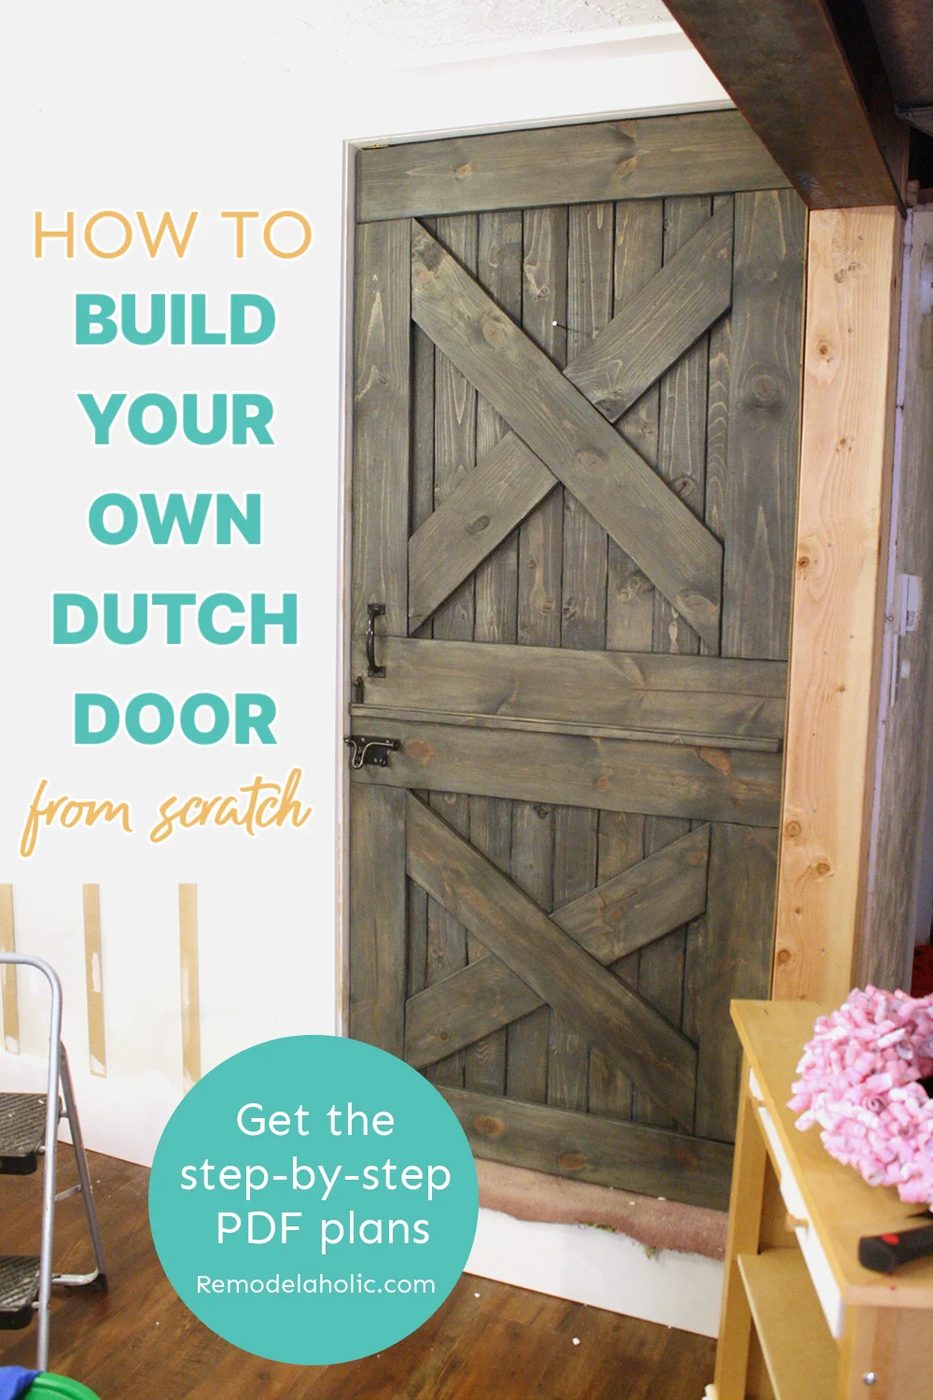
Build a stylish wood Handmade Dutch door from scratch, to your custom measurements, with step-by-step instructions and PDF woodworking plans. The lower section makes a well fitted barn door baby gate or pet gate and the full wooden Dutch barn door adds farmhouse charm to any doorway.
You’ll also like seeing how to upcycle a door into a Handmade Dutch split door, plus you can turn a door into a rolling Handmade barn door or build your own farmhouse sliding barn door using these plans.
Be sure to subscribe to our YouTube channel to see all the other great projects we’ve been working on!
How to Build a Handmade Dutch Door from Scratch
We’ve always loved Dutch doors, and our love of natural wood tones lends itself to a modern farmhouse style. So, after I designed the barn door baby gate for the stairs, I realized that I could add the same type of door up above and make it into a Dutch barn door. Double the barn door, double the love!
This is a great farmhouse Handmade door option: rustic wood, barn door design, and the split door resembles a stall door, too!
What is a Dutch door?
A Dutch door is a door that is split in half horizontally, allowing the top half and the bottom half of the door to open independently. This allows for light and airflow without having the entire door open.
A Dutch door is also sometimes called a stable door (especially for an interior door) or may also be referred to as a half door, double hung door, or split door. And yes, Dutch doors did actually originate in Holland!
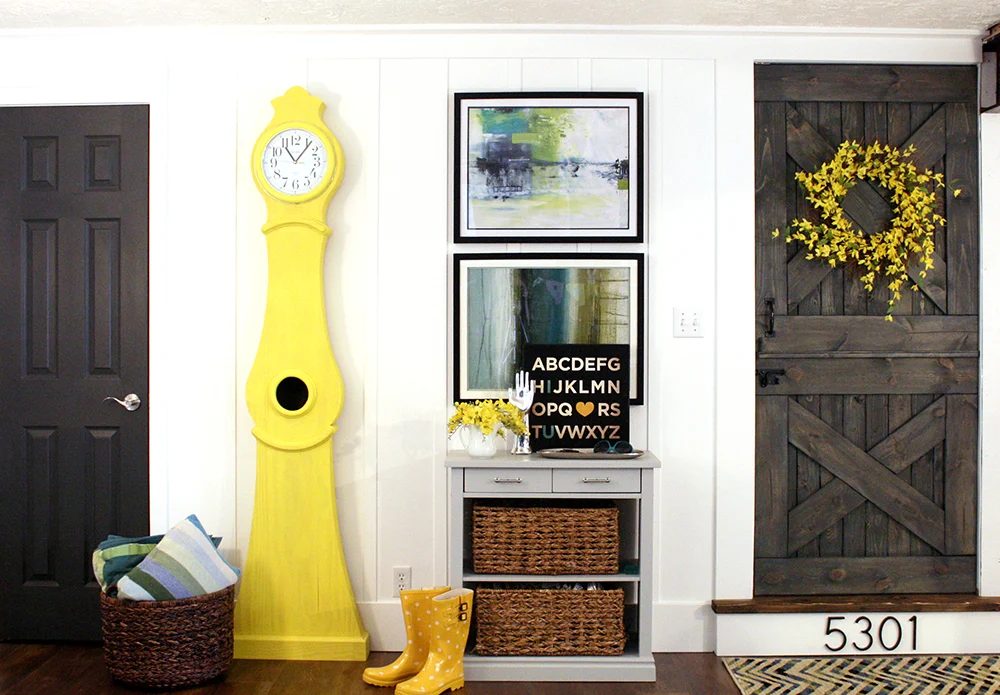
I do speak Dutch, so having a Dutch barn door door sounded like a genius plan to me! Between the Swedish mora clock we built, the classic full-height board and batten in the entryway, and the Dutch door, this view of the living room has plenty of European architecture influence in the design! Maybe now I should add my wooden Dutch shoes to finish it off.
Adding the top Dutch door to the baby gate adds both style and privacy to our living room. You can build your own Dutch door to fit any doorway in your home where you’d like to keep kids or pets in (or out) or where you’d like to add some style with an adjustable level of privacy and lighting. This Handmade Dutch door is a great option for a mudroom or laundry room (to help hide the dirty clothes!), but would look right at home on a chicken coop or outdoor shed as well.
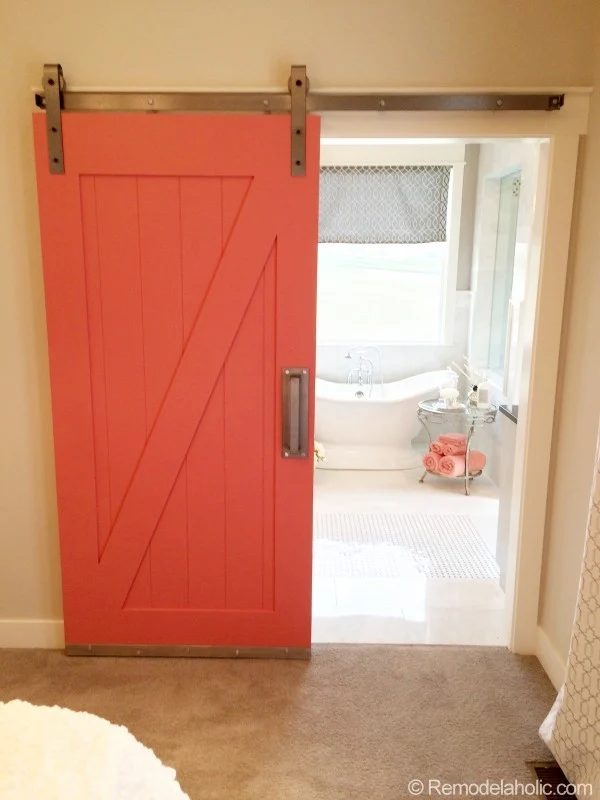
More Handmade Barn Door options
- How to Build a direct Handmade Barn Door
- How to Upgrade an Existing Door to a Wood Barn Door for $25
- How to Make a Rolling Barn Door from a Regular Door
- 35+ Handmade Barn Doors and Barn Door Hardware options
How to Build a Dutch Barn Door
This post contains affiliate links. Learn more and read our full disclosure policy here.
The split barn door is basically just two wooden baby gates hung in the same doorway. Once you’ve built the lower gate section, adjust the height of the baby gate building plan to your desired height (calculating an extra 1/2″ clearance) to fill the rest of the door frame.
GET THE Handmade DUTCH DOOR PLANS HEREThe premium Dutch Barn Door woodworking plan includes step by step instructions for the half door gate as well as tips and a measurement/calculation worksheet to determine the dimensions of the Dutch door, top and bottom.
Don’t want to build from scratch? Follow this Dutch Door Handmade walkthrough which starts with an existing solid wood door and upcycles it into a split Dutch door. This is a great option if you want a traditional door style instead of the farmhouse barn door style, and you can use a solid core door or a hollow core door.
Materials
Be sure to measure the door frame and consider the hinge and latch hardware you want to use before you start building. (See more about the hardware at the end of this post.)
To build your own Handmade wooden Dutch door (2 half doors) to replace a standard 36″ x 80″ door, you’ll need:
- Dutch barn door building plan
- (4) 1x6x96″ pine boards (actual width is 5 1/2”)
- (12) 1x4x96″ pine lumbers (actual width is 3 1/2”)
- (1) 1×3×48″ pine board (actual width is 2 1/2″) – optional to use for top cap
- (1 box) 1 1/4” drywall screws (black, since the heads are visible)
- Wood glue (optional)
- Wood stain or paint of your choice
- I used Minwax water based stain in Charcoal Gray; we later adjusted the stain to match our painted doors by using this colorwashing technique
- 4 Extra Heavy Gate Hinge (see below for more details about hinge installation)
- 1 Gate latch (the gate latch that I used requires a hole drilled in the door frame)
- 2 Handles (pull)
- 1 Ball catch / magnetic catch (to hold the top door half in the door frame)
- 1 Surface latch (to hold the two door halves together)
Note: I decided to use screws on this Dutch door construction because it pulls the two layers of wood together nice and tight and the screw heads add a nice rustic look. If you’d prefer, you could use nails with wood glue and clamp the pieces together.
Tools
- miter saw (for cutting the lumber to length and the angles)
- table saw (only for ripping cap to width — you could use a 1×3 instead)
- drill
- brad nailer (optional, for attaching cap)
- sander (we used the Dremel Multi-Max MM20 to reach the corners)
- utility knife (for shaving edges of pine boards)
- framing square
- tape measure
- pencil
- sander block
- sand paper
- 4” foam brush
- old rag
Before You Build: Tips for This Handmade Dutch Door
This split barn door is a great farmhouse look – here are our top tips to make it easier to build and give it extra rustic handmade style.
All these tips and details are in the woodworking plan as well for straightforward reference.
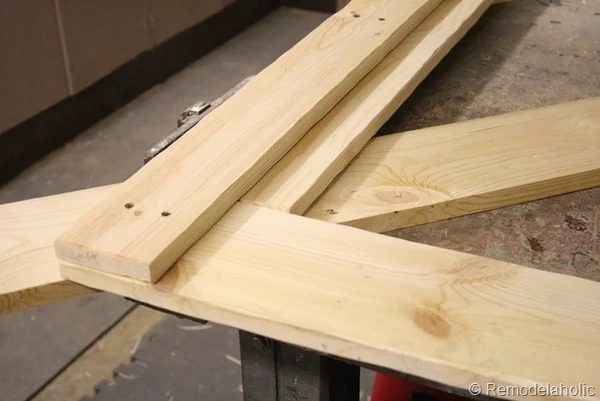
Tip 1: Cutting Accurate Farmhouse X Cross Braces
Calculating the exact angles of the center X crossbraces can be tricky. Instead of doing the math, use the frame to mark and cut the cross braces to fit exactly.
Tip 2: Make Your Own Hand-Carved Lumber
For a really nice hand-carved look, Cassity suggested I trim the square edges off each of the boards. As most of her options do, it turned out nice with the well fitted rustic barn door look.
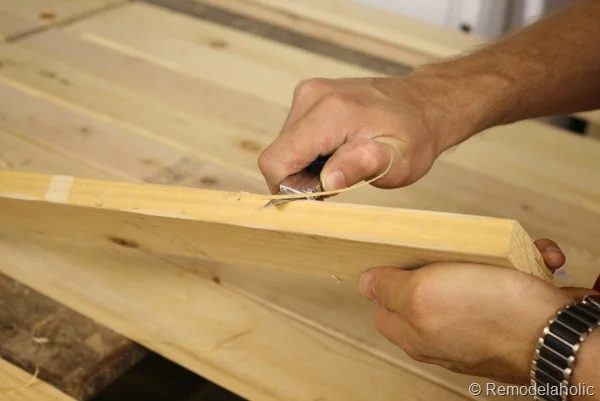
I used a utility knife razor blade to shave off the corners. Imperfection is the goal, so some cuts are wider/deeper than others. This took a little more time but was absolutely worth it for the finished look.
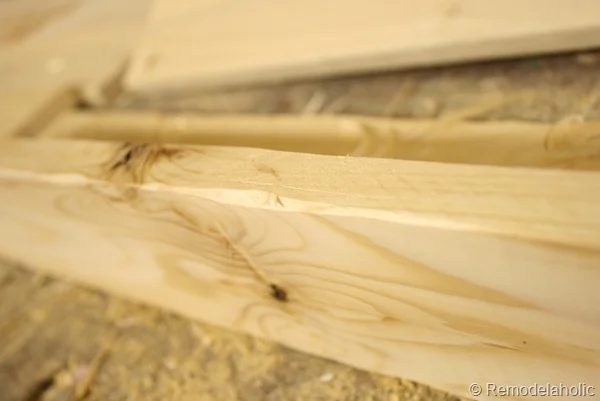
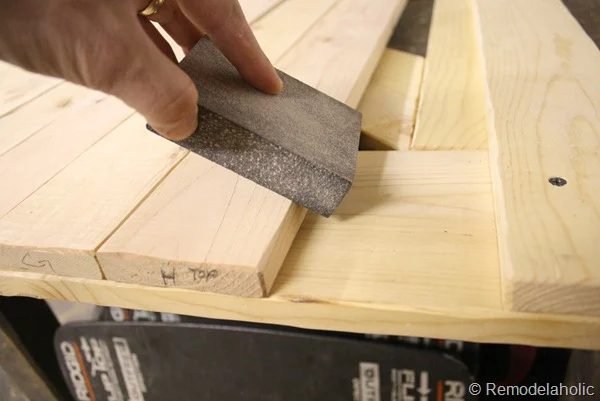
I lightly sanded all the “hand-carved” board edges as I assembled the door.
Tip 3: Line Up the Screws
All of the screw heads are visible on the back side of the door. As you install the back stiles and attach the cross braces, keep all your screws lined up to keep it nice and clean looking. A neat line of screws makes the difference between looking “homemade” and “handmade” — a pro craftsman trick. Draw a few pencil lines to help if needed.
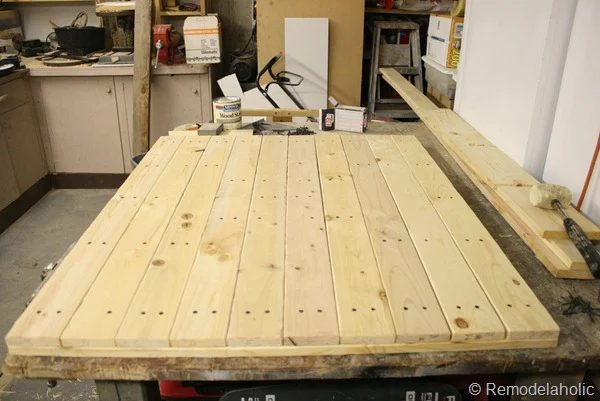
Handmade Dutch Door, Step by Step Building Instructions
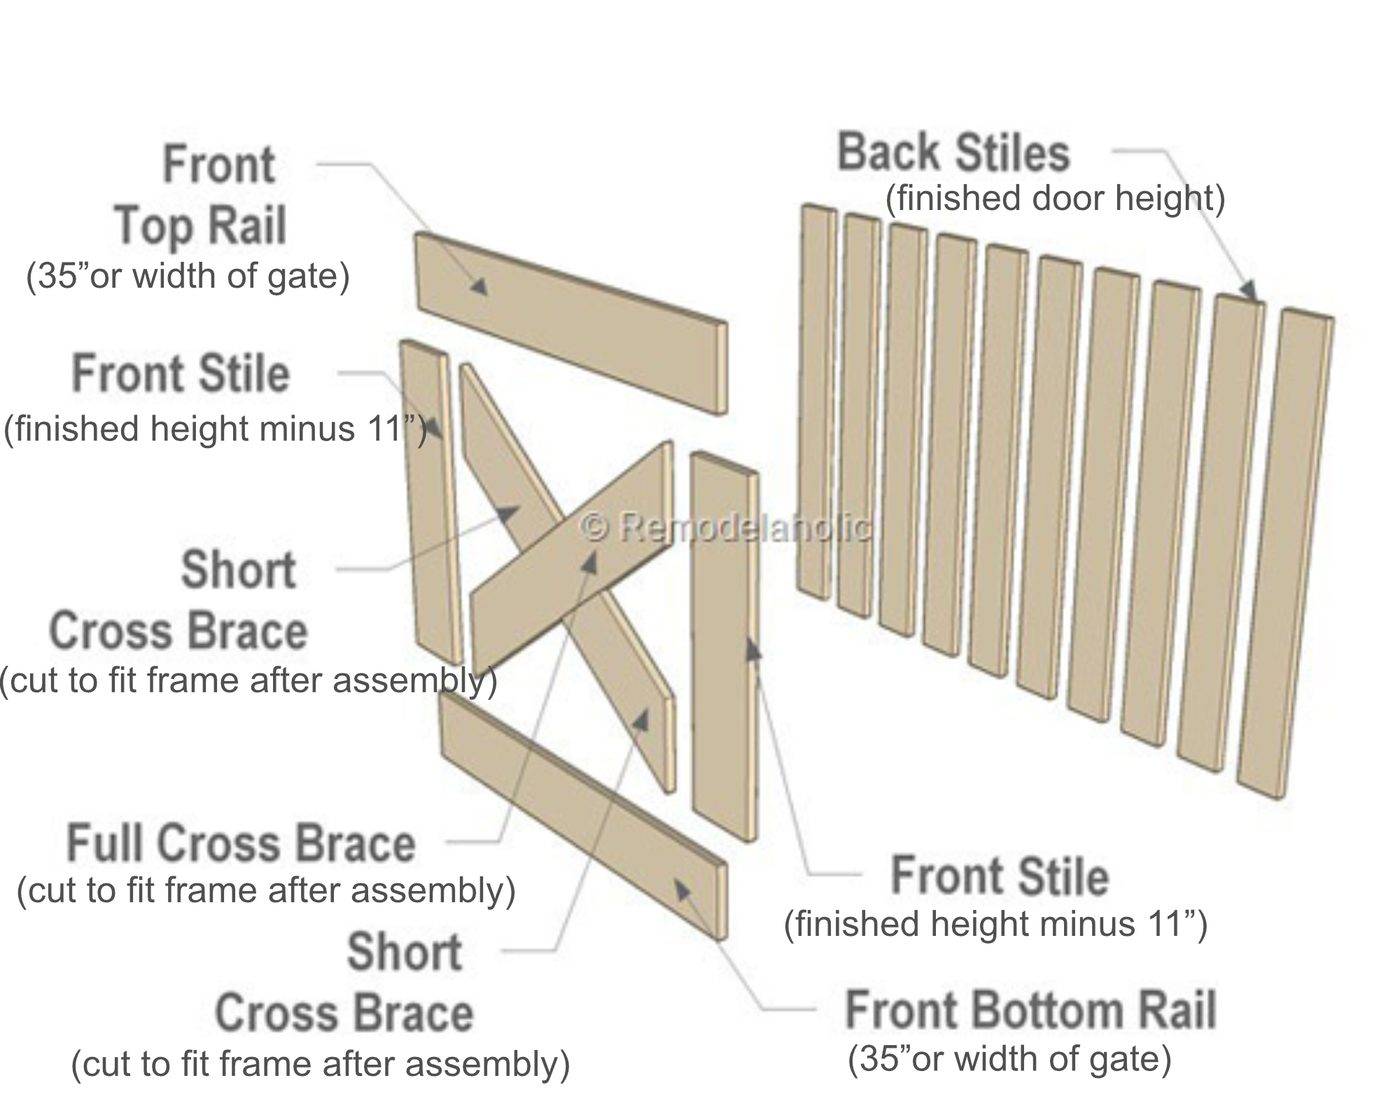
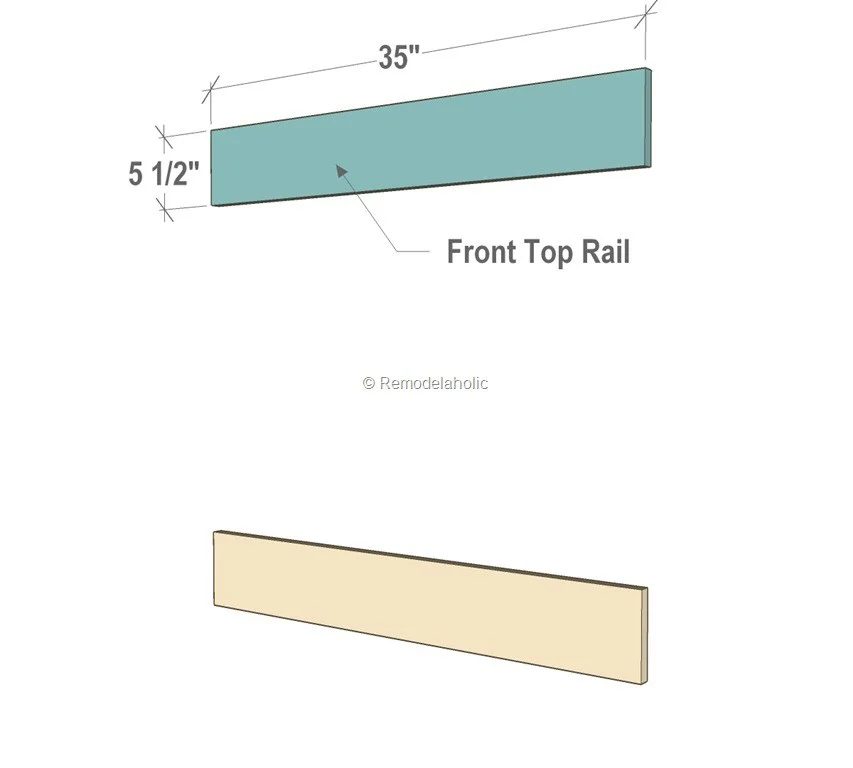
Step 1: Cut front rails
Cut the top and bottom front rails to size from a 1×6 board. For our standard 36″ door replacement, the needed width was 35″.
Step 2: Cut & attach back side stiles
Cut 2 back stiles to length from a 1×4 board. This was 35″ for the bottom panel and about 43″ for the top panel – adjust those measurements to fit your door height and desired split height.
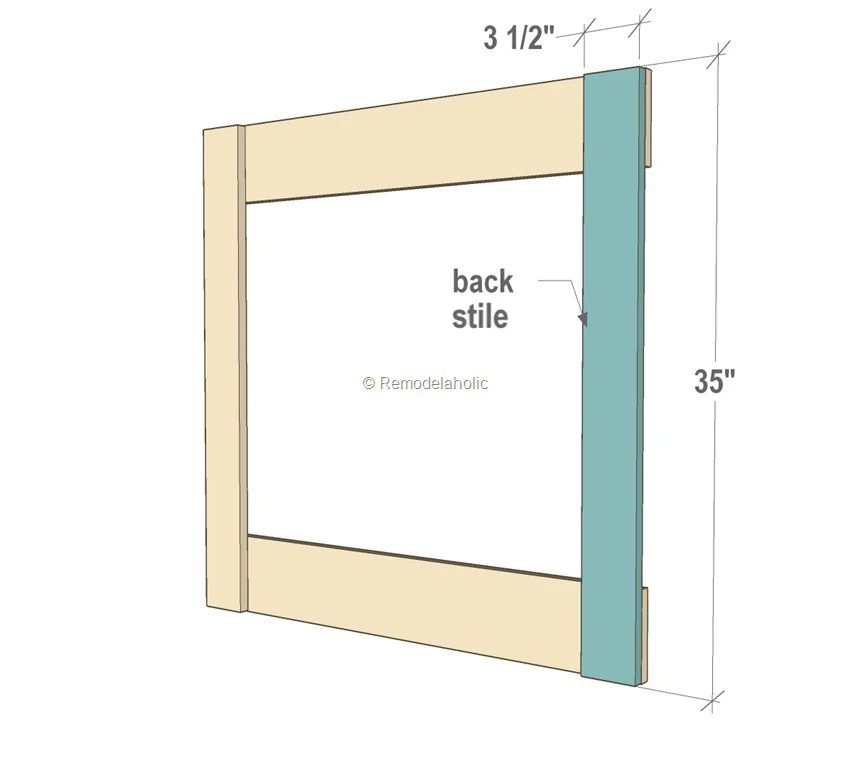
Attach these 2 back side stiles to the front rails using one screw only in each. Square up the frame using a speed square and/or a rafter square.
Step 3: Square up the frame
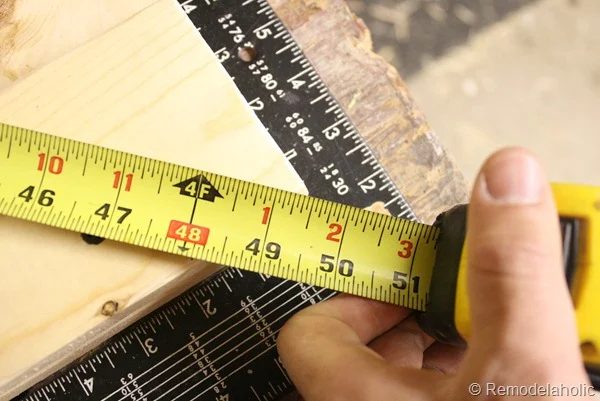
Check the frame for square with an straightforward measuring tape trick. Measure one diagonal, then compare it to the measurement of the other diagonal. If the piece is square, they’ll be the same length.
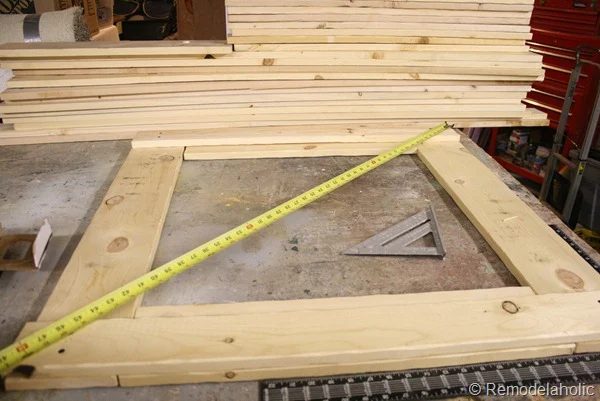
Adjust the pieces (by squeezing or pulling apart the corners) until the measurements match, then secure the back side stiles with additional screws to keep the frame square. Remember to line up the screws neatly.
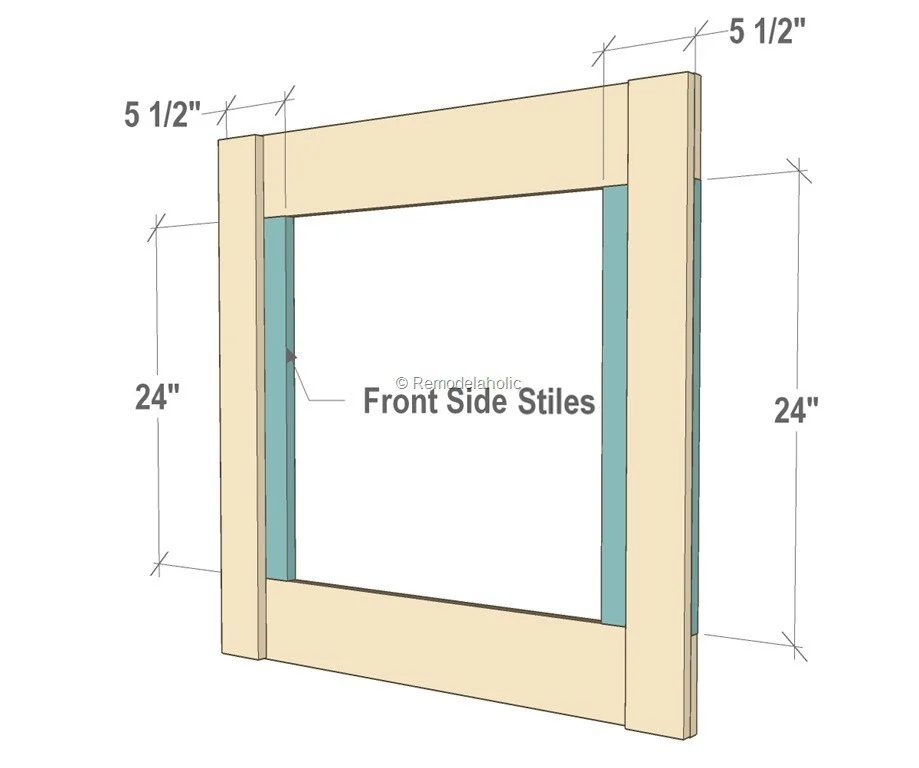
Step 4: Cut and attach front stiles
Measure and cut the 2 front stiles to length from the remaining 1×6 board. This length will be the height of the half door minus 11″ (5 1/2″ each for the top and bottom rails).
Attach the front side stiles through the 2 back side stiles using screws. Remember to line up the screws neatly.
Step 5: Cut long X cross brace
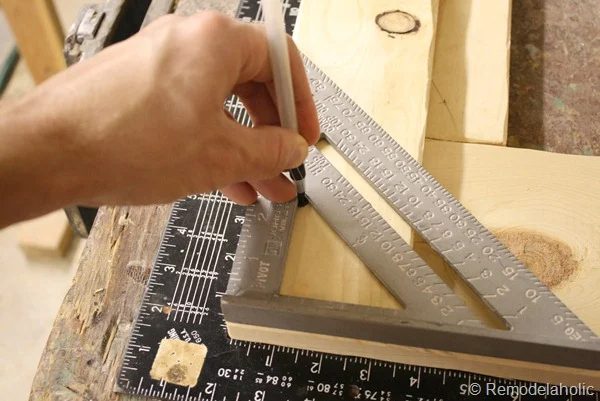
Place the 1×6 crossbrace board under the frame at an angle, matching up board edge with the corners like shown.
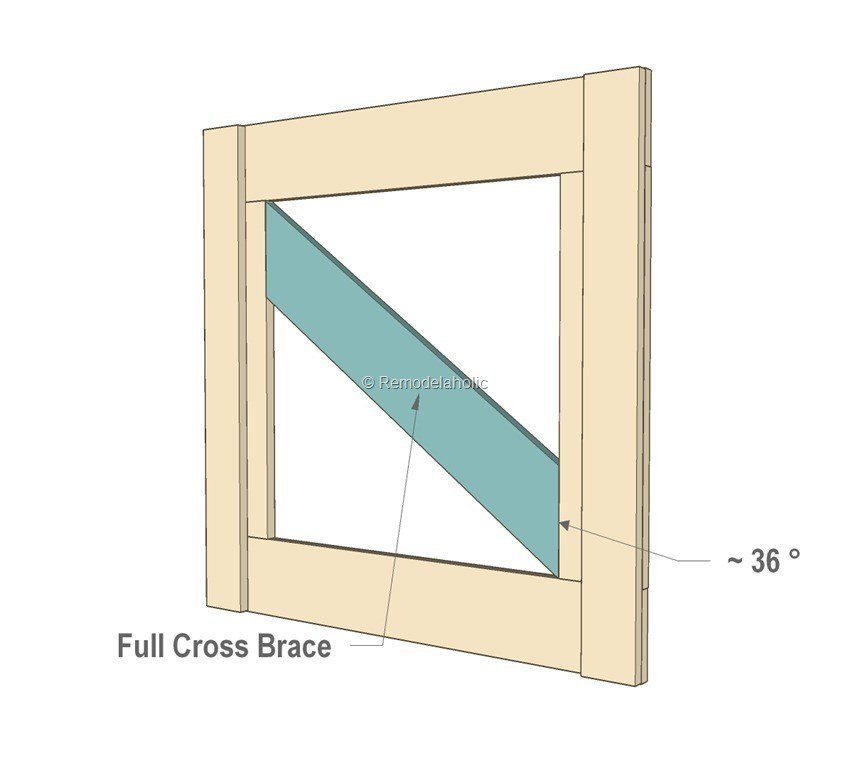
Overlap the ends slightly to provide part of the board to be cut off.
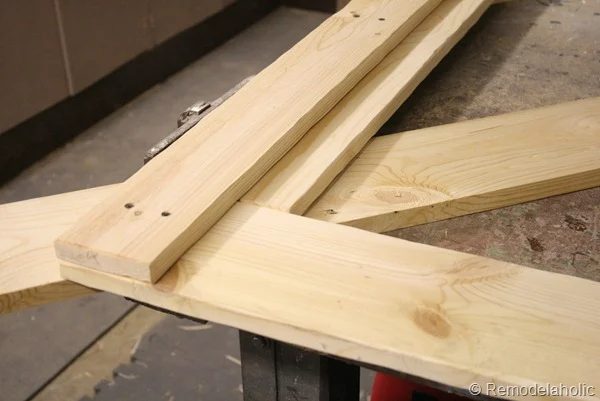
Use a pencil to mark both inside edges where the frame crosses over the cross brace. This gives you the exact angle to cut your board to fit the frame. (Be sure to mark the piece on the wood that will be discarded.)
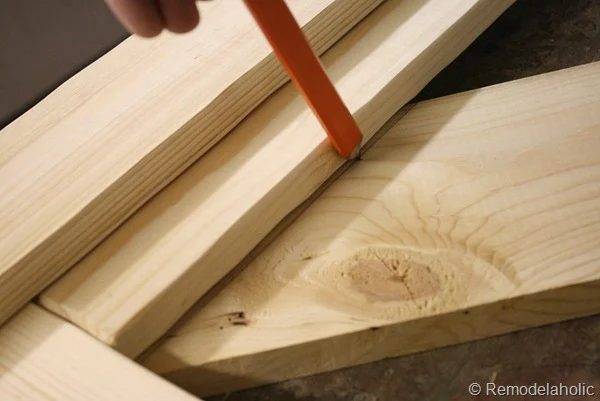
Step 6: Cut short X cross braces
Repeat the process for the second crossbrace section, marking and cutting the 2 smaller crossbrace pieces.
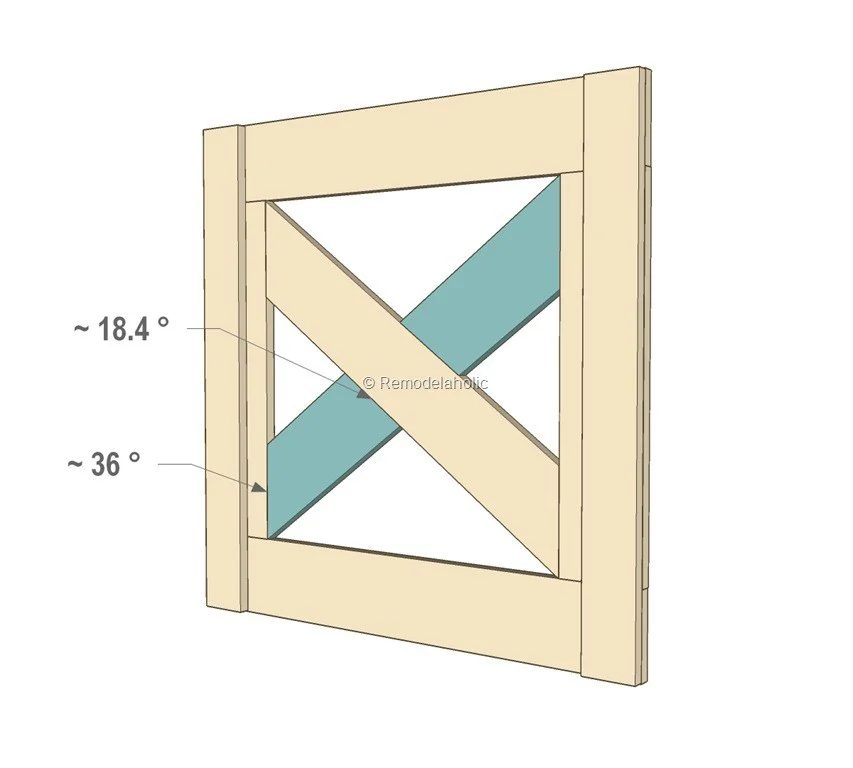
Place the crossbrace pieces in the frame – they’ll be attached through the back stiles in the next step.
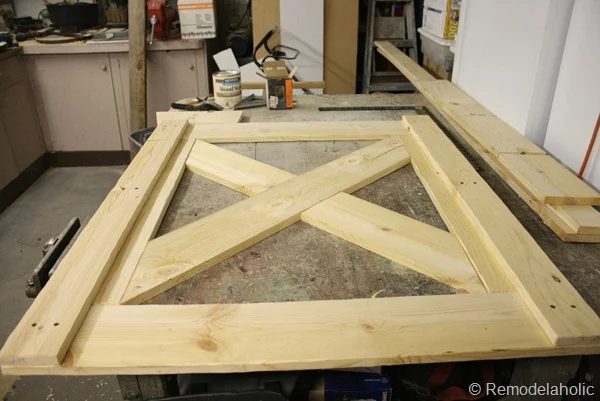
Step 7: Cut and attach back stiles
Cut the remaining 8 back stiles from the 1×4 boards. Lay them, one at a time, over the top of the crossbrace pieces. Attach each to the front rails and crossbraces using screws – and remember to line up the screws neatly.
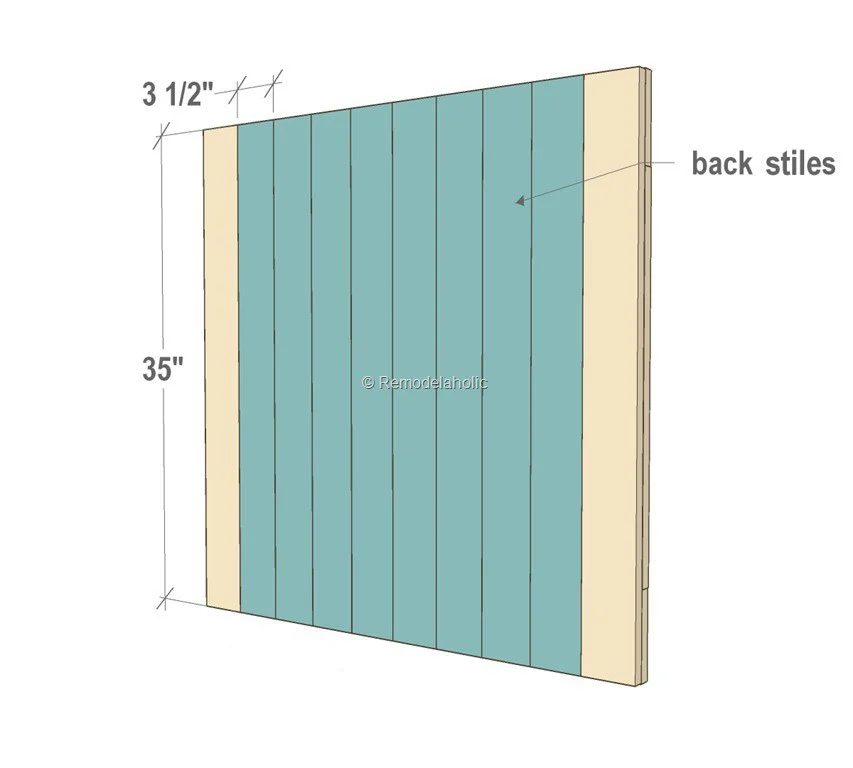
If you’ve adjusted the Dutch door width to fit a custom door size, you may need to add extra back stiles here and/or trim one or more stiles to fit neatly in the frame.
Step 8: Add top cap / shelf ledge (lower door only)
Rip the remaining 1×4 piece to 2 1/4″ width on the table saw (or use a 1×3, no table saw required), and cut the cap to length.
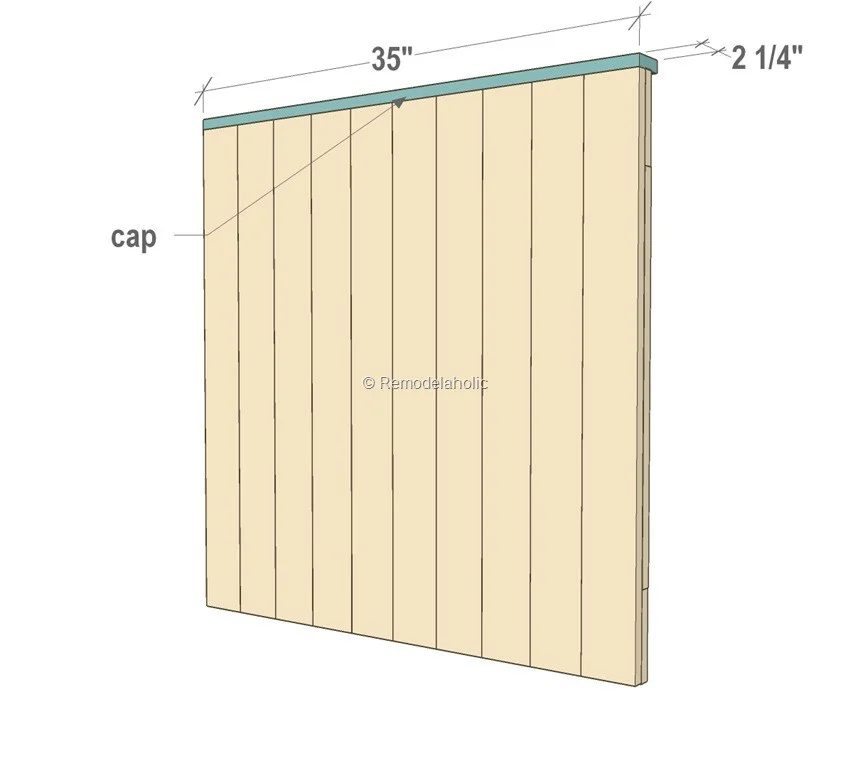
Screw or nail on the cap. I used brad nails and glue so they wouldn’t show.
Step 8: Repeat for the second half door
Repeat the building process (minus the top cap / shelf) for the upper half of the Handmade Dutch door. Measure carefully to build the door to your needed specifications, leaving 1/2″ allowance for the doors to swing freely.
The printable Dutch Barn Door woodworking plan includes a worksheet for measuring and calculating the dimensions for the upper Dutch door section to make it straightforward!
GET THE Handmade DUTCH DOOR PLANS HERE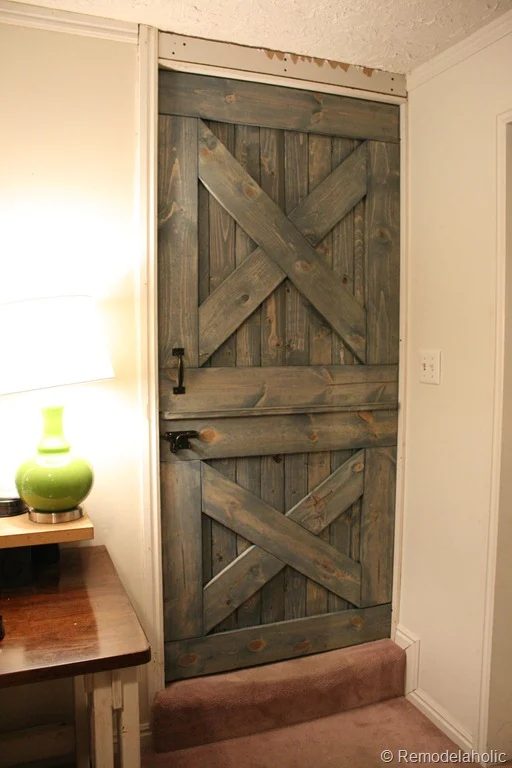
How to Stain a Wooden Dutch Door
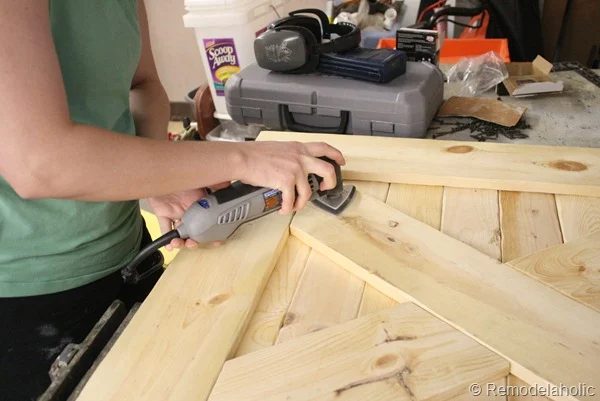
Sand First
After the door is assembled, sand it again before staining. You want it to *look* like an authentic barn door, not *feel* like it’s actually lived in a barn!
We used an solid tool called the Dremel Multi-Max MM20 to get in the tricky corners. This tool can sand in corners easily… along with a million other great uses, which I have been trying out lately. Anyway I grabbed my new tool and lightly sanded off any imperfection with little effort.
Read more tips for sanding a woodworking project here.
Stain the Handmade Dutch Door
Now that the Dutch barn door is sanded, it’s time to stain it.
We originally went with a gray stain for these doors. We purchased Minwax Water Based Wood Stain at True Value, tinted Charcoal Grey.
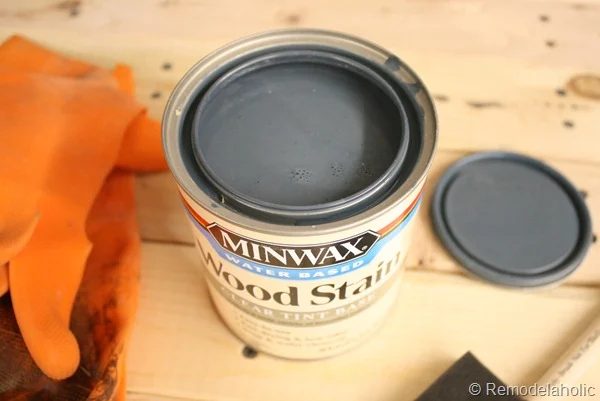
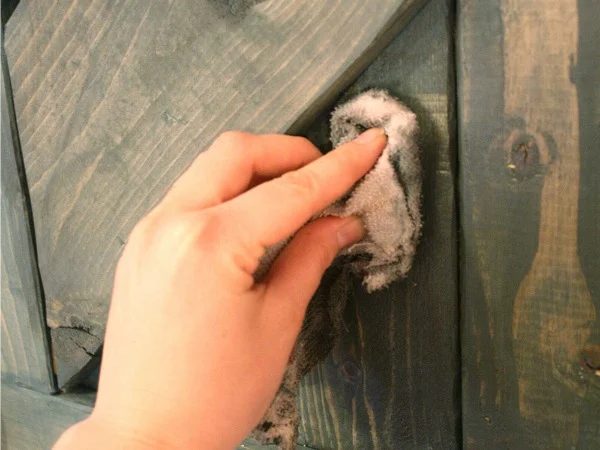
We applied the stain and wiped off the excess almost immediately, to let the knots show in the pine. We didn’t want to add anything else to it after the stain. We wanted the rustic feel, so no shiny finish necessary! (You could look for a wax if you felt like you needed a finish, or a satin finish sealer.)
Stain the back first and be sure not to drip stain through to the front. If you do drip through, wipe it off right away, to avoid really dark spots of stain.
Start with one or two boards at a time. I used a foam brush to apply the stain in the joints first. Then I brushed the stain on the length of boards and wiped it right off. This is how it looked with wipe on, wipe off.
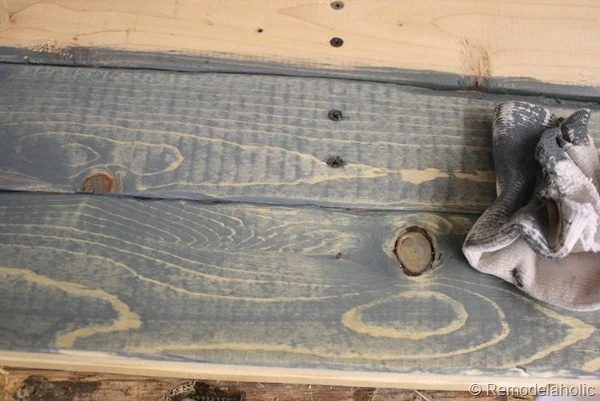
Here is how it looked after staining it. Very nice! We wanted the rustic feel and the gray wood stain did a great job of giving the look we originally wanted.
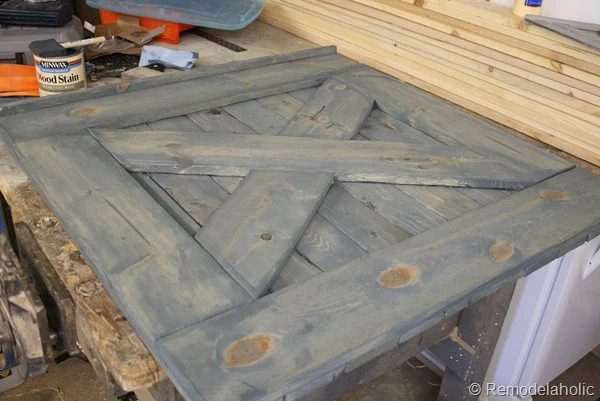
Paint Wash to Adjust Wood Stain Color
Later, after we also painted our interior doors, we adjusted the color of the stain to match by using this straightforward paint wash trick to adjust the stain color. Using a color wash of the interior door paint made the stained wood the well fitted match for the deep gray Iron Ore painted doors.
Dutch Door Hardware and Installation
To match the rustic farmhouse look of the Dutch barn door, we chose outdoor gate hardware that was all black. The advantage of gate hardware is that it’s also all surface mount, so we didn’t have to drill a hole for a door handle/latch or chisel out hinges.
A traditional door latch can be added to this door if you’d like — just be aware that this door is only about 1 1/2″ thick and most door hardware is designed for a minimum of 1 5/8″. This means that you’ll need to choose a door knob made for a thin door or adjust the door itself to fit a standard door knob using a trim plate or extension collar. We found good options for both doorknobs and deadbolts to fit 1 1/2″ doors at Build.com.
Dutch Door Hinges
We used heavy duty surface mount gate hinges for our Dutch door. With this type of hinge, I had to hang it differently than you would a regular swing door hinge that would be hidden at the end of the door. We wanted to see these hinges so they had to be hung on the outside of the door and on the door jamb.
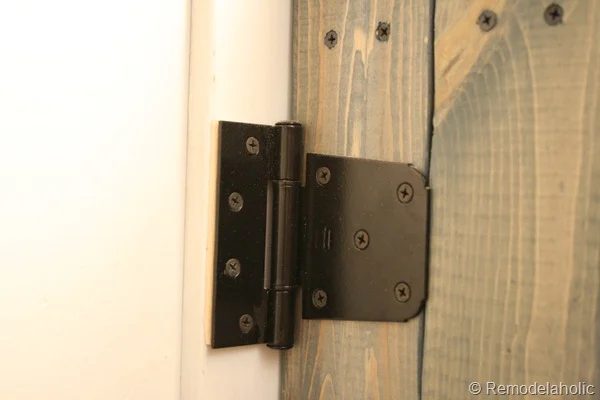
You could avoid this visible hinge setup if you wanted by using regular door hinges. You’ll want to determine what type of hinges you are using BEFORE you build the Dutch door, so you can measure accurately and adjust as you build so you’ll have room for a different hinge type.
Dutch door hinge placement
If you’re replacing an existing door, you can likely use the same placement as the previous top and bottom hinges, then add the extra middle hinges. I’d suggest placing them at the same distance from the center of the door as the hinge is at the top/bottom.
Dutch Door Latch and Handle
On top of the upper door I added a ball door catch, similar to what you would see on a bedroom closet door. This helps the top half of the door stay closed without needing a latch, while still being straightforward to push or pull open just the top of the door when needed. For an interior door, a magnetic door catch like this could also be a good option.
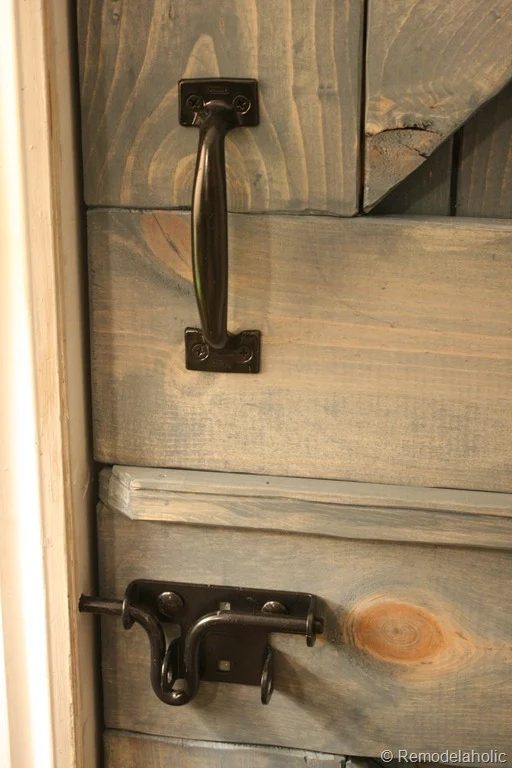
We wanted a direct handle and latch that so we could lock the door by drilling a hole into the door frame. There was not actually a door in this door frame before, so there was no existing latch or strikeplate to consider, and the gate latch was much easier to install than a traditional door handle.
By just by opening the top door you can unlock the door from either side, which works great for how we use this interior door — basically the front door of this basement apartment. For an actual exterior front door, you’ll likely want a regular door handle on the bottom and a deadbolt latch on the top to make both sections secure and able to lock and unlock from either side of the door.
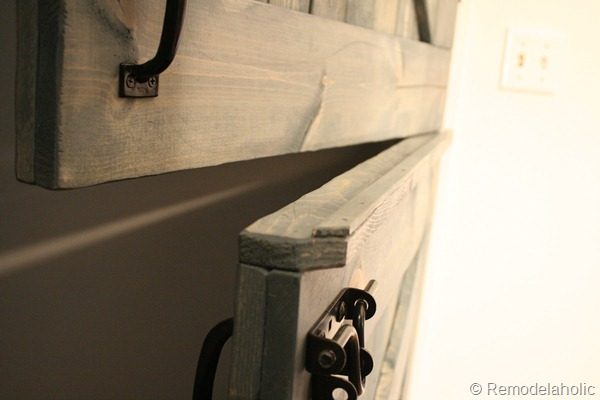
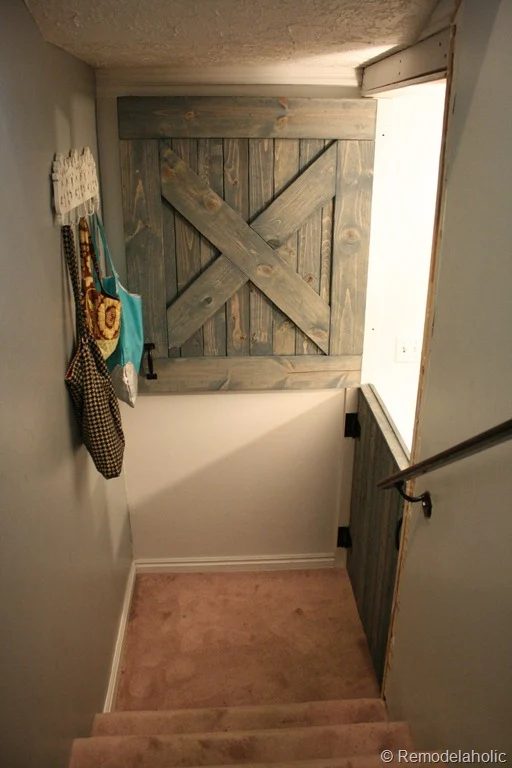
In order to open the full door together, I added a small piece of molding on top of the baby gate to push the upper door open at the same time as you opened the bottom gate. Later, as you can see in the final pictures with the yellow wreath, I also added a surface bolt / barrel latch to hold the 2 door sections together better.
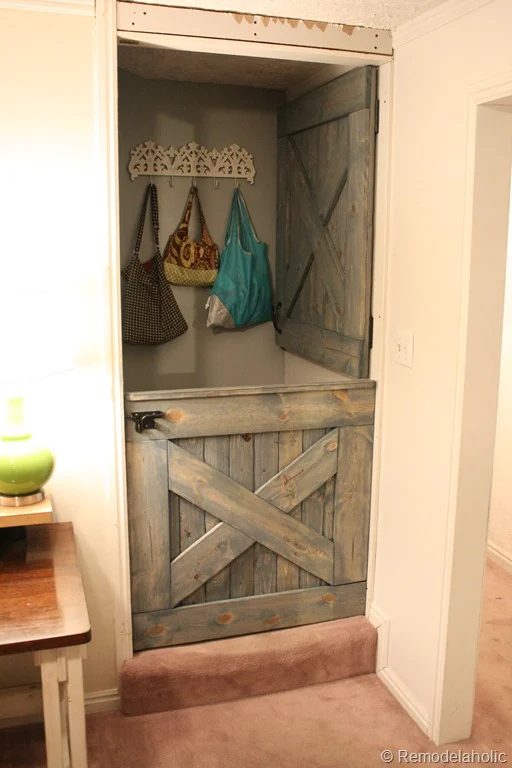
Here is the final door put together in all it’s glory (but before we finished the door trim and also updated the stain color with a paint wash).
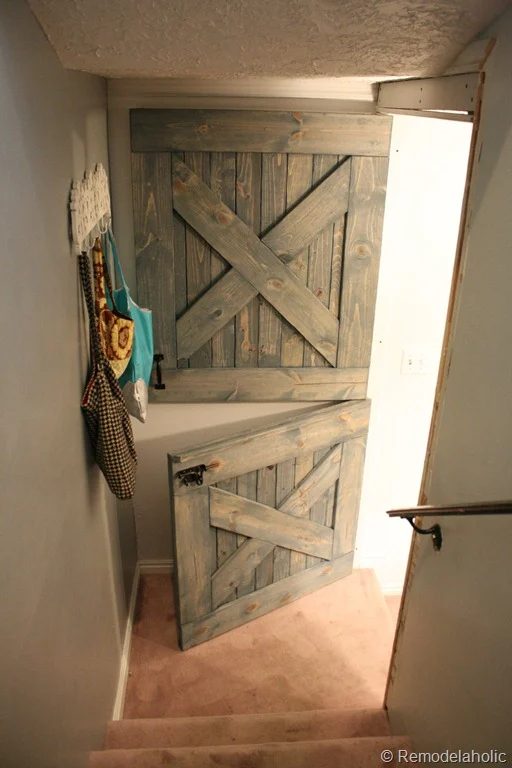
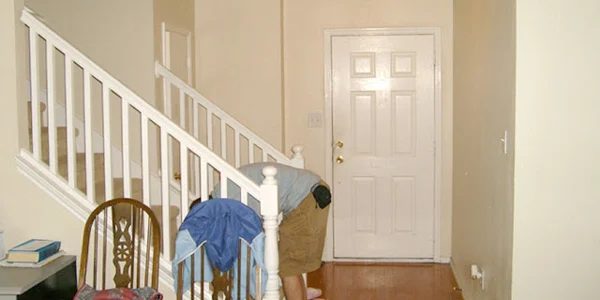
This wood Dutch door is a great solution for us to add some privacy to our basement apartment living space, while also keeping our babies safe and off the stairs.
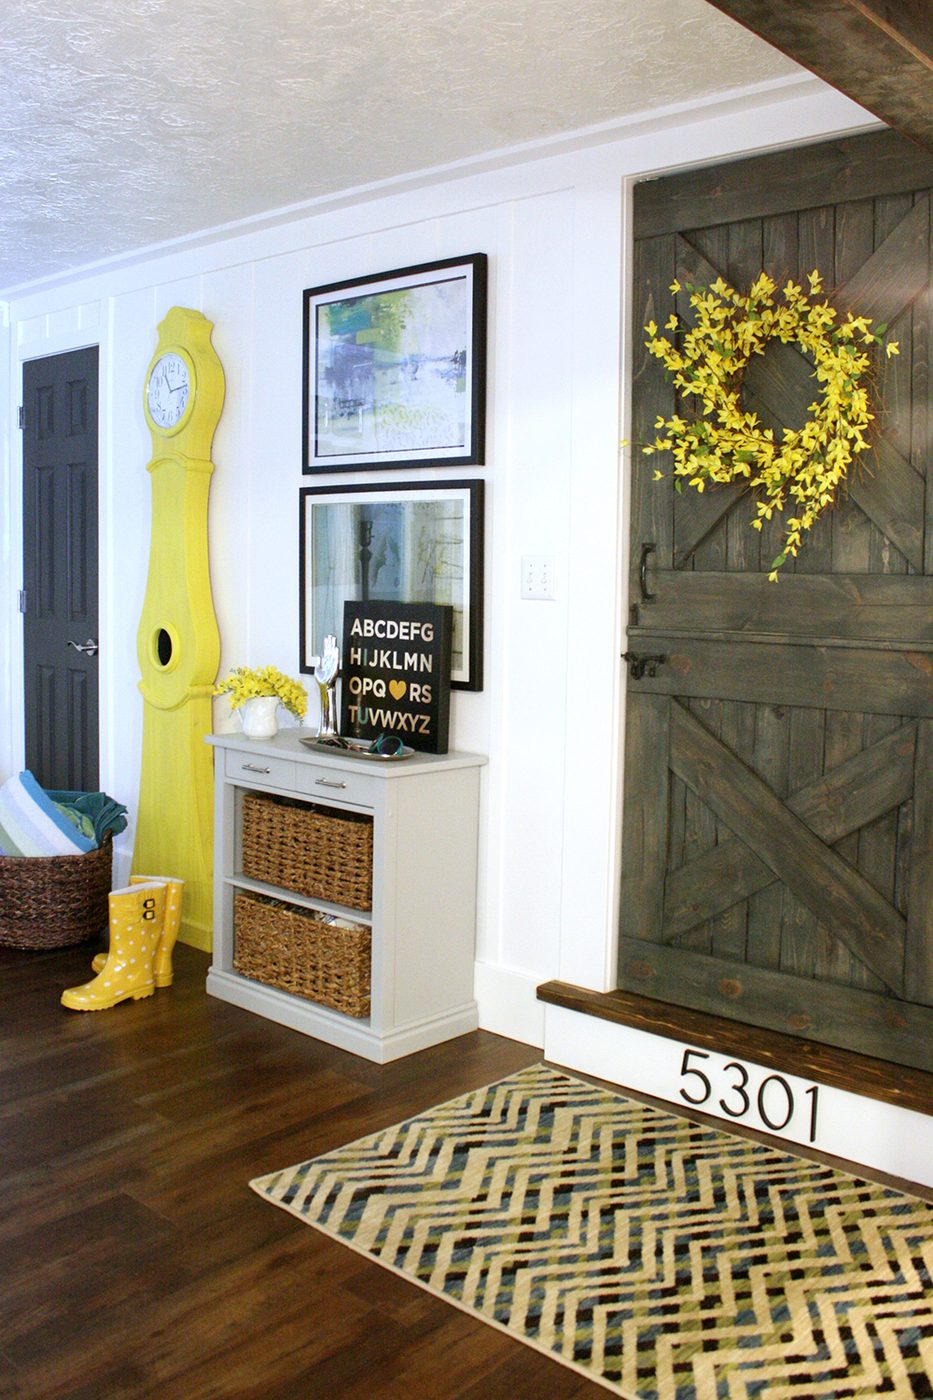
And here’s the updated FINISHED product! (As finished as it’s probably going to get… just maybe don’t look too close!)
This is after we stained it to match our interior door paint, installed new flooring, remodeled the stair riser and installed house numbers, installed floor-to-ceiling board and batten, built the Swedish mora clock, and built the console table from a thrift store find. Phew! That’s a lot of projects for just one wall of a living room!
Handmade Doors and Door Installation Tips
- How to Install a Pocket Door
- Our Solid Wood Flush Door Installation
- Build a Handmade Screen Door
- How to Easily Make a Flat Door Look Like a Paneled Door
Handmade Dutch Door FAQs
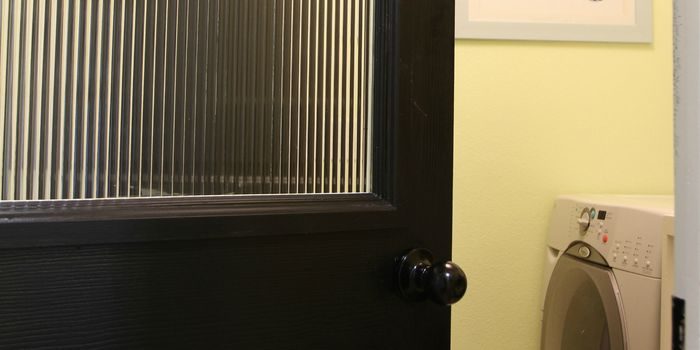
I want to let in more sunlight. How can I add a window to this Handmade Dutch door?
A Dutch door window is a great option for a laundry room or mudroom that gets natural light but that also accumulates stuff you want to keep hidden. To modify this Handmade Dutch door to include a window, consider which style you’d like and consult these tutorials:
- Handmade Wood Door with Large Window – Combine this walkthrough with the Dutch door frame to add a large window to the top half of a split door.
- Add a Window to a Wood Door // Add a Window to a Hollow Core Door – If you’re upcycling an old door into a Dutch door, use one of these tutorials to add a window to the top half.
- Add Mullions To a Door Window – If you want a grid on your windows, use the techniques in this 6-pane Handmade decorative window walkthrough to use smaller glass panels and add wood mullions as you build, or use this affordable trick to add a mullion grid to a large window.
- Add Privacy to A Window or Sidelight Using Lace or this Handmade privacy film method, or by DIYing a leaded stained glass window that adds both privacy AND style.
Can I build an exterior Dutch door?
Yes! We built this Dutch barn door as an interior door, but if you’d like to replace your back door with a Dutch door to let in extra fresh air or light, this door could also be used as an exterior Dutch door or a Dutch screen door to prevent bugs from getting in the house.
The main difference in construction between exterior doors and interiors doors is insulation values, so to use this door as an exterior door, you’ll want to be sure to caulk all the seams, ensure a tight fit between the top and bottom of the door, and add weather stripping around the door. These steps will prevent drafts.
For security on an exterior Dutch Door, you’ll want to use a deadbolt on both the top and bottom sections of the door. Pair it with a retractable screen for a major upgrade on a standard door!
Want a Dutch screen door? Follow this Handmade screen door walkthrough for the top half of the Handmade Dutch door.
This looks great, but I’d rather purchase a premade Dutch door. Any recommendations?
Sure! A pre-made Dutch door can save lots of time on an update or remodel, and can have added features and security (especially for an exterior Dutch door). You can get a sidelight or transom option, too, for even more natural light. Here are some options we found:
- Single Dutch Doors
- Double Dutch Doors (great replacement for standard French doors)
- Exterior Dutch Doors
Why are Dutch doors so expensive?
Premade Dutch doors are expensive because of the extra hardware and craftsmanship required, plus most off-the-shelf Dutch doors are a premium product made from more expensive wood species with few defects, and include different shelf options and window or sidelight options and heavy duty Dutch door bolts, etc which all add up to the higher price of a Dutch door system.
Our go-toHandmade Barn Door options
- How to Upgrade an Existing Door to a Wood Barn Door
- How to Turn an Old Door into a Rolling Barn Door
- How to Build a direct Barn Door
- 35+ Handmade Barn Doors and Barn Door Hardware options
Step by Step: How to Build a Handmade Dutch Door from Scratch
Build your own Handmade wooden Dutch door (2 half doors) to replace a standard 36″ x 80″ door, or a custom size door. Follow these step-by-step instructions, and get more tips + PDF printable plans at Bekob.com Print Recipe
Equipment
- miter saw (for cutting the lumber to length and the angles)
- table saw (only for ripping cap to width — you could use a 1×3 instead)
- Drill
- brad nailer (optional, for attaching cap)
- sander (we used the Dremel Multi-Max MM20 to reach the corners)
- utility knife (for shaving edges of pine boards)
- framing square
- Tape Measure
- Pencil
- sander block
- sand paper
- 4” foam brush
- old rag
Ingredients
- Dutch barn door building plan from Bekob.com
- 4 1x6x96" pine boards (actual width is 5 1/2”)
- 12 1x4x96" pine lumbers (actual width is 3 1/2”)
- 1 1×3×48" pine board (actual width is 2 1/2″) – optional to use for top cap
- 1 box 1 1/4” drywall screws (black, since the heads are visible)
- Wood glue optional
- Wood stain or paint of your choice I used Charcoal Gray stain
- 4 Extra Heavy Gate Hinge
- 1 Gate latch
- 2 Handles
- 1 Ball catch / magnetic catch to hold the top door half in the door frame
- 1 Surface mount latch / barrel bolt to hold the two door halves together
Instructions
- Cut front rails. Cut the top and bottom front rails to size from a 1×6 board. For our standard 36" door replacement, the needed width was 35".
- Cut back side stiles. Cut 2 back stiles to length from a 1×4 board. This was 35" for the bottom panel and about 43" for the top panel – adjust those measurements to fit your door height and desired split height.
- Attach back side stiles. Attach these 2 back side stiles to the front rails using one screw only in each. Square up the frame using a speed square and/or a rafter square.
- Square up the frame. Check the frame for square with an straightforward measuring tape trick. Measure one diagonal, then compare it to the measurement of the other diagonal. If the piece is square, they'll be the same length.
- Adjust the pieces (by squeezing or pulling apart the corners) until the measurements match, then secure the back side stiles with additional screws to keep the frame square. Remember to line up the screws neatly.
- Cut front stiles. Measure and cut the 2 front stiles to length from the remaining 1×6 board. This length will be the height of the half door minus 11" (5 1/2" each for the top and bottom rails).
- Attach front stiles. Attach the front side stiles through the 2 back side stiles using screws. Remember to line up the screws neatly.
- Cut X crossbrace. Place the 1×6 crossbrace board under the frame at an angle, matching up board edge with the corners. Overlap the ends slightly to provide part of the board to be cut off. Use a pencil to mark both inside edges where the frame crosses over the cross brace. This gives you the exact angle to cut your board to fit the frame. (Be sure to mark the piece on the wood that will be discarded.)
- Cut shorter cross braces. Repeat the process for the second crossbrace section, marking and cutting the 2 smaller crossbrace pieces. Leave the crossbrace pieces in the frame – they'll be attached through the back stiles in the next step.
- Cut and attach back stiles. Cut the remaining 8 back stiles from the 1×4 boards. Lay them over the top of the crossbrace pieces. Attach them to the front rails and crossbraces using screws – and remember to line up the screws neatly.
- Add top cap / shelf ledge (lower door only). Rip the remaining 1×4 piece to 2 1/4" width on the table saw (unless you are using a 1×3), and cut the cap to length. Screw or nail on the cap. I used brad nails and glue so they wouldn’t show.
- Repeat for the second half door. Repeat the building process (minus the top cap / shelf) for the upper half of the door. Measure carefully to build the door to your needed specifications, leaving 1/2" allowance for the doors to swing freely.
- Sand and stain the 2 half doors. We used Minwax water-based Charcoal Gray, then colorwashed the doors with Sherwin-Williams Iron Ore paint to match our painted interior doors.
- Hang the doors and install Dutch door hardware. It’s typically easiest to attach the doors together and hang them (with the extra hinge) like one door. Install and hang the hinges, latch(es), and handle(s).
Video
Pin this to save and share!
Originally published 09.25.12 // Last updated 01.30.24